| Author |
Message |
indytriple
Samba Member

Joined: April 27, 2009
Posts: 710
Location: Brownsburg, Indiana

|
 Posted: Thu Dec 16, 2010 10:39 pm Post subject: 87-91 Armrest R&R for Dummies (w/ Pics) Posted: Thu Dec 16, 2010 10:39 pm Post subject: 87-91 Armrest R&R for Dummies (w/ Pics) |
 |
|
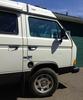
Every since I purchased my '91 pass van, the loose and broken armrests have been driving me nuts. This is a great project for winter as I was able to take the seats out of the van and work on them in the warm comfort of home on top of my bar. I would NOT recommend doing this project with the seats in the van. It's so darned easy to remove them. Just save yourself the trouble and take them out. There is a little spring-loaded catch on the left side of the seat that has to be pulled back as you slide the seat forward off of the rails.
Tools and supplies that you will need:
-1 or 2 long, skinny punches with blunt, round ends
-Blue (medium) Loctite
-3mm allen wrench (hex head)
-Hammer
-Shop rag
-Good lighting (a headlamp really helps)
-A chest high work surface is preferrable
-About 1-2 hours
Here's a primer on how the late-model adjustable armrests work:
There is an armrest bracket that mounts on the seat that looks like this:
As I found out, these armrest brackets are really hard to find. The online vendors either don't have them or they were indefinitely out of stock. I purchased one via the Samba classifieds for $15.
**Beware that there are apparently earlier versions of this bracket where the holes are not oriented properly. The PO put one of these brackets into the van, and the armrest's range of motion was completely wrong. Make sure you're buying one that looks exactly like these pictures with the holes oriented in the same position.**
The armrest bracket itself is held on by two countersunk hex head bolts that take a 3mm wrench to tighten. You could probably find them at the hardware store or GW sells them here:
http://www.gowesty.com/ec_view_details.php?id=3849
The armrest bracket needs to be mounted in the correct orientation. It CAN be put on upside down. The post that juts out should be angled slightly upwards towards the headrest when mounted properly. If you put it back on upside down the armrest will have a weird angle to it in the up and down position. Here's a picture of the proper orientation. You can see it angled up slightly.
The armrest has a round tube on it that fits on the post on the armrest bracket. The round tube has a hole on either side through which a roll pin is pressed to hold the entire assembly together. The tube rotates inside of the armrest to give it articulation and range of motion up and down. Here it is with the punch I used to remove the pin placed through it for illustration:
The roll pin that holds the entire assembly together looks like this:
It has a flat end that is very slightly flared, and an end with beveled edges. When you hammer it out, it should be driven out in this direction, with the punch against the beveled end:
In case you need to replace a damaged or missing pin, the diameter needs to be right at 8mm:
The entire thing looks like this when you pull back the foam on the armrest and peer down into the assembly. In this picture we're looking at the beveled end of the roll pin. We want to hammer on this end to drive it out:
Once the pin is completely hammered out of the assembly you should be able to pull the armrest off. If it is stuck, simply spin it 360 degrees around in a circle while you pull away firmly until it comes off.
Take off your armrest brackets by completely removing the hex head bolts with your 3mm hex head wrench:
Wipe any old grease or dirt off of the bolts. Loctite the threads of each bolt with blue (medium) Loctite. Yes, Loctite is expensive, but don't skip this step or you will regret it later, my friend.
Now it's time to rremount the armrest. This is the trickiest part. For this operation I fashioned a special tool. There are tools that are made especially for roll pin insertion, but perhaps you can copy my idea or come up with your own. I used a long, thin punch with a series of washers stacked on it to create a flat end to rest on the end of the roll pin. Here it is with the roll pin on it ready to go:
Here's a close-up of the tool/pin interface:
The tool gets placed through the hole and serves to guide the pin straight through. Make sure that you drive the beveled end of the pin in first. It will take some pretty good whacks with the hammer to get the pin started.
Drive the pin all the way in until you have equal amounts of pin showing on each side of the tube, like this:
Stop putting up with those missing, loose, or broken armrests. Fix 'em and go for a long road trip. Feel free to post or PM with questions.
_________________
"See The Glass As Already Broken."
87 Vanagon Westy Auto Bostig
www.bluegrassbicyclecompany.com |
|
| Back to top |
|
 |
1621
Samba Member
Joined: May 15, 2006
Posts: 2174
|
| Posted: Thu Dec 16, 2010 10:45 pm Post subject: |
|
|
Very informative post. Thanks for taking the time.
I recently made the switch from the early model armrests to the later adjustable versions. They are far more comfortable IMHO if for no other reason than they are longer by about 2".
_________________
'85 Westy |
|
| Back to top |
|
|
7thing3
Samba Member
Joined: April 05, 2003
Posts: 473
Location: Cleveland, OH
|
| Posted: Fri Dec 17, 2010 5:49 am Post subject: |
|
|
Just did mine about 2 weeks ago. That homemade tool is the bee's knees. Wish I had it. Maybe you could market that!
_________________
'73 Thing--Ted
'77 Super Beetle Convertible
'87 Vanagon GL Syncro
'84 Mercedes 280 CE |
|
| Back to top |
|
|
Summers420us
Samba Member
Joined: June 14, 2010
Posts: 759
Location: Amissville, Virginia
|
| Posted: Fri Dec 17, 2010 6:38 am Post subject: |
|
|
| I also made a protector of sorts from a flat piece of plastic cut from a milk jug. I wedged this where the pin was being driving out to keep it from snagging the seat material. |
|
| Back to top |
|
|
7thing3
Samba Member
Joined: April 05, 2003
Posts: 473
Location: Cleveland, OH
|
| Posted: Fri Dec 17, 2010 6:57 am Post subject: |
|
|
One of my bolts broke off in the nut. I drilled it out but then the welded on nut just came off. When I took my covers off I just used a regular nut and slipped the cover over the arm rest bracket. Hopefully it doesn't ever come off otherwise I will have to take the cover part way off to get at that nut. Another option would be to tap the steel right next to it.
_________________
'73 Thing--Ted
'77 Super Beetle Convertible
'87 Vanagon GL Syncro
'84 Mercedes 280 CE |
|
| Back to top |
|
|
indytriple
Samba Member
Joined: April 27, 2009
Posts: 710
Location: Brownsburg, Indiana
|
| Posted: Fri Dec 17, 2010 6:59 am Post subject: |
|
|
| Summers420us wrote: |
| I also made a protector of sorts from a flat piece of plastic cut from a milk jug. I wedged this where the pin was being driving out to keep it from snagging the seat material. |
Great friggin' idea. This van is kind of my "beater" so I wasn't real concerned with making marks or slight tears to the vinyl. However, if you're concerned, I would absolutely recommend Summers420us' milk jug idea.
_________________
"See The Glass As Already Broken."
87 Vanagon Westy Auto Bostig
www.bluegrassbicyclecompany.com |
|
| Back to top |
|
|
CaptTurbo
Samba Member
Joined: February 24, 2012
Posts: 93
Location: SW Florida
|
| Posted: Sun Aug 05, 2012 1:53 pm Post subject: |
|
|
My thanks to indytriple for posting this thread so long ago with the excellent pictures. It was very helpful to me. I changed out my driver's seat long ago, swapping it for the passenger seat because the armrests were FUBAR on both sides of it. I had no idea how to fix it.
Well, today I fixed those buggers. Ace Hardware sold me six of those hex screws for 3.50 and I only needed two of them to repair that seat. I did notice that the new screws were much harder then the OEM I replaced them with. The hex key was stripping an original one that I was tightening with the blue loc-tite. When I noticed that I just backed it out and tossed it and grabbed a new one and was able to put some serious grunt on it.
I still have the other seat to do at some point soon. They are a little loose and now that I understand the beast I will set them straight. Thanks again! [url] [/url] |
|
| Back to top |
|
|
Masta Shake
Samba Member

Joined: October 29, 2010
Posts: 198
Location: San Diego, CA
|
| Posted: Mon Sep 10, 2012 3:27 pm Post subject: |
|
|
FYI, the 3 way Park tool 4/5/6mm wrench from the OPs pics works great for getting the pin started back into the hole. The plastic of the wrench is really strong and the 4mm goes through the hole of the pin and far enough through to locate the pin and allow a few taps to get it started. I finished with a 3/8" bolt, caveman style.
_________________
As a good friend told me when I got the Syncro: "Welcome to the an intense love/hate relationship". |
|
| Back to top |
|
|
bstein
Samba Member

Joined: January 17, 2015
Posts: 87
Location: PDX
|
| Posted: Sat Apr 18, 2015 11:07 am Post subject: Re: 87-91 Armrest R&R for Dummies (w/ Pics) |
|
|
Great write-up! Having just gone through this, a few more bits of info:
- The screws are M6x1.0x16 (.40/ea at my local h/w store)
- A 5/16" roll pin punch seems to fit just fine (I bought a cheap set at Amazon http://www.amazon.com/gp/product/B003L7HOMG/)
- Don't forget the wood block to support the arm while banging out the roll pin ... obvious after the first two whacks ( ) )
- If you do forget the block, chase the threads and make sure you've got a new M6 screw or two.
Brian
_________________
1987 Syncro Wolfsburg Weekender | Triple Knob | SAH 1.8T |
|
| Back to top |
|
|
SSWesty
Samba Member

Joined: August 20, 2008
Posts: 732
Location: Bellevue
|
| Posted: Wed Jun 29, 2016 7:31 pm Post subject: Re: 87-91 Armrest R&R for Dummies (w/ Pics) |
|
|
I had a floppy armrest and the one of the screws finally backed out so a repair was needed. The OP did a great job documenting this procedure, kudos.
One of the things that helped me was using a putty knife to keep the tools from tearing up the armrest while removing the roll pin.
As the OP noted getting the roll pin back in is a bit tricky. I used a double headed nail to get the roll pin back in. I started with it about an inch longer than in the picture to get the pin lined up in the holes. Once the roll pin was started I cut the nail shorter so it wouldn't poke into anything on the opposite end of the bracket. It was pretty easy to removal and replace once I figured out the right combination of punches and I had the help of my neighbor to hold things in place. This job is easier with 4 hands rather than just 2. Nice to have my armrest back.
|
|
| Back to top |
|
|
mcr314
Samba Member
Joined: August 11, 2014
Posts: 2
Location: Canada
|
| Posted: Sat Aug 05, 2017 1:29 pm Post subject: Re: 87-91 Armrest R&R for Dummies (w/ Pics) |
|
|
I took my apart, and found the pin really easy to remove. That's when I discovered the real reason it wobbles: the pin was really a cut off galvanized nail!
So I need an 8mm pin. Where to get such a thing easily. Cutting off an appropriately sized nail/bolt does seem like a good plan. |
|
| Back to top |
|
|
dennisdcarty
Samba Member
Joined: February 13, 2012
Posts: 3
|
| Posted: Sun Aug 30, 2020 7:59 am Post subject: |
|
|
Re: 87-91 Armrest disassemble
I need to repair the metal piece that the tension pin attaches to,
Anyone know about a possible fix? |
|
| Back to top |
|
|
VicVan
Samba Member

Joined: July 01, 2015
Posts: 1845
Location: Vancouver Island, BC
|
| Posted: Sun Aug 30, 2020 9:00 am Post subject: |
|
|
| dennisdcarty wrote: |
Re: 87-91 Armrest disassemble
I need to repair the metal piece that the tension pin attaches to,
Anyone know about a possible fix? |
What is the damage? Can you post a picture?
_________________
'90 Little Blue Truck, 2WD auto, FAS GenV 2.0 NA (AVH) |
|
| Back to top |
|
|
|


