| Author |
Message |
kangaboy
Samba Member

Joined: August 28, 2010
Posts: 1064
Location: St. Louis, Mo

|
 Posted: Sat Feb 26, 2011 2:05 pm Post subject: Installing Gauges - 74 Standard Posted: Sat Feb 26, 2011 2:05 pm Post subject: Installing Gauges - 74 Standard |
 |
|
Thought i would write up a little some thing to help others here who are going do do the same thing i just got through.
First things first. Got my order into CIP1 for some VDO gauges and sender:
-volt meter
-cylinder head temp gauge
-oil pressure
-dual post oil pressure sender
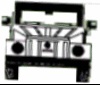
Next was taking a look at how to get the grill off of the dash. There are four metal tabs that hold it in the back of the dash that you have to get to from the trunk. They have some glue on them for whatever reason, so I just knocked it off. Just give the tabs a turn with a pair of pliers so they are straight enough to fit through the slots that hold them in the dash. It shouldn't take to much force to get the grill to pop out, and if it does, then you may want to make sure your tabs are lined up to come out of the dash correctly.
There will be excess dash pad on the inside of the grill area that you should cut out with a razor knife. Make sure you don't cut out more than the grill will cover up, or it will look like a hack job when you put the grill back on and there is a gouge out of your pad that isn't covered.
At this point I lined up the gauges on the grill and roughed in where I wanted them to sit. The gauges come with mounting screws that screw over the whole gauge, and allow you to mount them straight to the grill which is great. So i used something that was similar in size to the 2 1/16 diameter gauges, and began cutting away. I used a dremel, but I've heard of others using tin snips, and jig saws.
NOTE: be aware of getting to close the sides of the grill when sizing and cutting. You want to try and keep them a little towards the center of the grill so the lips of your gauges don't hit your dash or each other, and so the mounting screws have clearance from the dash as well.
Check every so often on your final rounding so you don't get to carried away. The gauges have a decent lip to hold them in, but the grill is the only thing holding them in so you want as much of the lip to sit on the grill as you can.
Take a final look at them and make sure they are where you want them. Mine are a little crooked but whatever...function not fashion.
Then I tightened them in an got to the next step.
Now comes the hard part. It kinda made me sick at first to cut up my pretty little California Beetle...but I just kept telling myself it was for the better.
Method of cutting is up to you...i used my Dremel w/ reinforced cutting blades again that went through it like butter. I also was able to use the grinding wheel attachment to take off the edges and sharp points.
NOTE: The gas tank and other electronics are not to far from where your grinding, so take care to use some sort of shield to deflect and catch all your sparks and hot shavings. We wouldn't want this work to be for nothing.
Test fit your gauge panel in the opening a few times till it fits well enough to get in and out.
Now the fun part...wiring. This is super simple and straight forward...I don't think i swore once.
So for my gauges I needed 3 accessory leads and 3 grounds for the lights of the gauges (16gauge); and 2 12Volt leads (14gauge) and 2 grounds (14gauge) for the positive and ground on the volt and oil pressure gauge. The CHT gauge comes with a thermocouple and a load of wire for you to run, and those are the positive and ground for that.
For the lights, look for the fuse that is on when the running lights are on, and tap into that...I think its #3/#4. Then get a few ft of wire with ends on it, hook them to the fuse box and stick them though the dash hole. (Same for the ground wires.)
Next, for the voltage and oil gauges, they need power when the key is turned on. So find a fuse that comes on with the key, and wire appropriately with 14gauge wire (per VDO instructions). Then get two ground wires for them (Also 14gauge wire).
Now comes a little trickier part...getting the sending wires for the CHT and oil pressure gauges. This may be easy if you have a few spare wires in your engine bay or you had an external regulator that you took out. If not...you might have to do a little fishing.
So first i wrapped the ends of the CHT, and the wire for the oil pressure sender up in electrical tape so they wouldn't get snagged and jammed them down the first trouble spot, the trunk to the cabin. This part was pretty easy, but for some I see trouble. Try not to use a screwdriver if you don't need to, cause you don't want to cut up the wires. You can see where i went down behind the hood spring.
And it comes out on the driver side under the dash.
Run it along the heater channel and under the back seat. For this part I ran it through the rubber grommet that the main wiring harness is in and into the quarter panel.
Now to get it into the engine bay. I used a simple metal coat hanger I straightened out as a snake. Go into the engine bay, and up in the driver side corner, behind the tarboard and you will find the ever popular foam. If you can jam the coat hanger on the outside of the main wire loom, but very close to the loom itself, I found that the coat hanger went through rather well. Keep jamming the hanger till you get through, and into the quarter panel.
At this point, hook whatever wires you want in the engine bay to the coat hanger, and wrap them in electrical tape so they don't get snagged up on the way out. Try and make your tapping in a way that it has little resistance on the way out. So for me, I attached the CHT wire and the oil pressure sender wire, and pulled them into the engine bay.
Well now its time to hook stuff up.
For the oil pressure sending unit, you will simply hook your new wire that you ran through, to the post. If it is a dual post sender, the WK is for the warning light, and the other side is for the sender wire. Done.
Next is the thermocouple. The directions say to remove the compression ring from the spark plug, so I cut that off...very carefully so u don't mess up the threads or seating surface of the plug. I used plug #3 cause that is the hottest of the plugs...usually. Next install your coupler under your spark plug, spark plug back in your head, and attach the sender wires from the CHT to the coupler. Done.
Back to the trunk.
So now you have all your wires up front, and ready for install. When I was planning all my wires out, I cut enough slack to fit about a foot out of the dash, so then it wouldn't be a pain to hook 13 wires up at the same time, in such a small space.
Now its time to hook them up. I used white tape through out the process to label everything. So with my labels, hooking everything up was a snap.
You can test a few things to make sure its working, like the lights and volt meter, before you mount it up.
Now its time to fit the grill back in place. Slowly place it back where it lines up, and from the trunk, turn the metal tabs to hold it in place.
DONE!
Clean up your wires and make sure you don't have any slack that will get caught up somewhere or get snagged on something.
Also its to darn cold here to paint anything, but i would suggest putting something behind the grill but in front of the gauges to keep trunk wind out and the contrasting colors out of sight. But that is a later day.
Hope this helped and please correct me on anything so i can edit it in.
-Joe-
_________________
-74 Standard - "CaliBug" 2084T, MS3X w/FI and Crank Fire
-76 Westy - "Gandalf"
-18 GTI SE
| skills@eurocarsplus wrote: |

that fucking thing looks like it drove through a J.C. Whitney catalogue and hit everything on the way out  |
Last edited by kangaboy on Sun Feb 27, 2011 1:48 am; edited 2 times in total |
|
| Back to top |
|
 |
wompninja
Samba Member

Joined: July 06, 2008
Posts: 2163
Location: Salt Lake City
|
| Posted: Sat Feb 26, 2011 2:10 pm Post subject: |
|
|
Great write up. I would suggest putting some vinyl or the original padding between the dash grill and the dash so that you can't see the gaping hole, but other than that looks great and it'll keep your car running longer because you can see problems before they get too bad.
_________________
Pics of my 1970 Satin Black Type 1 build |
|
| Back to top |
|
|
Pops 74
Samba Member

Joined: January 29, 2011
Posts: 30
Location: Virginia
|
| Posted: Sat Feb 26, 2011 3:37 pm Post subject: |
|
|
Great pics.... I am doing the exact same thing on my '74 Super. Except I had to fabricate a center gauge console with the same three gauges plus a tach. I'll be wiring it all up tomorrow or next weekend - depends what the wife has in store for me.
_________________
Mark
___________
'74 Super |
|
| Back to top |
|
|
Wolfgangdieter
Samba Member
Joined: June 25, 2008
Posts: 2001
Location: FL Panhandle
|
| Posted: Sat Feb 26, 2011 4:02 pm Post subject: |
|
|
Thru the dash air conditioning to boot!
_________________
CMC '57 Porsche Speedster Replica and Dolphin boat tailed full pan VW MOD-T Street Buggy |
|
| Back to top |
|
|
blankmange
Type 3 Darksider

Joined: July 17, 2004
Posts: 11497
Location: Bloßer Stahl-preapocalyptic MidCoast
|
| Posted: Sat Feb 26, 2011 4:20 pm Post subject: |
|
|
Just as a suggestion: if you are wanting to provide this as a guide on how to do things, use proper grammar and English. Many people will start reading, see misspellings and poor diction and not finish reading.
| Quote: |
Their will be excess dash pad on the inside of the grill area that you should cut out with a razor knife. Make sure you dont cut out more than the grill will cover up, or it will look like a hack job when you put the grill back on and their is a gouge out of ur pad that isnt covered. |
| Quote: |
NOTE: be aware of getting to close the sides of the grill when sizing and cutting. You want to try and keep them a little towards the center of the grill so the lips of ur gauges dont hit ur dash or each other, and so the mounting screws have clearance from the dash as well. |
_________________
póg mo thóin
Certified DHS Technician
Samba Member # 24517 |
|
| Back to top |
|
|
Semper_Dad
Samba Member
Joined: May 14, 2005
Posts: 3535
Location: Indiana
|
| Posted: Sat Feb 26, 2011 4:55 pm Post subject: |
|
|
Thanks, Nice write up. Agree that spray painting the exposed part of the dash with a black flat paint would help to disguise the cutting behind the grill.
_________________
Walküre Restoration Thread: https://www.thesamba.com/vw/forum/viewtopic.php?t=737492 |
|
| Back to top |
|
|
Cusser
Samba Member

Joined: October 02, 2006
Posts: 33437
Location: Hot Arizona
|
|
| Back to top |
|
|
kangaboy
Samba Member
Joined: August 28, 2010
Posts: 1064
Location: St. Louis, Mo
|
| Posted: Sun Feb 27, 2011 1:49 am Post subject: |
|
|
| blankmange wrote: |
Just as a suggestion: if you are wanting to provide this as a guide on how to do things, use proper grammar and English. Many people will start reading, see misspellings and poor diction and not finish reading.
| Quote: |
Their will be excess dash pad on the inside of the grill area that you should cut out with a razor knife. Make sure you dont cut out more than the grill will cover up, or it will look like a hack job when you put the grill back on and their is a gouge out of ur pad that isnt covered. |
| Quote: |
NOTE: be aware of getting to close the sides of the grill when sizing and cutting. You want to try and keep them a little towards the center of the grill so the lips of ur gauges dont hit ur dash or each other, and so the mounting screws have clearance from the dash as well. |
|
Thanks, Done 
_________________
-74 Standard - "CaliBug" 2084T, MS3X w/FI and Crank Fire
-76 Westy - "Gandalf"
-18 GTI SE
| skills@eurocarsplus wrote: |
that fucking thing looks like it drove through a J.C. Whitney catalogue and hit everything on the way out |
|
|
| Back to top |
|
|
Joel
Samba Member

Joined: September 04, 2006
Posts: 11099
Location: NSW Australia
|
| Posted: Sun Feb 27, 2011 3:49 am Post subject: |
|
|
Good job.
Just a couple of observations
Go to an auto store and get a roll of corrigated split loom and run the wires going to the back in it, cos there are several spots where those wires will wear through on sharp edges like through that hole in the front of the heater channel and near the back seat.
The old battery diagnosis connection wires on a 71 and later beetle are already run through the black hole in the original loom so are perfect for running gauges with.
_________________
Quick little bug, you got a Porsche motor in that?
1974 Germanlook 1303 2.5 Suba-Beetle |
|
| Back to top |
|
|
betatested
Samba Member
Joined: February 11, 2011
Posts: 86
Location: Phoenix AZ
|
| Posted: Sun Feb 27, 2011 8:16 am Post subject: |
|
|
| Cusser wrote: |
Nice write up. So where where you with this information 34 years ago when I did this to mine (below) ?
(image removed) |
Hey Cusser,
Your setup looks nice and clean. Could you tell me about what sort of nonsense goes into making a Tach work on these old ACVW's? I really want to install one to make sure I don't lug, or shift too late.
OP,
Nice work on the install. Thanks for all the pictures and the description. This is certainly a project that I am going to be doing in the future. I might replace your volt gauge with a oil temperature though. How would I go about mounting the sensor for oil temp? |
|
| Back to top |
|
|
kangaboy
Samba Member
Joined: August 28, 2010
Posts: 1064
Location: St. Louis, Mo
|
| Posted: Sun Feb 27, 2011 8:30 am Post subject: |
|
|
| betatested wrote: |
Hey Cusser,
Your setup looks nice and clean. Could you tell me about what sort of nonsense goes into making a Tach work on these old ACVW's? I really want to install one to make sure I don't lug, or shift too late.
OP,
Nice work on the install. Thanks for all the pictures and the description. This is certainly a project that I am going to be doing in the future. I might replace your volt gauge with a oil temperature though. How would I go about mounting the sensor for oil temp? |
For a tach its simple. You have a Positive lead to a power source when the key is turned on, a ground, and the signal wire comes off the negative side of the coil.
Oil temp is a little tricky, cause there are so many possible places to mount your temp post. Some put it in the bottom of the oil sump, some in the original idiot light post. And although i havn't hooked up on of thes units, i would assume it is the same as most others, with a sender wire, and a pos and ground wire.
_________________
-74 Standard - "CaliBug" 2084T, MS3X w/FI and Crank Fire
-76 Westy - "Gandalf"
-18 GTI SE
| skills@eurocarsplus wrote: |
that fucking thing looks like it drove through a J.C. Whitney catalogue and hit everything on the way out |
|
|
| Back to top |
|
|
|


