| Author |
Message |
micklongley
Samba Member

Joined: February 10, 2009
Posts: 44
Location: Durango, CO

|
 Posted: Sun May 15, 2011 8:48 pm Post subject: Pictorial: Tie Rod Replacement Posted: Sun May 15, 2011 8:48 pm Post subject: Pictorial: Tie Rod Replacement |
 |
|
Hey guys, I recently took on the job of replacing the whole tie rod assembly due to the astronomical cost to take it to the shop. Its pretty straight forward, and if you're lucky, you wont have to break out the Dremel like I did. This was on a 1984 Westy with manual steering. Enjoy!
Passenger side. Boot pulled back showing where the Bentley manual tells to "unlock" the inner tie rod end from the steering rack. This was some WORK on my van - whoever replaced these last made sure the tie rod wasn't going anywhere. There is a groove in the steering rack shaft where the lip of the tie rod is peened into. I had to use a Dremel to fully remove all the material from this groove.
The outer tie rod end comes out fairly easily when you remove the cotter pin, remove the nut, thread the nut on backwards, and give it a few blows with a hammer.
Old and new.
Old and new boots, check out the stretching that the old boot has undergone. This new boot is going to be a PAIN to get on!
New boot installed on the tie rod, ready for installation.
Inner installed with boot on the rack. This was a MAJOR pain. I had to unbolt the rack to get access to the back side of the boot for installation. Don't try to get it on without doing this... Save yourself and just undo the two bolts - I wish I would have done this immediately instead of messing around with it for 15 minutes.
Here it is, all installed. slide the outer into the steering knuckle and tighten down to around 20ft/lbs and advance the castle nut to the next slot. Throw the cotter pin in and get an alignment!
Some thoughts to help the next guy... The boots were, by far, the trickiest part of the job. I initially thought the "unlocking" of the tie rod from the steering rack shaft would be the hard part, and it was, but the most time consuming and frustrating part were the boots. I also had trouble on the driver side with lining the threads up on the new tie rod and the steering rack shaft - I had to undo the steering rack bolts and pry the rack out a bit in order to get a good angle. Overall a pretty satisfying job.
Thanks to all those that offered help in my original post on the topic.
Mick
_________________
Mick
www.boxerswaps.com ...your VW and Subaru motor swap lounge |
|
| Back to top |
|
 |
James 93SLC
Samba Member
Joined: January 21, 2009
Posts: 937
Location: NE Ohio
|
| Posted: Mon May 16, 2011 6:56 am Post subject: |
|
|
Nice job 
_________________
-------------------------
91 Vanagon Carat
93 Corrado SLC
-------------------------
Photos: http://picasaweb.google.com/slc.corrado
--------------------------------------------------------
tencentlife "Sometimes a pooka is a problem and sometimes it's just a pooka" |
|
| Back to top |
|
|
insyncro
Banned

Joined: March 07, 2002
Posts: 15086
Location: New York
|
| Posted: Mon May 16, 2011 8:08 am Post subject: |
|
|
 |
|
| Back to top |
|
|
Tom Powell
Samba Member

Joined: December 01, 2005
Posts: 4855
Location: Kaneohe
|
| Posted: Mon May 16, 2011 10:25 am Post subject: |
|
|
Nice writeup, thank you
Doing some front end work on the van I had a bit of difficulty with the nuts spinning the whole part without getting tight. The vise grips solved the problem. But I think that I made the mistake of finishing the job while the wheels were off the ground. I now suspect that the tightening should be done with the car on the ground. The job looked so simple I didn't read the Bentley or search TheSamba.
Should I loosen and retighten?
Aloha
tp |
|
| Back to top |
|
|
Vanagon Nut
Samba Member

Joined: February 08, 2008
Posts: 10379
Location: Sunshine Coast B.C.
|
| Posted: Mon May 16, 2011 12:20 pm Post subject: |
|
|
| Tom Powell wrote: |
Nice writeup, thank you
Doing some front end work on the van I had a bit of difficulty with the nuts spinning the whole part without getting tight. The vise grips solved the problem. But I think that I made the mistake of finishing the job while the wheels were off the ground. I now suspect that the tightening should be done with the car on the ground. The job looked so simple I didn't read the Bentley or search TheSamba.
Should I loosen and retighten?
Aloha
tp |
I've tightened the tie rod nuts in a similar fashion, vehicle on stands. Done this twice now. First time put thousands of miles on w/o issue.
I did the tie rod job recently, rack on bench (manual rack) One thing I should have done, as noted in Bentley, is softjaw the rack in a vice while torqing down the inner end nut. I gather that not doing so may allow the rack to twist a little or put stress on steering gear internal parts. That said, it seems to work fine
Just sayin. 
The boot install, rack mounted, may be easier using a smooth curved piece of steel to work boot around and onto rack (for the manual steering setup anyway)
Neil.
_________________
1981 Westy DIY 15º ABA
1988 West DIY 50º ABA
VE7TBN |
|
| Back to top |
|
|
presslab
Samba Member
Joined: September 29, 2008
Posts: 1730
Location: Sonoma County
|
| Posted: Mon May 16, 2011 12:53 pm Post subject: |
|
|
| Tom Powell wrote: |
But I think that I made the mistake of finishing the job while the wheels were off the ground. I now suspect that the tightening should be done with the car on the ground. The job looked so simple I didn't read the Bentley or search TheSamba.
|
Don't worry about it. The only bolts that should be tightened while on the ground are the vulcanized rubber bushings, like the lower control arm and the lower shock mount.
_________________
1986 Vanagon Westfalia EJ25
1988 Subaru GL-10 EJ20G --- 2000 Honda XR650L
2010 Titus El Guapo --- 2011 On-One 456 Ti |
|
| Back to top |
|
|
Tom Powell
Samba Member
Joined: December 01, 2005
Posts: 4855
Location: Kaneohe
|
| Posted: Mon May 16, 2011 1:24 pm Post subject: |
|
|
thanks
tp |
|
| Back to top |
|
|
dlb
Samba Member
Joined: July 08, 2010
Posts: 114
Location: Shawnigan Lake
|
| Posted: Tue Aug 02, 2011 8:45 pm Post subject: |
|
|
i just did this job on my '82 air-cooled and found that i also had to undo the stabilizer bar from the body because it was in the way of steering linkage, keeping me from having enough room to get the new steering boot on.
thanks for the post, pictures are worth a thousand words. |
|
| Back to top |
|
|
IdahoDoug
Samba Member

Joined: June 12, 2010
Posts: 10251
Location: N. Idaho
|
| Posted: Tue Aug 02, 2011 9:57 pm Post subject: |
|
|
Getting the inner part of the boots on took some finger strength. Find a buddy who's a rock climber. I was worried about tearing it at first and got progressively more aggressive each try. Finally just pulled the living crap out of it and it snapped into place. I stretched it a bit before I put it on the other end, having looked - as your picture shows - at the old one. I've got pretty strong hands and fingers and did not tear it.
DougM
_________________
1987 2WD Wolfsburg Vanagon Weekender "Mango", two fully locked 80 Series LandCruisers. 2017 Subaru Outback boxer. 1990 Audi 90 Quattro 20V with rear locking differential, 1990 burgundy parts Vanagon. 1984 Porsche 944, 1988 Toyota Supra 5 speed targa, 2002 BMW 325iX, 1982 Toyota Sunrader |
|
| Back to top |
|
|
stevey88
Samba Member
Joined: January 16, 2008
Posts: 1317
Location: Fremont, SF Bay Area
|
| Posted: Tue Aug 02, 2011 11:18 pm Post subject: |
|
|
I have one suggestion. After you put on the boots, move the small end of the boot so the length of the boots is the same as when they were before installation. This is to make sure they have no stress when the wheels are pointing straight ahead. The boots will last longer this way.
_________________
Steve
87 Westfalia full camper 4 speed |
|
| Back to top |
|
|
micklongley
Samba Member
Joined: February 10, 2009
Posts: 44
Location: Durango, CO
|
|
| Back to top |
|
|
Ahwahnee
Samba Member

Joined: June 05, 2010
Posts: 9810
Location: Mt Lemmon, AZ
|
| Posted: Thu Jan 26, 2012 2:29 pm Post subject: |
|
|
| micklongley wrote: |
| Old and new boots, check out the stretching that the old boot has undergone. This new boot is going to be a PAIN to get on! <snip> Inner installed with boot on the rack. This was a MAJOR pain. I had to unbolt the rack to get access to the back side of the boot for installation. Don't try to get it on without doing this... |
I found an easy way to stretch that new boot over the seemingly way too large fitting... made it possible to do the job quickly and in situ.
I start by stretching the boot over a glass bottle to relax it a bit. I warmed the end of the boot in hot water and filled the bottle with hot water though that may have been overkill:
You'll see in the above pic that I have a cap from a spray can that is just slightly larger diameter than the rack housing. Working quickly I remove the boot from the bottle and insert that cap, open end down:
That cap is in about 1/2" or so. Now I cut the cap near the end of the boot. Although the cap is thin and flimsy it can't go anywhere and the resulting 'ring' holds the boot open:
Now the boot can be put in place over the rack. Once there the ring can be yanked out and Walla! the boot is on! Cut the ring to remove it. |
|
| Back to top |
|
|
AtlasShrugged
Samba Member

Joined: October 30, 2008
Posts: 1605
Location: Decatur, Ga. USA
|
| Posted: Thu Jan 26, 2012 8:34 pm Post subject: |
|
|
A smear of Vaseline around on the inside of the boot where it goes over the rack end helps when installing.
You can walk the lubed boot onto the rack with your fingers, most of the time.
Helps if you lube up the small end of the boot with Vaseline when you want to do an alignment and need to turn the tie rod without twisting the boot too. |
|
| Back to top |
|
|
theDrew
Samba Member
Joined: May 17, 2011
Posts: 1155
Location: Camas, WA
|
| Posted: Fri Mar 09, 2012 11:33 am Post subject: |
|
|
I just did the tie rods and steering boots -- I was able to get the boots on WITHOUT taking the rack off.
A little bit of grease around the lip of the steering rack, hit the rubber with a heat gun and then I got one side of the boot over the lip, and then slowly rotated the boot and pushed the boot into place as it came around.
Silly boots!
_________________
Turbo 2276 MS3X build http://www.thesamba.com/vw/forum/viewtopic.php?t=673125
1985 Vanagon Campmobile w/ 2005 EJ25 |
|
| Back to top |
|
|
Gauche1968
Samba Member
Joined: April 13, 2006
Posts: 1518
|
| Posted: Fri Oct 04, 2013 8:36 pm Post subject: |
|
|
The process for "locking" the tie rod to the rack is still unclear. Just what are you supposed to do to "peen" it? The tie rods screwed out of the old rack without having to "unlock" anything. 
_________________
1984 Vanagon GL
1984 Vanagon Westy |
|
| Back to top |
|
|
Vanagon Nut
Samba Member
Joined: February 08, 2008
Posts: 10379
Location: Sunshine Coast B.C.
|
| Posted: Fri Oct 04, 2013 9:58 pm Post subject: |
|
|
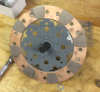
here's a giant image showing the "lock"
There is a thin-ish collar on the nut. A small section of it gets drifted over and into the slot on the rack rod "locking" the nut to rack rod to keep it from turning loose. I made a square faced drift out of a piece of round mild steel. Used that and a ball pein hammer to knock that collar over and onto the slot.
I guess it's entirely possible one could turn the nut and break this lock loose w/o too much effort but if the nut turned easily, check the other inner tie rod end.
Neil.
_________________
1981 Westy DIY 15º ABA
1988 West DIY 50º ABA
VE7TBN |
|
| Back to top |
|
|
Gauche1968
Samba Member
Joined: April 13, 2006
Posts: 1518
|
| Posted: Sat Oct 05, 2013 8:51 pm Post subject: |
|
|
AH, thanks. I get it now. Nice pic!
_________________
1984 Vanagon GL
1984 Vanagon Westy |
|
| Back to top |
|
|
timworx
Samba Member
Joined: May 26, 2013
Posts: 3
Location: Hudson Valley, NY
|
| Posted: Mon Aug 18, 2014 6:51 am Post subject: |
|
|
Hate to bump and older thread - but I figure it makes sense to keep a simple question in with the same topic for others.
----------
When removing the inner tie rod, is there a concern for how much you can crank on that sucker?
From what I've been told, they're normally VERY tight and take a bit to free. I'm just very worried about hurting the cast aluminum enclosure of the non-power steering rack.
I tried pulling it out and using a vise, but had trouble getting good grip on the shaft with the vice (forget soft-jaws, I'd destroy them from tightening the vice before anything comes free)
Should I be afraid of making this repair a whole lot more expensive?
Also, I'm just using a crescent wrench, no special tool.
Thanks! |
|
| Back to top |
|
|
campism
Samba Member
Joined: September 07, 2007
Posts: 4492
Location: Richmond VA
|
| Posted: Mon Aug 18, 2014 7:33 am Post subject: |
|
|
| timworx wrote: |
Hate to bump and older thread - but I figure it makes sense to keep a simple question in with the same topic for others.
----------
When removing the inner tie rod, is there a concern for how much you can crank on that sucker?
From what I've been told, they're normally VERY tight and take a bit to free. I'm just very worried about hurting the cast aluminum enclosure of the non-power steering rack.
I tried pulling it out and using a vise, but had trouble getting good grip on the shaft with the vice (forget soft-jaws, I'd destroy them from tightening the vice before anything comes free)
Should I be afraid of making this repair a whole lot more expensive?
Also, I'm just using a crescent wrench, no special tool.
Thanks! |
I did this yesterday with the rack out of the van. I put the rack in a vise. Once I finally located the lock (thanks, IdahoDoug) and drove it back out of the way, just put a large Crescent wrench on the flats and knocked it loose. The vise was actually clamped on the metal sleeve in the rubber mounting bushing (as a mounting bolt would hold it to the frame of the van) so when romping on the wrench I was getting a little rack movement but both ends came loose without drama.
_________________
'87 Westy in Wolfram Grey Metallic |
|
| Back to top |
|
|
timworx
Samba Member
Joined: May 26, 2013
Posts: 3
Location: Hudson Valley, NY
|
| Posted: Mon Aug 18, 2014 8:53 am Post subject: |
|
|
| campism wrote: |
I did this yesterday with the rack out of the van. I put the rack in a vise. Once I finally located the lock (thanks, IdahoDoug) and drove it back out of the way, just put a large Crescent wrench on the flats and knocked it loose. The vise was actually clamped on the metal sleeve in the rubber mounting bushing (as a mounting bolt would hold it to the frame of the van) so when romping on the wrench I was getting a little rack movement but both ends came loose without drama. |
Thanks!
I tried clamping onto the metal sleeve, but I couldn't get it stabilized - it flexed to much in the rubber bushing in my vice.
Were you literally knocking on the wrench with a hammer? |
|
| Back to top |
|
|
|


