| Author |
Message |
Crankey
Samba Member

Joined: July 11, 2004
Posts: 2659

|
 Posted: Tue Jan 24, 2012 10:07 pm Post subject: Posted: Tue Jan 24, 2012 10:07 pm Post subject: |
 |
|
nice !
I have a suggestion, instead of cutting notches to help put the curve in, do a series of spot welds along the flange, each time quenching the weld with a wet rag. it should shrink the flange. then grind off the tac weld bumps.
or, just do little spot heats with a torch instead of the mig welds. quenching with the wet rag as you go. |
|
| Back to top |
|
 |
kevtherev
Samba Member

Joined: December 23, 2007
Posts: 897
Location: the 51st state
|
| Posted: Tue Jan 24, 2012 4:16 pm Post subject: |
|
|
On to the other side now...
Well removed the sealant from around the old bit of lip
spots drilled out, no need to do them at the bottom as the lower panel is scrap so it comes off in one
now this shows the extent of the rust within the seam , it should be obvious that no matter how much effort we put into cleaning seams out, you will never get to the back/bottom of it,but blasting and dremel and opening it up to get further in then getting paints and such in there does help a lot.
oh heck
this wasnt visible from the arch side
this is looking at the underside of the rear 1/4 panel
now theres a few ways of doing this, I can just about be got at from the inside but would not make a good clean job and no doubt take a lot longer so we gain access

If you are doing repairs on this area then note the area i have marked round ,
the rear 1/4 panel is sandwiched between this and a box , so dont try to unpick as you wont , next picky shows how Ive cut it
now that its off you can access the part and drill and remove, in this case i will probably refit the same part after repairs , so wont need to.
deceptive, especially if you look at the 4th picky down
all the horrors cut out ready for new metal
first a piece to make up the base to the original pattern much the same as on the other side
then the joining plate as per original one
welded and spotted, its not 100% same construction method as the original was in 2 pieces, but its not an issue im too fussed with here
now an area that caused about an hour of grief was the removal of the gas charging point, these should be fitted through a panal and use a little non setting sealant on the underside of the outer part, then fit the rubber seal and clamp up , then its easy enough to remove, this had a 70mm hole bored in with a holesaw and the joddles were left on the inside
and then the seal fitted and the whole lot coated in what looks like tiger seal , FFS, how are you supposed to remove it for painting etc
Well the os wing only needed a little tweak to shrink to fit, there is a great delve in it but that was due to a heavy item flying through the air and landing on it as the van hurtled along the m62,or so Im told.
so crap off and trial fit after removing the remnants of the lip on the join to the center panel
it needs lifting and such but its generally thereabouts.
the same as I did on the other side, I shall weld this rear support to the old edge on the left ,this will give it a lot of rigidity and help with joining the lower part.
Now this is a very nice Genuine rear 1/4 panel,a good few hundred pounds worth so I does seem a shame to cut the bottom of to use
so I decided to do it this way, getting the constant curve was one of the harder aspects
looks rough but will be ok when done I hope
this is just a trial fit to check, before the next round of hammering and such, little and often as its harder to reshape after working
its nearly there 
|
|
| Back to top |
|
|
Crankey
Samba Member
Joined: July 11, 2004
Posts: 2659
|
| Posted: Tue Jan 17, 2012 6:21 pm Post subject: |
|
|
| you kick ass Kev ! way to go ! |
|
| Back to top |
|
|
kevtherev
Samba Member
Joined: December 23, 2007
Posts: 897
Location: the 51st state
|
| Posted: Tue Jan 17, 2012 11:36 am Post subject: |
|
|
Well a decent afternoon
for once Im grateful that the previous repairer did a bit of a bodge, as the wing was only held on with a few tacks, here is the tear that had been brazed up
It was decided that the van had been T-boned at some point
seams pointless. anyhow 1st trial fit of the wing, hopeless,
same top
this is with the wing hard up against the rear 1/4 so something is going to have to give
This panel is as is often the case with aftermarket replacement.. some several mm too long, so I have done a few things  and got it something like the right length and got it something like the right length
the flange part that sticks into the area where the seal goes is normal and is easy enough to remove, too much is better than if it was too short, the main thing is to get it to sit in to the pillar,
same here,its just fitting in good enough, you can have a little lateral lee way here but be mindful not to weld till the slider is fitted and you can confirm the width of the gap and also making sure the door and wing are flush with each other
this shows the gap to the face of the pillar
this is the trial fit of the wing over the inner wing
this is it welded, I have drilled it for puddle welding and this is the order it was originally done, it also makes for a neater job , it also helps if the metal behind is shiny and not rusty rotten ! the pen marks show what I have to remove to make it neat and fit how I want
this is now welded, the tacks are holding the inner wing to the inner frame and this is sandwiched by the load bed part and also welded from the other side
I think this gives a better idea
this is the top side and the welds are visible along the top
rear 1/4 fitted and ground off, its important to create a little spring in the panel so that when welded its keeps it shape and when depressed it springs back into place, at the same time i have kept the weld area slightly depressed so I will have a couple of mm of depth of lead.the area to the front where it meets the wing and the same at the rear i will do with gas as I want a very neat fine seam.
shortened wing clamped
lines all seem to be within whats acceptable
|
|
| Back to top |
|
|
Mickyfin
Samba Member

Joined: July 04, 2011
Posts: 96
Location: Kuopio, Finland
|
| Posted: Mon Jan 16, 2012 11:23 pm Post subject: |
|
|
| Good to see Mike's welding getting some showcase here on TheSamba |
|
| Back to top |
|
|
Zeitgeist 13
Samba Member

Joined: March 05, 2009
Posts: 12115
Location: Port Manteau
|
| Posted: Mon Jan 16, 2012 6:41 pm Post subject: |
|
|
Nice work. Now would be an excellent time to place the steering wheel back onto the correct side.
_________________
Casey--
'89 Bluestar ALH w/12mm Waldo pump, PP764 and GT2052
'01 Weekender --> full camper
y u rune klassik? |
|
| Back to top |
|
|
Terry Kay
Banned

Joined: June 22, 2003
Posts: 13331
|
| Posted: Mon Jan 16, 2012 6:13 pm Post subject: |
|
|
Time for some kemo on that roof panel--
I don't think I've ever seen one quite that bad---Yeowza---
_________________
T.K. |
|
| Back to top |
|
|
JPrato
Samba Member
Joined: December 15, 2006
Posts: 791
Location: Livonia, NY
|
| Posted: Mon Jan 16, 2012 6:02 pm Post subject: |
|
|
Gas welding has it's place just don't try to do it in the middle of a panel, you'll get a lot of warpage. The old timers did it, but metal was thicker then. They also knew how to shrink it back to shape.
_________________
Joe
87 Syncro Tin Top project
84 Westy, 2.5L Subaru power
06 Subaru 2.5 turbo in waiting
46 Cessna 140 |
|
| Back to top |
|
|
buildyourown
Samba Member

Joined: March 01, 2009
Posts: 1668
Location: Seattle
|
| Posted: Mon Jan 16, 2012 2:46 pm Post subject: |
|
|
The gas welding is interesting. Never thought of doing that before but it makes sense. Less clean-up than MIG and easier to do standing than TIG.
The brazing makes lots of sense too. That stuff will never rust. Just don't try and repair a braze with a weld. Once the bronze is bonded to the steel molecules, it can't be welded |
|
| Back to top |
|
|
kevtherev
Samba Member
Joined: December 23, 2007
Posts: 897
Location: the 51st state
|
| Posted: Mon Jan 16, 2012 1:26 pm Post subject: |
|
|
|
|
| Back to top |
|
|
Crankey
Samba Member
Joined: July 11, 2004
Posts: 2659
|
| Posted: Sat Jan 14, 2012 12:31 am Post subject: |
|
|
| nice work on that windshield frame. I would say you have quite a bit of fabrication to do. |
|
| Back to top |
|
|
kevtherev
Samba Member
Joined: December 23, 2007
Posts: 897
Location: the 51st state
|
| Posted: Fri Jan 13, 2012 5:12 pm Post subject: |
|
|
A picture that is not for the feint heart
rust removal is on going and ruthless
|
|
| Back to top |
|
|
andy syncro-nutz
Samba Member

Joined: August 22, 2010
Posts: 539
Location: Upper Ottawa Valley
|
| Posted: Thu Dec 22, 2011 5:33 pm Post subject: |
|
|
Metal Micky is Steel welding junkie! Mabe to much lead fume's inhaled on Chris's van He sure loves his metal, Ive a pile of pic on photobucket on his work  |
|
| Back to top |
|
|
kevtherev
Samba Member
Joined: December 23, 2007
Posts: 897
Location: the 51st state
|
| Posted: Thu Dec 22, 2011 4:14 pm Post subject: |
|
|
I might add these are extracts from this thread on club 80-90 bodywork forum... here's the full version
http://forum.club8090.co.uk/viewtopic.php?f=38&t=93497
the Guy doing the work is alas not me.. but a fella called Mike who lives in North Yorkshire, near York.
If the mods want I can stop posting pictures should it be a problem. |
|
| Back to top |
|
|
DAIZEE
Samba Member
Joined: January 26, 2010
Posts: 7552
Location: Greater Toronto Area Ontario West Side
|
| Posted: Thu Dec 22, 2011 4:13 pm Post subject: |
|
|
WOW,
_________________
'09 2.5L Jetta 5 cylinder, 5 spd, super turbo, see thread in H2O Cooled Jetta, etc...
83.5 Vanagon L Riviera Model with 98 1.9L TD AAZ 4 speed Daily Driver 3 out of 4 seasons (sold)
84 Vanagon GL Wolfsburg Westy WBX 4 speed (sold) |
|
| Back to top |
|
|
kevtherev
Samba Member
Joined: December 23, 2007
Posts: 897
Location: the 51st state
|
| Posted: Thu Dec 22, 2011 4:03 pm Post subject: |
|
|
some more choice pics
trial fit on OS with joddle done
and about where I want it now, you should always leave a small gap as when welding the heat will expand the metal and if no gap then it will warp more,I intend to gas this on both sides and re-braze to pillars as per original.
Well, I can confirm its had front end accident damage, nothing earth shattering but enough for all the tell tales to add up, I'll come to them as we get to those parts.
This is the N/S welded and re brazed, you will see a small area of what looks like fused glass on the left of the brazed bit, this is caused by excessive flux and isnt a problem ,But, if your going to do any brazing yourself then dont use flux coated rods as there is too much flux and they are a pig to use. you can buy plain rods in small numbers and then buy the flux powder, or second best are rods with flux impregnated into indentations in the rod, if you want or need to run the braze uphill or fill a hole then the problem with continual flux is that the brass will travell wherever the flux is, so you cant control it, anyhow back to the van
this is the raw state and looks awful but at least the flexpad makes it presentable
this is the inside of the cab roof, I will treat it and apply a run of brush on seam sealer
the welding is the easy bit, its this mess thats the headache everytime I do it
earth crowns are good, usefull picky for showing whats in/under here
Now I stated that there had been an accident and that the hitop was swopped and the wood bed frame broken at the front etc well I said the upper front panel had also been changed, well I know that they didnt remove the dash to do it, they did it the bodgy way,
I had a poke at the seams a bit ago and thought they had been welded externally and covered in bodge, (new panel) here's the pick
ive marked where the migging tacks are, its the same on the other side.
the 2 arrows show the rust trail from the water that has leaked in and run down behind the front frame and into the footwells, same both sides, crowns are very good, while its easy I will remove and clean and refit as its a 5 minute job now...
and the bit I chopped out was genuine,
trial fit
wish it was as simple  showing the rot cut out showing the rot cut out
not a lot of options here, but there again I like this type of repair as its sort of therapeutic and steady away.so first the rear screen rubber lip
next the small fillet for the corner
now this and the next bit have to be fairly good as they form the visible seam and I dont want to fill it with pod
first part of it gassed in
next is a very small bit that also forms the seam
now all welded in place
now after a touch with the disc
fairly happy with the line
just a little tweaking when the panel goes on and the curve in the corner to refine a tiny bit
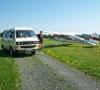
as a reminder...
and happy Christmas to you!
Last edited by kevtherev on Thu Dec 22, 2011 4:17 pm; edited 1 time in total |
|
| Back to top |
|
|
Timwhy
Samba Member

Joined: January 01, 2009
Posts: 4002
Location: Maine
|
|
| Back to top |
|
|
kevtherev
Samba Member
Joined: December 23, 2007
Posts: 897
Location: the 51st state
|
| Posted: Tue Dec 20, 2011 2:00 pm Post subject: |
|
|
| vw7266 wrote: |
| looks like a parts car to me... |
oh ye of little faith!
watch the magic as it unfolds.. |
|
| Back to top |
|
|
GBA 88West LA
Samba Member
Joined: September 04, 2008
Posts: 1279
Location: New Hampshire
|
| Posted: Tue Dec 20, 2011 1:23 pm Post subject: |
|
|
shes worth it Kev , cant wait to see how it progress' ive always loved your van, glad youa re taking the time and money to treat it right
_________________
88 Westy GL Vanaru 07 2.5 EJ25/AA Trans/oiling plates, 1.14 3rd-.77-4th..solar powered cabin |
|
| Back to top |
|
|
vw7266
Samba Member
Joined: April 28, 2004
Posts: 3038
Location: the point, ohio
|
| Posted: Tue Dec 20, 2011 12:23 pm Post subject: |
|
|
| looks like a parts car to me... |
|
| Back to top |
|
|
|


