| Author |
Message |
ALIKA T3
Samba Member

Joined: July 30, 2009
Posts: 6348
Location: Honolulu,Hawaii and France

|
 Posted: Thu Nov 27, 2014 1:18 am Post subject: Alika's Syncro transmission work Posted: Thu Nov 27, 2014 1:18 am Post subject: Alika's Syncro transmission work |
 |
|
Aloha all!
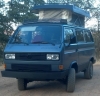
at the end of november 2010 (wow!! 4 years ago almost day to day. Just realized how long it takes to acomplish my project  ) , I bought a Syncro for 2.5K$ on a neighbor island. ) , I bought a Syncro for 2.5K$ on a neighbor island.
Syncrogreg sent me a private message with the Craigslist link, I couldn't pass on it.
I had initially planned on driving my Westy EJ22 with a UN1 transmission to South America ( the reason why I built it).
4 years ago, I took it apart and dropped the transmission, and decided to go the M-Tdi way.
This thread is about the work I started to do to rebuild that transmission, inspired solely by the Herman Blog in the beginning, with no real advice until I met Mr Gears, aka Paul.
I did my first 091 transmission back in 2003 with no special tools. Chisel and hammer for the pinion bearing nut  NO FEAR NO FEAR 
From there, a new world of possibilities opened and there it is, I hope you enjoy the pictures 
Syncro transmission AAN with locking differential /b]
Original locker transmission was missing and got replaced with a non locking model when I got the van.
Since I was stripping it, I traded my transmission, propshaft,springs,shocks,brakes for a locker transmission locally.
Turns out, a couple years later, I bought everything back for 500 bucks for spare parts, couldn't pass on the bargain
cleaning
oil draining
Flange removal with a 24mm wrench.I blocked it with a plumber's wrench left loose open and the M8 bolts still attached
Leverage on the casting ear to open the cover
Steyr Puch bearing stamping
Don't forget to loosent that allen bolt hidden in there. Luckily I have the french original VW workshop manual to help me.
Pull out the gear selector shaft
bellhousing out
[ut]2_-_fkLF-XU[/ut]
In order to remove the input shaft, loosen the differential bearing nut on the right, the differential will drop slightly, leaving you enough room to pull the last millimeters of the splined coupling, allowing you to unscrew the input shaft from the mainshaft.
The actuator shaft for the locking differential's fork gets out with the sleeve once the pin that retains the fork onto the shaft has been driven out (inner side of the transmission)
I bought plastic bins to store all my parts between 2 jobs, as the shop's roof leaks badly sometimes, and dust...
I fabricated an extractor for this pinion: a long M5 thread bolt, a 1" copper coupling (nice because it's not thick: not a lot of room in there) and a thick steel plate, and an M5 nut.
The threaded rod goes through the plate and the coupling and threads into the shaft. Cheap and easy.
you end up with this assembly...
.that comes from here
February 25th , 2011
You gotta put the transmission upside down to remove the damn cover. I didn't read the manual enough and was cursing like a sailor while bashing it to get out. I still don't understand the physics behind it though
.
the pinion goes out by itself almost, be carefull there are many washers, needle bearings
.
Now we reuse our cheap extractor again : the access is by the gasket surface, accessible only once the low gear housing is out.
There it is all assembled to not loose anything, it's basically the same as the previous one I got out.
I made a tool with the diesel injection pump dial gauge.
This is for marking the pinion's depth position in the case.
I learnt later thanks to Paul that I didn't need it because I didn't replace the main case nor the R&P 
No need the fancy VW tool pictured here (yet
)
I'd have made one out of 50mm PVC that I got sent from France (fits perfectly in the differential bearings  ) to hold the dial gauge and note the depth with MY tool on THIS R&P set in THIS case. ) to hold the dial gauge and note the depth with MY tool on THIS R&P set in THIS case.
In case you wondered, my research took me a while but I finally found out the depth of the magnetic spacer 385/17 that goes on the pinion face: 5x50mm.
March 6th 2011
Removal of the shift fork, it's tight: mounted with Loctite.
Pop this C-clip
2 arm-extractor for the reverse gear, secured with steel wire and a clamp. That will do.
It's out!!
Below it is a needle cage and a color coded thickness washer. I always get green somehow
Do not forget to remove the woodruff key that's here to prevent the mainshaft bearing form rotating.
The mainshaft ball bearing retainer clip
This is a tool I made to measure the pinion depth to set it back exactly the same way, but it's never giving me the same result 
Trying Plan B that was plan A initially (here with 2" SCH40 PVC: bad!!!)I need 50mm PVC (in metric it's always O.D: because it's metric and because it's smarter than the Imperial System. Bam! : )
To the worst will come Plan C: measuring accurately with a caliper the pinion bearing lip thickness to compare with the new one. That's why I started to talk to Paul later on: all bearings are the same. Thanks VW manual for allowing me to waste my time
I'm now marking the ring position in the case so I won't fool around for minutes trying the be close to the truth little steps by littles steps.( Backlash in english I think).
Extracting the bearing on the locker side with a guillotine extractor.
Same goes for the other side, but gotta destroy the differential bearing to get a good grip.
I tried extracting this needle bearing with a slide hammer, it won't budge, so I have to turn this blind hole extractor into my own sauce.
March 29th 2011
I got my replica pinion bearing race/nut tools from Latvia!
It's meant for a 5 speed 094, so I have to cut it in half and lengthen it with a chromoly tube welded in the middle.
Uploaded with ImageShack.us
Uploaded with ImageShack.us
The ring on the ring finger also comes from Latvia.Funny.
Uploaded with ImageShack.us I tried to cheat using a US threaded bolt for my M12x1.5 extractor (very close dimension) but it failed...
Gotta find a Japanese car wheel lung bolt to try again.
This set me back a while amongst other things in my life...
[b] November 21 2012 :rouge:
Bearing carrier removal with shafts
Spin the shifter guides with a big flat head screwdriver to get them out once they align with the hole in the housing.
Remove the clip that retains the needle bearing for the mainshaft
Extraction with a 19mm 1/2" dribe socket to drive the needle bearing out
This fork get outs as a whole.
It was time to open that transmission a year after I drained the oil out: it started to have rust signs inside 
Attaching the shafts together to drive them out. I found a hydraulic press on Craigslist for 200 bucks: what an improvement!! The hydraulic ram worked at the shop (press test) and failed at the first task at home
I replaced it with a hydraulic bottle jack.
Pressing onto the mainshaft , with a little brass cap to protect it. Using a deep 15mm 1/2" socket is a better idea as I figured out later: it pushes on the shoulder
It's out
Mainshaft, 4th idler gear removal
4th idler with the slider out
3rd/4th hub getting out
And then comes the 3rd gear.
3rd and 4th out together from the mainshaft
Pop the U clip for the 4th gear on the pinion shaft.
4th gear extracted. The groove goes towards the front of the van
2 Syncro pinion shafts side by side for comparison.
2nd and 3rd get out at the same time together
3rd and 2nd out from the pinion shaft
Slider hub gets out with the 1st gear
pinion shaft naked
I'm training myself on the old pinion shaft to get the pinion bearing nut/race out
I'm working late at night
parts list to order at the best prices, better needle bearings...
Some math to choose the 3rd and 4th gears for my Subaru engine and 215/70R16 tires (decided later to go with a Tdi engine).
End of the world
I finally received my goodies from Weddle a couple weeks ago.
Idler gear with separate teeth ring
The better synchronizing hubs,The left one is a Weddle Industries, the one on the right is a VW, round angles
I received my decoupler kit from Syncro Services in Holland, stainless steel locker actuator rods and sleeves 
2013
After talking to Gears, my gears have been spinning in my head. I had no idea about warping, case stress and so on.
Decision is taken: this transmission will be awesome or it won't be at all.
I sent the main case to Dave Folts on the mainland to get it modified/sleevd for the pinion bearing and the mainshaft needle bearing.
I sent the mainshaft to Thompson Gundrilling to be gundrilled at 3/8"
I cannot find a string enough vise to hold the damn pinion nut/race in place without ripping the whole bench out.
I squatted this big ass vise that I spotted on the harbor: not budging
I didn't know what to do at that point
Gears came to the rescue later and told me by email that I need to heat it up.
March 20th 2013
I heated up the pinion bearing nut/race and it came loose much more easily. I put some teflon to protect the shaft when I pounded the tool onto the splines (tool is a tight fit)
Press extraction
Main case back from sleeving: it's beautiful!!!
I received my mainshaft gundrilled too, drilled until the orange zipties. 2 holes will be drilled perpendicularly for oiling 3rd and 4th idler ger needle bearings.
I pushed the low gear shaft out with a 6mm punch under the press.
I opened the differential.
This differential comes from a broken transmission I bought in Germany a while ago for the locker that I will need in the front differential. It got delivered to my brother in France who then shipped me the parts I needed.The rest of the transmission came back summer 2012 with my suitcase.
Since I plan on rebuilding the rear locking differential, I decided to transfer the good one I had onto the front differential without rebuilding and rebuilding this bad looking one for my actual transmission.
Extracting the differential bearing on the cover side with a steel plate and a tube pushing the differential in the center of the bearing.
January 2014
Paul's sweet wife brought me the main case back from the mainland where I sent it again to have it bore checked since the pinion bearing felt way to tight in my opinion to be able to be pressed in without damages.
Eric (which I didn't know until today was Zeohsix?  ) got it drilled and welded for an oiling entry point for the pinion bearing. Bore got also checked and honed. ) got it drilled and welded for an oiling entry point for the pinion bearing. Bore got also checked and honed.
Still waiting on you to visit me Sir
I also drilled the pinion bearing thanks to a couple special drill bits Paul gave me.
But first I needed a vise to put under the drill press.
Perfect timing, I found this one on the curb
I restaured it . Much stronger than the chinese pot metal crap that was on here before. (not mine)
Marking, drilling.
Marking with sharpie ink scratched in, drilling.
I was extremely cautious while drilling, tons of cutting oil and backing up so many times, it looked paranoid. Once the outer hardened layer is drilled through , the rest of the shaft is butter.
breaking a 1/8" super tough drill bit is not a fun thing.Luckily it just made it out on the other side, so I used another smaller bit to bang it out like a chisel. 2 hours. In your face  . .
There are 3 holes like that.
Extracting the low gear
Drilling the mainshaft for 3rd and 4th iddler gear needle bearings.
I sent the shaft back to Thompson Gundrilling to have it drilled deeper in order to do the same for the needle bearing in the maincase as per Gear's excellent suggestion.
November 23rd 2014
I cut a groove in the pinion nut with an angle grinder.Not bad at all
Things I learned about the low gear housing on the way:
SA bearing carrier with 2WD and Syncro retaining plate for the mainshaft ball bearing
SA model I got:
Common bearing carrier: different material and there are no provision for the oil splash plate for 4th gear nor for adding a bearing retainer
therefore ou can mount this plate from AATransaxle and mill down the low gear housing to clear it
Mocking up the 4th gears in the SA gear carrier :scratching my head for designing a lubricating device for the 4th gears.
Superposing the low gear housing and the bearing carrier to see what's up.
Seen without the mainshaft ball bearing,seen from the 4th gear side.
Another view to look for an entry point for lubricating the mainshaft ball bearing
Eyeballing the retaining plate I designed inspired from the above pictures, laser cut in France for a song. I gotta give it a hair cut this and there.
"No fear mode activated": I decided to try a router and a 1/4" wood bit: what a marvel!! It works beautifully, and I got a result certainly much cleaner than what Universal Manufacturers of Honolulu had done for me in the past
Tapping at M6X1 for the 4 retaining screws.I'm using a rivet nut to guide the tap straight.
Luna thought my diagrams print out needed to be kept warm and safe
Hey, get out of there, you Princess!!
So here, I bought 17mm steel balls of ebay, to use as a spacer to extract the 2 half shafts that go through the differential body.
Gotta get that long shaft out by 70mm, then stick the ball in the other end: it will end up right across the 2 half shafts, so you can press them out together from one end without damaging the inner end of the said shafts.
So here, I cut it short, but I cursed like a sailor to jig the differential under the hydraulic press. Here is the 3rd version of it, the best one, under is a 3/4" brass tee that I carved to compensate the curvature of the differential's body.Nothing budged at 20 tons!! Not even with heat.
I finished it with much fury, sledge hammer and Viking yelling.Got it out damn it!! :2gunfire:
So I had 2 new half shafts in prediction this will end up the Neanderthal way.New guts,thrust washers,billet cover etc
Putting it back together all clean.Ouh yeah!
Heat up a tad bit the cover, center with 3/8" concrete anchor studs:perfect dowels
Heated up the crown real good, using the same centering dowels:goes in smootly
Old VW ring bolts 14mm head with lock washer , new ones on the right 13mm head with shoulder
Pressing in the new differential bearing using the old cups and broken inner bearings.
Voilà !
Master Paul Guard is back in Hawai'i, he brought his 385 tool to have some fun. That's a dream becoming reality: finally seeing this damn tool in real life: it is a marvel, I kept drooling on it
Pinion bearing:
Gotta assemble it using the VW method (heating and cooling), then oil it.
I have noticed my bearing's storage oil hardened reral bad,so prior to mount it I cleaned it real well with brake cleaner.
Once the bearing is pressed in, tighten it at 210Nm
I didn't take pictures BUT read the following I learnt from Paul last saturday when you install the pinion bearing:
you gotta feel the bearing for any hard spots and feel for smoothness (easier written then done)
If it's not feeling right, just loosen the nut/race a little bit and back it off under the presse, then press it back in.
Feel again.
Re-do if necessary.
We did it a few times until it felt right.
Don't ask me how and why, but it works 
The R&P deviation was 0.36mm ("36" engraved on the crown)
With the VW 385 tool, the reference is 63mm. Depth for my pinion is 63.36 from factory.
Since I had the case reworked by Dave Folts, we had to measure the R&P to set p a new S3 spacer.
So we measured, and we got 63.33mm with the original spacer.
Looks like Mr Folts did an amazing job here if you ask me
We check everything with Prussian Blue, awesome possom!
Now, where is that delicious Ahi sashimi you've been talking about Paul? 
_________________
Silicone Steering Boots and 930 Cv boots for sale in the classifieds.
Syncro transmission upgrade parts in the Classifieds.
Subaru EJ22+UN1 5 speed transmission
http://www.thesamba.com/vw/forum/viewtopic.php?t=416343
Syncro http://www.thesamba.com/vw/forum/viewtopic.php?t=4...num+gadget |
|
| Back to top |
|
 |
rubbachicken
Samba Member

Joined: October 05, 2004
Posts: 3058
Location: socal
|
| Posted: Thu Nov 27, 2014 2:16 am Post subject: |
|
|
wow, that's very cool, i wish i had the stones to get in there and have a go
oh and a spare trans to work on
_________________
lucy our westy
lucy's BIG adventure
meet 'burni'
markswagen {mobile mechanic} san diego area all early VW's cared for.
619 201 0310 or 617 935 4182 |
|
| Back to top |
|
|
bluefirefly
Samba Member
Joined: March 16, 2011
Posts: 438
Location: Calgary, Ab
|
| Posted: Thu Nov 27, 2014 5:39 am Post subject: |
|
|
| rubbachicken wrote: |
wow, that's very cool, i wish i had the stones to get in there and have a go
oh and a spare trans to work on |
I got the spare trans (well, without 3rd and 4th....) but not really ready to start it..... I guess I trust Matt a lot more than myself.....
_________________
86 Syncro Tintop G60
work in progress ...as always! |
|
| Back to top |
|
|
bluefirefly
Samba Member
Joined: March 16, 2011
Posts: 438
Location: Calgary, Ab
|
| Posted: Thu Nov 27, 2014 5:41 am Post subject: |
|
|
Good job Alika, impressive.... 
_________________
86 Syncro Tintop G60
work in progress ...as always! |
|
| Back to top |
|
|
fleet_maintenance
Samba Member

Joined: November 01, 2013
Posts: 323
Location: Upstate NY
|
| Posted: Thu Nov 27, 2014 7:42 am Post subject: |
|
|
ALIKA, the DIY attitude you've shown in all your projects is impressive to say the least. Coupled with your narritive, priceless. Thank you.
It is AWESOME to see so many familiar sambanistas involved, sending parts or helping in person too. Special community for sure.
Keep up the great work and fantastic posts. |
|
| Back to top |
|
|
BavarianWrench
Samba Member
Joined: January 18, 2004
Posts: 1045
Location: Oceans Edge
|
| Posted: Thu Nov 27, 2014 9:08 am Post subject: |
|
|
Happy Thanksgiving ALIKA. Your creative spirit, organization, no fear risk assessment, good eye, deep understanding of the task at hand, and pure determination continues to get it done. Glad your surfing Hawaii and making this country stronger, one tranny at a time. Nice work and Documentation.
Last edited by BavarianWrench on Thu Nov 27, 2014 1:13 pm; edited 1 time in total |
|
| Back to top |
|
|
candyman
Samba Trout Slayer

Joined: December 20, 2003
Posts: 2694
Location: Missoula MT
|
| Posted: Thu Nov 27, 2014 9:43 am Post subject: |
|
|
Great thread, thank you for posting. Just curious some photos did not upload, can you try to reload those?
Thanks! |
|
| Back to top |
|
|
ALIKA T3
Samba Member
Joined: July 30, 2009
Posts: 6348
Location: Honolulu,Hawaii and France
|
| Posted: Thu Nov 27, 2014 1:01 pm Post subject: |
|
|
| candyman wrote: |
Great thread, thank you for posting. Just curious some photos did not upload, can you try to reload those?
Thanks! |
BIG mahalo's all for the kind words! They go to the heart for sure
I will post the missing pictures soon, they are of the tools I got from Latvia.
Happy Thanksgiving day fellows!
_________________
Silicone Steering Boots and 930 Cv boots for sale in the classifieds.
Syncro transmission upgrade parts in the Classifieds.
Subaru EJ22+UN1 5 speed transmission
http://www.thesamba.com/vw/forum/viewtopic.php?t=416343
Syncro http://www.thesamba.com/vw/forum/viewtopic.php?t=4...num+gadget |
|
| Back to top |
|
|
Zeitgeist 13
Samba Member

Joined: March 05, 2009
Posts: 12115
Location: Port Manteau
|
| Posted: Thu Nov 27, 2014 2:06 pm Post subject: |
|
|
_________________
Casey--
'89 Bluestar ALH w/12mm Waldo pump, PP764 and GT2052
'01 Weekender --> full camper
y u rune klassik? |
|
| Back to top |
|
|
gears
Samba Member

Joined: October 28, 2002
Posts: 4391
Location: Tamarack, Bend, Kailua
|
| Posted: Thu Nov 27, 2014 3:52 pm Post subject: |
|
|
Alika's the kind of guy you want with you on a long road trip. Macgyver abilities, for sure ;>)
_________________
aka Pablo, Geary
9.36 @ 146 in '86 Hot & Sticky
'90 Syncro Westy SVX
'87 Syncro GL 2.5
https://guardtransaxle.com |
|
| Back to top |
|
|
nmerrill
Samba Member
Joined: January 07, 2014
Posts: 388
Location: Vermont
|
| Posted: Thu Nov 27, 2014 7:44 pm Post subject: |
|
|
Nice work! I'm puzzling my way through some trans work myself.
Why did you decide to use an SA style bearing retainer, and not Daryl's plate?
If I understand correctly, using the SA style retainer does not require precision milling of the G/R housing, it is simply bolted to the gear carrier/intermediate housing, and the old bearing retainer tang is just milled down to provide clearance.
That seems like a much easier approach for a DIYer. Is there enough thickness of the gear carrier to drill and tap, without going all the way though to the other side? Those pictures from T3zone seem to show that is the true?
Nat |
|
| Back to top |
|
|
kbeefy
Samba Member
Joined: March 10, 2006
Posts: 600
Location: Central Oregon
|
| Posted: Fri Nov 28, 2014 1:27 am Post subject: |
|
|
Wow, quite the post!!!
I'm on Oahu until December 16th, and then Feburary 1 - May 1 if you need a hand or someone to watch you work.
_________________
86 syncro CHC, NorthWesty subbie 2.5, decoupler, locker, custom interior, 225/75r16 Duratrack's on CLK's, Toyo cabin heater, ARB fridge, 300w Zamp Solar, Gowesty bumpers/skid/rails, Fiama awning
'86 Syncro Westy. Stock for now.
2000 F350 7.3 CC LB 11' Northland Cabover
2006 Subbie OBXT
2002 Tacoma DoubleCab 4x4
1969 Mustang Basket Case 351c/FMX/9
http://kbeefy.blogspot.com/ |
|
| Back to top |
|
|
Waldemar Sikorski
Samba Member

Joined: June 24, 2005
Posts: 573
Location: EU
|
| Posted: Fri Nov 28, 2014 2:21 am Post subject: |
|
|
| Vive la jeunesse, de courage et d'imagination. |
|
| Back to top |
|
|
ALIKA T3
Samba Member
Joined: July 30, 2009
Posts: 6348
Location: Honolulu,Hawaii and France
|
| Posted: Fri Nov 28, 2014 11:02 am Post subject: |
|
|
| gears wrote: |
| Alika's the kind of guy you want with you on a long road trip. Macgyver abilities, for sure ;>) |
Haha, funny, I heard that one before
Since MacGyver is getting a little old in the memories of people, lately it's more like people wanna stick with me for the zombie apocalypse (The Walking Dead).
| nmerrill wrote: |
Nice work! Thank you ! I'm puzzling my way through some trans work myself.
Why did you decide to use an SA style bearing retainer, and not Daryl's plate? Because I didn't know who sold it, and I wanted the SA aluminum housing I heard about
If I understand correctly, using the SA style retainer does not require precision milling of the G/R housing, it is simply bolted to the gear carrier/intermediate housing, and the old bearing retainer tang is just milled down to provide clearance. correct
That seems like a much easier approach for a DIYer. Is there enough thickness of the gear carrier to drill and tap, without going all the way though to the other side? yes, it's meant for that.I went 15mm deep without going through the other side. Those pictures from T3zone seem to show that is the true?
Nat |
Kbeefy, you should see where I work, you wouldn't want to stand watching me  But thank you! Do you have a van here? But thank you! Do you have a van here?
Waldemar Merci! L'imagination est importante. J'aime l'ingéniosité. I'm getting much better at it thanks to my work and projects I'm always doing. Funny how the brain evolves. I'm even re-figuring out math formulas by myself I couldn't understand at school as a teenager, and now it seems so clear to me when it's applied to what I'm doing. Love it.
I hope you all had a good time with your loved ones yesterday.
I'll be back working on the transmission in a couple weeks, I gotta finish getting some studs out of an WBX engine since the local machine shop couldn't do it. Gotta clean my TDi Jetta to sell it too. Need some coin since I bought a nice ( original/new) Westy van early November.
I made drill bit extensions out of 1/4" snap extenders redrilled and brazed.
I drilled the stud at 5/16" then used a conical burr to destroy the stud. It works so fast, it's blowing my mind!! Gotta be really good with eyeballing when drilling in the perfect center of the stud with a hand drill, as the OD of the burr is a hair shy of the ID of the threads in the case.
Then pick up the threads with a little metallic angled pic et voilà
Up to work now.
Aloha all!
_________________
Silicone Steering Boots and 930 Cv boots for sale in the classifieds.
Syncro transmission upgrade parts in the Classifieds.
Subaru EJ22+UN1 5 speed transmission
http://www.thesamba.com/vw/forum/viewtopic.php?t=416343
Syncro http://www.thesamba.com/vw/forum/viewtopic.php?t=4...num+gadget |
|
| Back to top |
|
|
kbeefy
Samba Member
Joined: March 10, 2006
Posts: 600
Location: Central Oregon
|
| Posted: Fri Nov 28, 2014 9:02 pm Post subject: |
|
|
| ALIKA T3 wrote: |
Kbeefy, you should see where I work, you wouldn't want to stand watching me But thank you! Do you have a van here?
|
Unfortunatly not. I tried to buy a couple over the past year but they've all been ridiculously rusty or sold before I could get to them.
I have a Syncro in Washington though.
_________________
86 syncro CHC, NorthWesty subbie 2.5, decoupler, locker, custom interior, 225/75r16 Duratrack's on CLK's, Toyo cabin heater, ARB fridge, 300w Zamp Solar, Gowesty bumpers/skid/rails, Fiama awning
'86 Syncro Westy. Stock for now.
2000 F350 7.3 CC LB 11' Northland Cabover
2006 Subbie OBXT
2002 Tacoma DoubleCab 4x4
1969 Mustang Basket Case 351c/FMX/9
http://kbeefy.blogspot.com/ |
|
| Back to top |
|
|
ALIKA T3
Samba Member
Joined: July 30, 2009
Posts: 6348
Location: Honolulu,Hawaii and France
|
|
| Back to top |
|
|
insyncro
Banned

Joined: March 07, 2002
Posts: 15086
Location: New York
|
| Posted: Sat Nov 29, 2014 10:04 am Post subject: |
|
|
| ALIKA T3 wrote: |
You should ship your syncro over if you plan on staying here long
It's not a good place to shop around, here  |
My "island" Syncro is under construction and hopefully will meet yours soon
Thanks for the writeup and pictures, very impressive. |
|
| Back to top |
|
|
ALIKA T3
Samba Member
Joined: July 30, 2009
Posts: 6348
Location: Honolulu,Hawaii and France
|
|
| Back to top |
|
|
zeohsix
Samba Member
Joined: August 31, 2012
Posts: 501
Location: United States
|
| Posted: Sun Nov 30, 2014 6:49 pm Post subject: |
|
|
Looking good Alika! not an easy task doing hot ridding living on that little rock. Good thing you have one of Maui's fastest VW drag racers ( retired ) to help you out. What are the specs on your diesel motor....AFN? Should be a great Syncro when done 
_________________
I'm Cheap! I'll build that Syncro Westy myself and save money but, my labor is "FREE" especially if I ever go to sell it! One thing is I will know the quality of the parts and labor that went into the build and rest better when I'm actually driving said Westy down the road! |
|
| Back to top |
|
|
ALIKA T3
Samba Member
Joined: July 30, 2009
Posts: 6348
Location: Honolulu,Hawaii and France
|
| Posted: Sun Nov 30, 2014 8:59 pm Post subject: |
|
|
| zeohsix wrote: |
| Looking good Alika! not an easy task doing hot ridding living on that little rock. Good thing you have one of Maui's fastest VW drag racers ( retired ) to help you out. What are the specs on your diesel motor....AFN? Should be a great Syncro when done |
Hi Eric!
Thanks you, yes not easy doing projects here, every single task takes forever
The M-tdi is an AHU block, I would have loved an AFN for the better bearings but that will do anyway.
It was from a 1997 Jetta that got flooded in Tenessee a few years ago.
I bought it for very cheap to compensate for the 800 bucks of shipping
Besides valves and camshaft, everything was looking great internally, even something like 4 years after the flood NO FEAR.
Mounted at 50° like stock (turbo,intake,exhaust,Syncro cyclonic air filter)
TD syncro carrier bars
TD syncro skid plate
TD syncro gas tank
TD battery tray
Hydraulic engine mounts
Silicone muffler mounts
Jetta AHU air conditioning compressor and all accessory belts (power steering, water pump)
1.6D NA early aluminum flanged elbow at the water pump
Audi 80 1.9 TD AAZ PVC pipe flange at the cylinder head
Audi 80 1.9 TD AAZ thermostatic oil cooler
Big oil/coolant heat exchanger from VAG from later cars.
Water cooled intercooler
VR6 80°C aquastat
Lightened TDi flywheel to get access to the oil pan bolts behind
VR6 clutch kit
Silicone hoses
New Beetle oil breather coupled with AHU oil breather to an oil catch can
1.9TD AAZ ezrly version oil breather pipe with aluminum elbow on the block (hose is removable with a clip at the elbow, easier to put the dial gauge in the injection pump )
SDi camshaft to lower the torque
Injection pump body is an 20 mm shaft pump from a Peugeot that is plug and play as far as pulley offset and such.
11mm hydraulic head
Bigger nozzles (I forgot what size)
Custom modified internal accelerator lever (17mm if I remember correctly)
External lever from a 1.6 TD JX
JX 10mm plunger
European 1.9 TDi 1Z camplate
1.6TD RA/SB cover with LDA
Here is the link waiting the potential day I get around posting the so many pictures
https://www.facebook.com/media/set/?set=a.10200561...ec76773a2a
Aloha!
_________________
Silicone Steering Boots and 930 Cv boots for sale in the classifieds.
Syncro transmission upgrade parts in the Classifieds.
Subaru EJ22+UN1 5 speed transmission
http://www.thesamba.com/vw/forum/viewtopic.php?t=416343
Syncro http://www.thesamba.com/vw/forum/viewtopic.php?t=4...num+gadget |
|
| Back to top |
|
|
|


