| Author |
Message |
flemcadiddlehopper
Samba Member

Joined: December 05, 2011
Posts: 2332
Location: Kelowna, BC. Canada.

|
 Posted: Sat Nov 21, 2015 10:06 am Post subject: Posted: Sat Nov 21, 2015 10:06 am Post subject: |
 |
|
| Mid West Dubber wrote: |
So my bus had sat sideways in the shed for over 2 years while I saved money and collected parts for the front and rear ends. I have put a 4.5" skinned knuckles narrowed beam under and did a straight axle conversion on a type 3 rear end.
With the help of my dad we put the rear end under and the beam under.This was the first time this bus has had a front and rear end under it in 25+ years.
the rear...
The front...
up in the air...!
we slowly brought it down lowering it onto wheels in various stages...
on the ground 
|
Nice work on the bus so far, very impressive.
I think you may want to turn your axle boots to the correct position. The boot opening should be level with the ground so that the boot can flex up and down with axle movement without stress.
Also, you've gone to a straight axle in the rear and a narrowed front end, yet the spindles are not flipped? Do you plan on flipping the spindles to match the ride height of the rear end?
Gordo.
_________________
Everybody Dies....Some Never Live.
Retrograde Garage. Vintage Aircooled, and others. |
|
| Back to top |
|
 |
Mid West Dubber
Samba Member

Joined: July 11, 2011
Posts: 314
Location: Natimuk, VICTORIA, AUSTRALIA
|
| Posted: Sat Mar 12, 2016 3:15 am Post subject: |
|
|
| flemcadiddlehopper wrote: |
| Mid West Dubber wrote: |
So my bus had sat sideways in the shed for over 2 years while I saved money and collected parts for the front and rear ends. I have put a 4.5" skinned knuckles narrowed beam under and did a straight axle conversion on a type 3 rear end.
With the help of my dad we put the rear end under and the beam under.This was the first time this bus has had a front and rear end under it in 25+ years.
the rear...
The front...
up in the air...!
we slowly brought it down lowering it onto wheels in various stages...
on the ground
|
Nice work on the bus so far, very impressive.
I think you may want to turn your axle boots to the correct position. The boot opening should be level with the ground so that the boot can flex up and down with axle movement without stress.
Also, you've gone to a straight axle in the rear and a narrowed front end, yet the spindles are not flipped? Do you plan on flipping the spindles to match the ride height of the rear end?
Gordo. |
Thanks for your concern Gordo, this bus will be getting completely stripped and rebuilt so the axle boots were only installed as a visual aspect, these will also be replaced for final assembly.
Flipped spindles are definitely a key aspect of the build, being only just out of high school the $$ are not always easily come by. |
|
| Back to top |
|
|
Mid West Dubber
Samba Member
Joined: July 11, 2011
Posts: 314
Location: Natimuk, VICTORIA, AUSTRALIA
|
| Posted: Wed Jul 20, 2016 6:51 pm Post subject: Re: Rusty's '63 11 window |
|
|
Front door hinge pin repair - Part 1
I attempted to remove the left hand side front door pin using one of these Bob Drake hinge pin tools. Unfortunately I had no success and the shortest push rod from the tool snapped clean off and didnt budge the pin.
The drivers side (RHS) mirror stalk had been snapped off years ago so I decided to try the method of drilling the door pin out and then reaming to suit the oversize mirror stalks or hinge pin.
To make the drilling process easier I decided to remove the hinge from the door. The first step to remove the hinge was to drill out the factory rivets until the heads broke free and the rivet could be removed. I started off with a small hole and went up in size until the rivet head broke loose.
|
|
| Back to top |
|
|
Mid West Dubber
Samba Member
Joined: July 11, 2011
Posts: 314
Location: Natimuk, VICTORIA, AUSTRALIA
|
| Posted: Wed Jul 20, 2016 6:51 pm Post subject: Re: Rusty's '63 11 window |
|
|
Front door hinge pin repair - Part 2
Pic of the rivets removed from the door
The next step was to mark out and cut two sections which would allow the hinge to be removed from the door. I used a small cut-off wheel in a Dremel to make the cuts. The sheet metal was then carefully peeled back and the hinge removed
|
|
| Back to top |
|
|
Mid West Dubber
Samba Member
Joined: July 11, 2011
Posts: 314
Location: Natimuk, VICTORIA, AUSTRALIA
|
| Posted: Wed Jul 20, 2016 6:52 pm Post subject: Re: Rusty's '63 11 window |
|
|
Front door hinge pin repair Part 3
I ground the top and bottom of the existing pin almost flush with the hinge surface then centre punched both ends so the drill bit would locate.
I then drilled out the pin, size by size until there was just a small layer of the pin remaining inside the shaft.
This pic shows the thin layer remaining inside the shaft
This step is where the dremel came in handy again. This time with a small tip grinding tool.
I used this little grinding tool to carefully grind out a small section of the remaining layer of the pin. This released the pressure from the pin and broke the rusted seal.
I could then use a small flat punch to drive out the remainder of the pin and leave the shaft inside the hinge untouched and undamaged.
|
|
| Back to top |
|
|
Mid West Dubber
Samba Member
Joined: July 11, 2011
Posts: 314
Location: Natimuk, VICTORIA, AUSTRALIA
|
| Posted: Wed Jul 20, 2016 6:52 pm Post subject: Re: Rusty's '63 11 window |
|
|
Front door hinge pin repair Part 4
A 5/16 drill bit was used to open the hole in both parts of the hinge
The 5/16 drill bit allowed the .3220 reamer (Purchased from Wolfsburg West) to accurately remove the remaining material and create a hole which would be spot on for the new oversize hinge pins/ mirror stalks.
Using the reamer in the drill press at a low speed
The new pin fitted through both parts of the hinge and was firm and moving freely. I used counter-sunk bolts and nyloc nuts to re-attach the hinge to the door. The hinge will soon be removed so I can sand blast and paint the cavity behind the hinge. The hinge can then be re-installed and the cuts I made can be welded and ground back.
|
|
| Back to top |
|
|
mandraks
Samba Member

Joined: November 28, 2004
Posts: 7047
Location: Lawrenceville, Ga
|
| Posted: Thu Jul 21, 2016 6:59 am Post subject: Re: Rusty's '63 11 window |
|
|
if the rest of the bus looks like your door hinges once you are done, wow!
_________________
regards
Uli
----------------------------------------
'53 3-Fold Oval, L35 Metallic Blue, looking for a narrow hatch panel |
|
| Back to top |
|
|
BarryL 
Samba Member

Joined: November 01, 2004
Posts: 14258
Location: Casa de Oro, California
|
| Posted: Thu Jul 21, 2016 9:13 am Post subject: Re: Rusty's '63 11 window |
|
|
Tee-dee-dom-city!
What keeps it from pulling the hinge straight out after drilling off the rivet heads? |
|
| Back to top |
|
|
cru62
Samba Member

Joined: December 31, 2002
Posts: 4117
Location: Margaritaville.....24/7
|
| Posted: Thu Jul 21, 2016 3:16 pm Post subject: Re: Rusty's '63 11 window |
|
|
The countersunk Allen head bolts maybe?
_________________
"My biggest worry is that when I die, my wife will sell all my parts for what I told her I paid for them"-Jon
Jokes about German sausage are the wurst.
Stop dead photo links! Post your photos to The Samba Gallery! |
|
| Back to top |
|
|
Mid West Dubber
Samba Member
Joined: July 11, 2011
Posts: 314
Location: Natimuk, VICTORIA, AUSTRALIA
|
| Posted: Thu Jul 21, 2016 9:36 pm Post subject: Re: Rusty's '63 11 window |
|
|
| BarryL wrote: |
Tee-dee-dom-city!
What keeps it from pulling the hinge straight out after drilling off the rivet heads? |
When the hinge is installed from factory, it is placed between a double skin and when the rivets are installed, the outer layer of sheet metal is pulled into the counter-sink of the hinge. This meant I had to cut and lift the outer layer as the skin panel was pressed down into the countersunk part of the hinge |
|
| Back to top |
|
|
Mid West Dubber
Samba Member
Joined: July 11, 2011
Posts: 314
Location: Natimuk, VICTORIA, AUSTRALIA
|
| Posted: Wed Nov 02, 2016 1:45 am Post subject: Re: Rusty's '63 11 window |
|
|
Spent a little bit of time messing around with the tail lights for the bus yesterday.
I've always been a fan of tail lights with a chrome bezel but I couldn't seem to find any apart from the all red US spec ones. I wasn't really all that keen on running the stock Red and Amber lenses with the painted silver style bezel built into the plastic.
So, I decided I would just fit the chrome bezel over the lenses.... But when I had all of the parts, I realised it wasn't going to be that simple.
As you can see from this pic, the Hella lense is too large for the chrome bezel...
and the screw hole sticks out the back of the lense too far, not allowing it to sit flush...
I started by using the bezel as a guide and marking out how much plastic I needed to remove from the outside edge to ensure the bezel will fit over...
Having ground off the excess from the edges it was now time to remove the bulk of the screw hole so the lense would sit flush at the base...
The bezel now fits around the outside...
|
|
| Back to top |
|
|
Mid West Dubber
Samba Member
Joined: July 11, 2011
Posts: 314
Location: Natimuk, VICTORIA, AUSTRALIA
|
| Posted: Wed Nov 02, 2016 1:48 am Post subject: Re: Rusty's '63 11 window |
|
|
The next step was to counter sink the screw holes on the lense due to the counter sink on the bezel...
Because I had to grind so much off the edges of the lenses, I now had to space the lense back out to tack up the slack from the removed plastic. So I made up a spacer from a piece of alloy...
All screw together and satisfied with the result. Much nicer then the silver paint on the inside of the plastic. Plan on getting the second one finished off this coming weekend...
|
|
| Back to top |
|
|
pondoras box
Samba Member
Joined: March 22, 2004
Posts: 1220
Location: Eerie PA
|
| Posted: Wed Nov 02, 2016 5:50 am Post subject: Re: Rusty's '63 11 window |
|
|
I am impressed, its not too often that a young person, has your level of skill and attention to detail.
You clearly have an eye for seeing your way through a problem and coming up with a high quality fix. Keep up the good work!
_________________
Looking for anything from Hal Casey Motors out of Hamburg New York, from license plate surrounds to matchbooks.
1961 23 Window (Bobo)
1965 11 Window (Zelda)
1965 13 Window (Lucas)
1957 Oval ragtop
1988 Cabriolet VR6 conversion
Plus a lot of other rusty junk |
|
| Back to top |
|
|
Mid West Dubber
Samba Member
Joined: July 11, 2011
Posts: 314
Location: Natimuk, VICTORIA, AUSTRALIA
|
| Posted: Sun Nov 06, 2016 2:59 am Post subject: Re: Rusty's '63 11 window |
|
|
Got the tail lights finished off this weekend. I think they have turned out not too bad..
Spacer made..
|
|
| Back to top |
|
|
Mid West Dubber
Samba Member
Joined: July 11, 2011
Posts: 314
Location: Natimuk, VICTORIA, AUSTRALIA
|
| Posted: Mon Nov 28, 2016 4:47 am Post subject: Re: Rusty's '63 11 window |
|
|
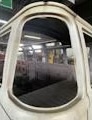
Bought a pile of rusty pop-out frames from the DOVW swap meet the other weekend as I would rather try repair originals then buy repo frames. Some would have looked at these frames and thought they were all beyond repair. Just proves that one mans trash is another's treasure...
After studying the many rusted frames, I came up with an idea on how I could make these work for me. I will let the pics do the talking. Pretty happy with how the repairs are turning out.
|
|
| Back to top |
|
|
Mid West Dubber
Samba Member
Joined: July 11, 2011
Posts: 314
Location: Natimuk, VICTORIA, AUSTRALIA
|
| Posted: Mon Nov 28, 2016 4:49 am Post subject: Re: Rusty's '63 11 window |
|
|
|
|
| Back to top |
|
|
Mid West Dubber
Samba Member
Joined: July 11, 2011
Posts: 314
Location: Natimuk, VICTORIA, AUSTRALIA
|
| Posted: Mon Nov 28, 2016 4:50 am Post subject: Re: Rusty's '63 11 window |
|
|
So far I have managed to make 2 complete frames and I am confident I have enough good sections to make another 2 solid frames. A lot of work but it satisfies me resurrecting original parts for my build...
|
|
| Back to top |
|
|
cru62
Samba Member
Joined: December 31, 2002
Posts: 4117
Location: Margaritaville.....24/7
|
| Posted: Mon Nov 28, 2016 6:48 am Post subject: Re: Rusty's '63 11 window |
|
|
WOW! Your work is brilliant. I won't be throwing any frames away. What a clever way to repair them. Thank you for the tutorial.
_________________
"My biggest worry is that when I die, my wife will sell all my parts for what I told her I paid for them"-Jon
Jokes about German sausage are the wurst.
Stop dead photo links! Post your photos to The Samba Gallery! |
|
| Back to top |
|
|
BarryL
Samba Member
Joined: November 01, 2004
Posts: 14258
Location: Casa de Oro, California
|
| Posted: Mon Nov 28, 2016 11:00 am Post subject: Re: Rusty's '63 11 window |
|
|
| Unbelievable artistry and commitment. |
|
| Back to top |
|
|
Mid West Dubber
Samba Member
Joined: July 11, 2011
Posts: 314
Location: Natimuk, VICTORIA, AUSTRALIA
|
| Posted: Tue Jan 26, 2021 8:38 pm Post subject: Re: Rusty's '63 11 window |
|
|
Well, its finally time to bring my split out of hibernation and get to work... it is full of parts at the moment so first up I will be spending some time cleaning it out and sorting stuff out.
|
|
| Back to top |
|
|
|


