| Author |
Message |
Madd Maxx
Samba Member

Joined: August 06, 2013
Posts: 80
Location: Cow Town

|
 Posted: Sat Jan 25, 2014 6:05 pm Post subject: Posted: Sat Jan 25, 2014 6:05 pm Post subject: |
 |
|
My fellow Texan, any updates yet? I'm going to be closing in on you soon, I finally got my '60 down here and have been busy. If you're ever in Arlington, give me a shout.
_________________
My 1960 Ragtop bug build
http://www.thesamba.com/vw/forum/viewtopic.php?t=565565&highlight=1960
Wanted: 1960 truck lid & rear fenders |
|
| Back to top |
|
 |
sportin-wood
Samba Member

Joined: September 12, 2010
Posts: 2006
Location: Texas
|
| Posted: Sun Mar 23, 2014 1:43 pm Post subject: |
|
|
Sorry for the long time span in between progress updates. The fact of the matter is that too many life matters took a priority (hard to believe, I know!!) to my progress, not to mention the lovely cold weather most of us had to endure this season. Having to work on my bug outdoors didn't help either. Enough whining...
Okay, so I did have some time to work on trying to get my axle nuts off. A breaker bar and socket didn't work, neither did an air impact wrench. So after soaking the nuts for weeks with Kroil Oil, I decided to try the angle iron technique I've read about.
I found a 5' scrap piece of 1/8" angle iron. After making a cardboard template from one of the wheels, I marked and drilled two 1/2" holes, breaking 3 drill bits in the process. Make sure you drill the correct side of the angle iron for this to work! 
_________________
.
Paused 66 project bug
.
"Relax, all right? My old man is a television repairman. He's got this ultimate set of tools. I can fix it." --- Jeff Spicoli |
|
| Back to top |
|
|
sportin-wood
Samba Member
Joined: September 12, 2010
Posts: 2006
Location: Texas
|
| Posted: Sun Mar 23, 2014 1:44 pm Post subject: |
|
|
With 2 lug nuts tightly secured...
_________________
.
Paused 66 project bug
.
"Relax, all right? My old man is a television repairman. He's got this ultimate set of tools. I can fix it." --- Jeff Spicoli |
|
| Back to top |
|
|
sportin-wood
Samba Member
Joined: September 12, 2010
Posts: 2006
Location: Texas
|
| Posted: Sun Mar 23, 2014 1:47 pm Post subject: |
|
|
First tried with the breaker bar, but got nowhere..
Then I added a 4' long cheater bar....
And PRESTO!! Both sides loosened up nicely after putting some weight on the bar. Something to be said about leverage, for sure!!
So when I have more time, I'm going to take the drums apart and see what's going on inside, then take the transmission off to take it to get rebuilt.
_________________
.
Paused 66 project bug
.
"Relax, all right? My old man is a television repairman. He's got this ultimate set of tools. I can fix it." --- Jeff Spicoli |
|
| Back to top |
|
|
pondoras box
Samba Member
Joined: March 22, 2004
Posts: 1218
Location: Eerie PA
|
| Posted: Tue Mar 25, 2014 5:34 am Post subject: |
|
|
You need one of these in your tool box, in fact every VW guy needs one.
Just put it one and hit the flats with a 5 pound sledge hammer, just lightly at first you will be surprised how little force you have to hit it with to get it to break free. It acts like an impact driver. You can re-use the nut afterwards.
I have done the 4 foot cheater bar before with good results until my 36mm Craftsman socket exploded into 4 pieces. The breaker bar slammed into my shin resulting in a nice hematoma a dent in the side of my bug and a lot of choice words. These things are cheap, less than 10 bucks and come in both the 36mm bug and the larger 46mm for 64 and later buses.
_________________
Looking for anything from Hal Casey Motors out of Hamburg New York, from license plate surrounds to matchbooks.
1961 23 Window (Bobo)
1965 11 Window (Zelda)
1965 13 Window (Lucas)
1957 Oval ragtop
1988 Cabriolet VR6 conversion
Plus a lot of other rusty junk |
|
| Back to top |
|
|
sportin-wood
Samba Member
Joined: September 12, 2010
Posts: 2006
Location: Texas
|
| Posted: Tue Mar 25, 2014 7:10 pm Post subject: |
|
|
| pondoras box wrote: |
| You need one of these in your tool box, in fact every VW guy needs one. |
Been there, done that! I had tried exactly as you described - 5lb sledge hammer and all. The tool actually started to flatten on the edges where I was hitting it. Ended up throwing the piece of crap away. I really think spraying the penetrating oil frequently, allowing it to soak in really made all the difference in the world.
_________________
.
Paused 66 project bug
.
"Relax, all right? My old man is a television repairman. He's got this ultimate set of tools. I can fix it." --- Jeff Spicoli |
|
| Back to top |
|
|
lo-lo55
Samba Member
Joined: April 08, 2004
Posts: 61
Location: christchurch New Zealand
|
| Posted: Wed Mar 26, 2014 12:32 am Post subject: |
|
|
| Watch that pin in the breaker bar too! Thought I had free'd up a nut when it screeched then hit the ground...pin nowhere to be seen. Thought where the f#@k has it gone then then heard it bounce off the roof of the house! Must have flown straight past my head, have a mk3 golf factory wheel brace (bent bar with 1/2 in drive end) and big socket that works a treat with pipe on it. |
|
| Back to top |
|
|
EA812
Samba Member

Joined: December 07, 2008
Posts: 1223
Location: North central, CT
|
| Posted: Fri Mar 28, 2014 11:40 am Post subject: |
|
|
| sportin-wood wrote: |
First tried with the breaker bar, but got nowhere..
Then I added a 4' long cheater bar....
And PRESTO!! Both sides loosened up nicely after putting some weight on the bar. Something to be said about leverage, for sure!!
So when I have more time, I'm going to take the drums apart and see what's going on inside, then take the transmission off to take it to get rebuilt. |
That's a great homemade tool for sure. Get your self a TORQUE TOOL FLYWHEEL & DRUM PLATE KIT http://www2.cip1.com/productdetails.asp?productcode=acc-c10-7036 its a great tool for stuff like that and getting the drum back on tight. I love the fact that it does more than one job!
I have to tell ya, taking the trans out at this point would be a breeze. I just did it for the second time and having it out in the open like that would have made the job a little better. |
|
| Back to top |
|
|
EverettB 
Administrator

Joined: April 11, 2000
Posts: 69807
Location: Phoenix Metro
|
| Posted: Fri Mar 28, 2014 5:49 pm Post subject: |
|
|
| sportin-wood wrote: |
First tried with the breaker bar, but got nowhere..
Then I added a 4' long cheater bar....
And PRESTO!! Both sides loosened up nicely after putting some weight on the bar. Something to be said about leverage, for sure!!
So when I have more time, I'm going to take the drums apart and see what's going on inside, then take the transmission off to take it to get rebuilt. |
I always use a cheater bar to put it on and off, if you can get it off without that usually the nut was too loose. Or you are heavy enough to put the required weight on it.
When you have to jump on a 6' bar or cut off the nut, that's when shit gets real.
_________________
How to Post Photos
Everett Barnes - [email protected] | My wanted ads
"Water is the only drink for a wise man" | "Communication prevents complaints"
Stop dead photo links! Post your photos to The Samba Gallery! |
|
| Back to top |
|
|
sportin-wood
Samba Member
Joined: September 12, 2010
Posts: 2006
Location: Texas
|
| Posted: Fri Mar 28, 2014 10:33 pm Post subject: |
|
|
| EA812 wrote: |
...its a great tool for stuff like that and getting the drum back on tight. I love the fact that it does more than one job!
I have to tell ya, taking the trans out at this point would be a breeze. I just did it for the second time and having it out in the open like that would have made the job a little better. |
I've planned on purchasing one of those tools. Just waiting until I get further along in the project. So I've decided to say "f*ck it, I'm taking the tranny off myself". I think I have enough resources to get me through it with The Samba, books, Bug Me Videos, etc. What the hell, right??
| EverettB wrote: |
I always use a cheater bar to put it on and off, if you can get it off without that usually the nut was too loose. Or you are heavy enough to put the required weight on it.
When you have to jump on a 6' bar or cut off the nut, that's when shit gets real. |
Dude, I have enough weight to surpass the required weight and then some!  It was surprisingly easier than I thought it would be. Going to get the rear brakes apart and boxed & labeled next. It was surprisingly easier than I thought it would be. Going to get the rear brakes apart and boxed & labeled next.
_________________
.
Paused 66 project bug
.
"Relax, all right? My old man is a television repairman. He's got this ultimate set of tools. I can fix it." --- Jeff Spicoli |
|
| Back to top |
|
|
sportin-wood
Samba Member
Joined: September 12, 2010
Posts: 2006
Location: Texas
|
| Posted: Sun Mar 30, 2014 3:36 pm Post subject: |
|
|
Made some time to remove the rear brake components. Gave me hell, but I did it...well, all except the axle bearings. Anyone suggest the best tool for the removal?
_________________
.
Paused 66 project bug
.
"Relax, all right? My old man is a television repairman. He's got this ultimate set of tools. I can fix it." --- Jeff Spicoli
Last edited by sportin-wood on Sat Apr 12, 2014 7:36 pm; edited 1 time in total |
|
| Back to top |
|
|
mrmdls
Samba Member
Joined: April 27, 2013
Posts: 410
Location: New Brunswick, Canada
|
| Posted: Mon Mar 31, 2014 6:51 am Post subject: |
|
|
When you replace the rear axle seals, do yourself a huge favor and get a German seal kit. I just replaced the seals on my 67, and I tried the cheap ones first. Only a single washer was included which was much thinner than the original, the quality of the rubber was terrible and it leaked like a sieve. The German kit contains both washers of original thickness,and the quaity of the rubber was great.
edited for spelling |
|
| Back to top |
|
|
sportin-wood
Samba Member
Joined: September 12, 2010
Posts: 2006
Location: Texas
|
| Posted: Mon Mar 31, 2014 8:45 am Post subject: |
|
|
| mrmdls wrote: |
When you replace the rear axle seals, do yourself a huge favor and get a German seal kit. I just replaced the seals on my 67, and I tried the cheap ones first. Only a single washer was included which was much thinner than the original, the quality of the rubber was terrible and it leaked like a sieve. The German kit contains both washers of original thickness,and the quaity of the rubber was great.
edited for spelling |
Good advice, thanks. I have decided to replace all necessary parts with German-made products (when available), especially those as inexpensive as seals, hoses, rubber, etc. As far as other German-made items that are just too costly for me right now (fuel pump, muffler, etc.), I can probably make due with something else. Not going whole-hog with spending, that's for sure!
Just ordered a bearing puller online. Thinking I may need to grind down or modify the "hook" parts if they don't fit into the bearing slots...
_________________
.
Paused 66 project bug
.
"Relax, all right? My old man is a television repairman. He's got this ultimate set of tools. I can fix it." --- Jeff Spicoli |
|
| Back to top |
|
|
sportin-wood
Samba Member
Joined: September 12, 2010
Posts: 2006
Location: Texas
|
| Posted: Sat Apr 12, 2014 7:51 pm Post subject: |
|
|
Ordered a bearing puller online and it ended up being crap. Couldn't even modify it to work, so I decided to try this technique I saw in a forum (and the vice-grip method didn't work either):
Purchased 2- 7" x 3/8" bolts, 2 nuts. 2 washers, and a u-bolt bracket that I ended up having to drill a 3/8" hole closer than what it came with in order to keep the bolts closer together. The little notches were filed off with a square file.
I cut one of the heads off a bolt. I found that cutting off both (as the 1st illustration says to) wasn't necessary.
I probably could have drilled the new hole a little closer together, but this ended up working good.
After alternating turns on the nuts, little by little and...TA-DA! We have bearing separation! This was a small victory but was good to have completed and for less than $5 in materials, it was a bargain.
_________________
.
Paused 66 project bug
.
"Relax, all right? My old man is a television repairman. He's got this ultimate set of tools. I can fix it." --- Jeff Spicoli
Last edited by sportin-wood on Sun Apr 13, 2014 6:21 am; edited 1 time in total |
|
| Back to top |
|
|
mrmdls
Samba Member
Joined: April 27, 2013
Posts: 410
Location: New Brunswick, Canada
|
| Posted: Sat Apr 12, 2014 8:01 pm Post subject: |
|
|
| Your homemade bearing puller is pretty darn slick. I'll be putting that away in some notes for when I need to do mine. Thanks for sharing! |
|
| Back to top |
|
|
sportin-wood
Samba Member
Joined: September 12, 2010
Posts: 2006
Location: Texas
|
| Posted: Sun Apr 13, 2014 6:20 am Post subject: |
|
|
| mrmdls wrote: |
| Your homemade bearing puller is pretty darn slick. I'll be putting that away in some notes for when I need to do mine. Thanks for sharing! |
Thanks! I think it would have made things easier for me if I had found something like this beforehand, so I hope maybe it'll help someone else. 
_________________
.
Paused 66 project bug
.
"Relax, all right? My old man is a television repairman. He's got this ultimate set of tools. I can fix it." --- Jeff Spicoli |
|
| Back to top |
|
|
sportin-wood
Samba Member
Joined: September 12, 2010
Posts: 2006
Location: Texas
|
| Posted: Mon May 12, 2014 9:46 pm Post subject: |
|
|
Ran into a snag trying to disconnect all necessary items that keep the transmission from being pulled away...like the Bowden tube. This thing would not budge, and I was afraid of breaking the bracket...
After soaking it with Kroil Oil for about a week, and applying indirect heat and gripping the tube side with vice grips, it finally came out.
Next step will be to drop the transmission, remove the axles, and get a rebuilt replacement to put in its place....
_________________
.
Paused 66 project bug
.
"Relax, all right? My old man is a television repairman. He's got this ultimate set of tools. I can fix it." --- Jeff Spicoli |
|
| Back to top |
|
|
EA812
Samba Member
Joined: December 07, 2008
Posts: 1223
Location: North central, CT
|
| Posted: Wed May 14, 2014 10:55 am Post subject: |
|
|
| Look at you go, your winning all the big battles! I broke the bracket that holds the boden tube the first time and the homemade bearing tool is real tricky. It worked the first time I tried but fell apart on me for the next car. That's some good work on this project;) |
|
| Back to top |
|
|
sportin-wood
Samba Member
Joined: September 12, 2010
Posts: 2006
Location: Texas
|
| Posted: Sun May 25, 2014 12:43 pm Post subject: |
|
|
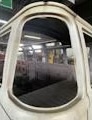
Got a few minutes and some cool weather to make my first attempt at transmission removal. Don't know what I'd do without the Bug Me Videos!! Everything went fairly smooth. The axle boots (2 different types, 1 original German) were both shot to heck. There was about an inch of crud build-up on the transmission supports...I'm thinking almost 50 years worth.
_________________
.
Paused 66 project bug
.
"Relax, all right? My old man is a television repairman. He's got this ultimate set of tools. I can fix it." --- Jeff Spicoli |
|
| Back to top |
|
|
sportin-wood
Samba Member
Joined: September 12, 2010
Posts: 2006
Location: Texas
|
| Posted: Tue Jun 03, 2014 6:46 pm Post subject: |
|
|
Has anyone else had the heck of a time with removing the C-clips that hold the axle shafts in place?
I had seen threads where people filed down needle nose pliers like this one I bought at Harbor Freight (didn't want to screw up my good ones!)
Only problem is that it wouldn't grip the clip enough to allow me to take it out. The hold on the C-clip kept slipping off. VERY frustrating...until one of the tips of the pliers eventually broke off, and that was that.
I ended up buying one of these online:
Best investment I could have made (eBay $24). Worked like a charm, had both C-clips taken off along with the axles within 5 or 10 minutes.
Next step is getting my rebuilt tranny on Saturday. 
_________________
.
Paused 66 project bug
.
"Relax, all right? My old man is a television repairman. He's got this ultimate set of tools. I can fix it." --- Jeff Spicoli |
|
| Back to top |
|
|
|


