| Author |
Message |
hans j
Samba Member
Joined: May 06, 2006
Posts: 2714
Location: Salt Lake City UT

|
 Posted: Sat Apr 28, 2012 9:25 pm Post subject: Posted: Sat Apr 28, 2012 9:25 pm Post subject: |
 |
|
As for questions, yes I will be building my own bumpers and spare tire carrier(s?), it has many years of Maine stickers on the plate but was originally Canadian (don't know complete history).
I'll get a list of part numbers for brakes, but basically the fronts are 2002 Audi A6 (fits MANY others too though) with the carrier holes drilled to fit the vanagon bolts, a couple of spacers for the carrier to match the offset of the rotor, longer caliper carrier bolts and I just had brake lines made locally. The rears are a little more interesting... Let's say '95 Audi S6 front brake rotors (276x25mm) and 2000-2002 Audi S4 rear calipers. The carriers are bolted to a plate I welded on the wheel bearing housing and I cut some out to fit from a 22mm wide rotor to a 25mm rotor. They would probably fit under 16" wheels with no modifications, but as you saw from the pics, I had to do a little surgery. Again, custom brake hoses and park brake cables yet to be determined (but shouldn't be hard).
As for my no start, it was the connector on the starter. Must have been being held on by the fuel tank and when I got that up off the trans, the connector fell off. Better now than later!
I got my awning reinstalled, I got those Fiamma brackets I was talking about earlier to fit on the Apollo awning. They work great. Lots of work to get them attached but I am pretty sure they aren't coming off!
Backside, you can see where I cut the top rail off. I also tack welded the nuts to the bolts.
awning pics
_________________
1986 Canadian Syncro Westy TDI - 1989 Syncro Single Cab - 2001 Audi S4 - 1981 VW Caddy ABA - 1980 VW Caddy EV - 1973 VW T-181 |
|
| Back to top |
|
 |
hans j
Samba Member
Joined: May 06, 2006
Posts: 2714
Location: Salt Lake City UT
|
| Posted: Sat Apr 28, 2012 9:27 pm Post subject: |
|
|
I finally got to 'actually' give it a good drive today! And drive it I did! I drove out to Five Mile Pass recreation area West of Utah Lake. 300 KM round trip (Canadians... so that's about 180 miles for the rest of us) Pretty freaking rad. The only other cars I own which could do some of the stuff (caddy and T181), wouldn't be able to do very well without at least a diff. Lucky for me, those smarty pants engineers decided to bless us with lockers and AWD. It's fantastic. Most of my cars are pretty low so I have a HUGE mental block to get over with how much ground clearance this thing has. Also climbing capabilities are above what I had first expected (watch till the end of my video, I don't even want to walk up or down it!)
Here is a video of some of what I did today. Ranged from highway, nice dirt roads, ATV stuff, pretty tight roads (roads?) and other stuff. Sorry for no outside views, it's a little hard to film stuff by yourself. Oh yeah and it's filmed in HD, so watch it in HD...
Link
And some pictures... some iphone, some DSLR
Beautiful cold morning to start off with!
Five Mile Pass recreation area
My first gnarly road! It got way worse after this so I had to turn around (probably could have made it but would have wanted a ride out just in case)
Other pics from my drive
My thoughtson about the car? Freaking awesome! I'm going to put it back up on the hoist and check it over, maybe tomorrow. I developed a slight clunk somewhere in the left. It's repeatable so it shouldn't have much trouble finding it. Brakes worked FANTASTIC, felt great, held anything I needed to stop on. At the ATV park there was a VERY steep short section that I came to a full stop going down. Held perfect. There was a family there fiding 4wheelers, I really wonder what was going through their minds as a big gold brick drove on the obstacles...
I still have what sounds like a harmonic whine, fourth gear, under load only and between 2800 and 3200 rpms. It sounds just like my S4 when I did poly trans and rear diff mounts. I already changed the oil (I'll post those pics later) and looked good. Then thought it was the fuel tank putting pressure on the trans, lifted it up and still no change. Still could be internal in the trans but it really just sounds like a harmonic noise. I'll tear into the trans when I change gears for the TDI swap. someday...
Oh and I finally ran the fridge long enough today to get it cold! Started to smell a little electrically from the back so I don't know if the fan is cycling yet (I never heard it?). If it's bad, I'll just do the big computer fan mod on it. I also will probably shoot some compressed air back there and flush out all the hanta virus 
Syncro Solstice, I think I'm ready!!!
_________________
1986 Canadian Syncro Westy TDI - 1989 Syncro Single Cab - 2001 Audi S4 - 1981 VW Caddy ABA - 1980 VW Caddy EV - 1973 VW T-181 |
|
| Back to top |
|
|
Crughy
Samba Member
Joined: July 12, 2004
Posts: 576
Location: Montreal, Qc
|
| Posted: Sun Apr 29, 2012 10:21 am Post subject: |
|
|
| hans j wrote: |
As for questions, yes I will be building my own bumpers and spare tire carrier(s?), it has many years of Maine stickers on the plate but was originally Canadian (don't know complete history).
I'll get a list of part numbers for brakes, but basically the fronts are 2002 Audi A6 (fits MANY others too though) with the carrier holes drilled to fit the vanagon bolts, a couple of spacers for the carrier to match the offset of the rotor, longer caliper carrier bolts and I just had brake lines made locally. The rears are a little more interesting... Let's say '95 Audi S6 front brake rotors (276x25mm) and 2000-2002 Audi S4 rear calipers. The carriers are bolted to a plate I welded on the wheel bearing housing and I cut some out to fit from a 22mm wide rotor to a 25mm rotor. They would probably fit under 16" wheels with no modifications, but as you saw from the pics, I had to do a little surgery. Again, custom brake hoses and park brake cables yet to be determined (but shouldn't be hard).
As for my no start, it was the connector on the starter. Must have been being held on by the fuel tank and when I got that up off the trans, the connector fell off. Better now than later!
I got my awning reinstalled, I got those Fiamma brackets I was talking about earlier to fit on the Apollo awning. They work great. Lots of work to get them attached but I am pretty sure they aren't coming off!
Backside, you can see where I cut the top rail off. I also tack welded the nuts to the bolts.
awning pics
|
I have the exact same one. I don't use the awning anymore. I don't trust the attachment.
I still have the alumium ones but they don't work well I find.
Theu don't catch the gutter that well.
Did you make those for the exact same reason?
JP |
|
| Back to top |
|
|
hans j
Samba Member
Joined: May 06, 2006
Posts: 2714
Location: Salt Lake City UT
|
| Posted: Sun Apr 29, 2012 11:37 am Post subject: |
|
|
| Crughy wrote: |
I have the exact same one. I don't use the awning anymore. I don't trust the attachment.
I still have the alumium ones but they don't work well I find.
Theu don't catch the gutter that well.
Did you make those for the exact same reason?
JP |
Yup. Basically it felt like the awning was going to fall off or break off the rain gutter. This one isn't coming off!
Oh and here is just the hill climb portion of my video, I would say probably 35-40* steep? I'll have to go back with someone to film 
Link
Edit: I guess I mentioned the brackets in another post? I just bought the standard Fiamma brackets from GoWesty. The back shape is basically the same and so I just drilled holes through the back of the awning into the brackets and mounted it that way.
_________________
1986 Canadian Syncro Westy TDI - 1989 Syncro Single Cab - 2001 Audi S4 - 1981 VW Caddy ABA - 1980 VW Caddy EV - 1973 VW T-181
Last edited by hans j on Sun Apr 29, 2012 7:21 pm; edited 1 time in total |
|
| Back to top |
|
|
vw7266
Samba Member
Joined: April 28, 2004
Posts: 3038
Location: the point, ohio
|
| Posted: Sun Apr 29, 2012 6:28 pm Post subject: |
|
|
| Nice work...Im in about the same boat as you with the 87 canadian syncro I have been working on. |
|
| Back to top |
|
|
hans j
Samba Member
Joined: May 06, 2006
Posts: 2714
Location: Salt Lake City UT
|
| Posted: Sun May 06, 2012 11:38 pm Post subject: |
|
|
Ok so it's been a couple weeks, I think I would rather forget most of what happened last weekend actually. I got most of it out of my head except this picture will haunt me forever...
I was able to get the one on the right out but the one on the left would not move. Even with some heat it wasn't going anywhere. Add to that I couldn't get one of the housing bolts out of the head (I was NOT going to break one of those off!), and I was not a happy camper. But the thermostat works now (I got 15mpg on my first fill up) and there are no leaks. I did some things I am not proud of to get it to seal and this is the last I will ever speak of it.
I honestly can't remember what I did the rest of last weekend, but I think it involved yard work (finally!).
But THIS weekend was a big one! I got my fuel tank secured better (going to get the stainless straps ASAP), my driveline protector back on, new catalytic converter so I can pass emissions, and I got my park brake cables done. Maybe that was last week but all I care about is they are done. I'm missing pics of those though, but they work awesome. Factory cables from a New Beetle or something and just added a small tube to extend the bowden tube and a spacer on the pull rod. I'll get pics. Pretty much I can pull the cable and even if I rev it up in low gear it won't go anywhere. This is on the rear disc brakes too.
_________________
1986 Canadian Syncro Westy TDI - 1989 Syncro Single Cab - 2001 Audi S4 - 1981 VW Caddy ABA - 1980 VW Caddy EV - 1973 VW T-181 |
|
| Back to top |
|
|
hans j
Samba Member
Joined: May 06, 2006
Posts: 2714
Location: Salt Lake City UT
|
| Posted: Sun May 06, 2012 11:40 pm Post subject: |
|
|
Other fun stuff accomplished this weekend was installation of my air compressor!
So Allroad compressors often sound like a box of rocks. Turns out they can be disassembled, cleaned and put back together. We have replaced a couple at the shop so I had one laying around.
The stock stuff uses a 10x1 thread with a pretty small hose. Hose and Rubber didn't have anything good to use so I changed it to 1/8NPT.
New 8mm or 5/16? air brake hose fitting.
Installed
I think I am in to all the very nice fittings and hose $70? totally worth it for what it does. I turned it on it's side and found some bosses that could be tapped for 5/16x18 (hardware store didn't have metric rubber bumpers with studs). Drilled three holes in the space in the right rear most corner (up behind the brake light) and used some big fender washers! It's super quiet and wiring is right there at the alternator. It's relayed from the alternator activation wire so it only turns on when the car is running (zero parasitic draw and will always have sufficient current). Also using a circuit breaker instead of a fuse that can reset itself if it blows. I might install a manual switch when I get a second battery. I have two 2.5 gallon freon tanks to be installed in the skid plate and when I build my bumpers, I'll have an outlet on each one. It's behind my license plate for now. It's awesome, now I can let air out of my tires and refill, fill my bike tires easy, pump up a raft? Whatever I want!
_________________
1986 Canadian Syncro Westy TDI - 1989 Syncro Single Cab - 2001 Audi S4 - 1981 VW Caddy ABA - 1980 VW Caddy EV - 1973 VW T-181
Last edited by hans j on Sun May 06, 2012 11:41 pm; edited 1 time in total |
|
| Back to top |
|
|
hans j
Samba Member
Joined: May 06, 2006
Posts: 2714
Location: Salt Lake City UT
|
| Posted: Sun May 06, 2012 11:40 pm Post subject: |
|
|
So I had a pretty good Saturday, went to the shop earlyish so I could go home and do some other stuff...
Get to the shop, smells like gasoline... I was REALLY hoping it wasn't my car...
wrong
Apparently when I secured my fuel tank better, I moved the fuel inlet to the tank and it leaked all over... Almost 1/8 of a tank over night
Got the fuel inlet out, sandblasted and POR-15'd. It's good now, glad it happened now then in Moab!
_________________
1986 Canadian Syncro Westy TDI - 1989 Syncro Single Cab - 2001 Audi S4 - 1981 VW Caddy ABA - 1980 VW Caddy EV - 1973 VW T-181 |
|
| Back to top |
|
|
hans j
Samba Member
Joined: May 06, 2006
Posts: 2714
Location: Salt Lake City UT
|
| Posted: Sun May 06, 2012 11:42 pm Post subject: |
|
|
While that was drying, I got to do the REALLY cool stuff!
I needed more space where the spare tire goes to hold the air tanks, maybe some spares, and ummm... I really want air horns. Yes, air horns. Google Siberian air horn, it's pretty fantastic. They will be relayed with a 87a circuit so stock horn is always on and then flip a switch and the loudness happens through the stock horn button. Someday...
Cardboard template.
Blank slate, 3'x3' $30 11 gauge (almost 3/16) outdoor steel. Measure twice, cut once. Glad I did too! White lines are the correct ones!!!
What do you do when the brake available can't bend your thick steel? You get creative!
Forklift is plenty strong, container isn't going anywhere.
Plasma cutters are awesome.
After more grinding it fits better!
Welded on some offroad tabs for the hinge
Lots of room!
Installed!!
I have to leave a spot for the factory tow hook until I get my bumpers done.
Super stoked
Still have to finish it but it's on! It will be painted the same black I have been using and likely a sticker/stencil of the locker diagram on the dash. It looks like I can also lower the mounting points up front to make it flush with the pinch weld. I'll have to see when that gets done
Good night. Three days until Moab and I am working way too hard, can't wait until the vacation!
_________________
1986 Canadian Syncro Westy TDI - 1989 Syncro Single Cab - 2001 Audi S4 - 1981 VW Caddy ABA - 1980 VW Caddy EV - 1973 VW T-181 |
|
| Back to top |
|
|
Summers420us
Samba Member
Joined: June 14, 2010
Posts: 759
Location: Amissville, Virginia
|
| Posted: Mon May 07, 2012 3:57 am Post subject: |
|
|
| Front plate looks great. Will it still allow enough air flow for radiator? |
|
| Back to top |
|
|
buspor63
Samba Member

Joined: February 17, 2005
Posts: 1179
Location: Knoxville,TN Where America stops for gas
|
| Posted: Mon May 07, 2012 6:04 am Post subject: |
|
|
So this is the thread where all those great pics from the gallery are ! I like the "DIY, Getter' Done" approach!
I'm guessing the radiator exhaust is less restrictive without the spare there.
_________________
Imagine that, theres not an "h" in either Westfalia or Syncro? |
|
| Back to top |
|
|
vw7266
Samba Member
Joined: April 28, 2004
Posts: 3038
Location: the point, ohio
|
| Posted: Mon May 07, 2012 7:37 am Post subject: |
|
|
| Nice work lots of good ideas! |
|
| Back to top |
|
|
markz2004
Samba Member
Joined: November 13, 2007
Posts: 944
Location: Portland, OR
|
| Posted: Mon May 07, 2012 9:18 am Post subject: |
|
|
Nice efforts. thanks for posting.
_________________
87 Westy, 250k GW 2.4 - 2.0  , 16" wheels , 16" wheels |
|
| Back to top |
|
|
hans j
Samba Member
Joined: May 06, 2006
Posts: 2714
Location: Salt Lake City UT
|
| Posted: Tue Jul 31, 2012 12:00 pm Post subject: |
|
|
Well time for an update! Not a lot has changed from where I last left off but did finally put some miles on the car! Around 2000 or so. And it's been pretty good so far, not really any major mishaps.
Let's see, I went to Syncro Solstice, my locked thread of pictures here: http://www.thesamba.com/vw/forum/viewtopic.php?t=511928&start=0. Only real issue I found was my charcoal canister was clogged, not allowing my fuel tank to vent. This became rapidly apparent while coming back from Hey Joe canyon and fuel started to leak out the filler neck grommet. Ok, not leak but spray!
Then I went back to Moab two weeks later for SyncroZest aka SyncroSandblast. Pics start on this page half way down: http://www.thesamba.com/vw/forum/viewtopic.php?t=5...p;start=80. Got to do some trails I missed the first time around and learned more about the capabilities of my car and definitely felt more comfortable with it. No real issues but I had a clunk in my steering wheel. Found out it was the bolts holding the rubber donuts in the steering shaft were loose. Tightened them up and all was good.
Then I built my spare tire carrier: http://www.thesamba.com/vw/forum/viewtopic.php?t=516607. It fits my needs perfect. I still have to add the hitch receiver and beef that up a little, but it's good. Still needs paint...
Then to make sure the spare tire would hold up to off road, I took it off road...
http://www.thesamba.com/vw/forum/viewtopic.php?t=517537
That trip ensured me my temp2 sensor was bad as it was flooding out when hot, and my thermostat (the used one I tested) was opening too early or sticking open. Fixed both those after this trip and all was good, again...
So off on another adventure. Syncro Safari was in a few weeks so I needed to put more miles on the car to try and sort everything out. That trip would effectively double my mileage I have put on the car so far.
I drove up to Bountiful Utah, there is Skyline drive. Popular with OHV and motorcycles. Found a little road off the side and decided to follow it. Found this big rock in the way.
I had actually tried to back up and turn around, but I ended up going over it.
Link
Doesn't look too bad from this side, I went to the left as you could see from the video.
https://www.thesamba.com/vw/gallery/pix/954465.jpg
Nice view up there too!
https://www.thesamba.com/vw/gallery/pix/954464.jpg
edit: for some reason the above pictures aren't coming through so I have had to link to them
But I didn't get any footage of the really bad parts, my mind was only thinking how to not roll off the side of the mountain! But here is one of the parts I found on youtube of another vehicle going through it.
Link
You can imagine how much my gold brick of a car was moving around in that ditch with the little articulation we have! My front bumper was scraping through the bottom too!  Needless to say, I was slightly frightened... Needless to say, I was slightly frightened...
But not as frightened as I was going to get... Further down the road was a place where motorcycles highmark and get back up on to the road to coast back down. Pretty much they had worn away much of the road. So picture a vanagon with one tire up on the hillside, one off the road slightly. It may not have looked bad, but definitely felt bad tilting like that, looking down at a hundred feet or so of 45* slope!!
Thankfully I made it through! And got some applause from some 4wheeler guys at the bottom. I felt good about not dying or rolling my syncro that day 
Up next: Syncro Safari and TDI engine conversion parts!!
_________________
1986 Canadian Syncro Westy TDI - 1989 Syncro Single Cab - 2001 Audi S4 - 1981 VW Caddy ABA - 1980 VW Caddy EV - 1973 VW T-181 |
|
| Back to top |
|
|
GBA 88West LA
Samba Member
Joined: September 04, 2008
Posts: 1279
Location: New Hampshire
|
| Posted: Tue Jul 31, 2012 1:03 pm Post subject: |
|
|
dude....DUDE...duuuude,,,that rock climb was real nice, stuff like that is why the term syncro envy came about...from canada to maine to utah reborn with new breath...its the circle of vanagon life at its best and time and time again it always brings a smile 
_________________
88 Westy GL Vanaru 07 2.5 EJ25/AA Trans/oiling plates, 1.14 3rd-.77-4th..solar powered cabin |
|
| Back to top |
|
|
hans j
Samba Member
Joined: May 06, 2006
Posts: 2714
Location: Salt Lake City UT
|
| Posted: Sun Sep 23, 2012 8:13 pm Post subject: |
|
|
Ok I somehow lost the pictures from Syncro Safari but should be able to recover them. Here is what I uploaded before I lost them... http://hansallover.wordpress.com/2012/07/14/2012-syncro-safari/
Pretty much it was awesome! Amazing people, vanagons and scenery. It was the longest drive I have had in the syncro yet and it did well. I had a coolant hose blow out just before the top of the mountain before Price Utah and was able to nurse it to town and find some parts to replace it.
I LOVE driving in sand and can't wait to get out and do it some more, especially with an engine that actually has some pickup!
_________________
1986 Canadian Syncro Westy TDI - 1989 Syncro Single Cab - 2001 Audi S4 - 1981 VW Caddy ABA - 1980 VW Caddy EV - 1973 VW T-181 |
|
| Back to top |
|
|
hans j
Samba Member
Joined: May 06, 2006
Posts: 2714
Location: Salt Lake City UT
|
| Posted: Sun Sep 23, 2012 8:41 pm Post subject: |
|
|
On to the ALH TDI conversion!
I decided when I got back from Syncro Safari, the WBX wasn't cutting it. I had a nagging exhaust gasket blow out every few hundred miles that I was getting tired of cramming JB weld in. I knew if I touched the exhaust to replace it, everything would snowball and I would be removing the heads to drill out the broken off studs in the head. I didn't want to do that.
It's about mid-July at this point. So I started looking around the shop, trying to decide what to do. I eventually wanted to get to a TDI but I have a 2.0L ABA out of a Jetta just sitting there so I was going to put that in, or I could build a 06A 2.0L gas engine and then when I do go TDI, all the mounts will be done.
I started digging and it turned out we had about 70% of the ALH stuff laying around! So I start to gather it up and see what I need.
I got a pretty good pile going and parts would get changed out when I thought more about it, (such as the longitudinal oil pan, I went with the transverse pan as you will see shortly).
I ordered up the 15* Mexican bell housing from Eurospec Sport
They welded this for the hydraulic clutch
It also comes with a mount for 2wd transmissions but I don't use it.
I also ordered new oversize pistons from them. The ones I had were scuffed kind of bad so I didn't want to use them.
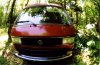
Last view of the WBX, July 31
Three hours later...
I get the fuel tank out (falls out?) Passenger side strap is totally broken, drivers side mounting point is missing. Is it bad that this isn't as bad as I thought it was going to be?
After sandblasting with a siphon type blaster, outside on the pavement, in 100* heat...
I can now literally say, I have had sand everywhere. Even with earplugs in, I was still pulling sand out
After that adventure, I did some other stuff...
Modified gas filler neck.
Turns out there are two small resistance welds that hold the whole narrow piece in. I just heated it up and tore them out with my impact gun. I measure over 30mm so I should be able to fill even at the large trucker pumps.
I sent my block to me machined for the pistons, each one was very slightly different so I had a specific hole for each piston. He also decked it straight while it was there. My crank was rusty and I was worried it would have to be turned but he blasted it with walnuts? then polished it. It's beautiful.
After getting the crank and pistons back, I sent everything out to get balanced. Turns out one of the fire chiefs in town is the best! I told him what I was doing with it and he spun them up to 5k RPM. Said my optimum RPM range will be 2500 to 3500. Awesome.
He spun and balanced everything in the picture as well as the pressure plate and flywheel.
Started assembly!
Shiny!!
Longblocked, new cam/lifters too!
_________________
1986 Canadian Syncro Westy TDI - 1989 Syncro Single Cab - 2001 Audi S4 - 1981 VW Caddy ABA - 1980 VW Caddy EV - 1973 VW T-181 |
|
| Back to top |
|
|
hans j
Samba Member
Joined: May 06, 2006
Posts: 2714
Location: Salt Lake City UT
|
| Posted: Sun Sep 23, 2012 8:59 pm Post subject: |
|
|
What did I say about the firewall not being as bad as I thought? Yeah......
Some weldable zinc primer and some patches, just like mending my favorite pair of pants.
I love this tool so much
Now coated in Rustbullet. I only caught the van on fire once welding all that
3M undercoating
Note to self, even though the can says it dries in one hour, wait longer before you try to stuff the fuel tank back into place...
New stainless steel tank straps plus lots of very thick duct tape on both the tank and straps. I ate my bag of cookies WAY before I had these installed.
Ignore the old insulation, I do. I didn't want to replace it and didn't even really want to pull it off.
Ok back to engine stuff. Somewhere along the way I did this
I bought the rest of the parts I didn't have at the shop from a seller on TDIclub.
I read about people cutting these ad being afraid of breaking so they take it back out, we'll see what happens here
A few minutes with the sawzall saved me hours of custom mount building
I'm not running A/C or P/S so there is much less weight and strain on the bracket. If it breaks, I'll modify a new one and have it welded and reinforced at the weak points.
TDI alternator barely clears the 1.8T mount
The ALH never came to the USA in longitudinal format, only transverse so mount building has to be creative! But I wanted it to be bolted in as close to as a factory longitudinal engine as I could. I tried to keep the distance between the mounts the same as well as the angle. I am also using a snub mount on the rear to reduce lift of the engine.
It doubles as an exhaust hanger too
One thing with the Mexican bell housing is the gear reduction starter is so long, it hits the locker actuator! Soooo I ground the bracket for the actuator down, then ground on the starter...
I did open it up to see if I had enough space first!
There actually is some space between there
_________________
1986 Canadian Syncro Westy TDI - 1989 Syncro Single Cab - 2001 Audi S4 - 1981 VW Caddy ABA - 1980 VW Caddy EV - 1973 VW T-181 |
|
| Back to top |
|
|
hans j
Samba Member
Joined: May 06, 2006
Posts: 2714
Location: Salt Lake City UT
|
| Posted: Sun Sep 23, 2012 9:30 pm Post subject: |
|
|
While everything was apart, I decided to proactively make stuff stronger. So I welded up most of the seams on the clutch bracket.
And a Weddle cross shaft bushing (I also welded on the cross shaft where the arms go in)
[/img]
I couldn't find any information about using any shield between engine and trans so I went digging through the pile of them. Ended up using a Mk3 2.0L plate and had to space the flywheel off slightly with a factory spacer from an Audi 1.8T to make it not rub.
I really wanted to use what looked like a diesel plate because it almost sealed up the trans like factory but the flywheel wouldn't fit with it on.
Oh when you are grabbing 038 gears out of the box, don't get a PD gear, they don't fit...
Also don't forget to put the oil pump tensioner on before the front cover (I ended up pulling it all back apart after the engine was installed! At least now I know a belt in the car isn't hard at all)
And yes you do have to pull the passenger? side diff bearing off a little bit to switch the input shaft out when you have a locker
Hey it's hanging in the engine bay!!
Drivers side engine bracket
And I'll be switching to the late style turbo oil return pipe when I find one.
View of the oil pickup tube
The Mexican 15* bell housing is actually slightly more than that. I had to bend the pickup a little to be correct.
Bending some DOM tubing (that was part of a botched roll cage install) for the engine carrier.
I decided on the transverse oil pan because a steel version of this pan is available.
Also because it wasn't too difficult to get away from the cross member people use.
Engine subframe
Note the female portion of the snub mount on the back. The mount plates also got gussets underneath them. It turns out I might be able to mount my rear limiting straps to the most forward brackets of the subframe!
Now I was resisting this as much as I possibly could, but things were settling well with me. I could have fit the engine under the lid, but there were some problems with that.
First of all when I looked at all the crank bolts of stock engined syncros, they were all nearly level with the lower rear louvers on the body. With the TDI fitting under the lid, I was far below that point, almost 4 inches! That also meant I had 4" less ground clearance and my driveline angles weren't correct!
So I began pushing up the engine until the crank bolt was in the correct spot and my driveline angles matched front and rear. This is where it ends up...
My engine cover was damaged anyway so I cut it in half to play with it. I really didn't want it to go this high, but it must be correct. Besides, I can deal with this issue much easier than losing significant ground clearance!! It will get some sort of fiberglass bubble as soon as I learn how to glass  I can also still shave some stuff down to reduce the footprint of the bubble, but it's still going to be there. I can also still shave some stuff down to reduce the footprint of the bubble, but it's still going to be there.
This stuff is called Firejacket. Google it for the specs.
Basically it's awesome and it's covering my oil supply line to the turbo to keep the oil cooler.
Mk3 coolant bottle and bracket
It get's cleaner, I promise!
Testing my homemade bead roller
Practical application of said bead roller!
I used a couple factory VW hoses and three from Autozone, I can get you the part numbers if you really really want to know.
Finally gave it some life blood
This has been my view for nearly 2 months...
Usually 3-5 hours after work everyday and up to 16 hours a day on the weekends. I may have taken a couple days off of working on it, it all blurs together by now.
_________________
1986 Canadian Syncro Westy TDI - 1989 Syncro Single Cab - 2001 Audi S4 - 1981 VW Caddy ABA - 1980 VW Caddy EV - 1973 VW T-181
Last edited by hans j on Mon Sep 24, 2012 7:38 am; edited 1 time in total |
|
| Back to top |
|
|
hans j
Samba Member
Joined: May 06, 2006
Posts: 2714
Location: Salt Lake City UT
|
| Posted: Sun Sep 23, 2012 10:08 pm Post subject: |
|
|
Remember how much I love this tool?
I also discovered our brake can bend small pieces of 11 gauge steel! This was left over stuff from my skid plate.
Drive by wire pedal bracket!
Goes under the carpet like so...
Poke some holes in the carpet, cut off the pedal, reinforce and smooth out...
Smooth the factory pedal down, cut a piece of conduit in half, make it the right height and JBweld to keep it in...
And you end up with a very nice, smooth factory feeling pedal!
It was VERY important to me that the pedal remain as close to stock as possible. It sits at about 55* which is what I measured off the other van in the shop. I drive at least 10 different VW/Audi cars a day and I don't even notice placement of factory pedals anymore. That is why it was important to me that it's stock. The TDI van which started it all for me (see the first line of this thread) had the complete TDI pedal installed and, well, it was awful. It hurt my ankle and was annoying as all get out. That's why mine is stock.
I pulled 5 lines of 22gauge, shielded communication wire through the van. I bought a roll of 200 feet for $25 from a damaged shipping warehouse locally. Yes, now I have extra...
I only needed 16 wires to go up front
includes, pedal, cruise, brake/clutch switch, speedo input, OBD communication wire, glow plug wire and one other I'm forgetting...
I ran an extra line just in case I want to add something in the future.
Also while walking around the shop the other day, I noticed a Mk2 cluster on a bench. So I stole the vehicle speed sensor out of it.
Don't worry, I asked my boss and he said it was ok. the cluster looked like it had been in the rain and mud for some time and had a TON of white residue on all the resistors... Hopefully this thing works...
Stereo guys like to lay wires anywhere...
They will get cleaned up someday, but not today. I did pull about 3 feet of the biggest wire into a better space though.
And so my car, being Canadian, didn't have the O2 sensor bulb? Oh well. All the tracks are there, so I just poked a needle through and put in a new 12v LED (with the polarity correct!). See small circle near bottom!
The circle on the right is to complete the circuit for the track. I guess I could have put any voltage bulb I wanted there and then installed the correct resistor for it... But I didn't feel like it. Plus Radioshack had 12v ones, but only in red. So my glow plug light is red instead of orange. I'm already over it since it's done. I did dribble a little bit of solder into the LED connection, it was a little sporadic in working until then.
Annnndddd I didn't have a diesel cluster to steal the center display out of... So I had to improvise, again.
And what I got was an awesome, VERY small glow light symbol!
Oh how cute...
It's a little more white and thicker than the other symbols, but it SUCKS weeding stickers that small.
Looks good though!
I can make you some if you really, REALLY want one.
And last but certainly not least, modifications to the tach for the ECU signal
This one is mine:
After TONS of searching and not finding anything, somehow I came upon this post: http://www.brick-yard.co.uk/forum/lt-24-petrol-eng...tml#527970 mind=blown...
Now when I opened up the 1988 tach that was laying around, I noticed it was a bit different. Same basic layout, but the capacitor he had originally as a 0.047, I have as a 0.22. So I'm leaving it for now, at least until the engine runs and I can check it out against what the computer reads in VDCS. I did happen to buy a 0.47 capacitor that exactly like what is stock in my tach, but I'll see if I need it.
So that's it for now. I just keep on picking at the wiring until I hear back from Kerma in Tooele about deleting my IMMO3 issue. I do have a cable on the way from China that I might be able to use to pull the .bin file off the ECU, but I'm not holding my breath it's going to work.
I also still have to install the modified airbox, intake pipe, intercooler and charge piping. But it is SOOOO close!
_________________
1986 Canadian Syncro Westy TDI - 1989 Syncro Single Cab - 2001 Audi S4 - 1981 VW Caddy ABA - 1980 VW Caddy EV - 1973 VW T-181 |
|
| Back to top |
|
|
|


