| Author |
Message |
windfish
Samba Member

Joined: September 05, 2012
Posts: 1126
Location: NC

|
 Posted: Wed Sep 05, 2012 7:56 pm Post subject: Got a 1970 Beetle, questions Posted: Wed Sep 05, 2012 7:56 pm Post subject: Got a 1970 Beetle, questions |
 |
|
Friend of the family acquired a 1970 Bug that had been converted to electric.
He played around with it some but was unable to get it working right. It looks like it was an old conversion, done by trial and error and a rough idea of what needed to be done.
He got tired of dealing with it and asked if I wanted it. I said sure.
The motor was a 30V aircraft generator rated at 400A, powered by 7 (originally setup for 10) AGM deep cycle batteries. It was a single-speed setup, you pushed the pedal and a flap closed, activating two relays and sending the full force of the battery pack into the motor. Not the best way to do things, but as the car probably weighed upwards of 2500+ lbs it took it a while to get to speed anyways.
Unfortunately at some point the battery pack got wired wrong. One relay was sending 36v, the other 48v. These were put in parallel when the relays were fired and the batteries weren't very appreciative, most of them are dead now.
Did some research and it'd have been around 4-5 grand to get it to be a working electric car with a range of 25 - 30 miles @ 45mph. Better mileage with lithium, but probably double that price. I need 20 miles a day to commute, so not much wiggle room.
Basically none of the current system was worth going forward with.
Couldn't justify the price tag for that kind of range atm, so for now its getting reverted.
Found a rebuilt 1971 1600cc bug engine on craigslist.
Been gathering other misc parts (exhaust system, gas tank, seals, etc), nice that nearly all the parts are still available for reasonable.
Paint cleaned up better than I thought it would. Still fairly bad in some areas, but no major bubbles or flaking, so good enough for now.
A wash and three by-hand applications of Meguiars cleaning wax, and tinfoil on the chrome.
So yep. Its a work in progress, and I've gotten a decent ways on it -- this forum has been a nice resource.
Right now my last stumbling block before installing the engine is the fuel line. The old one was actually left inplace and sealed off, but it was left with some gas in it that dried and made one heck of a plug. As I replaced the throttle cable I was able to use the old one to fish around with it chucked in my drill. Got a bunch of gunk out, but right about the time I thought I'd finally gotten it all the cable snapped while in the line and its not coming out. So she's getting a new gas line, probably just as well.
I've done some searches and poking around, it seems like most people do this when they're doing major surgery anyways and they poke it back through the tunnel. Unless this is a lot easier than its been made to seem I think I'd just as soon run it along the outside.
Here's where I'd like to run it, along the vertical frame rail. Is there a better spot for it?
btw, most of the flaking is just old undercoat -- I've been pulling it off in chunks, mostly decent metal underneath excepting the heater channels (iffy) and floorpans (shot).
Also, unless its an awful idea I think I'd like to run the steel fuel line directly into the engine bay through the tarboard. Maybe below where the wires come in on the side... that is where those wires are supposed to come in right?
Any reasons against that? I believe the fuel line is supposed to run via another hardline through the engine shroud to the fuel pump, but through the tarboard would seem less hassle. I can run ~3" through and hook from there to the fuel pump with a softline... or another hardline I guess.
I'm also replacing the tarboard, wasn't going to but it really is trashed and the engine is out anyways.
Given those wires poking through the tarboard are original I'd appreciate it if someone could tell me where they go. I found a wiring diagram and I can backtrack them as needed.
The floorpans aren't worth saving and the heater channels aren't great, but everything else is quite decent.
Driver's seat and forward is solid, and I'd like to get her running before I put anything else into 'er -- though floorpans are the first thing after that.
Cheers |
|
| Back to top |
|
 |
Wideopen
Samba Member
Joined: May 17, 2012
Posts: 279
Location: N. California
|
| Posted: Wed Sep 05, 2012 8:25 pm Post subject: |
|
|
Very good job on the paint! you must have spent some real time on that. A ton of elbow grease involved I did that one time on a 240Z and was sore after the time it took.
Looks like a repaint rather than a polish job!
Well done! 
_________________
1971 Super Beetle...owned
Squareback.....wife is begging for....not in the $ right now!lol |
|
| Back to top |
|
|
TuckTuck
Samba Member
Joined: August 20, 2012
Posts: 67
Location: Saint Jo, Texas
|
| Posted: Wed Sep 05, 2012 8:41 pm Post subject: |
|
|
| Wires will go to your coil and alt/gen for sure. Not sure which one though. |
|
| Back to top |
|
|
dubllyou
Samba Member

Joined: May 24, 2012
Posts: 1251
Location: Jack & Cee Motors
|
| Posted: Wed Sep 05, 2012 9:15 pm Post subject: |
|
|
I ran new fuel line along the same route that you're thinking. Several adel clamps and a few pieces of oversize rubber fuel line where it goes around corners to keep it from rubbing and it worked pretty well. It will be easier to go through the tin like it was originally though, rather than through the tarboards. You really don't want the line too much higher than it was originally anyway since it might hinder the gravity feed somewhat. It converts to rubber by the trans, then back to metal where it goes through the tin (good place for a filter). Don't forget the grommet where it goes through the tin either. I can take a couple more pics at each end of the way I routed mine, if you want, but basically the start and end points are almost exactly as they were originally.
You can't see it here but I put a couple clamps into the front bulkhead, one by the master cylinder and one up higher, angling the line over to the original location under the tank.
In hindsight, it may have been better to flip the clamps over and put the screws on the bottom and the line on top. 
I may go back and do that and move this part further up on that well and on the frame horn. You can't see it here but there is another clamp or two on the frame horn before it ends at just about the original location.
If I would have taken a little more time, I would have drilled and run the line through that rail with a grommet rather than going under to get around the jack point. That is the lowest and least protected area of the whole thing. It would have taken more time that I didn't have when I did the job though and I really don't plan on driving off any curbs or anything. I may still go back and do that also...someday.
BTW, that paint came out pretty good. Nice job!
_________________
Two wrongs don't make a right...
three lefts do.
Wade
| vwo60 wrote: |
| You cannot polish a turd, but you can roll it in glitter. |
|
|
| Back to top |
|
|
windfish
Samba Member
Joined: September 05, 2012
Posts: 1126
Location: NC
|
| Posted: Fri Sep 07, 2012 5:15 pm Post subject: |
|
|
Thanks dubllyou!
If the parts I need come in tomorrow I might be able to get the gas line mounted over the weekend.
Now some engine questions
Its a 1971 VW Engine and my car is a 1970. I bought a 1970 style clutch for it that I've yet to put on.
I bought the engine off craigslist, it was dropped off at a machine shop to be rebuilt by the previous owner -- they did the work and the guy never came back for it. So they sold it a few months later.
This is my first bug, and I have really no idea what should be there and what doesn't need to be.
I've replaced the coil, flywheel, got a used airfilter thing, new muffler off wolfsburg west, and found some used heat exchangers that I cleaned up.
I have the three air tubes ready to go as well.
There's some screw holes in the sheet metal that I can't account for, I'm assuming I'm missing something.
The doghouse tin was missing, I ordered it and it came in two parts. I'm assuming I ordered the right thing as the top part fits where I'd expect it to. I have no idea on the bottom thing, is that right?
Searching online I may be missing the piece of tin that goes over the top of the flywheel, if so what's it called and where's the best place to find it?
What was the purpose of the pinched off tube, and should anything go in that rear screw hole.
A little piece is broken on my carb, looks like something may have been bracketed to the front at one time?
That line with the screw in it hanging out on the distributor cap, fuel line yes?
Oh, I did pick up one of these. Not sure how its supposed to line up though, unless I have the wrong one for this engine
There's a lot of stuff under there to bump into
Thanks guys |
|
| Back to top |
|
|
DJ Bill
Samba Member
Joined: May 13, 2012
Posts: 102
Location: Central Texas
|
| Posted: Fri Sep 07, 2012 6:15 pm Post subject: |
|
|
For your missing tin questions, go to http://www.awesomepowdercoat.com/
and check out his illustrations.
You are still missing a few pieces, and I think your preheat tube is for another engine.You are missing the small pieces that seal off around the small pipes that go to the muffler.( Heat riser I think they are called?) Also the front engine breastplate that the oil cooler tin goes thru.....
That line with the screw in it is a vacuum line for the distributor I think, check the bentleys or whatever for vac diagrams for your particular motor and carb. You may be missing the dashpot thing that lets the engine come back to an idle slowly , an often removed part. Your fuel line goes to the top of the fuel bowl on the carb, where it should dump right into the fuel bowl via the needle and seat.
I'd give you the right names for stuff If I had my manuals here but alas in the motel room I am lucky to have my MAM catalog, and they only sell tin by sets.
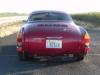
Great job on the bumpers....Hard to beleive tin foil was all you used there...I have a couple bumpers as bad as those and would liek to hear more about the process you used. |
|
| Back to top |
|
|
Joel
Samba Member

Joined: September 04, 2006
Posts: 11099
Location: NSW Australia
|
| Posted: Fri Sep 07, 2012 7:30 pm Post subject: |
|
|
| windfish wrote: |
Oh, I did pick up one of these. Not sure how its supposed to line up though, unless I have the wrong one for this engine |
The other tab goes through the pulley tin/lower deflector tinware screw.
But to make that actually functional you will need to track down a manifold with the vacuum port on it or fit a carb with a vac port on the front.
Also you would need to make sure the diaphragm in the air filter snout still works, most are punctured after 40 years.
Also the broken peice on your carb is just from where it's been drilled out to fit a helicoil, nothing to worry about.
Oh and pinched off tube on the shroud is the hose for the charcoal canister.
_________________
Quick little bug, you got a Porsche motor in that?
1974 Germanlook 1303 2.5 Suba-Beetle |
|
| Back to top |
|
|
dubllyou
Samba Member
Joined: May 24, 2012
Posts: 1251
Location: Jack & Cee Motors
|
| Posted: Fri Sep 07, 2012 9:38 pm Post subject: |
|
|
Make sure that gland nut is torqued to spec
...and don't forget to take the flywheel lock off before you install the motor. That'll make it go in alot easier!
_________________
Two wrongs don't make a right...
three lefts do.
Wade
| vwo60 wrote: |
| You cannot polish a turd, but you can roll it in glitter. |
|
|
| Back to top |
|
|
windfish
Samba Member
Joined: September 05, 2012
Posts: 1126
Location: NC
|
| Posted: Fri Sep 07, 2012 10:39 pm Post subject: |
|
|
Ah, yep. I see what happened to the carb now, thanks.
So missing tin wise,
Definitely one of these - http://vwparts.aircooled.net/Bellhousing-Tin-Firewall-Tin-Upright-Engines-p/bellhousingtin.htm
Maybe one of these - http://vwparts.aircooled.net/Pulley-Tin-Upright-Engines-p/pulleytin.htm
Not sure I see where these attach or if they're needed - http://vwparts.aircooled.net/Rear-Deflector-Tin-Cooling-Tin-Left-1966-T1-p/113-119-357.htm and http://vwparts.aircooled.net/Rear-Deflector-Tin-Cooling-Tin-Right-1966-T1-p/113-119-358a.htm
Can't find anything to seal the base of those two tubes, guess I could make something.
Not sure on the airfilter box, I'll play around with it. By its age (1970, probably) it should be mechanical not vacuum, right?
http://www.vw-resource.com/air_cleaner.html looks like I should tie it open in the mean time, so its always getting 'cold' air... hum. Probably should get a new filter for it too.
As far as the rust on the bumpers
Before and After
Literally just rubbing wet aluminum foil over the surface. Some recommend cola, but water seems to have worked fine -- with significantly less mess.
http://www.robertscycle.com/chrome-clean.html has a decent explanation
And yep. My torque wrench goes to 250 and I've gotten it to click a few times tightening that gland nut. I don't want it as tight as I found it, thing was crazy tight. Took a 6' cheater bar and a lot of pushing. Will do on the lock! Figured I'd get the clutch on then take it off. |
|
| Back to top |
|
|
dubllyou
Samba Member
Joined: May 24, 2012
Posts: 1251
Location: Jack & Cee Motors
|
| Posted: Fri Sep 07, 2012 11:06 pm Post subject: |
|
|
I only mentioned the gland nut because I installed a motor that my brother-in-law built once and didn't check it. Two days later and the flywheel was trying to machine it's way out of the bellhousing. Needless to say, it ruined the transaxle housing and the crankshaft. I don't know if he didn't torque it at all or just not nearly enough, either way it was bad news. 
It's not one of my favorite ACVW features by a long shot. I mean seriously, one bolt holding the flywheel on? Gimme a break! < really
_________________
Two wrongs don't make a right...
three lefts do.
Wade
| vwo60 wrote: |
| You cannot polish a turd, but you can roll it in glitter. |
|
|
| Back to top |
|
|
OLD VW NUT
Samba Member
Joined: February 23, 2011
Posts: 2776
Location: High Desert of Washington 98823
|
| Posted: Fri Sep 07, 2012 11:12 pm Post subject: |
|
|
Make sure you have the correct throwout bearing and pressure plate for your car. The new and old style are not compatible. The newer style (71 and up) has the sleeve that the throwout bearing rides on - yours does not have that sleeve.
Here's a photo showing the older style of pressure plate - it has that round collar on the center of the springs - many of the collars on the pressure plate are removable and can be used for either style:
Here is a newer style pressure plate for comparison:
And the old style throw out bearing for comparison - what yours should look like:
Newer style - what yours should NOT look like:
As for engine tin here's a photo that will help you see what you are missing:
The tin that goes over the flywheel (#3) is called the firewall tin - you'll need the one with the rectangular hole in it (as shown) for the hot air off the oil cooler to dump out under the car. Warning - there are replacement tins available but try to find original German tin if you can. They work - they fit - and they look like crap quite often but they won't make your motor run hot unless they fall off. The new stuff is crap. I'm dealing with fitting an aftermarket firewall tin on my 2110 right now. The hole for the accelerator cable to pass through is at least 1" off from where it should be and the hot air dump chute from the oil cooler doesn't line up. I live in an area where these old parts are hard to find but it looks like I'll need to find someone with these parts or find something in the classifieds here on Samba that has them.
Fuel line: I'd try to get the old line unplugged - its much safer to have the line inside the tunnel. In any case make sure you place your fuel filter just under the tank - or in that last bit of hose before entering the engine bay. Safety
Screw holes. Look at the picture of the tin - it would appear you are missing all of the items related to #11 - those are the thermostatically controlled air flaps. They help the engine reach operating temps faster. I encourage you to install them. Find a complete fan housing if you can that has them already installed - or buy some from the Samba classifieds. Thats where I got mine - everything including the spring was provided. Great deal if you can get all those small parts in the bargain.
The pinched off tube on the fan shroud is part of the evaporative emission control system. The holes on the top of the fan shroud is not stock - plug them up to prevent cooling air loss.
The little piece on your carb is/was part of the throttle positioning diaphragm. You won't miss it - nobody ever has.
That tube picks up warm air from the underneath side of the engine tin and connects via a tube same as the heater hose tubes to draw warm air into the air cleaner during warm up. Not totally necessary but it'll make the engine happy during warm ups. Where it is sitting is more or less where it goes. Your still missing many parts to make that work but its something you can do without if you have to.
_________________
71 Ghia Coupe - stock body - no rust! Powered by a 2110 W/Dual HPMX 44's - Rancho Pro Street Transaxle - A/C by Gilmore
Other car - 2013 VW Golf TDI |
|
| Back to top |
|
|
OLD VW NUT
Samba Member
Joined: February 23, 2011
Posts: 2776
Location: High Desert of Washington 98823
|
| Posted: Sat Sep 08, 2012 8:23 am Post subject: |
|
|
| dubllyou wrote: |
I only mentioned the gland nut because I installed a motor that my brother-in-law built once and didn't check it. Two days later and the flywheel was trying to machine it's way out of the bellhousing. Needless to say, it ruined the transaxle housing and the crankshaft. I don't know if he didn't torque it at all or just not nearly enough, either way it was bad news.
It's not one of my favorite ACVW features by a long shot. I mean seriously, one bolt holding the flywheel on? Gimme a break! < really |
Your BIL found out what happens when you don't torque the gland nut down to spec. I don't see that single gland nut as a design failure on VWs part. That same gland nut properly installed/torqued can hold on an 8 doweled flywheel and transmit 100+ hp to the clutch for many years with no problems. Try forgetting to torque one bolt on a rod - same thing. Absent mindedness is not a design flaw.
_________________
71 Ghia Coupe - stock body - no rust! Powered by a 2110 W/Dual HPMX 44's - Rancho Pro Street Transaxle - A/C by Gilmore
Other car - 2013 VW Golf TDI |
|
| Back to top |
|
|
ashman40
Samba Member

Joined: February 16, 2007
Posts: 15982
Location: North Florida, USA
|
| Posted: Sat Sep 08, 2012 9:26 am Post subject: |
|
|
Just checking, but with a new flywheel installed, did you check the crank end play was still correct? You might need to replace one or more of the three shims that sit between the flywheel and the end of the crank to get the proper end play with the new flywheel. Don't start it up without checking this measurement.
_________________
AshMan40
---------------------------
'67 Beetle #1 {project car that never made it to the road  } }
'75 Beetle 1200LS (RHD Japan model) {junked due to frame rot}
'67 Beetle #2 {2019 project car - Wish me luck!} |
|
| Back to top |
|
|
Cadaver
Samba Member

Joined: April 24, 2012
Posts: 2338
|
| Posted: Sat Sep 08, 2012 11:26 am Post subject: |
|
|
great idea dump, dynamo duddly.
no fuel in the cab
but in the tunnel way is fully documented on this forum
even the xray surgery cut points. measure x/y cut here.
that leaves on other place, under running boards in at outside of heater tubes. (frame)
x2 all above and for sure end play , measurement.
id go with an extra strong gland bolt and set it to 300 ft.lbs..
really nice posting, one of the best ....
_________________
for sale now.
in Samba classifieds....1968 T1. |
|
| Back to top |
|
|
windfish
Samba Member
Joined: September 05, 2012
Posts: 1126
Location: NC
|
| Posted: Sun Sep 09, 2012 9:47 pm Post subject: |
|
|
Found out the little pieces of tin I was missing are Manifold Pre Heat Tins, found a pair in the classifieds.
So I've got what feels like a stupid question.
I put these gaskets in between the flywheel and the engine, over the dowels - http://vwparts.aircooled.net/8-Dowel-Pin-Flywheel-Crankshaft-Gaskets-SPG-p/4034.htm , as when I pulled the original flywheel it had some (one very thin metal and two paper iirc). But I noticed today that the description says for flywheels without an O-ring. My flywheel has an O-ring.
Should there be anything between there, over the dowels, if the flywheel has an O-ring?
And yeah, I need to check endplay. Aircooled.net has http://vwparts.aircooled.net/Crankshaft-and-Flywheel-End-Play-Tool-p/7004.htm , I'll try that. I can't feel any play at all, so I guess that's a good thing (I know I can't feel in the thousandths of an inch, but its not like an eight of an inch out of whack).
I got the Sachs clutch kit: matching throwout bearing, clutch disk, and pressure plate. The throwout bearing is the old style, I forget which the pressure plate is but it presumably is matched to the throwout bearing in the kit.
I'll think about the thermostat and flaps.
On an article I was skimming it said a lot of people discarded their thermostat and flaps when doing rebuilds. Any particular reason to not want one, other than not wanting to replace a dead thermostat I guess.
I'm also assuming the flaps have a sort of default-open position in case something malfunctions its not not-cooling the engine.
On the fuel line, I did find this topic - http://www.thesamba.com/vw/forum/viewtopic.php?t=380724 for installing it through the tunnel. The middle tab that Hugo had an issue getting to even with a non-factory hole in his tunnel would seem slightly problematic. For the rear tab, I think he's looking through the gear shift coupler viewing thing. Mine's shift rod is still there. His front sheet metal was also off, aiding in fishing out the end.
I wouldn't mind running through the tunnel, just seems like a royal pain for someone who's car is still mostly together.
The old line is pretty irreversibly clogged, between the remaining gunk and the 16 odd inches of now unbraided cable that's broke off a good 8" from the end of the tube.
Given its the original fuel line its probably time for a replacement anyways
Cheers guys |
|
| Back to top |
|
|
dubllyou
Samba Member
Joined: May 24, 2012
Posts: 1251
Location: Jack & Cee Motors
|
| Posted: Sun Sep 09, 2012 10:14 pm Post subject: |
|
|
I ran my fuel line outside because it's my daily and it seemed like it was alot quicker and easier to do. If it comes to the point where I'm not driving it as much, I will probably put it back where it belongs. I read all the threads on here about it and I'm with you in thinking it looks like the people that say it's quick and easy to run it in the tunnel probably had the car disassembled a bit to start. I could see it easily taking me all day to do it that way and I did what I did in just an hour or so after work and before dinner! 
_________________
Two wrongs don't make a right...
three lefts do.
Wade
| vwo60 wrote: |
| You cannot polish a turd, but you can roll it in glitter. |
|
|
| Back to top |
|
|
Cadaver
Samba Member
Joined: April 24, 2012
Posts: 2338
|
| Posted: Mon Sep 10, 2012 6:15 am Post subject: |
|
|
its not easy job.
carpet and sets out.
you cut on the dotted line as the best posts shows.
and run new line, its not easy at all , in fact very very hard.
most cars run the fuel line down box beam frame rails for protection
you dont have that. so vw run it inside the tunnel for that protection.
the new line must be clamped in the tunnel so it dont hit the shift rod
and start a wear point.....
i bet there are lots of bugs like yours, do to these facts.
_________________
for sale now.
in Samba classifieds....1968 T1. |
|
| Back to top |
|
|
windfish
Samba Member
Joined: September 05, 2012
Posts: 1126
Location: NC
|
| Posted: Wed Oct 24, 2012 9:12 pm Post subject: |
|
|
Moving ahead slowly, had some distractions and weather related delays.
Getting closer.
Had to cut the tunnel open anyways to reweld the front clutch guide-tube mount, so I guess the gas line gets to go where it was always meant to.
Question on setting the endplay, just to make sure I'm not doing something stupid.
- Removed flywheel seal and the previous shims. Got new seal and a shim pack off one of the online VW shops. Cleaned the shims with a rag (no oil when getting the measurement right?) and put two on.
- Remounted flywheel and put the nut on snug
- Got a dial gauge and a magnetic base, sat base on the flywheel with the dial gauge's arm resting on the engine housing.
- With a pair of flathead screwdrivers pulled the front pulley (with the belt that goes up to the generator) out
- Reset dial gauge to zero
- Pulled the flywheel away from case using screwdrivers
- Took measurement off dial gauge, removed flywheel and tried shims till I found a set that worked (endplay to 5 right?). Ended up being just two 0.30 shims
Now that I have (?) the correct shims in, I need to take the flywheel back off, take the shims off and apply a bit of oil, install seal with the gigantic washer I ordered, apply a bit of oil, oil the o-ring in the flywheel, install flywheel and gland nut and tighten.
That it?
Thanks again |
|
| Back to top |
|
|
ashman40
Samba Member
Joined: February 16, 2007
Posts: 15982
Location: North Florida, USA
|
| Posted: Thu Oct 25, 2012 9:23 pm Post subject: |
|
|
| windfish wrote: |
Question on setting the endplay, just to make sure I'm not doing something stupid.
- Removed flywheel seal and the previous shims. Got new seal and a shim pack off one of the online VW shops. Cleaned the shims with a rag (no oil when getting the measurement right?) and put two on.
- Remounted flywheel and put the nut on snug
- Got a dial gauge and a magnetic base, sat base on the flywheel with the dial gauge's arm resting on the engine housing.
- With a pair of flathead screwdrivers pulled the front pulley (with the belt that goes up to the generator) out
- Reset dial gauge to zero
- Pulled the flywheel away from case using screwdrivers
- Took measurement off dial gauge, removed flywheel and tried shims till I found a set that worked (endplay to 5 right?). Ended up being just two 0.30 shims |
How many shims did you pull out from between the flywheel and the crank when you disassembled it? Originally it should have come with three (3) shims. I believe the spec calls for three shims to go back in. I believe this has to do with lowering friction, but am not certain.
One side of this shim pack will touch the flywheel flange which is spinning... the other side touches the #1 main bearing which does not move. I'd recommend finding three smaller shims that total the same thickness. I believe the spec is 0.003~0.005" with a wear limit of 0.006". I'd shoot for 0.004" as a target.
_________________
AshMan40
---------------------------
'67 Beetle #1 {project car that never made it to the road }
'75 Beetle 1200LS (RHD Japan model) {junked due to frame rot}
'67 Beetle #2 {2019 project car - Wish me luck!} |
|
| Back to top |
|
|
windfish
Samba Member
Joined: September 05, 2012
Posts: 1126
Location: NC
|
| Posted: Thu Oct 25, 2012 10:38 pm Post subject: |
|
|
I pulled out a bunch of shims, maybe 4, they were all worn and I don't have any way to measure thickness in the thousandths.
But it had two paper and a metal gasket (these things) over the dowels where the flywheel seats. From what I've read those paper/metal gaskets don't belong on a '71 1600cc engine, just the o-ring.
The guy I bought it off of owned a machine shop and said he rebuilt it, and like a dummy I didn't ask what he all did. I believe he replaced one of the cylinders, the guy said he had $400 odd just in parts in it.
Unless there's another place to buy thinner shims two .30's is it, I get zero movement with any combination of three shims.
wolfsburgwest carries .24 - .36
http://www.wolfsburgwest.com/wolfsburg_new/engine/40hp/flywheel_shims.cfm
same for Chirco
http://www.chircoestore.com/catalog/index.php?cPath=109_115_143
I guess there's always opening the engine and adjusting the endplay on the inside, but that's far outside my comfort zone.
Putting the paper gaskets back would seem a poor idea, but /shrug
I'm open to suggestions.
If its a huge, engine-killing deal there is a local machine shop that specializes in aircooled vw engines (T-Hoff) that I can take it to and ask them to fix it, but that sounds expensive.
(As to why I took the flywheel off in the first place, it was user error. It didn't really need to be replaced, but as a learning experience a $70 flywheel isn't the harshest thing) |
|
| Back to top |
|
|
|


