| Author |
Message |
flemcadiddlehopper
Samba Member

Joined: December 05, 2011
Posts: 2332
Location: Kelowna, BC. Canada.

|
 Posted: Wed Oct 31, 2012 6:29 pm Post subject: How to make a dent...not fix one? Posted: Wed Oct 31, 2012 6:29 pm Post subject: How to make a dent...not fix one? |
 |
|
I had posted a question earlier about my bus floor and how to make the flat indents for the seat mounts..no reply here, but the split bus people helped me out.
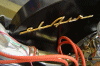
Now I am asking another question about how to make a dent....no not just a dent (I could have me 18 year old son show me that on his car). I want to mount a Wolfsburg emblem (from my '59 beetle, My first car) on the dash of my Bus. I want to mount it just below the passenger grab handle and have it recessed in (frenched?).
My question is, what would the best way to go about creating the recess?
I have limited experience in body work but I am very patient and a bit of a perfectionist. When explaining your suggestions please show examples of needed tools....the Snap-on guy loves me.
gordo.
_________________
Everybody Dies....Some Never Live.
Retrograde Garage. Vintage Aircooled, and others. |
|
| Back to top |
|
 |
beetlenut
Samba Member
Joined: May 27, 2009
Posts: 2983
Location: RI
|
| Posted: Thu Nov 01, 2012 7:01 am Post subject: |
|
|
Since I have a MIG and look for reasons to use it, I would use a dremel tool with a cut-off wheel and cut-out a hole the same shape as the emblem, maybe an 1/8 larger. Then decide how much to recess it, and fabricate a piece of metal with sides equal to the desired recess depth. Then just weld it in and finish with some filler and paint. But that's just me.
_________________
scrapyards are for quitters
---------------------------------------
| Wetstuff wrote: |
| ... I spend more time shaking it than directing it?! I get a pretty decent blast for 8sec. then have to shake it again. |
- Words to live by right there!
My 74 Super rebuild thread: http://www.thesamba.com/vw/forum/viewtopic.php?p=6507104#6507104 |
|
| Back to top |
|
|
marklee
Samba Member

Joined: March 24, 2009
Posts: 821
Location: Flintshire, North Wales
|
| Posted: Thu Nov 01, 2012 11:56 am Post subject: |
|
|
mark around the dash where you want the badge to be. Place the badge on a block of hardwood and mark its outer. do the same on a similar block. On one carve out the shape as a hollow. on the other carve the outer away thereby making one part fit into the other. Drill a hole through the centre of both and use a long bolt with washers or thread bar and nuts. Drill a corresponding hole in the dash. Male side of mould on outside, female side under dash, bolt the two together and gently squeeze the metal to shape using your mould. Probably wont even damage paint. Hope that makes sense, good luck!!
_________________
CGLI qualified body repair and refinish tech
CGLI qualified motor repair tech
Qualified automotive Glass installer
Motor Insurance Repair and Research Centre,Thatcham, Advanced Vehicle Damage Estimator.
Police qualified vehicle examiner
Police Class 1 High performance, pursuit trained Advanced driver |
|
| Back to top |
|
|
AZ65CalBug
Samba Member

Joined: December 08, 2001
Posts: 708
Location: Arizona
|
| Posted: Thu Nov 01, 2012 2:26 pm Post subject: |
|
|
I would trace out the emblem.
Cut it out.
Then take some 8ga scrap metal and follow the edges of the badge and make the box/edge of it to your desired depth. Tack it place.. finish it up and paint..
_________________
My Current Project is at:
https://www.facebook.com/pages/1965-Cal-Bug/172194646214739
please like the page to get updates as they happen. |
|
| Back to top |
|
|
DJ Bill
Samba Member
Joined: May 13, 2012
Posts: 102
Location: Central Texas
|
| Posted: Thu Nov 01, 2012 4:33 pm Post subject: |
|
|
| marklee wrote: |
| mark around the dash where you want the badge to be. Place the badge on a block of hardwood and mark its outer. do the same on a similar block. On one carve out the shape as a hollow. on the other carve the outer away thereby making one part fit into the other. Drill a hole through the centre of both and use a long bolt with washers or thread bar and nuts. Drill a corresponding hole in the dash. Male side of mould on outside, female side under dash, bolt the two together and gently squeeze the metal to shape using your mould. Probably wont even damage paint. Hope that makes sense, good luck!! |
That right there is the best option for a warpage free job. Might need to use metal dies if hardwood doesn't do it.. |
|
| Back to top |
|
|
flemcadiddlehopper
Samba Member
Joined: December 05, 2011
Posts: 2332
Location: Kelowna, BC. Canada.
|
| Posted: Thu Nov 01, 2012 6:42 pm Post subject: |
|
|
| marklee wrote: |
| mark around the dash where you want the badge to be. Place the badge on a block of hardwood and mark its outer. do the same on a similar block. On one carve out the shape as a hollow. on the other carve the outer away thereby making one part fit into the other. Drill a hole through the centre of both and use a long bolt with washers or thread bar and nuts. Drill a corresponding hole in the dash. Male side of mould on outside, female side under dash, bolt the two together and gently squeeze the metal to shape using your mould. Probably wont even damage paint. Hope that makes sense, good luck!! |
I like the way you think... that's a great idea.
I had thought about the hardwood on the under side, but I thought about gently tapping the metal into it. this seems like an even more controlled method. really it only needs to drop in about 3/16", but I feel that this way all edges will remain smooth. I am still at the primer stage so paint damage is not an issue.
Thanks for the input .
Gordo.
_________________
Everybody Dies....Some Never Live.
Retrograde Garage. Vintage Aircooled, and others. |
|
| Back to top |
|
|
flemcadiddlehopper
Samba Member
Joined: December 05, 2011
Posts: 2332
Location: Kelowna, BC. Canada.
|
| Posted: Fri Nov 02, 2012 6:12 pm Post subject: |
|
|
So, if I was to attempt the hardwood press method, would a 4" square piece of wood cover enough area as to not distort the rest of the dash?
Gordo.
_________________
Everybody Dies....Some Never Live.
Retrograde Garage. Vintage Aircooled, and others. |
|
| Back to top |
|
|
vaughn bros.
Samba Member
Joined: October 13, 2003
Posts: 2395
Location: Hickory, NC
|
| Posted: Sat Nov 03, 2012 3:01 pm Post subject: |
|
|
I traced out a crest and carved one (male) out of aluminum. Then used HP Die Rubber (press brake type) instead of carving out a female. It took about 3 tons to press a 3/16 deep "dent" in a section of Oval Window Roof. This method not only cant be organized under a dash, it also leaves horrible creases. I think a bolt together design would work fine.
I would make a male/female with a draw bolt center. Similar to dimple dies. Then also incorporate a way to "clock" it so the male and female line up. I would use a 3/8 Gr8 bolt to draw them together. |
|
| Back to top |
|
|
VintageVulture
Samba Member
Joined: May 25, 2003
Posts: 789
Location: Pacific Northwest- USA
|
| Posted: Sat Nov 03, 2012 8:01 pm Post subject: |
|
|
Good tips. And in another ten years I'll get PAID to undo this atrocity.
_________________
The best things in life aren't Things
(they're Buses) |
|
| Back to top |
|
|
chrisflstf
Samba Member

Joined: February 10, 2004
Posts: 3442
Location: San Diego
|
| Posted: Sun Nov 04, 2012 6:47 pm Post subject: |
|
|
| I'd buy a scrap dash section to practice on first. I like the idea of making a buck or hardwood clamp/press. As long as it didnt deform the surrounding area |
|
| Back to top |
|
|
volksaddict
Samba Member
Joined: August 19, 2003
Posts: 1724
|
| Posted: Mon Nov 05, 2012 6:22 am Post subject: |
|
|
| Please update this if you decide to do it. |
|
| Back to top |
|
|
flemcadiddlehopper
Samba Member
Joined: December 05, 2011
Posts: 2332
Location: Kelowna, BC. Canada.
|
| Posted: Mon Nov 05, 2012 11:30 pm Post subject: |
|
|
Ok, I was in Vancouver today and bought a good size hunk of hard wood. I will have to laminate the wood together to get a surface big enough to spread the load and not distort the dash (less the area being pressed).
As far as clocking the male/ female sections together , I plan on using two bolts which the holes in the dash will later act as the holes for the emblem tabs to go through.
I had thought at one point about not using hard wood, but using two part epoxy to make the press pieces, as it would be easier to for the dash shape while the epoxy was soft. I abandoned the idea after testing the pressing attributes of the hardened epoxy...not good.
Gordo.
_________________
Everybody Dies....Some Never Live.
Retrograde Garage. Vintage Aircooled, and others. |
|
| Back to top |
|
|
tisius
Samba Member

Joined: July 11, 2011
Posts: 1570
Location: Rotterdam,NL (+Chicago,IL)
|
| Posted: Thu Nov 30, 2017 9:57 am Post subject: |
|
|
| volksaddict wrote: |
| Please update this if you decide to do it. |
_________________
drive it like you just robbed the bank
you don't have to be crazy to be into VW's, but it sure helps!!
.... if it ain't dutch, it ain't much! |
|
| Back to top |
|
|
anthracitedub
Samba Member
Joined: June 20, 2007
Posts: 3241
Location: Michigan
|
| Posted: Fri Dec 01, 2017 5:33 pm Post subject: Re: How to make a dent...not fix one? |
|
|
| I would personally pass on doing this. There is a lot of strength in that panel because of the curves... youll have a tough time trying to press a nice, clean indentation for that crest...Id just hang it on the wall in the garage. |
|
| Back to top |
|
|
dirtkeeper
Samba Member

Joined: February 19, 2008
Posts: 3200
Location: Left of everywhere
|
| Posted: Thu Dec 21, 2017 8:21 pm Post subject: Re: How to make a dent...not fix one? |
|
|
press idea is smart but I think the metal is two thick and strong to stretch that much with out a lot of unwanted distortion.
Cut out method would work best |
|
| Back to top |
|
|
|


