| Author |
Message |
Ian
Samba Moderator

Joined: August 28, 2002
Posts: 4930
Location: 713

|
 Posted: Sat Dec 22, 2012 11:42 am Post subject: Eberspacher BN-4 Install in a 1979 Westfalia *PIC HEAVY* Posted: Sat Dec 22, 2012 11:42 am Post subject: Eberspacher BN-4 Install in a 1979 Westfalia *PIC HEAVY* |
 |
|
Alright, early this year I had a customer ask me to install a gas heater for a reasonable price. Since new Espars and Propex heaters are pretty expensive, we opted to source and install an original Eberspacher BN-4. I bought a used BN-4 unit from VDubTech in New York, and I did some extensive searching and found the heater ducts on here from a fella in Virginia. Sweet! I had an early heater so I cleaned up the fan grill and used it to avoid having to install the fresh air circulating ducts. I soaked the fuel pump that came with the heater in marvel mystery oil over night, hit it with 12volts, and it loosened up and started working! I got the heater running on my workbench before doing any final install. This was one of the more involved projects I've ever done and took quite some time, ofcourse I wanted it all to be perfect. Anyway, I wish I had one in my Bus!
Here is the heater on my extremely special top secret test stand
This Bus had an auxiliary battery setup on the drivers side where the heater was going, so I had to relocate that. I fit a battery box under the back seat and put the battery in there. When I was removing the wiring, it turned out that this auxiliary battery wasn't even hooked up to begin with!! So the customer told me not to worry about running cables for it, but it is under the back seat now if he does ever want to hook it up.
Fits like a glove with less than an inch to spare to the front door and an inch to spare on the top between the seat.
I used a picture I found in the gallery to determine the rough size of an original heater duct hole.
I carefully cut the hole with my air grinder.
This is how the outlet duct will fit.
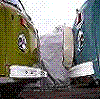
This Bus also had the refrigerator option, which the cooling element interferes with the heater duct. The fridge wasn't working anyway, so we turned it into an ice box and removed the cooling element.
I installed a piece of space shuttle insulation then a piece of 1/8" baltic birch.
So, basically with this cabinet installed, the heater will vent out of the bottom of it and out of the top of the rear most compartment. Now the metal grates on that cabinet make sense!
I made this template for the firewall hole that has to be cut.
Gas tank side
What I do for the heater control is wire it all the way hot. I mean, if your heater is on you want it hot right. So I used an old piece of choke cable and wired it open.
Scored some foam tape from my local ACE.
Tape all the ducts where they enter and exit.
I clamped the fuel vapor lines to prevent fuel vapor from entering the heater ductwork.
I test fit everything a bunch.
_________________
All your Buses are belong to us.
Love and good roads!
IN LOVING MEMORY OF ROB CRESS 1968-2012 |
|
| Back to top |
|
 |
Ian
Samba Moderator
Joined: August 28, 2002
Posts: 4930
Location: 713
|
| Posted: Sat Dec 22, 2012 11:59 am Post subject: |
|
|
Here is the heater just sitting there, not bolted in.
I couldn't come up with the exhaust pieces and the one local guy who sells gas heaters didn't want to sell me any of them, so I made my own from stuff I found at Advanced Auto.
Oddly enough I had just the right size hole saws laying around my shop, so I cut a couple holes.
Exhaust
Intake snorkel. Funny thing is I had a 1971 Bus come in months later that had a factory Eberspacher that had been removed a long time. I looked underneath and the snorkel was in exactly the same spot I put this one in.
I used a piece of Super Beetle defrost tube to go from the heater to the snorkel. It fit perfectly on the heater, but had to be slit to be a little bigger to fit over the snorkel. So I used some aluminum duct tape to seal off the minor slit, after hose clamping it on the snorkel.
Install a brass t-fitting in the fuel line. I did put hose clamps on everything after this pic was taken.
Drilled a hole in the engine bay and put a rubber grommet on it for the 5/16" fuel line to go through. Also had to relocate the FI relays a little bit to the right. Use short screws so they don't go into the gas tank.
Here it all is without the heater.
I used all original VW electrical connectors.
For the switch I used an old defrost switch because I couldn't find a knob for my NOS timer switch. I ran the wire from the heater through a factory grommet that used to be for the fridge, and then through another factory grommet on the base of the driver's seat, and then put the switch on the base of the drivers seat as well.
After that the heater was basically installed.
We put the interior back in which was fairly involved since it had to all come out.
A few months later I replaced the engine bay seal.
That's basically it. It did take me a long time to do this, but I think it was well worth it. Obviously you can't sleep with one of these heaters running, but it really does heat the Bus up good when you're on the road.
Any questions feel free to ask. I have a lot more pictures in my gallery, but this is the condensed version.
Hope you are all staying warm!!
Later
_________________
All your Buses are belong to us.
Love and good roads!
IN LOVING MEMORY OF ROB CRESS 1968-2012 |
|
| Back to top |
|
|
busdaddy
Samba Member

Joined: February 12, 2004
Posts: 51112
Location: Surrey B.C. Canada, but thinking of Ukraine
|
|
| Back to top |
|
|
germansupplyscott
Samba Member

Joined: May 22, 2004
Posts: 7093
Location: toronto
|
| Posted: Sun Dec 23, 2012 7:48 am Post subject: |
|
|
great job. the BN4 is a very good heater. in many ways it's better than the BA6, mostly because it makes almost as much heat and it is far simpler. the late BN4 that you used is the best one. if the heater doesn't have a metering pump, pass it up and find one that does.
if you were to get the outlet ducting (the orange part) from a camper - yours is from a passenger bus - you could duct the hot air through the bench into the back cabin. right now it looks like it dumps into the bench. you need the metal outlet piece, the flexible duct and the little metal duct end that screws to the bench. and you'd have to drill a 70mm hole in the bench, that would not be a deal-killer for me since it's still a 'factory' install and the warmth is worth it!
_________________
SL |
|
| Back to top |
|
|
obnoxiousblue
Samba Member

Joined: February 21, 2007
Posts: 2935
Location: East Northport, NY
|
| Posted: Sun Dec 23, 2012 7:59 am Post subject: |
|
|
Great work, I wish I had this as a resource a few weeks ago when I did my BN4! I'm curious why after all that work, why you didn't opt to install the thermostat cable though? I'm not trying to slight the work involved, looks like you really did a very nice install, it just crossed my mind.
I've been trying to figure how to rig my exhaust too... I can't find any accordion style exhaust tubing that is the same diameter as the exhaust outlet, or any adapter for that matter either. Also, what did you do for a seal there? It looks like you have a rubber O ring... I'd be curious what you did.
I also see that you have a exhaust pipe under the bus, did you make that?
Lastly, is it necessary to have a duct to the fresh air inlet? We're you used the super beetle vent tube, I have nothing... Should I?
_________________
Mike
1964 Beetle
2001 Eurovan Camper |
|
| Back to top |
|
|
germansupplyscott
Samba Member
Joined: May 22, 2004
Posts: 7093
Location: toronto
|
| Posted: Sun Dec 23, 2012 8:13 am Post subject: |
|
|
ok, i totally missed this part of how the heater is now using the 'duct' for the refer. that's great. and the early stuff i was talking about wouldn't work with the late bench/fridge cabinets. so part of my post above was a red herring.
_________________
SL |
|
| Back to top |
|
|
Ian
Samba Moderator
Joined: August 28, 2002
Posts: 4930
Location: 713
|
| Posted: Sun Dec 23, 2012 10:49 am Post subject: |
|
|
| germansupplyscott wrote: |
ok, i totally missed this part of how the heater is now using the 'duct' for the refer. that's great. and the early stuff i was talking about wouldn't work with the late bench/fridge cabinets. so part of my post above was a red herring. |
Yeah, I'm pretty sure that's the only duct work that is "correct" for this late model heater. I found a sweet complete kit on German E-Bay, I'll upload that picture. I had an early heater from a '71 that was 100% complete with ductwork and exhaust, but I sold it to my buddy.
_________________
All your Buses are belong to us.
Love and good roads!
IN LOVING MEMORY OF ROB CRESS 1968-2012 |
|
| Back to top |
|
|
Ian
Samba Moderator
Joined: August 28, 2002
Posts: 4930
Location: 713
|
| Posted: Sun Dec 23, 2012 10:52 am Post subject: |
|
|
| obnoxiousblue wrote: |
Great work, I wish I had this as a resource a few weeks ago when I did my BN4! I'm curious why after all that work, why you didn't opt to install the thermostat cable though? I'm not trying to slight the work involved, looks like you really did a very nice install, it just crossed my mind.
I've been trying to figure how to rig my exhaust too... I can't find any accordion style exhaust tubing that is the same diameter as the exhaust outlet, or any adapter for that matter either. Also, what did you do for a seal there? It looks like you have a rubber O ring... I'd be curious what you did.
I also see that you have a exhaust pipe under the bus, did you make that?
Lastly, is it necessary to have a duct to the fresh air inlet? We're you used the super beetle vent tube, I have nothing... Should I? |
I didn't want to install the cable because it was more work. Like I said, if you're turning the heater on you want hot air right? The cable just adjusts the air from hot to cold. Turn heater off if it gets too hot. The cable is really just useless.
The hole I cut was almost exactly the right size, so I didn't use a seal there for the exhaust. Anything would probably just melt off anyway.
The pipe under the Bus is an original intake snorkel, for fresh intake air for the heat exchanger. It isn't neccessary, since it can suck fresh air from the engine compartment, but I had the piece so I figured I'd make it work.
_________________
All your Buses are belong to us.
Love and good roads!
IN LOVING MEMORY OF ROB CRESS 1968-2012 |
|
| Back to top |
|
|
obnoxiousblue
Samba Member
Joined: February 21, 2007
Posts: 2935
Location: East Northport, NY
|
| Posted: Sun Dec 23, 2012 11:08 am Post subject: |
|
|
I guess you're right about the cable.
Curious about what diameter accordion style exhaust tubing you used. I couldn't find anything that was a good fit in the exhaust outlet of my BN4.
Did you thinkit was nessecary to have some sort of a seal between the accordion exhaust pipe, and the outlet on the heater itself?
_________________
Mike
1964 Beetle
2001 Eurovan Camper |
|
| Back to top |
|
|
Ian
Samba Moderator
Joined: August 28, 2002
Posts: 4930
Location: 713
|
| Posted: Sun Dec 23, 2012 11:16 am Post subject: |
|
|
I bought the smallest size I could find. Then I made this adapter piece.
https://www.thesamba.com/vw/gallery/pix/1004046.jpg
I used one of those clamps to hold the adapter on the heater, then I used another of them to hold the accordian tube to the adapter.
_________________
All your Buses are belong to us.
Love and good roads!
IN LOVING MEMORY OF ROB CRESS 1968-2012 |
|
| Back to top |
|
|
obnoxiousblue
Samba Member
Joined: February 21, 2007
Posts: 2935
Location: East Northport, NY
|
| Posted: Sun Dec 23, 2012 11:24 am Post subject: |
|
|
That's what I had to do also. I half thought you might've found a more "elegant" solution. I'm not sure if you were able to get a good fit from that small adapter piece to the heater, but I made 4 relief cuts (think at 12 o'clock, 3, 6 and 9) that way the clamp was ale to "crush" the pipe down and get more grab.
Do you know what diameter you used?
Sorry to be a pain!
-Mike
_________________
Mike
1964 Beetle
2001 Eurovan Camper |
|
| Back to top |
|
|
Ian
Samba Moderator
Joined: August 28, 2002
Posts: 4930
Location: 713
|
| Posted: Sun Dec 23, 2012 11:34 am Post subject: |
|
|
I WANT to help other people doing the BN-4 conversion. 
I also made a couple relief cuts and flared the end so it would look half decent. Don't remember the sizes we just kinda bought a bunch and made something work.
Here is that pic from German E-Bay. You can see how they amputated the outlet and had some other thing going on.
One of the images on here I used for reference.
I prefer era correct installs, so yeah this style of heater was original for pancake Type 4 engines and is commonly called the fuel metering version because of the piston action pump.
_________________
All your Buses are belong to us.
Love and good roads!
IN LOVING MEMORY OF ROB CRESS 1968-2012 |
|
| Back to top |
|
|
obnoxiousblue
Samba Member
Joined: February 21, 2007
Posts: 2935
Location: East Northport, NY
|
| Posted: Sun Dec 23, 2012 11:43 am Post subject: |
|
|
Great stuff. Good to hear you had similar methods. Reassures me a bit.
My 77 has a BN4, I deciphered the M code plate and its evidently a factory install which was cool. I recently rehabbed my system, and just a week or to ago got it fired up. Everyone here, and posts like yours were a bg help.
Heres my rebuild
Thanks!
_________________
Mike
1964 Beetle
2001 Eurovan Camper |
|
| Back to top |
|
|
jmstu76
Samba Member

Joined: March 01, 2004
Posts: 1223
Location: Edmond Oklahoma
|
| Posted: Sun Dec 23, 2012 6:34 pm Post subject: |
|
|
Awesome write up. I would love to do this. I have a full BA-6 but I don't want the hastle of tryin to make it work correctly.
_________________
James
'76 Deluxe Sage Green Westy
2258 cc GD case 78mm CW crank, 2.0 H-beam rods 5,325 22mm pin, JE forged pistons with 15cc dish, JE rings, type 11 clearanced oil pump, CB Eagle 2205 Type-2 Torque Special hydraulic cam with matched lifters fed by CB Dual Weber 40 IDF MX with 6 foam air filters, currently 55 idle, 130 main, 200 air correction, 32 mm venturis. 27in General Grabber AT2 All Terrains, Berg Shifter, stock '76 exhaust HPC Ceramic Coated. 11/18/2020 |
|
| Back to top |
|
|
VDubTech
Samba Member
Joined: December 29, 2002
Posts: 9142
Location: Syracuse, NY
|
| Posted: Sun Dec 23, 2012 6:46 pm Post subject: |
|
|
Great job, very nice install. I'm glad the heater worked out for you and your customer!!
_________________
First Trip in the RustyBus:
http://www.thesamba.com/vw/forum/viewtopic.php?t=279077&highlight=
| borninabus wrote: |
| a measurement of your rod would be extremely useful. |
| notchboy wrote: |
| my dad wasnt a belittling cock when he tought me how to wrench on cars. |
| EverettB wrote: |
One photo = good for reference.
10 photos = douchebaggery |
|
|
| Back to top |
|
|
zaakystyles
Samba Member
Joined: April 27, 2009
Posts: 238
Location: Lakewood, CO
|
| Posted: Mon Feb 25, 2013 3:28 pm Post subject: |
|
|
Days like today, are the days I wish I would of bought that heater before your friend did.
I then remember my set up with Dual Carbs gets in the way and a funky install would occur instead. I rather stay away from that.
Might as well keep my warmer clothes on anyways. |
|
| Back to top |
|
|
thewalrus
Big Jack
Joined: March 27, 2006
Posts: 3014
Location: Belchertown, MA
|
| Posted: Tue Jan 28, 2014 9:10 am Post subject: |
|
|
Great thread!!!!
I have a BN-4 and want to eventually put it in my '75. This is what I started with. Got it for free from a friend!
After I cleaned up the motor I ended up with this:
My question is, in your original install it doesn't look like you have the white plastic vent tube installed and just used a metal cover. Do you have to have the plastic tube in order for this to work?
_________________
'73 Transporter 1.7L Dual Carb
| notchboy wrote: |
| You ran over some #Vanlife'ers hopes and dreams? |
| 60vwnewengland wrote: |
| Looking forward to next weekend, weed, krunk juice, hookers, blow, hanging with bums, philly, ...the awards! |
Last edited by thewalrus on Tue Jan 28, 2014 10:12 am; edited 1 time in total |
|
| Back to top |
|
|
busdaddy
Samba Member
Joined: February 12, 2004
Posts: 51112
Location: Surrey B.C. Canada, but thinking of Ukraine
|
| Posted: Tue Jan 28, 2014 10:00 am Post subject: |
|
|
| thewalrus wrote: |
| My question is, in your original install it doesn't look like you have the white plastic vent tube installed and just used a metal cover. Do you have to have the plastic tube in order for this to work? |
No, but you will need the duct with the temperature controlled flap in it that goes along side the gas tank, the recirculating heater doesn't need it since both ends of the heater ducts are in the cabin, with the engine compartment inlet you'll get a constant icy draft when the heater is off. The challenge is the duct with the valve came with 68-71 heaters and they mount on a slightly different angle so it'll collide with dual carbs on a later bus, the exhaust pipe will need modification as well.
_________________
Rust NEVER sleeps and stock never goes out of style.
Please don't PM technical questions, ask your problem in public so everyone can play along. If you think it's too stupid post it here
Stop dead photo links! Post your photos to The Samba Gallery!
Слава Україні! |
|
| Back to top |
|
|
thewalrus
Big Jack
Joined: March 27, 2006
Posts: 3014
Location: Belchertown, MA
|
| Posted: Tue Jan 28, 2014 10:59 am Post subject: |
|
|
| busdaddy wrote: |
| thewalrus wrote: |
| My question is, in your original install it doesn't look like you have the white plastic vent tube installed and just used a metal cover. Do you have to have the plastic tube in order for this to work? |
No, but you will need the duct with the temperature controlled flap in it that goes along side the gas tank, the recirculating heater doesn't need it since both ends of the heater ducts are in the cabin, with the engine compartment inlet you'll get a constant icy draft when the heater is off. The challenge is the duct with the valve came with 68-71 heaters and they mount on a slightly different angle so it'll collide with dual carbs on a later bus, the exhaust pipe will need modification as well. |
Good to know the white tube isn't required. Very good point about the cold air back flow. Maybe during the summer months I could come up with some cap to keep debris and bugs out when the blower isn't on and I won't be using it.
I have the duct with the temperature controlled flap also. It's pictured attached to the blower motor in my picture above. The problem with that is the cable and all the wiring is cut 
_________________
'73 Transporter 1.7L Dual Carb
| notchboy wrote: |
| You ran over some #Vanlife'ers hopes and dreams? |
| 60vwnewengland wrote: |
| Looking forward to next weekend, weed, krunk juice, hookers, blow, hanging with bums, philly, ...the awards! |
|
|
| Back to top |
|
|
Lencki
Samba Member
Joined: August 15, 2013
Posts: 33
Location: Kentucky
|
| Posted: Sat Nov 04, 2017 9:52 pm Post subject: Re: Eberspacher BN-4 Install in a 1979 Westfalia *PIC HEAVY* |
|
|
| Wow that is awesome in so many ways. I'm looking to install the same heater in my 78 westy deluxe. I have the luxury of having fully functional components on the inside so am not looking to lose anything to get heat. Which brings me to my questions. 1. Does the aux battery absolutely have to be relocated? 2. Is it possible to run ducting out of fridge and under seat without moving fridge parts? It that what the picture from German ebay is of. It looks like it goes from rectangle to round. |
|
| Back to top |
|
|
|


