| Author |
Message |
cellerdoor
Samba Member
Joined: July 10, 2012
Posts: 403
Location: Fairfax Virginia

|
 Posted: Thu Jan 17, 2013 5:06 am Post subject: Fan Resistor Connector No-Splice - Done with pics Posted: Thu Jan 17, 2013 5:06 am Post subject: Fan Resistor Connector No-Splice - Done with pics |
 |
|
I understand that fan resistors for vanagons are no longer available but they are for eurovans, but the connector is different and you must reuse your existing connector.
Left to my own devices I would cut the wires closer to the old resistor and put a heat shrink butt splice on the three wires to the new resistor and call it a day. I have no experience in automotive (exposed to the elements) wiring and would like some guidance from this group.
How would you tackle this?
_________________
1986 Westy
Last edited by cellerdoor on Sat Mar 02, 2013 2:31 pm; edited 2 times in total |
|
| Back to top |
|
 |
spitsnrovers
Samba Member
Joined: December 17, 2005
Posts: 924
Location: Calgary, Canada
|
| Posted: Thu Jan 17, 2013 6:23 am Post subject: |
|
|
If the pins inside that connector are the same as in the EV version, you can push the pins out with either the correct tool, or a small screwdriver.
Then insert the pins into the new EV plug and away you go.
_________________
'88 VW Westfalia
'75 Triumph Spitfire 1500 |
|
| Back to top |
|
|
cellerdoor
Samba Member
Joined: July 10, 2012
Posts: 403
Location: Fairfax Virginia
|
| Posted: Thu Jan 17, 2013 6:55 am Post subject: |
|
|
The part is on order and i should have it in a few days to see if the pins are the same.
I just messed around with the connector with a small screwdriver and the pins slide out easy. With any luck the new pins are the same and this will be easy (just need to label which wire is what pin).
Even if the pins arent the same I think the best thing to do is find the correct pins and replace on the new unit.
Thanks for the help. Ill post the results when the new resistor comes in.
_________________
1986 Westy |
|
| Back to top |
|
|
cellerdoor
Samba Member
Joined: July 10, 2012
Posts: 403
Location: Fairfax Virginia
|
| Posted: Wed Feb 27, 2013 4:32 pm Post subject: |
|
|
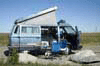
Finally got around to doing this:
New resistor on right, need to swap connectors since the only resistor available is for the eurovan which is different than the vanogon:
I tried to see if the new spades would fit in the old connector (so I would have no splice) but I could not figure out how to release the spades for closer look. Resorted to nibbling the new connector to death.
Obvious that the new spades wont work, so if your doing this just cut the new connector off and save yourself the frustration. Old on left.
Due to old car paranoia, I carefully pried the old spades off to reuse on the new resistor since i dont know if I can find these. Are these common to find?
Just need to clean, strip, recrimp and solder for good measure.
_________________
1986 Westy |
|
| Back to top |
|
|
SCM
Samba Member
Joined: January 26, 2011
Posts: 3116
Location: Bozeman MT
|
| Posted: Wed Feb 27, 2013 5:16 pm Post subject: |
|
|
Now that you're sure that the spades aren't the same, in hindsight, would it have been better to just cut the wires, splice/solder/heat shrink the old and new wires together?
_________________
'91 Westfalia GL Automatic (GTA "Turbo" Rebuild w/Peloquin) and 2.3L GoWesty Engine |
|
| Back to top |
|
|
cellerdoor
Samba Member
Joined: July 10, 2012
Posts: 403
Location: Fairfax Virginia
|
| Posted: Wed Feb 27, 2013 6:19 pm Post subject: |
|
|
| SCM wrote: |
| Now that you're sure that the spades aren't the same, in hindsight, would it have been better to just cut the wires, splice/solder/heat shrink the old and new wires together? |
Maybe, but then Id have a section of the old wire, and the casing of the wire was brittle and crumbling.
Knowing what I know now Id just cut the new connector off and had the time to source new spades that are the same as the old. Would have been a 10 minute job. The vendors should locate and include the new spades in the package if they could be located.
_________________
1986 Westy |
|
| Back to top |
|
|
Howesight
Samba Member

Joined: July 02, 2008
Posts: 3274
Location: Vancouver, B.C.
|
| Posted: Wed Feb 27, 2013 6:39 pm Post subject: |
|
|
Great pictorial. Here's somehting I am using on my DIY front air conditioning system instead of the VW resistor and switch: Toyota 4runner/pickup blower fan switch and resistor. Cheap at the pick and pull and has 4 speeds (plus off) as opposed to VW's three speeds.
BTW, I think that almost all 1980's to mid 1990's Toyota's (cars included) used the same resistor and a very similar, if not identical, fan speed switch.
_________________
'86 Syncro Westy SVX |
|
| Back to top |
|
|
cellerdoor
Samba Member
Joined: July 10, 2012
Posts: 403
Location: Fairfax Virginia
|
| Posted: Sat Mar 02, 2013 2:32 pm Post subject: |
|
|
Finished.
Hope it works because I doubt I can return it. Took a while but I avoided using the old wires.
_________________
1986 Westy |
|
| Back to top |
|
|
JPrato
Samba Member

Joined: December 15, 2006
Posts: 791
Location: Livonia, NY
|
| Posted: Sat Mar 02, 2013 5:05 pm Post subject: |
|
|
Tutorial on crimped connectors with some sources for getting terminals http://www.ratwell.com/technical/Terminals.html
_________________
Joe
87 Syncro Tin Top project
84 Westy, 2.5L Subaru power
06 Subaru 2.5 turbo in waiting
46 Cessna 140 |
|
| Back to top |
|
|
|


