| Author |
Message |
specialev
Samba Member

Joined: March 25, 2011
Posts: 281
Location: Mukilteo WA

|
 Posted: Sun Nov 30, 2014 9:21 pm Post subject: Posted: Sun Nov 30, 2014 9:21 pm Post subject: |
 |
|
| Very nice. A lot of fine engineering on display here! |
|
| Back to top |
|
 |
narendra.vw
Samba Member
Joined: February 07, 2013
Posts: 440
Location: Bangalore India
|
| Posted: Mon Dec 01, 2014 4:44 am Post subject: |
|
|
| specialev wrote: |
| Very nice. A lot of fine engineering on display here! |
Thank you. specialev. Your appreciation fills my Energy drink. |
|
| Back to top |
|
|
240Gordy
Samba Member

Joined: May 15, 2008
Posts: 2354
Location: Vancouver, BC
|
| Posted: Wed Dec 10, 2014 11:33 am Post subject: |
|
|
Very interesting thread, many interesting mods and pictures
Cable shifting mod is interesting.
Most beyond my skill level
Take care
Hope to see more
Will be watching for updates
_________________
Tencentlife said,
"So, now that you know what you're doing, go to town."
2010 GOLF TRENDLINE 2.5
1985 GL now with more! a 2.1L
H&R SPORT(RED) Springs FRONT , SLAM SPECIALTIES RE6 AIRBAGS REAR |
|
| Back to top |
|
|
narendra.vw
Samba Member
Joined: February 07, 2013
Posts: 440
Location: Bangalore India
|
| Posted: Sat Dec 13, 2014 11:22 pm Post subject: |
|
|
Im sorry for the late reply, just wanted to add some spice to the post before posting.
Thank you 240Gordy,
My views,
Every one is skilled in his own sense.
Spicy Update on shifter cable;
Yes, yes, the wait is over, I Just received the shifter cable(A big hug to my niece). 
1.Shifter cable along with more goodies. A spare Clutch plate(228mm), compressor, Rear Bilstein Shock Absorbers(HD) & Bazooka 300W
Old 1990 M year Shocks will be replaced immediately by Bilstein HD.
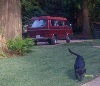
2. Showoff(resent forest venture pic near my farm). 
Project will not resume before Christmas & New Year celebration(family get together). |
|
| Back to top |
|
|
luVWagn
Samba Member
Joined: February 21, 2008
Posts: 1340
Location: Snoqualmie (WA)
|
|
| Back to top |
|
|
narendra.vw
Samba Member
Joined: February 07, 2013
Posts: 440
Location: Bangalore India
|
| Posted: Sat Dec 13, 2014 11:50 pm Post subject: |
|
|
| luVWagn wrote: |
| Will not resume, or will NOW resume? |
Project continues from next year. I need to change the coolant of my brain. It's heated up  |
|
| Back to top |
|
|
narendra.vw
Samba Member
Joined: February 07, 2013
Posts: 440
Location: Bangalore India
|
| Posted: Wed Jan 07, 2015 7:36 pm Post subject: |
|
|
Let this Year 2015, keep You all in Top Speed / low rpm.
I once again thank you all for the Inspiring comments.
luVWagn, Thanks for the eagerness.
Shifter cable Mod,
Snail pace progress.
New Cable details.
The new Cable rod thickness(5mm) & the previously made adapter thread didnt match. So, I had to revisit the Lathe shop.
By careful measurement, the new Cable rod guides Sleeve & rod length were customized.
Patience is the key here. Any slight mistake, and the Cable is as good as a scrap.
I made sure, the gear lever stroke length & selector length unchanged.
One week is over for the completion of such a simple work. Time flies.
Shifter cable M5 threaded rod on the Left
Shifter cable M6 threaded ring on the Right
.. Adapter bush with matching threads on the either side, right in the centre.
Same goes to both end of the Cables.
A modified stopper plate(GB side) for the new cables to fit in. Cable clamps useful for body mounting.
Clamps found in the lathe shop(cost-0$).
A bit of uncertainty on the New Cables.
New cables(unknown to me) itself is a uncertainty.
New Cable rod thickness is less by 1mm in comparison with shorter shifter cable rod thickness.
The Cable strength???
Cables are non lubricated. Should I lubricate it or not?
On a positive note,
The product is meant for the 4 wheelers Gear shifter.
The background of the Product marketing company seems to be reputed(Autozones.com).
the cable moment is 100% better than my old cable. The most Free cable moment I have seen.
The finished Product quality is beyond my expectation.
Please, someone enlighten me on these Cables.
First stage & mid stage is over.
The project last stage, fitting off the Shifter unit.
For further Shifter work, van needs to be on the ramp for a week. I hate to see my beast on a ramp. 
Some excessive thinking for you. 
Self designed folding, sliding & rotating user friendly Table.
Meant for the Front & the Mid row seats. I need a royalty from you folks.
My thoughts, the additional sliding option makes it much easier to use. Your thoughts?
Fabrication details.
MS steel pipe dimension details.
1.5 dia x 9 L sleeve with 2mm wall thickness.
1 dia x 17 L pipe with 2mm wall thickness.
1 dia x 3 L sleeve with 2mm wall thickness.
¾ dia x 21 L pipe with 2mm wall thickness
Plywood 13 x 21 sheet with ¾ thickness.
2 x 8 L, 1/4th thick flat for Body mounting.
Make sure , the sleeve wall thickness is min 2mm.
Hardware, two M8 thread knob, nuts, wing bolt & wood screws.
All the above dimension are as per my requirement. You can change the dimension to your requirement, but make sure the pipe slide in & out of the sleeve freely.
Also see to that, there is no play between the sleeve & the sliding pipe. Visuals should give you a better idea.
Visuals (remember my van is a RHD).
Dimension Details.
Absorb the T vertical, it has an angle app 30* at the top. The angle takes care of the of the Front seats back rest contours.
Three + one way compatible. Fourth, is for the external use. How?
Surprise, surprise.
Table on the Bubble, irrespective of vans parked angle details & finished Table fabrication work details in my next post.
Until then, these pics to keep you in company(sorry no CAD).
Yet to find a time slot for the van to be on the ramp. |
|
| Back to top |
|
|
insyncro
Banned

Joined: March 07, 2002
Posts: 15086
Location: New York
|
| Posted: Sun Jan 18, 2015 8:48 am Post subject: |
|
|
| I am working on a cable shifter as well. |
|
| Back to top |
|
|
narendra.vw
Samba Member
Joined: February 07, 2013
Posts: 440
Location: Bangalore India
|
| Posted: Sun Jan 18, 2015 8:58 am Post subject: |
|
|
| Thanks. I was feeling lonely, but not anymore. Please do share your mod. Good luck! |
|
| Back to top |
|
|
insyncro
Banned
Joined: March 07, 2002
Posts: 15086
Location: New York
|
| Posted: Sun Jan 18, 2015 9:03 am Post subject: |
|
|
I will when completed.
Thanks for the inspiration. |
|
| Back to top |
|
|
narendra.vw
Samba Member
Joined: February 07, 2013
Posts: 440
Location: Bangalore India
|
| Posted: Sat Feb 14, 2015 9:59 pm Post subject: |
|
|
One more Cable shifter Mod. Its a confidence booster for mine
Cable shifter update.
The Project has hit a minor Road block. The new Cables overall length is not what it claims to be. Its 2 short. Im bit disappointed. It affects the gear stick positioning. Most importantly free arm movement(long term shoulder fatigue).
1.Gear stick position as per my design. 2.Gear stick position moved back due to new Cable shorter in length. Your valuable opinion appreciated.
Keeping the originality as close as possible, minor changes has to be made in the Shifter unit.
No feed back yet on new Cables! so, my focus on new cables has changed .I have decided to rework on the design. The new design will incorporate both the cables to be adaptable(old or new).
1.Old & new Cable adaptable Design. The Design will allow the shifter unit to regain 1 inch.
Removing few bolts, the Cables can be replaced(old or new). GB & the Shifter unit linkage is undisturbed.
Old refers to the linking of two shorter Shifter Cable to makeup the length needed(my initial plan)..
Please let me know if I can go ahead with the new Cable.
Table Mod end results.
Small observation,
-Table tilting height has to be kept under +/-2. Beyond that the Wing bolt will lose its alignment.
- Greater Van angle, youll start feeding your ears.
- Easy Table movement even while seated.
- 13mm ring spanner a must to adjust the leveling of the Table
Work Details.
Explanation with visuals.
All parts were Powder coated & given some glamour
1. M8 Threaded rod of the Slider pipe inserted into the pre drilled hole of the wood. 2. The M8 threaded Bush levers inside face was coated with a sealant. 3. The bush was placed into the cut portion of the wood & screwed. The Slider pipe then rotated 360* till the gap between the pipe & the wood narrowed down to app 4mm.
1. The second lever was bolted on to the right side of the Slider pipe. A point was marked on the wood through the slotted side of the lever. A 8mm hole was drilled into the wood. A M6 threaded Bush was hammered into the wood which will be used by the Wing Bolt. 2.T vertical finds its place.
The unit is ready for the vans Table mount.
Table mount fitting details(made sure van was parked on a level ground).
Since, Van had a Modified Utility box below the passenger seat, access to fasten the mount with bolt & nut was possible.
1)1flat with a 6mm hole at the top along with a nut welded(useful where hand or the tool are not able to reach). 2.Carefully holes marked & drilled(paint scraped for proper sealant bonding). 3.Sealant used on the mounts surface(once it dries up it turns into rock solid).
Edit: Made sure the Table was parallel to the vans floor before drilling the holes.
1.Table mount, fastened onto the Body 2. Mount cover press fitted.
Table Utility option.
Table at rest, 2. Self lock option for Mid row(centre) & front (L/R) seats.
Table in check with the vans gradient angle.
This concludes Table Mod details.
Its so much satisfying, when the out come is every bit of your imagination.
I hope, my Utility Table project was interesting.
Thanks. |
|
| Back to top |
|
|
EL31415
Samba Member

Joined: December 13, 2009
Posts: 192
Location: Los Angeles
|
| Posted: Sun Feb 15, 2015 2:19 am Post subject: |
|
|
_________________
~~~~~~~~~~~~~~~~~~~~
1985 Westy |
|
| Back to top |
|
|
tjet 
Samba Member

Joined: June 10, 2014
Posts: 3533
Location: CA & NM
|
| Posted: Sun Feb 15, 2015 6:06 am Post subject: |
|
|
These taillights look good.
Anyone have the OEM part #'s?
|
|
| Back to top |
|
|
narendra.vw
Samba Member
Joined: February 07, 2013
Posts: 440
Location: Bangalore India
|
| Posted: Sun Feb 15, 2015 7:19 am Post subject: |
|
|
Thanks, EL31415.
Mr, tjet,
The tail lamp is from VW Golf(Rabbit) MK1
Its not a direct fit. It needs a skilled sheet metal worker.
Few more pics of its development are in the starting of my Thread.
One more pic with all the fittings completed. This Pic angle is my favorite.
1) The Air Scoop viewed from the rear. 2)The Back Wiper & Tail lamp are not a part of Vans OE. 3) Rear camera between the two number plate lights .
Alternative mechanical Brake switch
...64 LED clustered Third brake light
..........Brake lights are lit when brake applied
|
|
| Back to top |
|
|
narendra.vw
Samba Member
Joined: February 07, 2013
Posts: 440
Location: Bangalore India
|
| Posted: Tue Jun 30, 2015 5:48 am Post subject: |
|
|
Cable shifter update,
Im not confident with the cable I got & no feedback yet to give me confidence to go ahead. In fact the cable shifter fitting are still on the gearbox.
Shifter unit placement(note, the OE shifter rod is still in place).
Arrow indicates a hole needed for the shifter rod space inside the cabin.
Cup holder at its rightful place.
In the mean time. Some brain teaser!!
The picture bellow shows a exploded view of a unit. Once the parts are reassembled together & fitted, the parts as a Unit turn into a handy Tool of comfort for the Van user.
I call this Mother of all my Mod.
Just to make things more interesting, I wish you to solve the Puzzle by guessing the Tool.
Hint:-
--A universal Tool for all VW van models .
--The Unit fitment is inside the van but it has nothing to do with the Interiors.
-- The Mod will boost of being in Present generation.
Picture puzzle
The unit has been tried & tested. It worked beyond my expectation.
Good lock. |
|
| Back to top |
|
|
Gnarlodious
Samba Member

Joined: September 28, 2013
Posts: 2323
Location: Adobe Jungle USA
|
| Posted: Tue Jun 30, 2015 9:31 am Post subject: |
|
|
Electric sliding door latch?
_________________
Vanagon 83 diesel AAZ w/Giles injection, 5spd 4.57R&P+TBD and a '78 diesel Rabbit |
|
| Back to top |
|
|
Zeitgeist 13
Samba Member

Joined: March 05, 2009
Posts: 12115
Location: Port Manteau
|
| Posted: Tue Jun 30, 2015 9:56 am Post subject: |
|
|
| That's what I was thinking |
|
| Back to top |
|
|
narendra.vw
Samba Member
Joined: February 07, 2013
Posts: 440
Location: Bangalore India
|
| Posted: Wed Jul 01, 2015 6:17 am Post subject: |
|
|
Hi, Gnarlodious,
The power latch opening was done way long back. At a press of a switch the slider door latch unlocks.
Thanks for the reply.
Hi, Zeitgeist 13,
Thanking your reply I like to wait for few more. |
|
| Back to top |
|
|
Brandonfast
Samba Member
Joined: January 23, 2013
Posts: 20
|
| Posted: Wed Jul 01, 2015 6:23 am Post subject: |
|
|
| Automatic hatch operation? |
|
| Back to top |
|
|
newfisher
Samba Member
Joined: January 05, 2012
Posts: 1764
Location: The wet spot--Oregon
|
| Posted: Wed Jul 01, 2015 6:42 am Post subject: |
|
|
| Auto sunroof? |
|
| Back to top |
|
|
|


