| Author |
Message |
Signalocity
Samba Member
Joined: February 13, 2012
Posts: 573

|
 Posted: Mon May 05, 2014 6:53 pm Post subject: Posted: Mon May 05, 2014 6:53 pm Post subject: |
 |
|
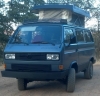
So time to get the engine and transaxle out of the van, along with the gas tank. Everything came out pretty smoothly and just in time to catch a failing coolant pipe. A little bit of rust on the gas tank mount, but nothing that will require any fab work. The two routing/spacers for the fuel tank vent lines were busted up, which seems to be fairly common from other pics I have seen. I will address this later on. The mounting straps were not rusted through, but they were well on their way to being so.
|
|
| Back to top |
|
 |
kbeefy
Samba Member
Joined: March 10, 2006
Posts: 600
Location: Central Oregon
|
| Posted: Mon May 05, 2014 8:19 pm Post subject: |
|
|
wish I had the patience to do a complete teardown. I imagine you'll have a nicer rig than any VW ever sold when your done!
_________________
86 syncro CHC, NorthWesty subbie 2.5, decoupler, locker, custom interior, 225/75r16 Duratrack's on CLK's, Toyo cabin heater, ARB fridge, 300w Zamp Solar, Gowesty bumpers/skid/rails, Fiama awning
'86 Syncro Westy. Stock for now.
2000 F350 7.3 CC LB 11' Northland Cabover
2006 Subbie OBXT
2002 Tacoma DoubleCab 4x4
1969 Mustang Basket Case 351c/FMX/9
http://kbeefy.blogspot.com/ |
|
| Back to top |
|
|
Signalocity
Samba Member
Joined: February 13, 2012
Posts: 573
|
| Posted: Tue May 06, 2014 8:23 am Post subject: |
|
|
| kbeefy wrote: |
| wish I had the patience to do a complete teardown. I imagine you'll have a nicer rig than any VW ever sold when your done! |
Well I hope so, I am going to give it my best shot anyhow.  |
|
| Back to top |
|
|
Signalocity
Samba Member
Joined: February 13, 2012
Posts: 573
|
| Posted: Wed May 07, 2014 8:57 am Post subject: |
|
|
The engine bay seemed to be to be more of an extension of the underbody to me, so I decided to keep it in the same color scheme. Another reason for staying with the lighter color on the underside is for visibility. Field repairs are so much easier when you can clearly see what it is you are working on, more so in poor light conditions. Even in a well-lit shop and on a lift, the dingy underside can be rather gloomy. All body and wiring grommets are being removed and threaded inserts are either being plugged or chased. I drilled out a 2 inch hole under the electronic junction box to afford me some better routing options for the wiring later on.
|
|
| Back to top |
|
|
danfromsyr
Samba Member

Joined: March 01, 2004
Posts: 15144
Location: Syracuse, NY
|
| Posted: Wed May 07, 2014 11:11 am Post subject: |
|
|
there is NOTHING crunchie about this van, it's nearly as clean as yoru shop floor..
I might not eat off of either of them, but either would be a fine place for a little nookie.
_________________
| Abscate wrote: |
| These are the reasons we have words like wanker |
|
|
| Back to top |
|
|
Signalocity
Samba Member
Joined: February 13, 2012
Posts: 573
|
| Posted: Wed May 07, 2014 12:40 pm Post subject: |
|
|
| danfromsyr wrote: |
there is NOTHING crunchie about this van, it's nearly as clean as yoru shop floor..
I might not eat off of either of them, but either would be a fine place for a little nookie. |
I was told surgery would probably be safe enough lol. |
|
| Back to top |
|
|
Signalocity
Samba Member
Joined: February 13, 2012
Posts: 573
|
| Posted: Thu May 08, 2014 7:27 am Post subject: |
|
|
I moved on to detailing the transaxle for a bit, in an effort to break up the monotony of scrubbing the underside of the van. A wire brush on the drill came in handy for removing a lot of the oxidization. But once again, mostly time and elbow grease. I removed the flanges, shift linkage and swapped out the hardware in preparation for refinishing. I also did this to get access to all of the case. The transaxle is going out for a rebuild, but I decided to paint it prior to sending it out. I got more than a few weird looks for this, but it is the only way to get it truly detailed (short of getting the empty housings back from the builder, which was not an option). Once I get it back from the rebuild, I will touch it up. I prefer paint, due to the porous nature of the material. All of the hardware, brackets and such I media blasted and took to my local metal refinishing place for zinc plating.
|
|
| Back to top |
|
|
joetiger 
Samba Member

Joined: January 27, 2005
Posts: 5078
Location: denver
|
| Posted: Thu May 08, 2014 7:45 am Post subject: |
|
|
Wow, nice work! If I ever got anything on my Vanagon that clean, I'd be afraid to get it dirty!
_________________
Joe T.
'86 NAHT Vanagon GL Syncro/ supercharged ABA 2.0 "Pigpen"
'04 GTI 1.8T
'04 Golf R32
"get metaphysical with it. if it's simply a means to get to and from places, it will let you down. if it becomes your zen, it can't fail you." -dabaron
"Still, it's good to be afield."--VWagabond
Available Now! Vanagon to Louisiana--A Two-Lane Reckoning Through Past and Present
www.josephtrussell.com |
|
| Back to top |
|
|
Steve Arndt
Samba Member
Joined: August 01, 2005
Posts: 1780
Location: Boise, Idaho
|
| Posted: Thu May 08, 2014 10:09 am Post subject: |
|
|
Impressive attention to the details. I can only imagine how many hours you have in this project so far.
Steve |
|
| Back to top |
|
|
Signalocity
Samba Member
Joined: February 13, 2012
Posts: 573
|
| Posted: Thu May 08, 2014 10:17 am Post subject: |
|
|
| joetiger wrote: |
| Wow, nice work! If I ever got anything on my Vanagon that clean, I'd be afraid to get it dirty! |
| Steve Arndt wrote: |
| Impressive attention to the details. I can only imagine how many hours you have in this project so far. |
Thanks! Yeah ... I get that quite a bit lol. I won't be afraid to drive it as intended though, rest assured. Every hour is being logged as well. |
|
| Back to top |
|
|
Steve Arndt
Samba Member
Joined: August 01, 2005
Posts: 1780
Location: Boise, Idaho
|
| Posted: Thu May 08, 2014 12:56 pm Post subject: |
|
|
| I bet you had some sore shoulder after cleaning up the underside of the van working upside down. |
|
| Back to top |
|
|
Signalocity
Samba Member
Joined: February 13, 2012
Posts: 573
|
| Posted: Thu May 08, 2014 2:01 pm Post subject: |
|
|
| Steve Arndt wrote: |
| I bet you had some sore shoulder after cleaning up the underside of the van working upside down. |
The first few times at it were pretty rough, I have to admit. It got to be second nature after a while though and did a great job at toning up my arms lol. |
|
| Back to top |
|
|
Phishman068
Samba Member

Joined: February 19, 2007
Posts: 1868
Location: Pittsburgh PA (ish)
|
|
| Back to top |
|
|
Farfrumwork
Samba Member

Joined: October 10, 2008
Posts: 692
Location: Mile High
|
| Posted: Thu May 08, 2014 8:44 pm Post subject: |
|
|


Holy crap. Nice work man! That is gorgeous.
_________________
sold  -> '85 Wolfsburg Syncro / 'Built' DOHC EJ25 (a great machine!) -> '85 Wolfsburg Syncro / 'Built' DOHC EJ25 (a great machine!)
'07 Legacy spec.B, road tuned stgII
'17 4x4 Sprinter, stone grey, SMB pop-top, on 33"s
"Blood stains, speed kills - Fast cars, cheap thrills - Rich girls, fine wine - I've lost my sense, I've lost control, I've lost my mind" |
|
| Back to top |
|
|
Signalocity
Samba Member
Joined: February 13, 2012
Posts: 573
|
| Posted: Fri May 09, 2014 5:55 am Post subject: |
|
|
| Phishman068 wrote: |
Well I spent the whole day cleaning and wire brushing my transaxle for coating as well.....
And I was so excited to post my progress.....
But WOW. Yours looks SOOOOOOOO much better.
I hang my head in defeat. : / |
Ha, Thanks! It did take me more than a day, if that helps.
| Farfrumwork wrote: |
Holy crap. Nice work man! That is gorgeous. |
I appreciate it! |
|
| Back to top |
|
|
Signalocity
Samba Member
Joined: February 13, 2012
Posts: 573
|
| Posted: Fri May 09, 2014 8:27 am Post subject: |
|
|
Generally I would not consider an engine swap and would make do with whatever a vehicle comes with stock, but the nature of this build had me thinking differently. I am also not a fan of aging 80s fuel injection. I did a ton of research on the many different options available and weighed all the pros and cons of what I was trying to achieve. I wont bother going into too much information on that, as it has been hashed out over and over again here in the forums. So sticking with the simple/reliable/detail theme, I opted for the Bostig conversion. Doing what I do, I can really appreciate the level of product, design and engineering they have put into their offerings. I located a factory long block, which was perfect for my needs. I wanted to trim out the engine to keep with the driveline theme. I also removed the front engine mount studs as they are no longer utilized and plugged holes with a couple of bolts for a cleaner look.
|
|
| Back to top |
|
|
Volkska
Samba Member

Joined: October 07, 2013
Posts: 106
Location: Central Jersey
|
| Posted: Fri May 09, 2014 9:59 am Post subject: |
|
|
Beautiful my man! Keep it up! I'm loving this thing
_________________
2011 VW GTi 6MT (The Daily)
2003 Golf 2.Sl0w (The Flaming Turd)
1997 VR6 motor awaiting some love and a Vanagon
1986 Honda Elitee 150 awaiting a title |
|
| Back to top |
|
|
insyncro
Banned

Joined: March 07, 2002
Posts: 15086
Location: New York
|
| Posted: Fri May 09, 2014 1:14 pm Post subject: |
|
|
I absolutely love seeing this attention to detail and that you chose Bostig.
Awesome 
Bostig Syncros drive really well  |
|
| Back to top |
|
|
Signalocity
Samba Member
Joined: February 13, 2012
Posts: 573
|
| Posted: Fri May 09, 2014 1:59 pm Post subject: |
|
|
| Volkska wrote: |
| Beautiful my man! Keep it up! I'm loving this thing |
| insyncro wrote: |
I absolutely love seeing this attention to detail and that you chose Bostig.
Awesome
Bostig Syncros drive really well |
Thanks! This is happening! |
|
| Back to top |
|
|
Signalocity
Samba Member
Joined: February 13, 2012
Posts: 573
|
| Posted: Mon May 12, 2014 6:47 am Post subject: |
|
|
Getting back under the van, I began cleaning out the fuel tank area. I had a broken bolt in one of the cage nuts from the gas tank strap that needed to be dealt with as well. I managed to get it drilled out, only to break off my reversing bit inside of it lol. I was able to get my air hammer on it and just busted it out of there (loudest thing ever). I will fit a nutsert to it later on. I have pulled all of the wiring up to the front diff area for the time being. The rust on the gas tank mount was minor and I was able to ziz it off with a flap disk and wire wheel. I threw in some better welds on the upper spring perches for fun, since they are more or less just tacked into place. The last picture illustrates the before/during/after process pretty well.
|
|
| Back to top |
|
|
|


