| Author |
Message |
NAES
Samba Member

Joined: September 10, 2003
Posts: 2120
Location: AREA-52 Southern Killafornia

|
 Posted: Mon Jan 05, 2004 9:29 pm Post subject: Narrowed Beam Tutorial (Super long post) Posted: Mon Jan 05, 2004 9:29 pm Post subject: Narrowed Beam Tutorial (Super long post) |
 |
|
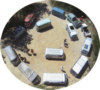
OK, here goes. I just got finished narrowing a beam and dropped spindles for "Bobby Hollywood" of the BDM and I'm going to attempt to give a step by step.
This beam is for stock wheels with lopro tires on it. We only narrowed 2" total, just enough to clear the step in the wheelwell. If you need a narrower beam then your better off going for one of those ones with the lasercut sideplates.
Anyway, you start by yanking your beam and disassembling everything. Remove the spindles, trailing arms, leaves and center steering link if the bushings are bad (these were not)
Next your going to inspect your Bakelite bushings and if they are not cracked or too worn your going to take a pipe or socket the same ID as the beam tubes and knock them in 1 1/8" in preparation for the cutting
Then you carefully measure 1" from the ends and mark and cut the inch off. A trick to use is to cut a little, measure and cut some more to ensure accuracy.
If you look at the pic, some of the shock tower has disengaged from the beam tubes. I/We welded a ring around the end and put the heat up as high as possible then ground it back down as extra insurance. Probably not necessary but done none the less.
Now reinstall the leaves and the trailing arms in preparation for offset measurements. A little trick I use is to grind off the edges of the leaves so they go in the trailing arms easier as seen in the pic. I clamp the exposed leaves w/ vise grips and then measure the offset (between 5 and 9mm). If you do not know what I'm talking about look it up in the Idiot Book.
Now you take a drill the same size as the hole in the trailing arms and dimple the leaves. Use a new bit as it tends to get wasted and use alot of oil. If your worried about the threads use some tape on the bit but it is not necessary to do. Then replace the Allen studs and recheck your measurements. The 5-9mm is critical for proper camber alignment. Once done you can cut off the excess leaves if you want and run a weld across them to keep em together
Now weld a shock mount tab 1" closer in and back a little bit to keep the shocks as vertical as possible. No need to get carried away though.
And heres the finished beam ready for disassembly and paint if desired.
I will continue to edit this post as needed to clarify anything. PM or post if you have any questions. Good luck.
_________________
Barndoor Mafia
Box On Wheels
SBS #00 |
|
| Back to top |
|
 |
MoneyMike
Samba Member
Joined: September 16, 2003
Posts: 415
Location: West Cochina!
|
| Posted: Mon Jan 05, 2004 10:44 pm Post subject: |
|
|
Kick Back Ferret!
Ferret Don't Flair It! |
|
| Back to top |
|
|
DubStyle
SBS Hit Squad

Joined: July 26, 2003
Posts: 6250
Location: SBS headquarters: Missery
|
| Posted: Mon Jan 05, 2004 10:57 pm Post subject: |
|
|
Sean you rock brother! This has to be the best step by step I seen on narrowing a bus beam! I can't wait for my Bus to hit the island for some narrowing and spindle dropping. Got me some stock 15"s today. Hell yeah thanks for the pics and tutorial!
_________________
Anthony
SBS #1
SBS #1 on FB
"The original & best lowered Split Bus website/club" |
|
| Back to top |
|
|
NorCalNick
Ain't yo baby daddy

Joined: December 07, 2002
Posts: 1582
Location: San Jose, Ca.
|
| Posted: Mon Jan 05, 2004 11:11 pm Post subject: |
|
|
yeah bro, you gave me confidence i can do my own beam.
_________________
When I'm done punching the clock, I start punching the clown. |
|
| Back to top |
|
|
rizzag
Now Wut?

Joined: April 19, 2001
Posts: 3116
Location: Keizer, OR
|
| Posted: Tue Jan 06, 2004 10:02 am Post subject: |
|
|
******this only works this way on early beams with bakelite bushings(63 and earlier i believe) later beams(64 to 67) with needle bearings have a ledge behind them and can not be knocked in the beam******
just didnt want someone with a later beam getting into something they cant finish or worse.
jeff
_________________
flossin, tossin, dippin, and trippin |
|
| Back to top |
|
|
j.pickens
Samba Member
Joined: December 03, 2002
Posts: 9789
Location: Exit 7, New Jersey
|
| Posted: Tue Jan 06, 2004 1:37 pm Post subject: |
|
|
Is there a quick way to identify which beam you have without dissassembly?
Many buses have been swapped around so much, you can't tell by just the year of the chassis.
_________________
Founder and Chairman Emeritus, ECMSAS
BBX BBXII and BBXXI Long Distance Award Winner
| BeaterBarndoor wrote: |
i wish more people would actually drive their vws rather than just talking about what they have in the garage. |
| Red Fau Veh wrote: |
If you've seen one sunroof swivel seat kombi, you've seen them all!  |
|
|
| Back to top |
|
|
rizzag
Now Wut?
Joined: April 19, 2001
Posts: 3116
Location: Keizer, OR
|
| Posted: Tue Jan 06, 2004 2:10 pm Post subject: |
|
|
an easy way to tell is by looking at the center pin housing. early style is round and the late style is kind square with an indentation in the center where the greese zerk is.
_________________
flossin, tossin, dippin, and trippin |
|
| Back to top |
|
|
campingbox 
Samba Member

Joined: November 14, 2000
Posts: 10196
Location: Petaluma, CA
|
| Posted: Tue Jan 06, 2004 4:37 pm Post subject: |
|
|
See the two verticle pieces of metal between the two beams?
The early ones (shown) have these, later ones do not. |
|
| Back to top |
|
|
Peter - Belgium
Samba Member

Joined: December 22, 2003
Posts: 762
Location: Brussels - Belgium
|
| Posted: Thu Jan 08, 2004 3:56 am Post subject: narrowing the beam. |
|
|
Very good and usefull post!!!
I still have some extra questions:
- You are only pushing in the bakelite parts 1 1/8 inch in order to cut off 1 inch. Will you not destroy the bakelite parts while welding since it is only 1/8 inch removed from the hot welding area?
- If I want to push it in further, how can I get it back out?
- How do you prefent the beamtube from distorsion so the arm would block instead of rotate freely?
- Do you happen to have a picture of the ring you welded on the cutted area?
Thanks,
Peter
Belgium. |
|
| Back to top |
|
|
diy570
Samba Member

Joined: September 19, 2003
Posts: 1062
Location: Maggie Valley, NC
|
| Posted: Thu Jan 08, 2004 6:53 pm Post subject: |
|
|
| also if you are gonna tear it this far down, you might want to consider making it an adjustable beam while you are at it. for an extra hour or so of work its well worth it. |
|
| Back to top |
|
|
NAES
Samba Member
Joined: September 10, 2003
Posts: 2120
Location: AREA-52 Southern Killafornia
|
| Posted: Sat Jan 10, 2004 1:53 am Post subject: |
|
|
| Quote: |
I still have some extra questions:
- You are only pushing in the bakelite parts 1 1/8 inch in order to cut off 1 inch. Will you not destroy the bakelite parts while welding since it is only 1/8 inch removed from the hot welding area?
- If I want to push it in further, how can I get it back out?
- How do you prefent the beamtube from distorsion so the arm would block instead of rotate freely?
- Do you happen to have a picture of the ring you welded on the cutted area?
|
Didn't think the weld heat would be an issue so I never considered it.
To get the bushings to come back out you would have to use some kind of puller that doesn't put a bunch of stress on one area of the bushing. I guess I wouldn't recommend a cotter pin puller as my tool of choice. I would probably remove the bakelite bushings If I was concerned with the heat in the first place
Distortion? From the weld? I'm unclear what you mean but since the bakelite bushing is keeping everything round there has never been any issue on the beams that I have done.
Sorry, I don't have a pic but all you need to know is that you send the welder up on a high heat to get the good penetration. You will be grinding the face down and only utilizing the benefit of the weld that has penetrated and formed a bead on the oter side of the shock tower. But in my opinion, this was an unnecessary step. I just wanted to do it as a measure of safety but still I'm not sold on the idea.
Good Luck on your beam. Don't worry about it, it''ll all work out fine as long as you take your time and do a little bit at a time.
Making it adjustable kinda went without saying. I was only addressing the narrowing part. Get to work on your dropped spindles while your at it. If you don't want to do it yourself, get em done and do it all at the same time. nothing more frustrating than pulling the front beam out or spindles off time after time.
_________________
Barndoor Mafia
Box On Wheels
SBS #00 |
|
| Back to top |
|
|
MoneyMike
Samba Member
Joined: September 16, 2003
Posts: 415
Location: West Cochina!
|
| Posted: Sun Jan 11, 2004 7:55 pm Post subject: |
|
|
| Ferret Dont Flair It! |
|
| Back to top |
|
|
DubStyle
SBS Hit Squad
Joined: July 26, 2003
Posts: 6250
Location: SBS headquarters: Missery
|
| Posted: Tue Feb 10, 2004 5:02 am Post subject: |
|
|
Up for you Narrow'd Fanatics!
_________________
Anthony
SBS #1
SBS #1 on FB
"The original & best lowered Split Bus website/club" |
|
| Back to top |
|
|
Skim
Rants Master

Joined: April 15, 2001
Posts: 17082
Location: GFK 31 Year Vet
|
| Posted: Tue Feb 10, 2004 6:25 pm Post subject: |
|
|
very informative. Im suprised I missed it. Now since a barndoor beam is alot different, Im wondering how difficult it would be to narrow one.
_________________
GFK
Samba since before the towers collapsed. Still here.
1953 Kabriolet
1954 Sunroof
1959 Lowlight Ghia vert
1960 Lt Grey Double Cab SMZ LEGIT
1963 Deluxe Turkis Walk Thru 15 Window OG Paint |
|
| Back to top |
|
|
Long-roofs
Samba Member

Joined: March 20, 2002
Posts: 2295
Location: Millwood, Wa
|
| Posted: Tue Feb 10, 2004 6:39 pm Post subject: |
|
|
A barndoor beam would be the same depending how narrowed you go, like the later buses. The problem for me is I didn't get trailing arms or spindles with my 2/55 bus. All I have is a beam and torsions, only 4 bars for each tube. That's why my bus is getting a '67 beam.
_________________
---
I have been on a treadmill drinking vodka, maybe more than once.
"No, I do not own a bleepin' leaf blower"
-- |
|
| Back to top |
|
|
15window
Samba Member
Joined: June 22, 2003
Posts: 89
Location: Texas
|
| Posted: Thu Feb 12, 2004 1:28 am Post subject: |
|
|
NAES,
Great thread and really appreciated, I have an early beam that I wanted to narrow but my bakerlite outer bushes are shot, any idea where or if you can get new ones, can't seem to find any in the UK.
Many thanks
Alex |
|
| Back to top |
|
|
DubStyle
SBS Hit Squad
Joined: July 26, 2003
Posts: 6250
Location: SBS headquarters: Missery
|
| Posted: Thu Feb 12, 2004 4:35 am Post subject: |
|
|
Buy the material and have a local Machine Shop cut you some new ones.
_________________
Anthony
SBS #1
SBS #1 on FB
"The original & best lowered Split Bus website/club" |
|
| Back to top |
|
|
The Milky Barndoor Kid
Samba Member
Joined: February 15, 2004
Posts: 84
Location: under the bus
|
| Posted: Sun Feb 15, 2004 10:07 am Post subject: |
|
|
Very good thread,thanks for taking the time to show us how to do this 
Q) I have a 67 bus but I can't push in the bakelite sleeves in because of the needle bearings,are there any other was of doing this narrowed beam to a 67 bus?
thanks
karl |
|
| Back to top |
|
|
NAES
Samba Member
Joined: September 10, 2003
Posts: 2120
Location: AREA-52 Southern Killafornia
|
| Posted: Sun Feb 15, 2004 4:42 pm Post subject: |
|
|
Theres a thread for a needlebearing beam out there. Way better than mine
_________________
Barndoor Mafia
Box On Wheels
SBS #00 |
|
| Back to top |
|
|
cage66
Samba Member

Joined: January 14, 2005
Posts: 2039
Location: reno,nv. cultwagen.com
|
| Posted: Thu Jun 11, 2009 1:54 pm Post subject: Re: Narrowed Beam Tutorial (Super long post) |
|
|
| NAES wrote: |
| Now you take a drill the same size as the hole in the trailing arms and dimple the leaves. Use a new bit as it tends to get wasted and use alot of oil. If your worried about the threads use some tape on the bit but it is not necessary to do. |
Are you drilling the dimples with the arms in?
If so you can also get a bus lug nut and drill a hole in the middle them screw it in where the grub screw goes and use it as a guide. Then there is no way to distort the threads |
|
| Back to top |
|
|
|


