| Author |
Message |
BetaVan
Samba Member
Joined: September 14, 2011
Posts: 209
Location: Redwood City, CA

|
 Posted: Tue Jul 21, 2015 12:20 am Post subject: Broken Alternator Studs and New GoWesty Bracket Posted: Tue Jul 21, 2015 12:20 am Post subject: Broken Alternator Studs and New GoWesty Bracket |
 |
|
One of those days. It was supposed to be fun. Squealing from the alternator made me check under the hatch, and to my dismay, the only thing holding my alternator on was the adjustment bracket. Both bolts are sheared off, and the new gowesty bracket is busted clean in two. I also had the supporting bracket in place, so I am surprised this happened. What gives? Ah, who cares
How the hell do I get these studs out? One is deeper than flush and the other has very little sticking out. I've seen some posts about the quick center bolt drill system. Is that something a first timer can do? I can't weld, so that's out. The van is very close to the shop, so that's obviously my default option. Can I do this myself? Little apprehensive about drilling.
Thank goodness my 100 mile tow with AAA was there. Funny enough, I called Van Cafe, as this happened at a friends in Santa Cruz, and they said they weren't taking new work right now. And B, even if they were, they wouldn't take this job! Ha, I guess this job really sucks.
_________________
84 Westfalia
Vanistan 2.2 Powerplant
WBXhaust + External Oilcooler |
|
| Back to top |
|
 |
davideric9
Samba Member
Joined: January 21, 2009
Posts: 1001
Location: Oakland CA
|
| Posted: Tue Jul 21, 2015 12:51 am Post subject: |
|
|
Good chance the broken bolts will come out with a little finesse. There may be no tension on the remainder of the bolts. Try a sharp pick or awl or scribe to get them to spin out. Drilling is usually for rusted in or seized bolts.
_________________
1987 Syncro Westfalia, stock (bought 1994)
1986 Syncro Westfalia SVX, 3 knob (bought 2008)
1987 Westfalia (bought 2010)
1988 Wolfsburg GL (bought 2012) |
|
| Back to top |
|
|
djkeev
Samba Moderator

Joined: September 30, 2007
Posts: 32625
Location: Reading Pennsylvania
|
|
| Back to top |
|
|
Steve M.
Samba Member

Joined: July 30, 2013
Posts: 6832
Location: Fort Lauderdale, Fl.
|
| Posted: Tue Jul 21, 2015 6:56 am Post subject: |
|
|
If those bolts are not so tight that you can get a little movement out of them this is something worth trying to see it it will work. I haven't tried it yet as I just thought of the possibility.
Spray the ends of them with brake cleaner and let air dry.
Get 2 smaller diameter long, long bolts-something you can easily grab with your fingers considering the location.
Take a file and dress the end to match the surface of the broken bolts.
Put a drop of super glue on the end of the smaller bolt and stick it to the end of the broken bolt and hold until it dries and holds.
If the broken bolts are loose at all you might get really incredibly lucky and they will turn out.
If you're not lucky with them...you've read the other posts on the pita they are! It's worth a shot, what have you got to loose! |
|
| Back to top |
|
|
T3 Pilot
Samba Member

Joined: January 10, 2011
Posts: 1507
Location: Deep South of the Great White North
|
| Posted: Tue Jul 21, 2015 7:18 am Post subject: |
|
|
Mornin' BetaVan,
We use the quikcenter frequently for broken fastener extraction. Works every time. In this specific location you will need a 90 degree drill adapter. CAUTION: you are drilling into the area of the water jacket, so mark your depth.......
If you are doing this for the very first time, then you should practice on an old piece of junk like an old lawnmower.
Hey good luck and keep us posted....
Pete.
_________________
1988 Vanagon
The most important part in every vehicle is the nut behind the wheel...... |
|
| Back to top |
|
|
61Scout
Samba Member

Joined: November 06, 2011
Posts: 1297
Location: Shoreline/Yakima WA
|
|
| Back to top |
|
|
Huxmobile
Samba Member
Joined: June 16, 2008
Posts: 141
Location: SF Bay area
|
| Posted: Tue Jul 21, 2015 9:26 am Post subject: |
|
|
Bummer, and I've been there and made a mess of this similar situation. First timer too, but I was able to resolve it, so relax, think it thru and take your time. Move PS pump and reservoir out of the way to give yourself lots of room.
Before resorting to extractor drill bits, see if you can get them to release and spin out as others have suggested. Maybe a whack with a cold chisel will help. Though there is not much room for that. Mine were more stubborn.
I was able to use an extractor bit on the right bolt with no problem. After it grabbed, the remaining bolt spun right out. The left sheared bolt was another story. What I learned: Make sure to hit it with a pointed center punch, in the center of the sheared bolt. Then use a 90 degree drill (or adapter) when drilling your pilot hole so it goes in straight! The extractor bolt should only be used with a T-shaped tap handle, to manually drive it in.
Post some pictures and maybe others can help with more ideas.
I'm in RWC also and would be happy to take a look. PM me.
DJ
_________________
87 Westy 2.1L, manual (sold) |
|
| Back to top |
|
|
BetaVan
Samba Member
Joined: September 14, 2011
Posts: 209
Location: Redwood City, CA
|
| Posted: Tue Jul 21, 2015 12:21 pm Post subject: |
|
|
Thanks for all the input everyone. I just went down to the shop this morning. We talked about different options, and in the end I told them to do what they thought would be the strongest and longest lasting option. Options are re-welding the bracket and then adding on a lower support bar running from the bottom of the alternator adjustment bracket to bottom alt bracket, pulling the studs, replacing with new ones and adding on a new support bracket + lower arm support, etc
After looking at time involved + the possibility of catastrophic failure if I were to pierce the engine case, and the fact that the Quick Center tools are $150 + new right angle drill at $$$, it's going to be the same $ just to have them do it and get it done.
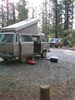
Attached are some pictures just to prove it happened. And I am not sure if I stated that the bracket sheared or the support, but it's definitely the alternator bracket fix kit supporting the bracket.
http://www.gowesty.com/ec_view_details.php?id=4454&category_id=&category_parent_id=
Should I contact GoWesty just to let them know this happened? I don't know if the bracket was made for this kind of event, but I kinda thought it was.
Anyway, it's only money 
Here's the bracket support piece
And the studs. One is flush and one is poking out a bit.
_________________
84 Westfalia
Vanistan 2.2 Powerplant
WBXhaust + External Oilcooler |
|
| Back to top |
|
|
Ahwahnee
Samba Member

Joined: June 05, 2010
Posts: 9808
Location: Mt Lemmon, AZ
|
| Posted: Tue Jul 21, 2015 12:55 pm Post subject: |
|
|
You should definitely advise GoWesty of what happened.
It may be a case of part failure that in turn put stress on their bracket that was beyond what it was designed to do.
You may find they are willing to replace your bracket in exchange for the return of the one that broke just so they can examine it. Even if the failure was something beyond their control or caused by another problem - they may want to see just what occurred.
I have used their bracket since it was first introduced (about 10 years ago?) with no problem and likely the benefits mentioned in the ad. |
|
| Back to top |
|
|
61Scout
Samba Member
Joined: November 06, 2011
Posts: 1297
Location: Shoreline/Yakima WA
|
| Posted: Tue Jul 21, 2015 10:26 pm Post subject: |
|
|
Betavan, how long have you had the GW bracket installed? Did you install it yourself? Did you torque it? Loctite it?
I'm not an engineer, and I know there are members here with engineering backgrounds, but to me that looks like a break in the metal caused by vibration. Like the bracket was worked back and forth until the metal fatigued enough to let go. It's hard to see, but it also looks like there is no radius on the inside corner of the GW bracket, which may have contributed to a failure. This leads me to believe the two nuts underneath the bracket were overtightened, things got hot and the studs let go. Or the two nuts underneath were left loose or came loose, and in turn all of the tension was placed on the GW bracket. Just a theory.
I'd be interested to see if the holes on the original bracket became elongated or show signs of movement prior to the failure also. It's a strange failure in my opinion. x2 on contacting GW and working with them on this. And when it does start going back together, I'd take an extra long look at the alignment.
-Kevin
_________________
1986 Westfalia Weekender Wolfsburg, RJE 2.3
1985 Tin Top, Subie 2.2 + 5MT
Floppy Mirrors no more: http://www.thesamba.com/vw/forum/viewtopic.php?t=653018&highlight=
Remove the front spindle nut with ease: https://www.thesamba.com/vw/forum/viewtopic.php?t=679567&highlight=
Remove the rear wheel bearing housing without messing with the big 46mm nut: https://www.thesamba.com/vw/forum/viewtopic.php?t=679507&highlight=
-Nec Spe, Nec Metu |
|
| Back to top |
|
|
djkeev
Samba Moderator
Joined: September 30, 2007
Posts: 32625
Location: Reading Pennsylvania
|
|
| Back to top |
|
|
BetaVan
Samba Member
Joined: September 14, 2011
Posts: 209
Location: Redwood City, CA
|
| Posted: Wed Jul 22, 2015 10:19 am Post subject: |
|
|
| Quote: |
Betavan, how long have you had the GW bracket installed? Did you install it yourself? Did you torque it? Loctite it?
|
The bracket has been on for about a year. I did install it myself. I did not use Loctite, as at the time I didn't know that was something I should have done. I actually lost the directions to the bracket install before doing it, but went ahead with it, as it seemed pretty straight forward. Don't have a torque wrench, and yes, things could have been overtightened. That said, I didn't gorilla it down.
Looking at the orientation of the break, I think the studs went first and the torque of the alternator, pushing up and towards the rear of the van, snapped the bracket.
I contacted GW and Lucas responded, kindly suggesting that it could have been what you mentioned, or the resonance of the alternator itself was the right frequency to help work things loose and rattle free over time. He offered to replace the bracket fix kit if I wanted to replace the alternator + bracket. Since it's already at the shop being fixed, I don't think I'll pursue that option.
One more thing
I tensioned the belt some months ago, slightly. But, with GW's main alternator bracket being re-inforced with a cross piece/brace instead of the piece of crap L-angled bracket that VW installed, it's impossible (or near to) to get at the bottom bolts - to loosen and then re-tighten after tensioning - without taking the coolant pipe off. Maybe that slight bit of lateral force helped things along?
I'll drop by the shop today and see how it's going.
_________________
84 Westfalia
Vanistan 2.2 Powerplant
WBXhaust + External Oilcooler |
|
| Back to top |
|
|
davideric9
Samba Member
Joined: January 21, 2009
Posts: 1001
Location: Oakland CA
|
| Posted: Wed Jul 22, 2015 8:56 pm Post subject: |
|
|
Not gowesty bracket, but years ago I had bracket break, then welded, reinstalled, and bolts broke. Had this fixed by shop and then bolts broke again. Had a buddy fix this and he used bolts with larger shoulder, locktite the shoulder to the bracket (no locktite on the threads). When the bolts broke again, the head were still glued to the bracket, proving that the bolts never came loose, it was the vibration that broke the bolts. Replaced the bracket with new and replaced the alternator. NO locktite. Its been going strong for 10 years, no problems.
_________________
1987 Syncro Westfalia, stock (bought 1994)
1986 Syncro Westfalia SVX, 3 knob (bought 2008)
1987 Westfalia (bought 2010)
1988 Wolfsburg GL (bought 2012) |
|
| Back to top |
|
|
BetaVan
Samba Member
Joined: September 14, 2011
Posts: 209
Location: Redwood City, CA
|
| Posted: Thu Jul 23, 2015 9:02 am Post subject: |
|
|
| Quote: |
| proving that the bolts never came loose, it was the vibration that broke the bolts. |
So interesting davideric9. I will definitely be keeping an eye on things moving forward (and backwards too!)
When this whole ordeal happened, I was pretty bummed. It's been a little bit of this and a little bit of that for what seems like forever. Transaxle last year, rotors and pads this year, new tires, water pump has failed, alternator, and my front ends now needs some love - snapped drop links. So why the hell was I on GW last night looking at new bumpers?! I just can't see myself driving anything else. I can haul sheets of plywood, my bees, hundreds of pounds of honey, my little one
It just makes sense (when things are good).
Here's to the journey!
_________________
84 Westfalia
Vanistan 2.2 Powerplant
WBXhaust + External Oilcooler |
|
| Back to top |
|
|
yellowjacket
Samba Member
Joined: January 14, 2007
Posts: 141
Location: NCWA
|
| Posted: Thu Jul 23, 2015 9:52 am Post subject: |
|
|
My GW alternator bracket also broke like the OP's bracket. I didn't have broken bolts, however the long through mounting bolt was slightly loose. Neighbor welded the bracket for me and advised that I get a new one.
I took the alternator to the FLAPS to check output and see if one of the bearings was bad. Tech said it sounded like the rear bearing was making noise. Took it apart and found it was the front bearing, Possibly this is what caused vibration that lead to failure of GW bracket.
Replaced the bearings in the alternator and voltage regulator installed everything back in place. Have a new bracket in hand, will replace next time I pull the van into the shop for maintenance. Every time I take the deck lid off I grab the alternator and check for movement. And check the bolts for tightness.
The bracket did not have any flaws that were visible along the break line, it was a vibration failure due to loose mounting bolt and/or bearing.
_________________
86 Syncro Westy - Bostig RG11
71 Squareback |
|
| Back to top |
|
|
BetaVan
Samba Member
Joined: September 14, 2011
Posts: 209
Location: Redwood City, CA
|
| Posted: Fri Jul 24, 2015 12:23 pm Post subject: |
|
|
Yep, guess vibration was the culprit. Nuts came off and then the studs sheared, then the bracket. My shop re-welded the fix it bracket and fabbed a new brace that attaches to the lower tension bar bolt. It's pretty bomb proof now. I'll post a few pictures when I get her back after the front end work is done. Should be around Tuesday.
_________________
84 Westfalia
Vanistan 2.2 Powerplant
WBXhaust + External Oilcooler |
|
| Back to top |
|
|
syncrodoka
Samba Member

Joined: December 27, 2005
Posts: 12006
Location: Santa Cruz, CA
|
| Posted: Fri Jul 24, 2015 1:45 pm Post subject: |
|
|
| GW's bracket is made of stainless steel. Stainess steel tends to shear while mild steel would deform long before failure. |
|
| Back to top |
|
|
BetaVan
Samba Member
Joined: September 14, 2011
Posts: 209
Location: Redwood City, CA
|
| Posted: Fri Jul 24, 2015 10:13 pm Post subject: |
|
|
Well, it was true to form!
_________________
84 Westfalia
Vanistan 2.2 Powerplant
WBXhaust + External Oilcooler |
|
| Back to top |
|
|
syncrodoka
Samba Member
Joined: December 27, 2005
Posts: 12006
Location: Santa Cruz, CA
|
| Posted: Fri Jul 24, 2015 11:39 pm Post subject: |
|
|
This is a common issue with stainless hardware. Beyond the galling issue the strength of stainless hardware is equivalent to a grade 2 steel bolt. I have seen stainless bolts fail many many times.
If they want to improve their product changing the material should be on the top of their list. |
|
| Back to top |
|
|
djkeev
Samba Moderator
Joined: September 30, 2007
Posts: 32625
Location: Reading Pennsylvania
|
|
| Back to top |
|
|
|


