| Author |
Message |
pyrOman
Fire Master

Joined: July 21, 2003
Posts: 12409
Location: Over 2002 posts deleted!

|
 Posted: Thu Aug 07, 2014 6:38 am Post subject: What to do if fuel tank breaks!?! Posted: Thu Aug 07, 2014 6:38 am Post subject: What to do if fuel tank breaks!?! |
 |
|
DON'T LET IT BREAK!!!!! 
But we all know that some times $H1T happens. 
It's always sweet when things breakdown close to home. Easy walk home, or cheap tow and so on. But when a breakdown happens far enough from home that it is impossible and/or expensive to tow or leave behind, you have to come up with something so as to get your bus home with you no matter what!!! 
In my case, after driving some 500 miles overnite, we came to a HAZMAT road closure just 13 miles short of our detination!!! Trying to find an alternative place to camp we took a long assed washboard road. The placed sucked and after driving back out of it, my awesome 17.5 gallon aluminum gas tank did not like. It CRACKED at some point. So small a crack that it was dripping slowly and the mess seeped into the bus making it impossible to sleep in it the first night. I turned it around so as to let it leak out the back and not anymore into the bus. Overnight it was still leaking! We asked the camp manager if they had some gas jugs available and they could have FREE gas. Of course they did! After siphoning nearly all the gas out, it still was leaking! So took Turbo_g's advice to punch a hole on it. It could not make it any worse and I managed to "save" a little of the gas left. So then I had to come up with some "fix" in order to drive the Dormy up the 13 miles to the lakes. Using one of the 2.5 gallon jugs I always carry in the trailer, figured a way to "hose" it while preventing any "spillage" and tied it in the engine compartment. After easing it to camp I had to come up with a better idea. 
Punched hole to finish emptying the tank before taking another drive.
First rigging to get to camp.
Options now were from locating a fuel tank up in there thar parts, which would require an engine drop-tank-swap process, to just "jug it" home. The drive back 85 miles to Bishop (best chance to find one) proved fruitless. So I bought a couple of 5 gallon jugs, some gas line and put on my McGivan hat. 
Here's the first attempt at 10 gallons. A bit safer since the jugs are not in the engine compartment.
Packed and ready to go!
That set up did not work well. Apparently the pump could not pull from both jugs at the same time and started drawing from one more than the other. Also, the spare tire cover "pinched" the gas line so we had to address that situation too. Once that was taken care of, I could drive 60 to 70 miles on a single jug (some 4.5 gallons) and either swap jugs or just stop at a station and fill up. 
After the ordeal, actually while at it, I've dicided to just replace the tank with a phatchick juan. Cannot see myself going from 17.5 gallons to just 10. Hell! I'd be stopping at every other gas station with that!
Though at first it seemed like I'd be cheet-outta-luck, with call after call of negative feed back, there was "some" hope. The top suppliers do not even list one, and we all know that junkyards are NOT allowed to sell them. At first, VeeParts said they'd try to contact one of their suppliers and to call back. Randee Randar gave me a number too. Called that and the nice fellow told me that "nobody is reproducing bay window tanks!" since no one really cared for phatchicks. But he said he may have one available, just not with him, somewhere in the high desert. VeeParts "could" have one but it would get here Tuesday. Almost rethinking yet another custom tank or reparing the aluminum juan, called VeeParts and he said "You know, after talking to you, I remembered having one here. So I looked for it and found it. $250!" I replied, "I'll be right over!!!!" 
Had already priced tanks. Split window 10 gallon tank is $170 just plain without sender and fuel tap. After market tanks in the Classic Trucks magazine I recieve start at around $215. Senders are about $50. The juan I got had both tap and working sender!!! It is used but looks almost like new and I noticed no rust inside it!
Now, the main reason I wanted to start a thread on this is because I "thought" this tank would almost fit right in since the swap is talked about so damn much. Well, as Ahnold would say "let me tell you somming!" it was a hella process!!! Spent half Saturday and the whole day Sunday getting it to fit in "right". It is too tall so I had to "squeeze" it down some. Crunch it, is more like it. Then to secure it properly I made straps and used some rubber strips around wherever it would go against the body. Ah, yes, the body panels... You'll need a BFH to get it to go where it is supposed to go! It also will help to already have a HUGE opening hatch like my Dormy has! 
Like with my issues, this is the perfect time to do as I did and goop the hell out of the panels where they connect to one another with seam sealer!!! It happens that they did use seam sealer in the engine compartment but after some 40 plus years, it has gotten hard, brittle and cracked to the point of, well, NOT sealing! So when your tank leaks, the gas will seep into the bus. I'll start by showing that issue:
The straps:
Tank compressed:
It now clears the top:
Do not bother buying the "correct" fuel tap area seal and/or the pads where your old tank sat. This tank will not come near any of it as it sits higher. Here's where it sits. Also "bumps" against the front panel, even after pounding the crap out of it, so I put some rubber strips there too.
After going back to VeeParts for the "correct" seal, what I got was a roll of rubber sealing strip. Told to just make it out of it! 
Ended up using a lot of the strip to "build up" on it, a good inch or so, in order to get it to seal.
Here's the tank strapped down:
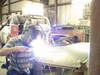
Having a welder is also good in order to adapt you stock filler neck to the phatchick tank! BTW, it's a little over 2 and a quater inches so I had to go to NAPA and got 2 feet of 2.25" filler neck hose... $16.+ per foot!!!! 
Here's the end product:
_________________
Some people are so busy being clever they don't have time enough to be wise. |
|
| Back to top |
|
 |
SkooobaSteve
Samba Member
Joined: March 23, 2005
Posts: 3152
Location: Dothan Alabama
|
|
| Back to top |
|
|
pyrOman
Fire Master
Joined: July 21, 2003
Posts: 12409
Location: Over 2002 posts deleted!
|
| Posted: Thu Aug 07, 2014 9:31 am Post subject: |
|
|
| YOUBUGME2 wrote: |
| Wow what a head ache looks like it came out all right though. Did you just plug the vent line holes in the tank. |
Yes, indeed! Not a walk in the park at all! And yes, that's a plug on the vent. Notice I kept the "early" filler neck with it's vented cap.
_________________
Some people are so busy being clever they don't have time enough to be wise. |
|
| Back to top |
|
|
quartermilecamel
Samba Member

Joined: April 16, 2008
Posts: 3929
Location: ohio
|
| Posted: Thu Aug 07, 2014 10:20 am Post subject: |
|
|
bummer to lose 17.5 capacity. Curious as to how and where the tank cracked. Not possible to fix crack?
Also noted in pictures: where did you get red fuel line?
_________________
Waiting for santa to drop off funky green. I can wish can't I???? |
|
| Back to top |
|
|
pyrOman
Fire Master
Joined: July 21, 2003
Posts: 12409
Location: Over 2002 posts deleted!
|
| Posted: Thu Aug 07, 2014 11:06 am Post subject: |
|
|
Tried looking for it yesterday. No "visible" crack but sure signs of leakage from quite a few places. Had it for many years so I'm guessing it was a matter of time... just decided to do it 500 forkin miles from home!
Can't recall where I got the red line. Wasn't much so I use it as "connectors" for the hard line. 
_________________
Some people are so busy being clever they don't have time enough to be wise. |
|
| Back to top |
|
|
williamM
Samba Member
Joined: August 07, 2008
Posts: 4333
Location: southwest Arizona
|
| Posted: Thu Aug 07, 2014 3:19 pm Post subject: |
|
|
That looks like a lot of work- but you seem to have pulled it off. After the "squishing" of the tank, how much will it hold? And do you have a pic of your custom aluminum tank?
Side note when trying to run off remote tanks I find 1 or 2 boat outboard tanks work great and safely and with quick disconnects it's easy to switch tanks and they have a gauge on them.- Just a thought.
_________________
some days I get up and just sit and think. Some days I just sit.
opinion untempered by fact is ignorance.
Don't step in any! |
|
| Back to top |
|
|
Stocknazi
Samba Member

Joined: June 18, 2004
Posts: 5150
|
| Posted: Thu Aug 07, 2014 5:42 pm Post subject: |
|
|
Seeing all the trouble you went through to mount that bay tank makes me really love my og 10 gal. tank
I had no idea early bay tanks were commanding that kind of money.
_________________
WANTED:
58 Westfalia cabinet knobs (3 needed), roof rack, and (7) privy tent poles (silver painted).
"When the people are afraid of the government, that's tyranny. But when the government is afraid of the people, that's liberty."
"Resistance to tyrants is obedience to God."
Thomas Jefferson |
|
| Back to top |
|
|
busdaddy
Samba Member

Joined: February 12, 2004
Posts: 51153
Location: Surrey B.C. Canada, but thinking of Ukraine
|
| Posted: Thu Aug 07, 2014 7:10 pm Post subject: |
|
|
| pyrOman wrote: |
| Had it for many years so I'm guessing it was a matter of time... just decided to do it 500 forkin miles from home! |
That sucks, apparently tank #2 will need some better support engineering and internal baffling to stabilize the side walls, flex flex flex = crack eventually. 105 lbs of gas can really stress things when it's bouncing around in there.
Good work on the repair, at least you had shop access, X2 on the outboard tanks next time.
BTW there is a new baywindow tank available now but it's not cheap: http://www.busdepot.com/211201075l
_________________
Rust NEVER sleeps and stock never goes out of style.
Please don't PM technical questions, ask your problem in public so everyone can play along. If you think it's too stupid post it here
Stop dead photo links! Post your photos to The Samba Gallery!
Слава Україні! |
|
| Back to top |
|
|
pyrOman
Fire Master
Joined: July 21, 2003
Posts: 12409
Location: Over 2002 posts deleted!
|
| Posted: Thu Aug 07, 2014 7:45 pm Post subject: |
|
|
| StockNazi wrote: |
| Seeing all the trouble you went through to mount that bay tank makes me really love my og 10 gal. tank |
With the 2.3 liter motor and my lead foot, I simply could not go from 17 gallons down to just 10. I'd be stopping for gas at every other station. 
There will be NO next time! 
This looks like a late bay tank which "could" fit a little better.
Oh, and the "squish" was just at the rear edge of it and just enough to clear the top shelf. I figure it may compromise about a quarter of a gallon at best.
Will post pix of the aluminum tank tomorrow.
_________________
Some people are so busy being clever they don't have time enough to be wise. |
|
| Back to top |
|
|
pyrOman
Fire Master
Joined: July 21, 2003
Posts: 12409
Location: Over 2002 posts deleted!
|
| Posted: Fri Aug 08, 2014 6:58 am Post subject: |
|
|
Alright, here are pix of the super-duper-extra-capacity-custom-made aluminum tank! 
Obviously I did not think it thoroughly before having my friend make it. He's done many aluminum tanks for boats that make use of as much space as possible and that was my main issue. Ok, use of ALL available space was my ONLY concern!
So I gave him the dimensions of the space available and he made the tank to "fit" it. Then I tried to install it and found out I went way to far into using "all the space"! Hence the "securing" hack I came up with, which had barely enough room for even my skinny fingers to get in there and do something about it. 
Anyway, lasted long enough I think. First pix shows the "slope" shape of the front side.
Here's the "pretty" rear side, faces the engine.
The front "sloped" side.
Shows obvious sign of leakage here!
Also notice the black markings on the crests here. Sign of rubbing against the front wall in the engine compartment.
The bottom showing some serious muck and leakage!
The top opening for the bug sender/fuel-line.
The modified bug sender = fuel line pick up going through it.
Plenty of signs of leakage around tank. Mostly pin holes and around the top of it. However, I've yet to find the main culprit of the last leaky issues which have to be a small crack around the bottom.
I'll prolly end up fixing the it, figuring out a much better way of securing so as to prevent this to ever happen again, but will also likely put it up for sale. It's either that or recycle it!
_________________
Some people are so busy being clever they don't have time enough to be wise. |
|
| Back to top |
|
|
pyrOman
Fire Master
Joined: July 21, 2003
Posts: 12409
Location: Over 2002 posts deleted!
|
| Posted: Thu Aug 14, 2014 2:15 pm Post subject: |
|
|
| Daddybus wrote: |
| You'll need to vent the top of the phatchick tank to the filler neck if you want to be able to fill the tank completely without having to rock the bus to burp the tank. |
There!
_________________
Some people are so busy being clever they don't have time enough to be wise. |
|
| Back to top |
|
|
brettsvw
Samba Member

Joined: November 22, 2007
Posts: 2145
Location: Florida
|
|
| Back to top |
|
|
pyrOman
Fire Master
Joined: July 21, 2003
Posts: 12409
Location: Over 2002 posts deleted!
|
| Posted: Fri Aug 15, 2014 6:57 am Post subject: |
|
|
| brettsvw wrote: |
I hope the straps you are using will hold up without breaking when the fuel sloshes around.
The weak link is where it is bent to anchor down. An L-bracket to keep strap straight would solve it. |
I trust they'll do just fine. Unlike the aluminum tank, this one has baffles and is secured properly. It is tight without wiggles! I'd bet even a flipped bus will not cut it loose. But thanks for your concern. 
Lastly, someone suggested on another thread, installing a valve on the gas line in order to shut it off when dropping the engine and such. So here's my hack on doing the job.
Using a hole "punch", pre-drill a 1/4" hole then punch it out to the correct diameter, 9/16" in this case.
Took quite some wiggling to get it in there, having to fit through 2 holes at once, also without much room from underneath, but I managed. {Pay no mind to the previously hacked hole for the oil line next to the valve.  } }
_________________
Some people are so busy being clever they don't have time enough to be wise. |
|
| Back to top |
|
|
SingleWheel
Samba Member
Joined: April 08, 2004
Posts: 184
|
| Posted: Fri Aug 15, 2014 7:08 am Post subject: |
|
|
Damn Pyro, that shut off valve is a great addition. Been following this thread and the rebuild and cleanup.
PS. Still bitter at you ... That should be my garage you bastard!
_________________
Visit http://www.singlewheel.com |
|
| Back to top |
|
|
pyrOman
Fire Master
Joined: July 21, 2003
Posts: 12409
Location: Over 2002 posts deleted!
|
| Posted: Fri Aug 15, 2014 9:06 am Post subject: |
|
|
| SingleWheel wrote: |
| PS. Still bitter at you ... That should be my garage you bastard! |
You are always welcome to visit it!
_________________
Some people are so busy being clever they don't have time enough to be wise. |
|
| Back to top |
|
|
sub-hatchtim
Samba Member
Joined: September 19, 2006
Posts: 2610
Location: Phoenix AZ
|
| Posted: Sat Aug 16, 2014 12:00 pm Post subject: |
|
|
any thought's about making your valve cable operated from the cab
_________________
58' pg/sg silo fridge westy
58 Dove blue singlecab
76 911S |
|
| Back to top |
|
|
ZENVWDRIVER
Samba Member

Joined: November 07, 2008
Posts: 3340
Location: N.E. Oklahoma
|
| Posted: Sat Aug 16, 2014 7:44 pm Post subject: tank |
|
|
...sucks that your stock tank died...as far as I know, the tank ion my ;60 single cab is the original or at least is the same one since I purchased it in 1995...I have a few extra stock tanks anyway. So, I'm covered.
_________________
5/50, pastel green 11G - SOLD
8/50, gray 11A Beetle
6/52, pastel green 11C - SOLD
11/4/52, black Zwitter - SOLD to my little bro.
1954 Porsche, pre A, with VW 36 horse- SOLD
1/54, black 11C Beetle - TRADED
2/55 Iceland green Beetle, on a 1965 pan
3/55 113 Beetle, stratos silver
1955 Messerschmitt KR175 - SOLD, sadly
1960 single cab
1962 SO33, with SO 42 interior
9/63 Pacific blue, Ghia
'87 Toyota MR2
'02 WestFORDia E-150, GAVE TO OUR SON
All super-heroes, wear a MASK |
|
| Back to top |
|
|
pyrOman
Fire Master
Joined: July 21, 2003
Posts: 12409
Location: Over 2002 posts deleted!
|
| Posted: Sun Aug 17, 2014 4:44 am Post subject: |
|
|
Though it's only been a few days since the "fix", I can safely testify this: not only did it have some small leaky issues for some time, not to mention the "normal" over spill when parked leaning to the right after a fill up, but the old dried and cracked seam sealer was allowing seepage into the bus. Haven't caught even a wiff so far! Happy days!
_________________
Some people are so busy being clever they don't have time enough to be wise. |
|
| Back to top |
|
|
|


