| Author |
Message |
whatdoesthisbuttondo?
Samba Member

Joined: April 05, 2012
Posts: 259
Location: Victoria

|
 Posted: Fri Sep 04, 2015 1:55 pm Post subject: Posted: Fri Sep 04, 2015 1:55 pm Post subject: |
 |
|
I found the worse part of the job was cleaning crud out of the bolts. Used an impact drill and luckily didn't strip any.
Maybe ill keep the least gouged old ones and spare bolts for an emergency. I'm also collecting old parts to try my hand at welding auto-part sculpture  . .
Im hoping new grease and solid boots will help give some extended life to the used CVs. The most noticeable wear on the ones I'm keeping is the ball bearings making concavities in the cages.
Those Lobro joints sure seem to have lasted. I found a '72, '76, and an '83. Rest were unmarked. Not to say that they were put into operation near the time of manufacture, but they were made tough.
_________________
Orange 1973 Campervan. Rebuilt 1700cc with dual Solex carbs. Pertronix electronic points on stock distributor. Engine rebuild in progress (fall 2023). |
|
| Back to top |
|
 |
Patrick Metsker
Samba Member
Joined: February 15, 2005
Posts: 112
Location: Indiana
|
| Posted: Fri Sep 04, 2015 2:04 pm Post subject: |
|
|
Looking really REALLY nice!
Color me jealous over here...
the only thing holding me back is finances, which puts everything on hold.
I'll just have to be inspired by your build.
thanks for sharing |
|
| Back to top |
|
|
whatdoesthisbuttondo?
Samba Member
Joined: April 05, 2012
Posts: 259
Location: Victoria
|
| Posted: Tue Sep 15, 2015 11:37 am Post subject: |
|
|
Thanks Patrick, good luck with your build!
She runs!!! Finally took the bus for a test drive. Felt really good to get on the road again! Did a very basic timing and carb set up, made sure oil level was up, and took it for a little spin. Engine sounded pretty good, a bit of a whine at first, I put some load on it up the hills and the torque felt great, comparable or better than the 2L in the other bus (which is not running optimally, granted).
Backtracking a bit, here's some photos...
CV/s cleaned off, repacked and ready to go:
And of course, what 90 percent of the job looked like:
Redoing the wiring on the engine, we took out some of the PO additions and redid sections where needed.
Looking a lot cleaner!
Tried out the jack and it works incredibly well! A little sketch...
and put on the All Terrains.
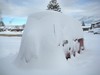
Finally, in the process of cleaning the roof (replacing with other bus's), and redoing the canvas.
Next up is shocks, bumpers etc etc.
_________________
Orange 1973 Campervan. Rebuilt 1700cc with dual Solex carbs. Pertronix electronic points on stock distributor. Engine rebuild in progress (fall 2023). |
|
| Back to top |
|
|
secretsubmariner
Champagne Wrangler

Joined: January 08, 2011
Posts: 3104
Location: Tulsa, OK
|
|
| Back to top |
|
|
whatdoesthisbuttondo?
Samba Member
Joined: April 05, 2012
Posts: 259
Location: Victoria
|
| Posted: Tue Oct 13, 2015 12:02 pm Post subject: |
|
|
Thanks! OK, last month has been a bit busy, but managed to get a few things done.
Like some more test runs!
Put in the new rear Koni's from the other bus:
After finding an oil leak, I was worried I had ripped a pushrod seal and would have to skin my knuckles getting that replaced but luckily the solution was pretty obvious after checking this:
Put in a new thicker valve cover that I got from Concept 1 in Calgary which was really nice quality and didn't distort on install, which was what led to the oil leak.
Spent a couple days getting my newer tent in after taking it off the other bus:
Quality is good but it is way to tight around the middle. Last time I installed it I thought it was my error, but I left slack everywhere I could this time and it still will barely hold itself up. Pretty sketchy as I now have an essentially spring loaded roof... Will devise some sort of lock mechanism for the spring arms that hold the roof up at the back.
Replaced the tow hook at the front where it had ripped out at some point. Luckily the PO kept it and I found it under the seat.
Used a rusted spare bumper to patch the worst rusted areas on the rear:
I also spent a quick minute punching out the old rusted bumper hanger bolts:
Finally, started cleaning up front pan for some Por 15:
Still have to finish bumpers, balance carbs, and sort out some electrical. Might get out for an extended fall drive yet before all the leaves are down...
_________________
Orange 1973 Campervan. Rebuilt 1700cc with dual Solex carbs. Pertronix electronic points on stock distributor. Engine rebuild in progress (fall 2023). |
|
| Back to top |
|
|
whatdoesthisbuttondo?
Samba Member
Joined: April 05, 2012
Posts: 259
Location: Victoria
|
| Posted: Fri Nov 06, 2015 4:34 pm Post subject: |
|
|
Hey all. On step 4 of dual carb adjustment. Idling a bit high at 900. Vacuum can off. Mixture reference hose off. Central idle solenoid off. Got it even idle Bo change when testing the hose with both screws a tiny bit richer. When I pull right cutoff to test left carb mixture, engine dies. Pulling left carb to test right mixture, idle drops from 900 to 650. Me and the engine are stalled out here, any thoughts?
_________________
Orange 1973 Campervan. Rebuilt 1700cc with dual Solex carbs. Pertronix electronic points on stock distributor. Engine rebuild in progress (fall 2023). |
|
| Back to top |
|
|
busdaddy
Samba Member

Joined: February 12, 2004
Posts: 51153
Location: Surrey B.C. Canada, but thinking of Ukraine

|
| Posted: Fri Nov 06, 2015 4:55 pm Post subject: |
|
|
Are you using a snail or Unisyn to set flow first?
Try opening the left carb's idle mixture screw a full turn and see if it still dies, if it does put it back to where it was and then another full turn in, you need to find out if that carb is too rich or too lean (assuming the flow is already set). When it's all balanced pulling a solenoid wire will result in a slow but steady idle on each side.
_________________
Rust NEVER sleeps and stock never goes out of style.
Please don't PM technical questions, ask your problem in public so everyone can play along. If you think it's too stupid post it here
Stop dead photo links! Post your photos to The Samba Gallery!
Слава Україні! |
|
| Back to top |
|
|
whatdoesthisbuttondo?
Samba Member
Joined: April 05, 2012
Posts: 259
Location: Victoria
|
| Posted: Fri Nov 06, 2015 6:15 pm Post subject: |
|
|
Used snail to set flow. Followed procedure to the letter to this point. At current setup it's sucking 7 kg per hour according to snail at idle of 800, setup same as above. Dies when I pull right cutoff when idle screw way in or way out. Chokes not hooked up and partly closed on both sides. But seems to run OK on right carb only. Hmm.
_________________
Orange 1973 Campervan. Rebuilt 1700cc with dual Solex carbs. Pertronix electronic points on stock distributor. Engine rebuild in progress (fall 2023). |
|
| Back to top |
|
|
busdaddy
Samba Member
Joined: February 12, 2004
Posts: 51153
Location: Surrey B.C. Canada, but thinking of Ukraine
|
| Posted: Fri Nov 06, 2015 6:52 pm Post subject: |
|
|
| whatdoesthisbuttondo? wrote: |
| . Chokes not hooked up and partly closed on both sides. . |
Now that's a problem, the chokes must be fully open and the engine well warmed up (preferrably just after a sprited drive around the block). Recheck your flow after it's warm as well, the fast idle cams could be throwing things off.
_________________
Rust NEVER sleeps and stock never goes out of style.
Please don't PM technical questions, ask your problem in public so everyone can play along. If you think it's too stupid post it here
Stop dead photo links! Post your photos to The Samba Gallery!
Слава Україні! |
|
| Back to top |
|
|
whatdoesthisbuttondo?
Samba Member
Joined: April 05, 2012
Posts: 259
Location: Victoria
|
| Posted: Fri Nov 06, 2015 7:35 pm Post subject: |
|
|
Thanks! Last time I set the flow they were all the way open and engine was warm, but I will try tomorrow and see if I can confirm the flow is adjusted properly.
_________________
Orange 1973 Campervan. Rebuilt 1700cc with dual Solex carbs. Pertronix electronic points on stock distributor. Engine rebuild in progress (fall 2023). |
|
| Back to top |
|
|
busdaddy
Samba Member
Joined: February 12, 2004
Posts: 51153
Location: Surrey B.C. Canada, but thinking of Ukraine
|
| Posted: Fri Nov 06, 2015 7:49 pm Post subject: |
|
|
If you are happy with the linkage and throttle stop settings leave them, but don't expect to get any reliable results setting mixtures (especially idle) with a choke partially closed, it has to be in the same condition you'd drive around with all the time and all the manuals and tutorials are for fully warmed up and wide open choke plates.
Right now the still running when you kill the other carb says the live carb is set too lean if it still idles with a choke partially closed, you may have to increase the flow equally on both carbs and dial them back equal amounts after you find the spot where it'll idle on either without the CIS or other carb.
_________________
Rust NEVER sleeps and stock never goes out of style.
Please don't PM technical questions, ask your problem in public so everyone can play along. If you think it's too stupid post it here
Stop dead photo links! Post your photos to The Samba Gallery!
Слава Україні! |
|
| Back to top |
|
|
1967250s
Samba Member
Joined: May 02, 2007
Posts: 2137
|
| Posted: Fri Nov 06, 2015 9:42 pm Post subject: |
|
|
http://www.ratwell.com/dotmac/Sites/Parts/PhotoAlbum80.html
http://www.itinerant-air-cooled.com/viewtopic.php?...djustments
Basically, the idle system should work only on the CIS. Main throttle should only be for above idle. Back out the two top screws about 3 turns, then follow itinerants instructions. Carb butterflys should be set at .4 mm IIRC. The Idle cutoffs should all work at the same time, so somewhere one is not working. Great work so far, Excellent metal work, too. You should get "The Key to Metal Bumping", primer on learning how to fix dents without cutting, I found it free on the net.
_________________
'72 Elm Green Deluxe |
|
| Back to top |
|
|
whatdoesthisbuttondo?
Samba Member
Joined: April 05, 2012
Posts: 259
Location: Victoria
|
| Posted: Sat Nov 07, 2015 1:28 pm Post subject: |
|
|
Ok sitting here in the rain under a tarp thank you for the links.
Still drawing 7 or 8 on the snail at idle which is now at 1200 after backing out idle speed and central mixture 3 turns. Left choke took about 5 minutes longer to open. New plot twist, I'm not getting any fuel squinting out on left carb when I hit the throttle. Right carb squirts ok but is aimed at the throttle shaft. I don't think it's supposed to be aimed there... Left carb was squinting fuel when I bench tested engine as far as I remember. Where to go from here?
_________________
Orange 1973 Campervan. Rebuilt 1700cc with dual Solex carbs. Pertronix electronic points on stock distributor. Engine rebuild in progress (fall 2023). |
|
| Back to top |
|
|
busdaddy
Samba Member
Joined: February 12, 2004
Posts: 51153
Location: Surrey B.C. Canada, but thinking of Ukraine
|
| Posted: Sat Nov 07, 2015 2:03 pm Post subject: |
|
|
Find out why the acellerator pump ain't pumpin' first because removing the carb will alter the linkage balance/adjustment.
The slow choke may be due to a poor contact where the terminal is riveted to the ceramic insulator on the outside of the heater disc, solder is usually the best fix for that.
_________________
Rust NEVER sleeps and stock never goes out of style.
Please don't PM technical questions, ask your problem in public so everyone can play along. If you think it's too stupid post it here
Stop dead photo links! Post your photos to The Samba Gallery!
Слава Україні! |
|
| Back to top |
|
|
whatdoesthisbuttondo?
Samba Member
Joined: April 05, 2012
Posts: 259
Location: Victoria
|
| Posted: Sat Nov 07, 2015 3:05 pm Post subject: |
|
|
Ok took apart pump and flipped spring around seems to be working better. Checking linkage to make sure it's configured correctly. One thing noticed is there is hole where idle mixture enrichment box (Bentley pg 22 fuel system #2) was is open to fuel in bowl... Could be a problem? Other bus had nothing there. Would putting this back on help? Never heard mention of this box in all research on here...
_________________
Orange 1973 Campervan. Rebuilt 1700cc with dual Solex carbs. Pertronix electronic points on stock distributor. Engine rebuild in progress (fall 2023). |
|
| Back to top |
|
|
busdaddy
Samba Member
Joined: February 12, 2004
Posts: 51153
Location: Surrey B.C. Canada, but thinking of Ukraine
|
|
| Back to top |
|
|
whatdoesthisbuttondo?
Samba Member
Joined: April 05, 2012
Posts: 259
Location: Victoria
|
| Posted: Sat Nov 07, 2015 4:10 pm Post subject: |
|
|
Plugged with metal rods. How concerned should I be about wet main gaskets on right carb? I don't like the idea of pulling the cutoffs and sparking next to evaporating gas. This is the carb I took apart and sanded flat so it would seal better. These black rebuild kit gaskets seem to like sponging up fuel...
_________________
Orange 1973 Campervan. Rebuilt 1700cc with dual Solex carbs. Pertronix electronic points on stock distributor. Engine rebuild in progress (fall 2023). |
|
| Back to top |
|
|
Tom Powell
Samba Member
Joined: December 01, 2005
Posts: 4855
Location: Kaneohe
|
| Posted: Sat Nov 07, 2015 4:18 pm Post subject: |
|
|
| whatdoesthisbuttondo? wrote: |
... After finding an oil leak, I was worried I had ripped a pushrod seal and would have to skin my knuckles getting that replaced but luckily the solution was pretty obvious after checking this:
... |
I've had that happen suddenly on startup in a parking lot after a valve adjustment and 2000 miles of driving. Fortunately someone started chasing after me and yelling for me to stop. Lost about a quart in a 100 yards. I will blame it on the composition gaskets that I had used.
The solution:
Cork gaskets and hylomar on the cover side and grease on the head side of the gaskets and a bit of wiggling and sliding as the bales are put in place.
Aloha
tp |
|
| Back to top |
|
|
busdaddy
Samba Member
Joined: February 12, 2004
Posts: 51153
Location: Surrey B.C. Canada, but thinking of Ukraine
|
| Posted: Sat Nov 07, 2015 4:55 pm Post subject: |
|
|
| whatdoesthisbuttondo? wrote: |
| Plugged with metal rods. How concerned should I be about wet main gaskets on right carb? I don't like the idea of pulling the cutoffs and sparking next to evaporating gas. This is the carb I took apart and sanded flat so it would seal better. These black rebuild kit gaskets seem to like sponging up fuel... |
How wet is wet?, if it's just damp don't be concerned, if it's drooling and constantly making the entire side of the carb wet that's a problem, of course if the tide is high enough in there to do that there's more issues.
_________________
Rust NEVER sleeps and stock never goes out of style.
Please don't PM technical questions, ask your problem in public so everyone can play along. If you think it's too stupid post it here
Stop dead photo links! Post your photos to The Samba Gallery!
Слава Україні! |
|
| Back to top |
|
|
whatdoesthisbuttondo?
Samba Member
Joined: April 05, 2012
Posts: 259
Location: Victoria
|
| Posted: Sat Nov 07, 2015 5:15 pm Post subject: |
|
|
It's damp not dripping, maybe not a big deal. A bit damp at the front end at butterfly shaft too. Not sure about the tide... Put in new fuel shutoff and stayed to spec I think. That was a year ago now. Slow and steady...
OK still not squinting left now, it was when we had it out. Redid procedure once back on. Went smoothly again until it came time to pull the right cutoff and it dies. Pulling left cutoff drops idle only 100.
I might pull the left carb for the third time today to check restrictions but I had those things spotless and blown out when I rebuilt them. Maybe I left something in there...
_________________
Orange 1973 Campervan. Rebuilt 1700cc with dual Solex carbs. Pertronix electronic points on stock distributor. Engine rebuild in progress (fall 2023). |
|
| Back to top |
|
|
|


