| Author |
Message |
mcdonaldneal
Samba Member
Joined: June 13, 2013
Posts: 2649
Location: Gullane, Scotland

|
 Posted: Sat Sep 27, 2014 11:30 am Post subject: Edit: Restoration behind rear seat showing original features Posted: Sat Sep 27, 2014 11:30 am Post subject: Edit: Restoration behind rear seat showing original features |
 |
|
Long story short...
Our beautiful, very largely original, unrestored Ghia convertible has had a leak around the convertible glass window.
We keep it garaged, but after washing or driving in the rain (common here in Scotland!  ) the rear carpets did feel wet. I finally gritted my teeth and pulled up the carpet and the fibrous underlay attached to it which has clearly been holding water. Not great. ) the rear carpets did feel wet. I finally gritted my teeth and pulled up the carpet and the fibrous underlay attached to it which has clearly been holding water. Not great.
This is what greeted me
Not a massive surprise in a 45yr old convertible, but I know next to nothing about how best to deal with this sort of thing, so I'm throwing myself to the lions of the Samba, and I'll tell you what I've got planned!
First I scraped at some of the rust and paint with a screwdriver to see how deep it is, actually seems fairly superficial, certainly no holes so far. The right side is scraped in these pics.
My plan is to sand down the rust with a drill strip disc
http://www.frost.co.uk/catalog/product/view/id/2198
Then to degrease, metal prep and paint with black POR 15. The area is hidden under carpet, so UV exposure is not an issue. When the carpet goes back I will back it with closed cell foam and secure it with poppers (snap fasteners) so that they can be taken out to dry.
First question: clearly water has run down through these drain holes and gaps in the welded panels.
Where on earth does it actually go, and can I access it or not? (the panels through the holes are covered in tarboard, so I'm not too keen on exploring)
Second, any comments on my novice approach, or suggestions, helpful or otherwise, given that I generally want to keep the car, which is a great condition 'survivor' as original as I can at the moment.
Over to you...
_________________
1978 marino yellow Bay Dormobile camper
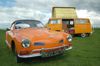
1969 signal orange Karmann Ghia convertible
1976 martini olive Bay Dormobile camper
Stop dead photo links! Post photos to The Samba Gallery!
Last edited by mcdonaldneal on Mon Oct 06, 2014 2:23 pm; edited 1 time in total |
|
| Back to top |
|
 |
57BLITZ
Samba Member

Joined: June 12, 2012
Posts: 2385
Location: DEEK - U.S.A.
|
| Posted: Sat Sep 27, 2014 2:43 pm Post subject: Re: What lies beneath... Ghia interior rust. Advice please. |
|
|
| mcdonaldneal wrote: |
First question: clearly water has run down through these drain holes and gaps in the welded panels. Where on earth does it actually go, and can I access it or not? |
Not actually drain holes, that is a panel that is where the seat back hinges attach (on Ghias with a rear seat), and you will not be able to get in there without drilling a BUNCH of spot welds to break the panel free. Sorry!
| mcdonaldneal wrote: |
Second, any comments on my novice approach, or suggestions, helpful or otherwise, given that I generally want to keep the car, which is a great condition 'survivor' as original as I can at the moment. |
In your situation, your plan for treating the sheet metal will be helpful, but it should be in addition to REPAIRING THE LEAK!
_________________
Jesucristo es mi Señor y Salvador! |
|
| Back to top |
|
|
kingkarmann
Samba Member

Joined: November 05, 2003
Posts: 4111
|
| Posted: Sat Sep 27, 2014 3:22 pm Post subject: |
|
|
My novice approach would be to direct a stream of water in those holes before you start the repairs. Hopefully you will learn what route the water takes and what you may be able to do to improve the situation.
_________________
"Depression is a malfunction of the instrument we use to determine reality.
Mike Gerson
What is your "Bespoke Reality"? |
|
| Back to top |
|
|
mcdonaldneal
Samba Member
Joined: June 13, 2013
Posts: 2649
Location: Gullane, Scotland
|
| Posted: Sat Sep 27, 2014 10:57 pm Post subject: Re: What lies beneath... Ghia interior rust. Advice please. |
|
|
| 57BLITZ wrote: |
Not actually drain holes, that is a panel that is where the seat back hinges attach (on Ghias with a rear seat), and you will not be able to get in there without drilling a BUNCH of spot welds to break the panel free. Sorry!
In your situation, your plan for treating the sheet metal will be helpful, but it should be in addition to REPAIRING THE LEAK! |
Thanks 57BLITZ, I'm glad to say, I had previously repaired the leak! The main problem was that the drain tubes were blocked, so a fairly easy fix.
I found these pics of the rear interior panels (apologies to CarlS of the KGforum)
It looks as though there is access from the front, I 'just' need to detach a vinyl panel from the front edge, seen on the right of the pic here
Then I guess, become a contortionist to follow and clean the trail of rust downwards...
_________________
1978 marino yellow Bay Dormobile camper
1969 signal orange Karmann Ghia convertible
1976 martini olive Bay Dormobile camper
Stop dead photo links! Post photos to The Samba Gallery! |
|
| Back to top |
|
|
mcdonaldneal
Samba Member
Joined: June 13, 2013
Posts: 2649
Location: Gullane, Scotland
|
|
| Back to top |
|
|
57BLITZ
Samba Member
Joined: June 12, 2012
Posts: 2385
Location: DEEK - U.S.A.
|
| Posted: Sat Sep 27, 2014 11:50 pm Post subject: |
|
|
I should think that if you remove that sound-deadening mat under the seat hinge panel and you do not find any rust-through, then carry on with your surface treatment plan and enjoy you car!
BTW, Forgot to tell ya . . . your Ghia looks nice
_________________
Jesucristo es mi Señor y Salvador! |
|
| Back to top |
|
|
mcdonaldneal
Samba Member
Joined: June 13, 2013
Posts: 2649
Location: Gullane, Scotland
|
|
| Back to top |
|
|
mcdonaldneal
Samba Member
Joined: June 13, 2013
Posts: 2649
Location: Gullane, Scotland
|
| Posted: Sat Oct 04, 2014 3:45 am Post subject: |
|
|
I'm slowly exposing the area behind the rear seat. Thought this would be interesting for you all to see, there was a mysterious piece of elastic poking through the plastic hinge cover...
The hinge cover is super fragile, so I have very carefully removed the dozen or so screws holding it on, the cover is cracked under some of these screws, and some of the screws were rusted solid and I had to dremel a groove into them.
Once the cover was off, you can see the elastic is attached to the headlining. (Needless to say, and tension it did have is long gone!)
You can also see where the headlining is hooked over the metal spikes at the back
This one taken from below, behind the headlining
You can see how the headlining is supposed to fit, most of the ones I have seen are badly creased, or pulled out of the screws
Thought this would be interesting to anyone wanting to know the original setup
_________________
1978 marino yellow Bay Dormobile camper
1969 signal orange Karmann Ghia convertible
1976 martini olive Bay Dormobile camper
Stop dead photo links! Post photos to The Samba Gallery! |
|
| Back to top |
|
|
mcdonaldneal
Samba Member
Joined: June 13, 2013
Posts: 2649
Location: Gullane, Scotland
|
| Posted: Mon Oct 06, 2014 2:32 pm Post subject: |
|
|
The 'white' plastic hinge covers are filthy. There has been a very poor attempt to secure carpet to them, possibly by firing contact cement at them from outside the car! 
I want to clean them up before attempting to repair them (or possibly getting a replacement made in ABS). The contact cement is old, dry, and super tenacious, so after trying to soften it with IPA and WD40 to no avail, I tried abrading it with a scotch brite pad, which didn't work either. I don't want to use a more aggressive solvent as it might melt the plastic.
So, using a cheap 'Dremel' type metal burr, I have gently sanded away the spots and layers of cement on a small section, so I think going slowly I can get it looking a lot better, then maybe finishing off with a fine sanding pad or something like metal polish, to make the plastic smoother again. We shall see...
_________________
1978 marino yellow Bay Dormobile camper
1969 signal orange Karmann Ghia convertible
1976 martini olive Bay Dormobile camper
Stop dead photo links! Post photos to The Samba Gallery! |
|
| Back to top |
|
|
mcdonaldneal
Samba Member
Joined: June 13, 2013
Posts: 2649
Location: Gullane, Scotland
|
|
| Back to top |
|
|
mcdonaldneal
Samba Member
Joined: June 13, 2013
Posts: 2649
Location: Gullane, Scotland
|
|
| Back to top |
|
|
mcdonaldneal
Samba Member
Joined: June 13, 2013
Posts: 2649
Location: Gullane, Scotland
|
| Posted: Sun Oct 19, 2014 1:22 pm Post subject: |
|
|
I think this thread need to turn into a bit of a documentation of the exposure of this rear shelf at the back of the car. Mostly so that I can put it back together again, but also if anyone is keen to see how the mostly OG interior fitted together.
I've lifted the black vinyl that was stuck down, dropping vertically behind the rear seat backrest. It revealed what in the UK we would call a hardboard (very thick cardboard) panel.
This was held in place by a central tack/screw, and behind is the space, lined with tarry board.
Just about came out, partially intact!
Thankfully, the metalwork behind the tar doesn't seem rusted, except a little in the grooves, and I can't find rust where any free water would run to, so I think the top surface rust is from where moisture has been held against the metal by the fibrous carpet underlay. Good news!
_________________
1978 marino yellow Bay Dormobile camper
1969 signal orange Karmann Ghia convertible
1976 martini olive Bay Dormobile camper
Stop dead photo links! Post photos to The Samba Gallery! |
|
| Back to top |
|
|
mcdonaldneal
Samba Member
Joined: June 13, 2013
Posts: 2649
Location: Gullane, Scotland
|
|
| Back to top |
|
|
Mike Fisher
Samba Member

Joined: January 30, 2006
Posts: 17970
Location: Eugene, OR
|
| Posted: Sun Oct 19, 2014 2:02 pm Post subject: |
|
|
Your hinge covers look good enough to use now without gooping them up with fiberglass resin. A little bigger washers would help. Wire wheel all your bare metal to see for sure what's there. Wipe Rust-Prep or similar phosphoric acid on it until you spray epoxy primer etc. MasterSeries silver & black would fill/protect the pitted metal.
_________________
https://imgur.com/user/FisherSquareback/posts
69 FI/AT square Daily Driver
66 sunroof,67,70,71,71,71AT,72,72AT,73 Parts
two 57 oval ragtops sold
'68 Karmann Ghia sold
Society is like stew. If you don't keep it stirred up you end up with a lot of scum on the top! - Russ_Wolfe/Edward Abbey |
|
| Back to top |
|
|
mcdonaldneal
Samba Member
Joined: June 13, 2013
Posts: 2649
Location: Gullane, Scotland
|
|
| Back to top |
|
|
mcdonaldneal
Samba Member
Joined: June 13, 2013
Posts: 2649
Location: Gullane, Scotland
|
| Posted: Mon Oct 20, 2014 5:49 am Post subject: |
|
|
Still trying to clear the area I want to paint.
This shows the attachment of the rear headliner over metal spikes.
There are three spikes, poking through the tar board, holding the board in place.
On the other side, one of the spikes was flattened down before the panel was painted, and so the tarboard is secured with a screw and flat cup washer (exactly the same as the others, so probably a 'fix' for a mistake in production?) Out of focus, but just seen here...
There is a cheeky square of carpet over each of the rear glass window drain tubes
So, having got the soft furnishings out of the way, abrasive disc and pads gets us to here...
Pleased to see that the rust is superficial, so prep and coat with POR15 should be a long lasting solution.
Having a break now!
_________________
1978 marino yellow Bay Dormobile camper
1969 signal orange Karmann Ghia convertible
1976 martini olive Bay Dormobile camper
Stop dead photo links! Post photos to The Samba Gallery! |
|
| Back to top |
|
|
mcdonaldneal
Samba Member
Joined: June 13, 2013
Posts: 2649
Location: Gullane, Scotland
|
|
| Back to top |
|
|
Mike Fisher
Samba Member
Joined: January 30, 2006
Posts: 17970
Location: Eugene, OR
|
| Posted: Thu Oct 23, 2014 2:01 pm Post subject: |
|
|
I just have cotton rag padding under my carpets, so it will evaporate if it gets wet. I have found Terrible rust under closed cell heat/noise padding that trapped the moisture. 
_________________
https://imgur.com/user/FisherSquareback/posts
69 FI/AT square Daily Driver
66 sunroof,67,70,71,71,71AT,72,72AT,73 Parts
two 57 oval ragtops sold
'68 Karmann Ghia sold
Society is like stew. If you don't keep it stirred up you end up with a lot of scum on the top! - Russ_Wolfe/Edward Abbey |
|
| Back to top |
|
|
djkeev
Samba Moderator

Joined: September 30, 2007
Posts: 32625
Location: Reading Pennsylvania
|
|
| Back to top |
|
|
djkeev
Samba Moderator
Joined: September 30, 2007
Posts: 32625
Location: Reading Pennsylvania
|
| Posted: Thu Mar 01, 2018 4:33 am Post subject: Re: Edit: Restoration behind rear seat showing original features |
|
|
Good Morning (for me at least!)
(BTW I asked Everett if he could move this thread to the Ghia forum where more people would see it)
Could I bother you for some photos of the rear luggage area reassembled?
Carpet, seat bumpers and latches, bumper for rear window when dropped, etc.
*********
Are the plastic hooks on your hinge cover panels for attaching the toneau cover?
**********
Along the top of the luggage area, Behind the window hinges, is a void to the engine lid.
What is up there? Is it simply bare tin or is there tar board or ???
***********
The rear window drain, obviously has a catch basin and a hose attached to both sides.
What does it look like? Metal or plastic?
These two hoses drain into the tire well?
***********
The hinge trim plastic panels. A photo on how high the are when mounted and how far back they extend?
***********
In front of the top hinges, on top next to the door top is a trim piece. On the Coupe it is chrome and is an integral part of the Door to quarter window seal.
What does it look like on the Convertible?
There is also a small plastic piece that covers the Vertical seam on top behind the door.
***********
I appreciate any and all help you can provide.
These little details are hard to find from searching history books and most online photos. Who really thinks, "I know! I'll photograph my rear luggage area! People will go ape over that!" 
Thanks!
Dave
_________________
Stop Dead Photo Links how to post photos
Ghia
http://www.thesamba.com/vw/forum/viewtopic.php?t=392473
Vanagon
http://www.thesamba.com/vw/forum/viewtopic.php?p=6315537#6315537
Beetle
https://www.thesamba.com/vw/forum/viewtopic.php?t=482968&highlight=74+super+vert
Last edited by djkeev on Thu Mar 01, 2018 5:23 am; edited 1 time in total |
|
| Back to top |
|
|
|


