| Author |
Message |
Enkiel
Samba Member

Joined: October 21, 2004
Posts: 2771
Location: Quebec, Canada

|
 Posted: Fri Sep 18, 2015 5:24 am Post subject: Posted: Fri Sep 18, 2015 5:24 am Post subject: |
 |
|
| EverettB wrote: |
I've never had that issue but you said the rear wheels are off?
I would install the wheels and block them all from moving and apply the e-brake, all for safety so you don't pull it backwards off some jackstands. |
the first time i tried to pull the engine, i noticed he almost fell off the stands, so the wheel are back on.
No handbrake but i have some wheel blocker to help it stop moving.
I'll give it another go tonight. |
|
| Back to top |
|
 |
Enkiel
Samba Member
Joined: October 21, 2004
Posts: 2771
Location: Quebec, Canada
|
| Posted: Fri Sep 18, 2015 6:58 pm Post subject: |
|
|
Another night, some more progress.
I managed to remove the engine. With no brake to hold the bus in place, it was alot harder than it should. Since i was there, i also removed the gaz tank.
While removing the engine, i noticed it was making a "slush slush" sound when i was moving it... i think its definately toast.
Once that was done, i decided to remove the rear window. Since half its rubber was falling apart, i was affraid it would eventually give up. There's no logo on it, so it wouldnt be so bad, but i just don't want to have glass shard everywhere. I was pretty happy to see that the whole frame was still pretty solid, no hole of any kind. I won't be that lucky with the front window, i'm sure...
While checking the rear, i noticed some bondo cracking. Turns out the whole driver side corner is pretty heavily bondoed. My plan is to clean it, patch the bottom then try some spray paint (Krylon Jade i believe) and blend it a bit. I think that's the job i'm looking forward to the most.
Then i moved to the spot i hate the most ; what's left of the metal above the engine... I cleaned it up a bit. I "think" i could patch it, but if i could find a 2'x2' with the right stamping, it would be perfect...
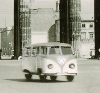
I plan on making a bit more artistic picture eventually of the bus inside the garage, but i was tired, and i wanted a nice picture to end the night, so here goes ;
Question time ;
1- My mirror arm in front arent positioned correctly. Basically, when we open the door, it stops the door from opening correctly. I tried turning the nut under it, but nothing seems to happen. It's currently sitting with a good quantity of "unstuck rusty part" liquid, and i'm hoping it will move easier tomorrow... is there a trick or something?
2- My flipseat's passenger arm is stuck. I can't pull the lever to move it. Again, any trick? i don't want to break it or damage it, so i'm scared to do anything more than adding more "unstuck rusty part" liquid...
3- I want to close the welding on the side, but i'm not sure how to approach it. most of the gap is around 1-2mm, but in some place its a bit wider, like 3-4mm... can i really fil it, or should i consider cuting small piece and welding new metal?
4- I used only a wire wheel brush on the metal above the engine. Is it enough to remove the bondo on the side? Or should i get a flap wheel? or those stringer bead wheel? I don't mind if its not perfect, and i dont plan on removing completely the piting. |
|
| Back to top |
|
|
Enkiel
Samba Member
Joined: October 21, 2004
Posts: 2771
Location: Quebec, Canada
|
| Posted: Sat Sep 19, 2015 4:57 pm Post subject: |
|
|
didn't get much of my question answered by trial and error ; both mirror arm are still completely stuck, so is the flipseat mechanism. I did manage to clean up the putty with my wire wheel. It was about 3/8 thick at the worst spot, but the metal is pretty clean underneat so i'll just prime it and paint it.
I decided to go with an Epoxy primer in spray can. The can seems pretty interesting, with 2 stage that you manually activate. For the color, there's no place around here than can get either Krylon Jade or Dupli-Color Detroit Diesel Alpine Green so monday i'll bring my gas cap to my NAPA and they'll make me a can.
Before ;
After ;
in my opinion, its not so bad. I'm not sure how to blend it tho. Should i prime over even the paint?
The worst is near the bottom, where metal seems to have folded a bit.
And i started visualising in my head how i want to repair this corner. I want to keep as much original metal as possible, even if its not 100% straight. My plan is to cut only inside the tape, make a piece the correct size and somewhat correct curve, and tack weld it in its place. Once that is done, i'll either adjust what isnt perfectly fitting, or cut more... sound like a good plan? I gues sthe best plan would be to just cut the whole thing and replace it, but that's not what i wanna do.
|
|
| Back to top |
|
|
Enkiel
Samba Member
Joined: October 21, 2004
Posts: 2771
Location: Quebec, Canada
|
| Posted: Sun Sep 20, 2015 5:49 pm Post subject: |
|
|
So today i tried the old saying : "measure twice, cut once"...
i ended up ; "measuring 3 times, cutting once, test fit #1, cut again, test fit #2, cut hole, test fit #3, cut metal, ..."
Eventually, the patch was pretty much fitting the hole. it's not 100% yet, since i couldnt curve the patch both horizontally and vertically with my current tool, so i figured i'd make a second patch at the bottom to close the whole thing. The fit is actually better than in picture, but i couldnt get it to stay still perfectly
the hole
the patch
my attempt at keeping the metal as close to original as possible ;
Once everyone was in their bed, i tried welding. Been a very long time since i did it, and damn, i missed it. I'm not aiming at being a pro anytime soon. My goal is to close the gap, and try as much as possible to keep it clean. If it look bad, i'll survive. I'm welding gasless for now, until i find the time and place to buy what's missing.
my testing. I wasn't sure on the setting, and i had to re-read the instruction to understand it. When i did, it was a piece of cake.
what i consider my best... yes i burnt through, but the penetration was pretty good, which is a good start.
and i tried to fix my hole (since i know i have quite a few to fix right now)
That's it for the weekend. I'm very tempted to try and tack my repair section into place tomorrow, but i'm not 100% sure i'll keep it like that. |
|
| Back to top |
|
|
60vwnewengland
Twin #2

Joined: June 25, 2003
Posts: 1784
Location: District of Columbia & Cape Cod
|
| Posted: Mon Sep 21, 2015 6:56 pm Post subject: |
|
|
| EverettB wrote: |
I've never had that issue but you said the rear wheels are off?
I would install the wheels and block them all from moving and apply the e-brake, all for safety so you don't pull it backwards off some jackstands. |
^
What he said!
It always feels good to pull out.
Link
_________________
77 Westy - Cape Cod Sage
LLAP |
|
| Back to top |
|
|
Enkiel
Samba Member
Joined: October 21, 2004
Posts: 2771
Location: Quebec, Canada
|
| Posted: Wed Sep 23, 2015 7:19 pm Post subject: |
|
|
Well tonight was another big night. I started the night with FINALLY! moving one of the mirror hinge. The other one is completely stuck, and the nut turns freely... I'll definately will have to hink of a way to remove that thing.
After that i tried moving my flipseat mechanism. Again, nearly a success as one of the bolt moved about 1/2 inch. I dont want to bang on it or pull on it just yet, so its soaking in PB blaster for a few more days.
Next i moved to the rear corner and tried to fit my replacement to tack it into place... i realized pretty quickly that i do no have the right tool to hold it in place, so i'll need to find it before i can start working on that again.
This left me with a fun job to do ; finish the stitches on the driver side corner. Please note that i have about 6 hours of welding behind the belt, 4 of them being roughly 10 years ago....
This is what i started with ;
And this is how it look now.
it's not completely cleaned yet, because i realized i dont really have anything good to grind it clean. I did cheat a bit and went from inside to close any gap there was... i'm sure its not a good idea, with hole that could trap moisture and all, but i'm doing it for myself, and learning in the process... |
|
| Back to top |
|
|
Clara 
Samba Member

Joined: June 14, 2003
Posts: 12401
|
| Posted: Thu Sep 24, 2015 6:44 am Post subject: |
|
|
Sorry to hear about your Dad.
Yes, that is how og paint fades. That is the look people want. I think it wears through on the beltline because it gets touched more there.
Looks like there has already been some patching of the area above the engine.
Both mirror arms are supposed to be able to be turned. Rarely do they move, so keep at with with the penetrating oil. I'd do all hinges and the door mechanisms, too. Be gentle with stuck pieces, or they can break.
| enkiel wrote: |
Another night, some more progress.
I managed to remove the engine. With no brake to hold the bus in place, it was alot harder than it should. Since i was there, i also removed the gaz tank.
Then i moved to the spot i hate the most ; what's left of the metal above the engine... I cleaned it up a bit. I "think" i could patch it, but if i could find a 2'x2' with the right stamping, it would be perfect...
Question time ;
1- My mirror arm in front arent positioned correctly. Basically, when we open the door, it stops the door from opening correctly. I tried turning the nut under it, but nothing seems to happen. It's currently sitting with a good quantity of "unstuck rusty part" liquid, and i'm hoping it will move easier tomorrow... is there a trick or something?
2- My flipseat's passenger arm is stuck. I can't pull the lever to move it. Again, any trick? i don't want to break it or damage it, so i'm scared to do anything more than adding more "unstuck rusty part" liquid...
|
_________________
The Obsolete Air-Cooled Documentation Project http://oacdp.org/ |
|
| Back to top |
|
|
Pinetops
Samba Member

Joined: March 24, 2007
Posts: 2987
|
| Posted: Thu Sep 24, 2015 8:06 am Post subject: |
|
|
Well, I see you're getting right into it! Nice looking work. I would cut out whatever needs fixing and replace it. I understand about wanting to keep as much og metal as you can but if something needs replacing then by all means do what you need to do.
_________________
"A rolling bus gathers no rust." |
|
| Back to top |
|
|
Enkiel
Samba Member
Joined: October 21, 2004
Posts: 2771
Location: Quebec, Canada
|
| Posted: Thu Sep 24, 2015 8:45 am Post subject: |
|
|
| Clara wrote: |
Sorry to hear about your Dad.
Yes, that is how og paint fades. That is the look people want. I think it wears through on the beltline because it gets touched more there.
Looks like there has already been some patching of the area above the engine.
Both mirror arms are supposed to be able to be turned. Rarely do they move, so keep at with with the penetrating oil. I'd do all hinges and the door mechanisms, too. Be gentle with stuck pieces, or they can break. |
Thanks.
on the OG paint, its really weird, because at the bottom there's a white drip. I guess its possible it came from factory that way, and was just buffed enough to hide it. It's pretty weird, since OG paint care are very rare here (they rust before they fade).
The door hinge are a nice surprise... welded on the door.... |
|
| Back to top |
|
|
ChrisFred
Samba Member

Joined: June 11, 2014
Posts: 322
Location: Boulder, CO
|
| Posted: Thu Sep 24, 2015 9:11 am Post subject: |
|
|
Love the build, keep on going!
How does the cargo floor and driver/passenger footwell look? Those are almost always trashed. I'd suggest using an anti-rust solvent or POR-15 to help prevent rust in the future! |
|
| Back to top |
|
|
Enkiel
Samba Member
Joined: October 21, 2004
Posts: 2771
Location: Quebec, Canada
|
| Posted: Thu Sep 24, 2015 9:19 am Post subject: |
|
|
| Pinetops wrote: |
| Well, I see you're getting right into it! Nice looking work. I would cut out whatever needs fixing and replace it. I understand about wanting to keep as much og metal as you can but if something needs replacing then by all means do what you need to do. |
I'm definately gonna replace some spot, but my main goal is to keep the exterior as original as possible, just because i love the look, and i'd hate to have something shiny that i'm affraid to drive to work
| ChrisFred wrote: |
Love the build, keep on going!
How does the cargo floor and driver/passenger footwell look? Those are almost always trashed. I'd suggest using an anti-rust solvent or POR-15 to help prevent rust in the future! |
front floor is a patch work, but with correct metal. For now this will stay as is.
The cargo floor is another story tho. I could get away with a 15" repair section for the driver side, and then repair the rest with some patch, but i think that since everything is stuck (cable, etc), i think removing the whole floor for easy access is the way to go.
EDIT : i'm missing a screw from the cargo door, between the locking mechanism and the little bar that lock the door. Is there repro of those? or are they a standard size i can find anywhere? |
|
| Back to top |
|
|
Enkiel
Samba Member
Joined: October 21, 2004
Posts: 2771
Location: Quebec, Canada
|
| Posted: Thu Sep 24, 2015 7:14 pm Post subject: |
|
|
Tonight was another big night. I decided to finish the stitches before starting something else, especially since i just ordered some butt weld claps from amazon, and wont be receiving them for 2 weeks... Before i started, i also went ahead and got myself a flap disk... amazing stuff, so much easier to grind than with the grinding wheel i had.
Mid way through my night, i ran out of wire. When i got to buy new one, i went with the smallest ; 0,030mm i believe. When i compared it to the old, i think my old one was closer to 0,050mm, and it made a HUGE difference. I noticed afterward that my welder recommend .030mm wire, with gas only for 22 gauge metal (the sheet i use). Since i been using that wire, i feel like i can more easily make puddle without going through the metal, or maybe i'm just getting better!
What i started with ;
the finish ;
I went as far as to use a light on the other side to see the hole i created while welding, and closing them up as i see them. Was tedious, but i think it did a great job in the end, especially since i wont be using any filler. On not using filler, i decided that a looong time ago when i was watching some car show on the tv, and the guy was fixing an old american car with something like melted pewter. It was amazing to watch, and i told myself from that days that its the type of repair i want ; all metal.
If all goes well, this weekend i'll close the last part, and start moving on something else.... not sure which project yet tho ;
|
|
| Back to top |
|
|
EverettB
Administrator

Joined: April 11, 2000
Posts: 69827
Location: Phoenix Metro
|
| Posted: Thu Sep 24, 2015 11:17 pm Post subject: |
|
|
| enkiel wrote: |
| Clara wrote: |
Sorry to hear about your Dad.
Yes, that is how og paint fades. That is the look people want. I think it wears through on the beltline because it gets touched more there.
Looks like there has already been some patching of the area above the engine.
Both mirror arms are supposed to be able to be turned. Rarely do they move, so keep at with with the penetrating oil. I'd do all hinges and the door mechanisms, too. Be gentle with stuck pieces, or they can break. |
Thanks.
on the OG paint, its really weird, because at the bottom there's a white drip. I guess its possible it came from factory that way, and was just buffed enough to hide it. It's pretty weird, since OG paint care are very rare here (they rust before they fade).
The door hinge are a nice surprise... welded on the door.... |
If it helps at all, I've seen a few original paint Buses with drips in the paint.
_________________
How to Post Photos
Everett Barnes - [email protected] | My wanted ads
"Water is the only drink for a wise man" | "Communication prevents complaints"
Stop dead photo links! Post your photos to The Samba Gallery! |
|
| Back to top |
|
|
BarryL
Samba Member

Joined: November 01, 2004
Posts: 14269
Location: Casa de Oro, California
|
| Posted: Fri Sep 25, 2015 9:22 am Post subject: |
|
|
| enkiel wrote: |
| i'm missing a screw from the cargo door, between the locking mechanism and the little bar that lock the door. Is there repro of those? or are they a standard size i can find anywhere? |
They are a specialty screw. Place a want ad. You can use my picture if you want.
Your cargo floor looks saveable. |
|
| Back to top |
|
|
crofty
Judas of the North

Joined: August 09, 2000
Posts: 19672
Location: Land of Whine and Phonies
|
|
| Back to top |
|
|
Enkiel
Samba Member
Joined: October 21, 2004
Posts: 2771
Location: Quebec, Canada
|
| Posted: Fri Sep 25, 2015 10:05 am Post subject: |
|
|
cool thanks! WBW is a b***h to order from when you're in Canada, but at least i know it exist! might bite the bulet and order from them at some point (they charge like 50% for shipping....) |
|
| Back to top |
|
|
Enkiel
Samba Member
Joined: October 21, 2004
Posts: 2771
Location: Quebec, Canada
|
| Posted: Sun Sep 27, 2015 3:58 pm Post subject: |
|
|
Today i had the chance of my kids playing with neighbors, so i had the whole day for myself. I spent the whole time closing stitches and finding new hole to fill... definately felt like swiss cheese....
First challenge was closing all the screw holes the carpet made... Since it will be hidden eventually, i didnt bother being neat, or caring much about heat. The largest part had a few hole that were hidden by ducktape (yes yes!) and some old piece of metal.
Next i cleaned up the post between the two rear windows. It had thick bondo, holes (i guess those were use to pull back the beltline), and a very, VERY, bad weld job. I mean, i know i'm not a great welder, but i would never leave something so unfinished and covered by bondo....
So i started with this ;
I don't know why, but it feels like the beltline is much thicker than the other panel, because i almost never burn through them....
And the finished job. Not so bad i think.
I took the time to remove the two windows, and noticed that the cut wasnt welded shut there either. so i closed it.
Then, i went on the rear corner, where those pull hole where too... I did try to keep the heat low, but the panel was already wavy, so i'm not sure if i succeed...
My last job was closing the top of the post. I got another few surprise there, which is a 1/2" hole around about 3/4 of the post. Figured it was a good way to practice my patching. I think i did ok. It's not cleaned yet, i have nothing that can get there and clean it. anyone got advice?
The monster hole i started with ;
And the finish ;
So now i got two question for you guys, and its tool related. What should i use to clean those weld? A dremel? It feels more crafty stuff than heavy duty...
Another question is what do you guys recommend to completely remove battery tray for example?
I got two in mind, but not sure if any are really what i need ;
A Saw? (DeWALT 10A Reciprocating Saw)
http://www.canadiantire.ca/en/pdp/dewalt-10a-reciprocating-saw-0541236p.html#.VgXwT_TZQw8
A.... cut out tool? (DeWalt DW660)
http://www.canadiantire.ca/en/pdp/dremel-rotary-tool-kit-0544869p.html#.VgXwF_TZQw8 |
|
| Back to top |
|
|
Enkiel
Samba Member
Joined: October 21, 2004
Posts: 2771
Location: Quebec, Canada
|
| Posted: Fri Oct 02, 2015 7:02 pm Post subject: |
|
|
well, i'd say this ; fixing badly repaired section is no fun. I know that post should have been replaced, but i think i closed it pretty good all around. Its a learning experience, and so far i'm loving it. I think i'm even getting better at welding!
First thing first, i finished closing the window post. It look bad (phone ran out of power for flash, so i had to use a light), but its actually pretty solid all around, and it still looks better than before...
Next thing, i moved to the rear driver panel, where the stitches weren't close. I tried to deal with heat, and i think i did pretty well. Half way through, i did notice that even if i wait a few seconds, the panel still get amazingly hot, so i used a wet towel to drop the temperature a bit... good practice?
I worked really hard to remove as little paint as possible.
the large gap closed.
While investigating under the bus to see what i needed once i started removing the floor, i notice something's missing............
|
|
| Back to top |
|
|
69vwcarl
Samba Member

Joined: September 14, 2008
Posts: 138
Location: midland michigan
|
| Posted: Sat Oct 03, 2015 5:27 am Post subject: |
|
|
 ............. looks like someone forgot the inner rocker..There are a ton of tips about body work if you just look around on the internet or on here enough. Go through some of the build threads on here and you will realize there is a true art to good bodywork and our Vw hobby has some amazing talent. Im no master but i think You need to get yourself a sheet metal gauge use the same gauge metal as the area you are trying to repair. You also need to take the time to trim the panels so that fitment is as close to perfect as you can get it. If you can avoid having a huge gap on one end and a over lap or a super small gap on the other you can have a lot cleaner work. Using a method of tack welding every so many inches over and over jumping around will help keep the heat down. Also remember you can heat and warp a panel from grinding also... I would get Gas for the welder ASAP and drop down to .023 or so wire it will cut down on your clean up. long road ahead but stay with it man. ............. looks like someone forgot the inner rocker..There are a ton of tips about body work if you just look around on the internet or on here enough. Go through some of the build threads on here and you will realize there is a true art to good bodywork and our Vw hobby has some amazing talent. Im no master but i think You need to get yourself a sheet metal gauge use the same gauge metal as the area you are trying to repair. You also need to take the time to trim the panels so that fitment is as close to perfect as you can get it. If you can avoid having a huge gap on one end and a over lap or a super small gap on the other you can have a lot cleaner work. Using a method of tack welding every so many inches over and over jumping around will help keep the heat down. Also remember you can heat and warp a panel from grinding also... I would get Gas for the welder ASAP and drop down to .023 or so wire it will cut down on your clean up. long road ahead but stay with it man.
_________________
LOVE splits more than Jean-Claude Van Damme |
|
| Back to top |
|
|
brettsvw
Samba Member
Joined: November 22, 2007
Posts: 2145
Location: Florida
|
|
| Back to top |
|
|
|


