| Author |
Message |
Evil_Fiz
Samba Member

Joined: May 06, 2011
Posts: 1045
Location: Jacksonville, FL

|
 Posted: Sat Apr 27, 2019 8:59 am Post subject: Re: The K_R_A_K_E_N_N : a 70 Ghia Convertible reinterpreted Posted: Sat Apr 27, 2019 8:59 am Post subject: Re: The K_R_A_K_E_N_N : a 70 Ghia Convertible reinterpreted |
 |
|
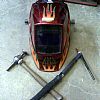
I made some progress on the door repair. My initial efforts with the hammer and dolly were not very fruitful due to the "crease" nature of the damage and the inner door brading getting in the way of the dolly. So I ended up doing the following:
- Work the the damage and low spots with the stud welder.
- Moved on to using an old mallet head as a dolly, and a conventional dolly as well, while I worked the larger low spots with my DIY slapper. The slapper is made out of a piece of 3/16" x 3" flat bar left over from the rotisserie build and a piece of bed rail bracketry bent as a handle. It's crude but it gets the job done for free. 
- The final step was to work out the last bit of the creases in a reverse dolly and slapper approach. I placed the slapper on the outside of the door (low side of the crease) and hammers it from behind with a low crown dolly. I know it is unorthodox and unconventional but it worked. I have a shrinking disc on order because there are several areas on the door that need to be shrunken before I can continue to shape the damaged areas properly. There are other repairs on the car that will need the shrinking disk as well. So far I have about five hours invested in the repair.
I'm not sure if you can tell from the pictures below that I actually made some progress but I'll let you decide.
DIY Slapper
Door Repair
-----
Emil
_________________
It's not just about what's interesting. It's also about what's helpful, and it's helpful even if it helps just one other guy working on a Ghia.
kiwighia68
See my build on TheSamba at:
The K_R_A_K_E_N_N : a 70 Ghia Convertible reinterpreted |
|
| Back to top |
|
 |
TRS63
Samba Member
Joined: December 17, 2017
Posts: 998
Location: Stuttgart - Germany
|
|
| Back to top |
|
|
bobnorman
Samba Newfoundlander

Joined: August 09, 2010
Posts: 1389
Location: Newfoundland
|
| Posted: Mon Apr 29, 2019 7:12 am Post subject: Re: The K_R_A_K_E_N_N : a 70 Ghia Convertible reinterpreted |
|
|
Well that was a nasty surprise. Great job bringing it back, looks like you made good progress. Ive been curious about shrinking discs as well, would love to try one.
_________________
Air does not freeze. Air does not boil.
http://www.thesamba.com/vw/forum/viewtopic.php?t=289807 |
|
| Back to top |
|
|
Evil_Fiz
Samba Member
Joined: May 06, 2011
Posts: 1045
Location: Jacksonville, FL
|
| Posted: Mon Apr 29, 2019 11:25 am Post subject: Re: The K_R_A_K_E_N_N : a 70 Ghia Convertible reinterpreted |
|
|
| bobnorman wrote: |
| Well that was a nasty surprise. Great job bringing it back, looks like you made good progress. Ive been curious about shrinking discs as well, would love to try one. |
Thanks for the encouragement guys. I have watched many YouTube videos on dent flipping and body work which make the process look fairly straight forward. In practice I find the stud welder to work faster and more effectively than hammer/slapper and dolly. I have also found that using an appropriately shaped dolly to strike dents from the back side works quite well.
I plan to post plenty of pictorial and videorial ( is that even a word?  ) documentation of the shrinking disc since there is not much present on TS; at least not that I found. For now I will move on to other non shinking disc requiring repairs of which are are plenty. ) documentation of the shrinking disc since there is not much present on TS; at least not that I found. For now I will move on to other non shinking disc requiring repairs of which are are plenty.
-----
Emil
_________________
It's not just about what's interesting. It's also about what's helpful, and it's helpful even if it helps just one other guy working on a Ghia.
kiwighia68
See my build on TheSamba at:
The K_R_A_K_E_N_N : a 70 Ghia Convertible reinterpreted |
|
| Back to top |
|
|
Evil_Fiz
Samba Member
Joined: May 06, 2011
Posts: 1045
Location: Jacksonville, FL
|
| Posted: Mon May 20, 2019 5:29 pm Post subject: Re: The K_R_A_K_E_N_N : a 70 Ghia Convertible reinterpreted |
|
|
Long post ahead, TL; DR summary:
I am making progress on the passenger door repair and learning a bunch about panel beating. The shrinking disc is a spectacular tool. Skip ahead to the progress pics.
The Long Version
I have been working to repair the collision damage on the passenger door. So far, I have about 30 Hrs. invested in the process and can say I am close but not there yet. I have made significant progress in getting the door back to a reasonable approximation of its original shape. The tools involved so far are: (All amounts in $ US)
- Hammer and dolly set from Harbor Freight - $30
- Stud puller set from Harbor Freight - $99
- Homemade slapper/ dinging spoon See previous post
- 30 YO Craftsman ball peen hammer modified with high crown face
- Half broken 4.5 Harbor Freight grinder - $25
- 7 Harbor Freight grinder - $32 (Purchased to accompany the shrinking disc)
- Old rubber mallet head (The handle broke)
- 5 and 9 shrinking disc set from ProShaper.com - $99
I watched, and continue to watch, many YouTube videos on dent flipping and shrinking disc technique. Many videos on YT are not worth 1/10 the time it takes to watch them. The ones that are well done are usually done by well-meaning professionals who have long forgotten what it was like when they were first learning their craft. I am thankful to the many crafts-men/women who have taken the time to share their knowledge and experience and will add what many of them fail to mention:
- Watching a video is no substitute for doing
- It takes a while of doing before you have the AHA moment of comprehension
- The real world repairs you do on your car will not be as easy as the ones they chose to use as a demonstration of a given technique
- You will mess up many times before you get something right. Once you get it right you will mess up many more times before you get it right consistently
What I have learned do far:
- Working on doors with hammer and dolly sucks. Murphys law is strongly at play here. Damage will occur primarily in places where either the dolly does not fit or cannot reach, or it will occur in places where you cant get a good hammer swing on the inside of the door.
- A ball peen hammer laying on its side is ideal for beating on dents from the inside of the door.
- The shrinking disk works wonders at shrinking stretched metal. So well in fact that it takes a while to learn how not to go too far and have to stretch the metal before you can go too far again with the shrinking disk.
- Using an adjacent area of the panel you are working on to slow down the shrinking disk will have unintended consequences. IOW, shrunken metal where you dont want it.
- The 9 shrinking disc is a substantial amount of rotating mass that wants to keep spinning long after you dont want it to.
- The best way I found to use the 9 shrinking disk is to let go of the trigger before you think you should and let the disk stop in place before moving it to cool the area.
- A wet rag works better than a spray bottle because you can use it to cool the heated metal AND use it as a cloth glove to feel the metal for variances.
I said I would post some video of the shrinking disk but the video below (previously posted in this thread by TDCTDI) does a much better job than I ever could of explaining and demonstrating the shrinking disc. I considered the disc sold by the producer of the video but the one from ProShaper.com was highly recommended as well and came in at $40 less for the set with free shipping. The one I bought is well made, balanced, and robust. I recommend it if you are planning on getting one.
Link
Here are some comparison shots of my first pass at repairs and where I am now
Before
After
Before
After
The rest
-----
Emil
_________________
It's not just about what's interesting. It's also about what's helpful, and it's helpful even if it helps just one other guy working on a Ghia.
kiwighia68
See my build on TheSamba at:
The K_R_A_K_E_N_N : a 70 Ghia Convertible reinterpreted |
|
| Back to top |
|
|
Peter D.
Samba Member

Joined: February 25, 2004
Posts: 718
Location: Stamford, CT
|
| Posted: Tue May 21, 2019 9:09 am Post subject: Re: The K_R_A_K_E_N_N : a 70 Ghia Convertible reinterpreted |
|
|
Outstanding work, I think most people would just find another door.
_________________
2019 Golf Alltrack, '65 Ghia Coupe Restoration in Progress |
|
| Back to top |
|
|
Evil_Fiz
Samba Member
Joined: May 06, 2011
Posts: 1045
Location: Jacksonville, FL
|
| Posted: Fri May 24, 2019 5:47 pm Post subject: Re: The K_R_A_K_E_N_N : a 70 Ghia Convertible reinterpreted |
|
|
| Peter D. wrote: |
| Outstanding work, I think most people would just find another door. |
Thanks Pete, it's been a real learning experience. I am only slightly better adept at panel beating than I was when i started. I will say that it is starting to click.
UPDATE
I am going to call this little project done. After about 37 Hrs. of working on the door I am satisfied with the outcome. I put some final touches on the door today and took some measurements. The door is very close to the shape of the undamaged left door but does have some minor waves in it. When measured with a straightedge the variance between high and low spots is between 1/16" and 3/32". I used a paint stirring stick, which is 1/8" thick, to measure the gap at the low spots by placing it against the straightedge and eyeballing the separation. The door is now ready for the Onceler treatment  My plan is to primer the door with MasterSeries inside and out and then do the final shaping with high build primer. It may be overly optimistic but it's worth a shot. My plan is to primer the door with MasterSeries inside and out and then do the final shaping with high build primer. It may be overly optimistic but it's worth a shot.
here are some pictures of the final product.
-----
Emil
_________________
It's not just about what's interesting. It's also about what's helpful, and it's helpful even if it helps just one other guy working on a Ghia.
kiwighia68
See my build on TheSamba at:
The K_R_A_K_E_N_N : a 70 Ghia Convertible reinterpreted |
|
| Back to top |
|
|
Onceler
Samba Member
Joined: May 28, 2010
Posts: 1646
Location: Indiana
|
| Posted: Fri May 24, 2019 6:52 pm Post subject: Re: The K_R_A_K_E_N_N : a 70 Ghia Convertible reinterpreted |
|
|
 Beautiful work! You should be proud of learning this new skill through shear desire and hard work. Polyester primer might just be enough to get it die straight. Beautiful work! You should be proud of learning this new skill through shear desire and hard work. Polyester primer might just be enough to get it die straight.
_________________
1972 Karmann Ghia |
|
| Back to top |
|
|
TDCTDI
Samba Advocatus Diaboli

Joined: August 31, 2013
Posts: 12846
Location: North Carolina
|
| Posted: Fri May 24, 2019 7:04 pm Post subject: Re: The K_R_A_K_E_N_N : a 70 Ghia Convertible reinterpreted |
|
|
WOW!!!! Great job!
I guess that I need to invest in a shrinking disc also since there are so many dents on my car (And Im sure that Ive probably been voted most likely to wreck their shit.).
_________________
Everybody born before 1975 has a story, good, bad, or indifferent, about a VW.
GOFUNDYOURSELF, quit asking everyone to do it for you!
An air cooled VW will make you a hoarder.
Do something, anything, to your project every day, and you will eventually complete it. |
|
| Back to top |
|
|
Peter D.
Samba Member
Joined: February 25, 2004
Posts: 718
Location: Stamford, CT
|
| Posted: Fri May 24, 2019 7:54 pm Post subject: Re: The K_R_A_K_E_N_N : a 70 Ghia Convertible reinterpreted |
|
|
WOW! Outstanding result! Congratulations
_________________
2019 Golf Alltrack, '65 Ghia Coupe Restoration in Progress |
|
| Back to top |
|
|
kiwighia68
Samba Member

Joined: October 20, 2013
Posts: 2874
Location: Auckland, New Zealand
|
| Posted: Fri May 24, 2019 7:59 pm Post subject: Re: The K_R_A_K_E_N_N : a 70 Ghia Convertible reinterpreted |
|
|
Yep. a near impossible job well done and now you have a door that, every time you open it to get into the car, will remind you of the loving attention you paid it.
_________________
Festina lente - hasten slowly
1968 Ghia named Emiko
Resto completed Dec 2015 |
|
| Back to top |
|
|
Evil_Fiz
Samba Member
Joined: May 06, 2011
Posts: 1045
Location: Jacksonville, FL
|
| Posted: Sat May 25, 2019 6:31 am Post subject: Re: The K_R_A_K_E_N_N : a 70 Ghia Convertible reinterpreted |
|
|
| TDCTDI wrote: |
| ...I guess that I need to invest in a shrinking disc also since there are so many dents on my car (And Im sure that Ive probably been voted most likely to wreck their shit.). |
It would not have been posible to get the results I got without the shrinking disk. I ended up Stretching and shrinking different sections of the door about 8 times. I would go too far shrinking and would have to stretch the metal again to get it where I needed it. The shrinking disk was most useful in getting the metal back in order after planishing with the hammed and dolly.
I highly recommend the disk from ProShaper.com. Get the kit that includes the 5" disk and the 9" disk and backing plate. It is $99 US with free shipping in the continental US. If your 7"/9" grinder does not include the large backing flange you can use the Harbor Freigt 4.5" backing plate (4-1/2 in. Backing Pad for Resin Fiber Discs - Part # 60290) for both the 5" and 9" disks. This was recommended by Wray Schelin (he makes the disks.) It is what he uses because it is cheaper than making it himself.
The HF 7" grinder does not include the large flange so I assembled the stack in the following order:
- HF 7" Grinder
- non-threaded lower flange (small, included with grinder)
- 4.5" backing pad
- 5" shrinking disc (uused as a spaced)
- 9" backing plate
- 9" shrinking disk
- Flange nut (the one included with the 4.5" backing pad)
For the 4.5" grinder I did the following:
- HF 4.5" grinder
- non-threaded lower flange (small, included with grinder)
- 4.5" backing pad
- 5" shrinking disc
- Flange nut (the one included with the 4.5" backing pad)
I was told by several people to use the 9" disk unless I am working in tight spaces or need to keep the heat very localized.
-----
Emil
_________________
It's not just about what's interesting. It's also about what's helpful, and it's helpful even if it helps just one other guy working on a Ghia.
kiwighia68
See my build on TheSamba at:
The K_R_A_K_E_N_N : a 70 Ghia Convertible reinterpreted |
|
| Back to top |
|
|
Evil_Fiz
Samba Member
Joined: May 06, 2011
Posts: 1045
Location: Jacksonville, FL
|
| Posted: Sun Jul 07, 2019 2:16 pm Post subject: Re: The K_R_A_K_E_N_N : a 70 Ghia Convertible reinterpreted |
|
|
It has been miserably hot and I have only logged 7.5 Hrs. since may 24th. last Saturday I spent three Hrs. on the continuing effort to get the right rear quarter panel into reasonably straight shape. Some work remains but I am getting close. I have given up on my goal of metal perfection and settled on accepting a < 1/8 layer of filler if I cant get it straight with high build primer alone.
Today I did my best Eddie Van Halen impersonation by spending 4.5 Hrs. doing hammer-ons and pull-offs on the left rear bumper bracket mount. OK, it was just hammering and yanking on the stud puller but I did get the bumper bracket straight and in what appears to be the proper special location within the body opening.
Here are a few before and after pictures
Before/after Bracket mount
Before/after Bracket location and orientation
-----
Emil
_________________
It's not just about what's interesting. It's also about what's helpful, and it's helpful even if it helps just one other guy working on a Ghia.
kiwighia68
See my build on TheSamba at:
The K_R_A_K_E_N_N : a 70 Ghia Convertible reinterpreted |
|
| Back to top |
|
|
Evil_Fiz
Samba Member
Joined: May 06, 2011
Posts: 1045
Location: Jacksonville, FL
|
| Posted: Sat Aug 03, 2019 12:05 pm Post subject: Re: The K_R_A_K_E_N_N : a 70 Ghia Convertible reinterpreted |
|
|
I'm back with more questions 
I have cut out some rust damage in the left-rear rocker/quarter outer skin. The pictures and video below show what I am dealing with. I would like to avoid cutting out any more metal if it can be avoided. My thoughts are to:
- Flood the area with phosphoric acid
- Abrade the area as best I can
- Repeat
- weld in a repair patch
- Flood the area with MasterSeries then drain
I don't want to go Captain Overkill but I don't want to phone it in either. Your feedback is encouraged.
Internal rocker skin after wire wheel
Internal rocker skin after wire wheel
Outer skin exterior (removed piece)
Outer skin interior (removed piece)
Wide shot of damaged area
Rocker metal integrity testing
Link
-----
Emil
_________________
It's not just about what's interesting. It's also about what's helpful, and it's helpful even if it helps just one other guy working on a Ghia.
kiwighia68
See my build on TheSamba at:
The K_R_A_K_E_N_N : a 70 Ghia Convertible reinterpreted |
|
| Back to top |
|
|
Evil_Fiz
Samba Member
Joined: May 06, 2011
Posts: 1045
Location: Jacksonville, FL
|
| Posted: Wed Apr 15, 2020 4:50 pm Post subject: Re: The K_R_A_K_E_N_N : a 70 Ghia Convertible reinterpreted |
|
|
I did not fall off the face of the planet nor did I stop working on the Ghia. I have been slowly progressing on doing bad, ugly sheet metal welds and getting closer to covering the car in primer. I put together the following rough sketch for Marcdeb of the convertible back seat support bracket. This is not final but I figured I'd share what i have so far.
-----
Emil
_________________
It's not just about what's interesting. It's also about what's helpful, and it's helpful even if it helps just one other guy working on a Ghia.
kiwighia68
See my build on TheSamba at:
The K_R_A_K_E_N_N : a 70 Ghia Convertible reinterpreted |
|
| Back to top |
|
|
fabricator john
Samba Member
Joined: October 09, 2009
Posts: 510
Location: manassas va. now Venice Fl.
|
| Posted: Wed Apr 15, 2020 5:14 pm Post subject: Re: The K_R_A_K_E_N_N : a 70 Ghia Convertible reinterpreted |
|
|
| make it from cardboard just to make sure you can make your bends if needed number them in order ,have seen many including myself make a part you cant bend ...any that says they havent is full of poo. fabricator john |
|
| Back to top |
|
|
rbsurfguy
Samba Member

Joined: August 10, 2008
Posts: 1757
Location: Fairfax, Northern Virginia Formerly Huntington Beach, SoCal
|
| Posted: Wed Apr 15, 2020 5:27 pm Post subject: Re: The K_R_A_K_E_N_N : a 70 Ghia Convertible reinterpreted |
|
|
Emil!! Good to see you back in action. That's really cool of you to mock up that design for Marc, I have been lurking through various local ads as well looking for a'Vert being scrapped to see if they have that part for him. I can't wait to see if/when he mocks something up in metal.
Jeff 
_________________
1971 Ghia convertible (Body off rebuild)
2019 VW Atlas 4Motion
2012 Passat-Sold
See my build on The Samba at:
Jeff's 71 Vert Restoration/Reassembly http://www.thesamba.com/vw/forum/viewtopic.php?t=6...highlight= |
|
| Back to top |
|
|
Marcdeb
Samba Member

Joined: May 22, 2019
Posts: 3031
Location: Vermont
|
| Posted: Wed Apr 15, 2020 5:42 pm Post subject: Re: The K_R_A_K_E_N_N : a 70 Ghia Convertible reinterpreted |
|
|
Your drawing looks great Emil. I really appreciate your taking the time to put this together for me. I will do my best to pay it forward. This community is amazing. The generosity and genuine willingness to help others is what makes TheSamba so special.
I'm looking forward to seeing more progress on your car. The hammer and dolly work you did on the door is just incredible.
_________________
Marc
68 Karmann Ghia Cabrio Autostick
71 Karmann Ghia Cabrio
Previously Owned:
2011 VW EOS Hard Top Conv
2008 Saab 9-3 2.0T Conv
2003 Saab 9-3 SE Conv
2001 Saab 9-3 Conv
1998 BMW 3 Series Conv
1997 Saab 900 Conv
1997 Mazda Miata
68 Ghia Vert Survivor with 22,350 miles: https://www.thesamba.com/vw/forum/viewtopic.php?t=768107&highlight=
71 Ghia Vert Restoration: https://www.thesamba.com/vw/forum/viewtopic.php?t=726710&postorder=asc |
|
| Back to top |
|
|
Marcdeb
Samba Member
Joined: May 22, 2019
Posts: 3031
Location: Vermont
|
| Posted: Wed Apr 15, 2020 6:10 pm Post subject: Re: The K_R_A_K_E_N_N : a 70 Ghia Convertible reinterpreted |
|
|
| rbsurfguy wrote: |
Emil!! Good to see you back in action. That's really cool of you to mock up that design for Marc, I have been lurking through various local ads as well looking for a'Vert being scrapped to see if they have that part for him. I can't wait to see if/when he mocks something up in metal.
Jeff |
Thank you also Jeff. I'm totally committed to make these rear seat towers, especially after so much support from all of you. Thank you to Dave (djkeev) as well for his help. I have sourced the metal already and I have access to a Metal Brake. I will post my progress on my restoration thread when the time comes.
_________________
Marc
68 Karmann Ghia Cabrio Autostick
71 Karmann Ghia Cabrio
Previously Owned:
2011 VW EOS Hard Top Conv
2008 Saab 9-3 2.0T Conv
2003 Saab 9-3 SE Conv
2001 Saab 9-3 Conv
1998 BMW 3 Series Conv
1997 Saab 900 Conv
1997 Mazda Miata
68 Ghia Vert Survivor with 22,350 miles: https://www.thesamba.com/vw/forum/viewtopic.php?t=768107&highlight=
71 Ghia Vert Restoration: https://www.thesamba.com/vw/forum/viewtopic.php?t=726710&postorder=asc |
|
| Back to top |
|
|
Evil_Fiz
Samba Member
Joined: May 06, 2011
Posts: 1045
Location: Jacksonville, FL
|
| Posted: Fri Apr 05, 2024 11:56 am Post subject: Re: The K_R_A_K_E_N_N : a 70 Ghia Convertible reinterpreted |
|
|
I'm back after nearly 4 years to the day since my last update.
I need advice from those who have painted their own Ghias.
If all goes well, next weekend my wife will apply epoxy to the entire bare metal car. I started a thread in the Body/Paint forum and will link it here for reference:
Any tips on how to paint the "Naughty Bits" on a Karmann Ghia?
Here is the text from that post to spare you a trip over there:
| Quote: |
I will soon apply a complete epoxy sprayout on a fully bare metal 70 Ghia Vert mounted on a rotisserie.
I am particularly interested in tips and strategies on how to paint/approach the following:
- Under rear seat area (y-pipe pocket under rear seat sides)
- Behind and around convertible bracing and luggage tray
- Inner nose
- Engine compartment wheel well drop-downs.
- Front wheel well blind areas (behind fresh air vent duct, gas lid pocket, Etc.)
- Behind dash and dash "Side pockets"
I am not beyond using a brush or brush-like substance, and I have a mini detail spray gun as well as a full-size LVLP gun. |
-----
Emil
_________________
It's not just about what's interesting. It's also about what's helpful, and it's helpful even if it helps just one other guy working on a Ghia.
kiwighia68
See my build on TheSamba at:
The K_R_A_K_E_N_N : a 70 Ghia Convertible reinterpreted |
|
| Back to top |
|
|
|


