| Author |
Message |
mpl
Samba Member
Joined: December 07, 2015
Posts: 97

|
 Posted: Tue May 03, 2016 3:28 pm Post subject: Re: The yet to be named 87 Syncro build (or TYTBN) Posted: Tue May 03, 2016 3:28 pm Post subject: Re: The yet to be named 87 Syncro build (or TYTBN) |
 |
|
| Looking good, Atadloco. Eager to hear how your RG7 experience goes! |
|
| Back to top |
|
 |
All4You
Samba Member
Joined: March 01, 2015
Posts: 146
Location: NY
|
| Posted: Wed May 04, 2016 10:31 pm Post subject: Re: The yet to be named 87 Syncro build (or TYTBN) |
|
|

Moving along nicely. There's so much to do on these cars but I like your pace! It will come together nicely seeing that you're not cutting any corners.
I am getting my spare trans shipped back to me from Greg at Mr Gas soon. Hope to have it in a a month or so and will report back.
Looking forward to future updates.
All4Him
_________________
86' Syncro, EJ25
------------------
Build Thread
http://www.thesamba.com/vw/forum/viewtopic.php?t=647477&postdays=0&postorder=asc&start=0 |
|
| Back to top |
|
|
insyncro
Banned

Joined: March 07, 2002
Posts: 15086
Location: New York
|
| Posted: Thu May 05, 2016 6:19 am Post subject: Re: The yet to be named 87 Syncro build (or TYTBN) |
|
|
You will love the Bostig  |
|
| Back to top |
|
|
Atadloco
Samba Member
Joined: July 13, 2012
Posts: 254
Location: New Hampshire
|
| Posted: Mon Jun 06, 2016 8:07 am Post subject: Re: The yet to be named 87 Syncro build (or TYTBN) |
|
|
Work freed up so I can have a little fun with... really need to come up with a clever name. Still unsure how much cabinet space I want / need, might also depend if I go with a high-top option or keep the tin top with a roof storage rack and half sized Thule box. For now the interior is done, once all the mechanical and paint is done, I can start back up on the inside.
In preparation for the Bostig conversion, I pulled the radiator and will be putting a new one along with all new hoses and stainless cooling lines. Yesterday was a rainy day in NH so I spent the day working on pulling the front drive train out. Slow going but did mange to get one side done and the other side I have most of the bolts loosened up, finish that side up this week and find a place to sand blast and possibly powder-coat.
After wheel area is free and clear I'll start grinding off all the old undercoating and POR15 here we come. |
|
| Back to top |
|
|
Atadloco
Samba Member
Joined: July 13, 2012
Posts: 254
Location: New Hampshire
|
| Posted: Mon Jun 06, 2016 8:18 am Post subject: Re: The yet to be named 87 Syncro build (or TYTBN) |
|
|
| I'll be sending all the suspension and drive train parts out to be sandblasted and possibly powder coated (possibly). What the census for power coating used parts that have been sandblasted, or would it be better to paint or POR15 everything. |
|
| Back to top |
|
|
insyncro
Banned
Joined: March 07, 2002
Posts: 15086
Location: New York
|
| Posted: Mon Jun 06, 2016 8:30 am Post subject: Re: The yet to be named 87 Syncro build (or TYTBN) |
|
|
If the blaster is detailed and can get ever last spec of rust, powder looks great and will last.
In our East Coast environment, coating with a product like POR offers spot touchups.
Using a high quality wax over the coatings will keep them intact longer.
Since we have met before, I will gladly allow you to borrow the applicators for the waxes when you are ready.
You will need a larger compressor to run them as they are pressure pots.
Let me know via PM and I will set you up.
D |
|
| Back to top |
|
|
Atadloco
Samba Member
Joined: July 13, 2012
Posts: 254
Location: New Hampshire
|
| Posted: Mon Jul 11, 2016 1:06 pm Post subject: Re: The yet to be named 87 Syncro build (or TYTBN) |
|
|
Things are moving along, seems mountain biking and hiking have taken precedence over the Syncro. With little to no weight left, had a heck of a time pulling the axle nut off the last wheel. Had to improvise a bit and use a tie down and some wood (not to mention the 3' of extension pipe). Finally came loose.
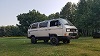
So now I have a very cool futuristic hover van.
The grinding and cleaning of the frame and underneath have started. Coating with POR15 to finish up. At this point I have the 4 wheel wells cleaned up and Por'ed, next is the remaining areas under the van and send out the suspension for sandblasting.
Once I have the underneath cleaned up, painted and all the old crap removed, I can start replacing with new. Going to start at the front and work my way back.
Don't have the obligatory pic, but I did get my Bostig RG7 kit a few weeks ago and my transmission has been sent out to Mr Gas on Colorado..  |
|
| Back to top |
|
|
Atadloco
Samba Member
Joined: July 13, 2012
Posts: 254
Location: New Hampshire
|
| Posted: Sat Sep 10, 2016 9:38 am Post subject: Re: The yet to be named 87 Syncro build (or TYTBN) |
|
|
Decided the interior cabinet I built needed a little color, still not sure if I'm going to extend the cabinets all the way back, or keep it a half cabinet. If anyone has any pictures of their custom cabinets, send them my way so I can get some more ideas.
Spent a full day sandblasting all the suspension and drive train parts and a few more days after that prepping, POR15 and painting. Waiting for another shipment from T3 with front CV's, upper / lower ball joints, Rockford boots, tie rod ends and so on and so on. The T3 anti sway bar is sitting pretty in the picture. I think the parts look angry.
|
|
| Back to top |
|
|
Sodo
Samba Member

Joined: July 06, 2007
Posts: 9603
Location: Western WA
|
| Posted: Sat Sep 10, 2016 9:51 am Post subject: Re: The yet to be named 87 Syncro build (or TYTBN) |
|
|
| Atadloco wrote: |
| I think the parts look angry. |
Angry is the new happy.

Nice work. That will be an angry Syncro BTW.
_________________
'90 Westy EJ25, 2Peloquins, 3knobs, pressure-oiled GT mainshaft, filtered, cooled gearbox
'87 Tintop w 47k 53k, '12 SmallCar EJ25, cooled filtered gearbox
....KTMs, GasGas, SPOT mtb |
|
| Back to top |
|
|
Atadloco
Samba Member
Joined: July 13, 2012
Posts: 254
Location: New Hampshire
|
| Posted: Wed Sep 14, 2016 11:26 am Post subject: Re: The yet to be named 87 Syncro build (or TYTBN) |
|
|
Since I've never taken a Syncro gas tank out before I followed the Syncro.org instructions which worked well. http://syncro.org/removing-the-syncro-gas-tank/
For the Syncro newbie such as myself, I figured I'd take some pictures of the process for other newbie that may some day tackle this.
I started off draining the tank from the fuel filter connection on the drivers side on the tank. I knew I didn't have much (or at least I hope I knew I didn't have much) fuel in the tank. After the tank was drained I started on the drivers side to remove the charcoal canister, all that was holding it on was a strap and the connection on the bottom to move it out of the way.
From there I moved the the passenger side to remove the fill pipe and such. I have the suspension out so it was easy to access everything I needed. There is a screw on a bracket right in the middle of the pipe and also a hose clamp to the rear of that.
There us also two screws near the gas cap and another hose clamp as well. Here you can raise the gas filler enhough to remove the metal pipe from the rubber hose. You can twist the metal pipe part to pull it out if the tank.
At this point all my cables and hoses are out of the way and I started fudging to get the tank out. I started on the drivers side and used a long pipe to wedge on the top to gently start pushing down.
I never push or pulled too hard, towards the end the sending unit bolts were getting hung on the frame lip. I pushed in and down to free the bolts.
And there is always that one last bolt to cause havoc, well not too much. I used a flat pri bar to free the nut on the sending unit from the frame.
At this point it was just wiggling the tank to get it free and voila... Gas tank removed.
There is some surface rust but no rot which is nice. Now time to clean it all up, use some rust converter and POR15 for the engine bay. |
|
| Back to top |
|
|
Atadloco
Samba Member
Joined: July 13, 2012
Posts: 254
Location: New Hampshire
|
| Posted: Wed Sep 28, 2016 10:57 am Post subject: Re: The yet to be named 87 Syncro build (or TYTBN) |
|
|
The last item to pull from the Syncro (I think) was the power steering unit. Not only to add new poly bushings but to also tear down and replace all the gaskets.
After pulling the fuel tank I wanted to go through and clean up any rust, use some Eastman rust converter and then POR15 the fuel tank area and also the engine bay. A quick spray of Rustoleum as the POR15 was still tacky for the final touch.
I'm finally at the point where I can really start putting things back together. received my final shipment from Christopher at T3 and all the new front and rear wheel bearings from GoWesty.
|
|
| Back to top |
|
|
unibagel
Samba Member

Joined: December 02, 2004
Posts: 528
Location: Bflo, NY
|
| Posted: Wed Sep 28, 2016 12:03 pm Post subject: Re: The yet to be named 87 Syncro build (or TYTBN) |
|
|
| Like! |
|
| Back to top |
|
|
Atadloco
Samba Member
Joined: July 13, 2012
Posts: 254
Location: New Hampshire
|
| Posted: Sat Oct 08, 2016 2:03 pm Post subject: Re: The yet to be named 87 Syncro build (or TYTBN) |
|
|
Had some fun with bearings and my new $100 12 ton press. Having never changed the bearings on a Syncro before, it wasn't too bad. With new parts and Bently in hand, I was ready to go.
The before:
First step was to take the spindle off, I used a 30mm socket that fit perfectly to pop it out.
On the hub I need to pick up a race tool remover, bearing splitter, silver hoodicky thing.. Not sure what it's called to remove the race from the spindle, that needs to come off.
Once the spindle is out and the bearings are destroyed, you can remove the outer gaskets. Didn't find an easy way to do this other than taking small flat head screw driver and hammer being careful not to gouge the inside of the hub and pry the gasket off.
Now that the gasket is fully off you can remove the clamp.
Once the clamp has been removed I used a larger socket that fit pretty well on the inside to pop the bearings out.
All clean and ready for the new bearings.
|
|
| Back to top |
|
|
Atadloco
Samba Member
Joined: July 13, 2012
Posts: 254
Location: New Hampshire
|
| Posted: Fri Oct 14, 2016 2:40 pm Post subject: Re: The yet to be named 87 Syncro build (or TYTBN) |
|
|
| One of the rear wheel bearing clips was missing when I disassembled it. I've been looking for the size of the rear clip "retaining ring", but can't seem to find it anywhere. The front is an 80mm.2.5mm but that is too big for the rear. I also didn't see any on GoWesty or VanCafe, the rear wheel bearing package only comes with the bearings and the seal, but no clip. Am I being a dumbass and over looking something? |
|
| Back to top |
|
|
bosco53
Samba Member

Joined: August 04, 2014
Posts: 92
Location: San Diego, CA
|
| Posted: Wed Nov 02, 2016 8:35 pm Post subject: Re: The yet to be named 87 Syncro build (or TYTBN) |
|
|
Great work! Thanks for the pics and details! Going through my own Syncro restoration as well. Good stuff!
_________________
Bluey, "The Wonder Slug" - 80 Westfalia Air-Cooled to EJ22 and now Frankenmotor. #thewonderslug
Uncle Buck, 86 Syncro GL Camper Conversion - Restored to it's original glory and sold. 💔 |
|
| Back to top |
|
|
Atadloco
Samba Member
Joined: July 13, 2012
Posts: 254
Location: New Hampshire
|
| Posted: Mon Nov 14, 2016 11:13 am Post subject: Re: The yet to be named 87 Syncro build (or TYTBN) |
|
|
Made some more progress this past week and weekend. Such a nice feeling to be able to start putting parts back together instead of taking apart. Picked up most if not all the suspension parts from Christopher at T3, very easy to deal with. Put my 944 CV's together and all the wheel bearings are now in.
Had a heck of a time putting the rear trailing arm polyurethane bushings in, try boiling to soften them up, didn't work. Ending up taking a longer bolts with some washers and such on the end and pulled them in about half way.
From there I used the press to push them in the rest of the way.
Last part was to take a smaller bolt that was just a bit larger than the metal sleeve to press that the rest of the way in. Worked pretty slick.
And lastly for this Monday morning, a picture of my dog.
|
|
| Back to top |
|
|
xoo00oox
Samba Member
Joined: February 11, 2010
Posts: 2672
Location: East Nassau, NY
|
| Posted: Mon Nov 14, 2016 11:34 am Post subject: Re: The yet to be named 87 Syncro build (or TYTBN) |
|
|
What rear control arm bushings are those? I've put a bunch of the Power flex ones in with very little effort.
Where is your dog in that picture? White Mountains? Where did you hike in from? |
|
| Back to top |
|
|
Atadloco
Samba Member
Joined: July 13, 2012
Posts: 254
Location: New Hampshire
|
| Posted: Mon Nov 14, 2016 12:50 pm Post subject: Re: The yet to be named 87 Syncro build (or TYTBN) |
|
|
I went with the WhiteLine Poly bushings for the rear, very tight fit. Good eye, that was Mt Jefferson, started on the Cog railway road.
| xoo00oox wrote: |
What rear control arm bushings are those? I've put a bunch of the Power flex ones in with very little effort.
Where is your dog in that picture? White Mountains? Where did you hike in from? |
|
|
| Back to top |
|
|
xoo00oox
Samba Member
Joined: February 11, 2010
Posts: 2672
Location: East Nassau, NY
|
| Posted: Mon Nov 14, 2016 2:47 pm Post subject: Re: The yet to be named 87 Syncro build (or TYTBN) |
|
|
| Thanks. That's a beautiful area. You're making bing nicely on this Syncro. It's fun when parts start going back on. Maybe we'll see you at some of the northeast VW meets. |
|
| Back to top |
|
|
lucianosanchez
Samba Member

Joined: May 04, 2016
Posts: 212
Location: Ventura County
|
| Posted: Tue Nov 15, 2016 12:41 pm Post subject: Re: The yet to be named 87 Syncro build (or TYTBN) |
|
|
Awesome job man, keep it up!
_________________
1983.5 Aussan Brown Westfalia | 2016 to 2020
1983.5 Beige Westfalia | 2019 to Current |
|
| Back to top |
|
|
|


