| Author |
Message |
western auto
Samba Member
Joined: July 20, 2013
Posts: 293
Location: yuma,az

|
 Posted: Sun Jul 08, 2018 2:16 pm Post subject: Re: 64 Kombi partial restore Posted: Sun Jul 08, 2018 2:16 pm Post subject: Re: 64 Kombi partial restore |
 |
|
| took my seals 6 months before they would open without slapping the window to death, and adjusting them with credit card after closing..... |
|
| Back to top |
|
 |
sgellis
Samba Member

Joined: July 06, 2016
Posts: 2014
Location: SW Nova Scotia, Canada
|
| Posted: Sun Jul 08, 2018 2:32 pm Post subject: Re: 64 Kombi partial restore |
|
|
Vent window latch in place. I suspected some paint chips but went great. The aluminum rivets flatten out quite easily. I used pop rivets for the vent latch plates. I looked at the steel rivets and where they needed to go and decided it was not going to end well... Pop rivets worked fine.
Wired up the 70 amp alternator that came on the bus. I was planning to get a generator but maybe not with it being a camper. Did notice it will not charge until I rev the engine even though my idle is quite high. Once it starts charging it continues to charge at idle.
Replaced the spring in the engine lid latch. Was planning to get another latch but forgot. Actually works.
_________________
My 64 Kombi restoration
My camper interior build
My 54 standard restoration
The Nova Scotian Barndoor (YouTube)
The Nova Scotian Barndoor (CAD drawings) |
|
| Back to top |
|
|
Eric&Barb
Samba Member

Joined: September 19, 2004
Posts: 24764
Location: Olympia Wash Rinse & Repeat
|
| Posted: Sun Jul 08, 2018 3:26 pm Post subject: Re: 64 Kombi partial restore |
|
|
| sgellis wrote: |
| Eric&Barb wrote: |
| Have you applied talc powder to the rubber seals?? |
No... I was going to apply silicon spray though. |
Silicon spray can be a major pain to get rid of when later you need to do some paint touch up.
Talc is the factory suggested solution.
_________________
In Stereo, Where Available! |
|
| Back to top |
|
|
Joey
Samba Member

Joined: August 12, 2005
Posts: 5366
Location: Nova Scotia - Canada
|
| Posted: Sun Jul 08, 2018 4:24 pm Post subject: Re: 64 Kombi partial restore |
|
|
Your bus is going together fast! Those side pop out seals are a pain. Copious amounts of talcum/baby powder works for a while. I'm surprised I haven't broke any of my glass yet while trying to open them.
I was going to head to Dieppe N.B. for the MVOC show on Saturday but maybe I'll head to Yarmouth instead...
_________________
Joey
60 Kombi - '74 Bus - '79 Panel - '65 Beetle |
|
| Back to top |
|
|
sgellis
Samba Member
Joined: July 06, 2016
Posts: 2014
Location: SW Nova Scotia, Canada
|
|
| Back to top |
|
|
sgellis
Samba Member
Joined: July 06, 2016
Posts: 2014
Location: SW Nova Scotia, Canada
|
| Posted: Mon Jul 09, 2018 11:15 am Post subject: Re: 64 Kombi partial restore |
|
|
Getting down to the line. Needs to be complete by Thursday evening
well Friday at 9:00am
no later than Friday at 4:30pm. 7:00am Saturday is the absolute latest
Haha
Front bumper and emblem should be painted tomorrow night. Parcel tray and fresh air vent parts should be painted Wednesday night. Not running a back bumper this year.
Remainder of the pop outs should go in tonight. Need to modify my vent window jig. I hadnt planed on how much force it would take to press them in. First one is almost set. Hopefully I can get one or both vent windows done tonight
I forgot to order the door frame to door seals so $50 shipping later
They should be here Wednesday. If they dont show up I have some 1/8 rubber sheet that I can use to get by.
Should pull the engine to replace the throwout bearing and put the good clips on. Last year I had some trouble getting the crappy clips to stay and dont really trust them.
Still have the signal lights and dash lights to hook up. The flasher and emergency relay are both 6v even though the bus was running 12v. Will likely find a 12v 3-pin flasher and forget about the emergency lights for now. I need to run a proper wire from the alternator to the starter.
Would like to get the hubcaps on. Picked up #6 x3/8 flat head machine screws to attach the clips. Maybe I will swap them out for rivets sometime but I dont have the tool now. I didnt get the hubcaps painted but they wont look bad chrome with the dove blue.
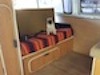
Still have some of the cargo door seals to glue on but that is not critical. Dont have the rubbers for the passenger seat to set on so will wrap some rubber around the seat frame for now. Need to cut some floor mats to fit the front. Just going to throw a blanket on the cargo floor for now
Hopping Thursday evening to clean the dust and greasy fingerprints off it.
And I need to call the insurance and up the value. I have no idea what to put on it. It is not like I can just go buy an identical bus.
Thats a big list. Think I feel the bus flue coming on

_________________
My 64 Kombi restoration
My camper interior build
My 54 standard restoration
The Nova Scotian Barndoor (YouTube)
The Nova Scotian Barndoor (CAD drawings) |
|
| Back to top |
|
|
crofty
Judas of the North

Joined: August 09, 2000
Posts: 19672
Location: Land of Whine and Phonies
|
| Posted: Mon Jul 09, 2018 12:50 pm Post subject: Re: 64 Kombi partial restore |
|
|
| Eric&Barb wrote: |
| sgellis wrote: |
| Eric&Barb wrote: |
| Have you applied talc powder to the rubber seals?? |
No... I was going to apply silicon spray though. |
Silicon spray can be a major pain to get rid of when later you need to do some paint touch up.
Talc is the factory suggested solution. |
Talc works amazing!
_________________
Your Vanagon sucks, Stop waving at me.
| HamburgerBrad wrote: |
I slept on crofty's tent once. I passed out drunk from two bottles of Everett's brother's wine. |
|
|
| Back to top |
|
|
khalimadeath
Samba Member
Joined: June 24, 2014
Posts: 768
Location: Reno, NV
|
| Posted: Mon Jul 09, 2018 3:03 pm Post subject: Re: 64 Kombi partial restore |
|
|
For the hubcap rivets, all I did is make a dimple in the bottom of a bolt, set the head of the bolt on the ground, place the head of the rivet in the dimple. Then lay the when across that with the clip in place. Once it was all lined up I just hammed the rivet. Went pretty quick.
_________________
The United States Constitution
(c) 1787. All Rights Reserved
1970 Bus Westfalia
1964 Kombi |
|
| Back to top |
|
|
sgellis
Samba Member
Joined: July 06, 2016
Posts: 2014
Location: SW Nova Scotia, Canada
|
|
| Back to top |
|
|
sgellis
Samba Member
Joined: July 06, 2016
Posts: 2014
Location: SW Nova Scotia, Canada
|
|
| Back to top |
|
|
earlywesty
Samba Member

Joined: May 03, 2004
Posts: 2358
Location: In the woods, Ontario
|
| Posted: Tue Jul 10, 2018 7:31 pm Post subject: Re: 64 Kombi partial restore |
|
|
| Eric&Barb wrote: |
| sgellis wrote: |
| Eric&Barb wrote: |
| Have you applied talc powder to the rubber seals?? |
No... I was going to apply silicon spray though. |
Silicon spray can be a major pain to get rid of when later you need to do some paint touch up.
Talc is the factory suggested solution. |
Talc works great, and smells baby bum fresh lol. |
|
| Back to top |
|
|
BarryL 
Samba Member

Joined: November 01, 2004
Posts: 14271
Location: Casa de Oro, California
|
| Posted: Wed Jul 11, 2018 11:03 am Post subject: Re: 64 Kombi partial restore |
|
|
In a way I'm jealous. The pictures make me want to break out my gun and do a bunch of spraying. You deserve the gloss you're getting after all the hard prep.
Two questions: How do you keep the overspray mist in the air off your camera and how did you place the plastic and huge slats over the inside of the huge barn? |
|
| Back to top |
|
|
Burlyhammer
Samba Member

Joined: March 07, 2002
Posts: 1693
Location: Great north woods Maine
|
| Posted: Wed Jul 11, 2018 11:55 am Post subject: Re: 64 Kombi partial restore |
|
|
| Wow. You are flying right through this bus. It is amazing what you are accomplishing in such a short time! Awesome! |
|
| Back to top |
|
|
sgellis
Samba Member
Joined: July 06, 2016
Posts: 2014
Location: SW Nova Scotia, Canada
|
| Posted: Wed Jul 11, 2018 7:24 pm Post subject: Re: 64 Kombi partial restore |
|
|
Bumper on.
Had some trouble getting the end the correct height. Drivers side is still a little high though it doesn't really show. At some point I will have to remove the bumper and slot the bracket some.
Emblem clips would only work on the pins I replaced. I left them a little long. I think the seals are a little thick and the clips seem really deep. I glued the others from the inside with sealer.
Replaced the throwout bearing and clips. Took a bit to find a trick to getting them on. New clips are very stiff.
And painted the last parts.
_________________
My 64 Kombi restoration
My camper interior build
My 54 standard restoration
The Nova Scotian Barndoor (YouTube)
The Nova Scotian Barndoor (CAD drawings) |
|
| Back to top |
|
|
sgellis
Samba Member
Joined: July 06, 2016
Posts: 2014
Location: SW Nova Scotia, Canada
|
|
| Back to top |
|
|
azbob
Samba Member

Joined: April 04, 2010
Posts: 714
Location: Phoenix, AZ
|
| Posted: Wed Jul 11, 2018 7:41 pm Post subject: Re: 64 Kombi partial restore |
|
|
Ouch! I about did that about a month ago!
_________________
Bus Builder |
|
| Back to top |
|
|
sgellis
Samba Member
Joined: July 06, 2016
Posts: 2014
Location: SW Nova Scotia, Canada
|
| Posted: Thu Jul 12, 2018 6:43 am Post subject: Re: 64 Kombi partial restore |
|
|
List for tonight...
Hook up signal lights. Forgetting about emergency flasher for now.
Install parcel tray
Install speedo cable. Looks like fun getting it routed through front.
Install draglink end
Wire fuel gage and speedo lights including oil light.
Clean and install passenger seat
Install good alternator wire
Install door to window frame seals. They are supposed to be delivered today.
Glue lower door seals. I should get the remainder of the cargo door seals on also. It is not forecasting rain for the weekend so no big deal if I dont get to it.
Install temporary air filter. I made a couple attempts to buy an elbow but sellers never got back to me. I have a bay elbow that I will tape a paper air filter to the end. Think I will leave the engine lid closed for the show this year. Haha
New bolts in apron. Put tape over gap from apron to tin. The seal I got is much to big to go in the channel and wrong shape. I should have looked at it closer when it arrived. I will get one like I got before that was smaller where it went in the channel.
Install fresh air cover. Flaps will wait for another day.
Make floor mat for the front. Some day I will get a correct mat.
Fill with gas. I forgot to bring a gas can to work today. I should have enough home to get to a station.
List still seams quite long. Maybe I will sneek out of work early
Looks like tomorrow morning for a quick cleaning.
I had a wow moment last night while standing back and admiring it. I never expected this when I started 2 years ago. it was just supposed to be fix steel, rebuild mechanicals and make it good enough to drive.
I love working on this thing but a break from the shop will be nice Maybe next year it wont be such a rush to get ready for the show. haha
_________________
My 64 Kombi restoration
My camper interior build
My 54 standard restoration
The Nova Scotian Barndoor (YouTube)
The Nova Scotian Barndoor (CAD drawings) |
|
| Back to top |
|
|
western auto
Samba Member
Joined: July 20, 2013
Posts: 293
Location: yuma,az
|
| Posted: Thu Jul 12, 2018 8:23 am Post subject: Re: 64 Kombi partial restore |
|
|
| vw 5 wire fog light relay from napa with 2 87b outlet terminals works awesome for hazards, just need to add a ground to chassis on terminal 85 or 86 |
|
| Back to top |
|
|
sgellis
Samba Member
Joined: July 06, 2016
Posts: 2014
Location: SW Nova Scotia, Canada
|
|
| Back to top |
|
|
Eric&Barb
Samba Member
Joined: September 19, 2004
Posts: 24764
Location: Olympia Wash Rinse & Repeat
|
| Posted: Thu Jul 12, 2018 7:30 pm Post subject: Re: 64 Kombi partial restore |
|
|
Get the oil light working before you run the engine anymore!
_________________
In Stereo, Where Available! |
|
| Back to top |
|
|
|


