| Author |
Message |
furrylittleotter
Samba Member

Joined: May 19, 2008
Posts: 1506
Location: West Seattle

|
 Posted: Fri Apr 07, 2017 9:02 pm Post subject: Mid Engine Subaru EJ22 & 4EAT Auto Trans. Running. NOT THEORY Posted: Fri Apr 07, 2017 9:02 pm Post subject: Mid Engine Subaru EJ22 & 4EAT Auto Trans. Running. NOT THEORY |
 |
|
I got bored one day so I built this. I like it.

Nice Stance, Eh?
Now to the build...
I was at the gas station and a guy asked me if I wanted to look at a Legacy he had for sale. Yes I do.

Mint!
Actual Miles...1992 with 50k? Turns out the guy was an engineer at Litton Microwave company and walked to work. At first I tried to sell the car. surrounded by fools, no one wanted to buy it, so I kept it.

took out the go parts.

4by 8 trailer...Say HI Daisy-Mae!

so I cut that

Cut that, added that...

New crossmember 2x4" 16gauge ( I think)

Rear framerail in front of spring "tower", added flange to allow moving framerail outboard.

4

I installed rectangular tubing INSIDE the original framerails. Very strong

Here you see the new strong inner framerails tied into the new strong crossmember...
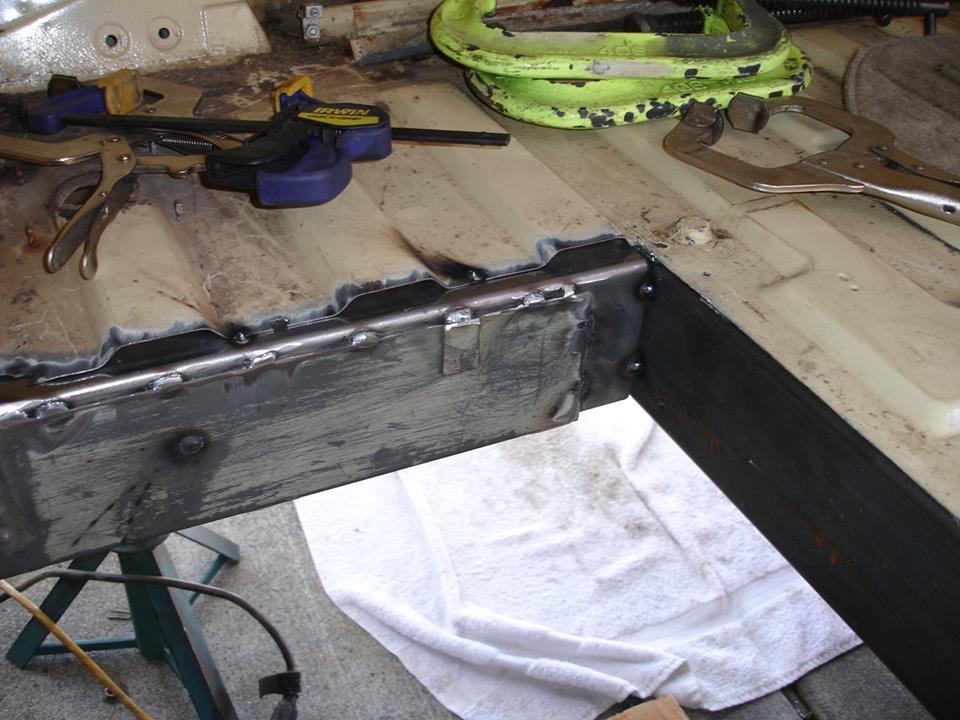
5

7

I tied the frame rails into the new crossmember
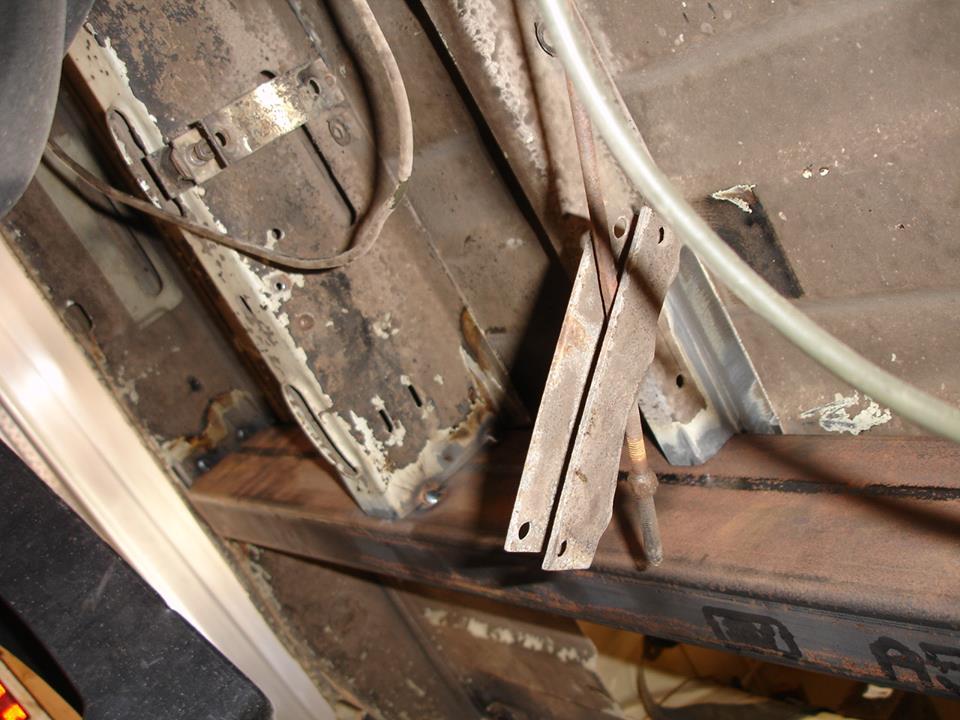
I tied the floor support "Z" bars in to the crossmember but later removed them completely to raise my fuel tank...

Here you can see the old, cut crossmember behind the new one.

11

See the tubing inside the framerails...
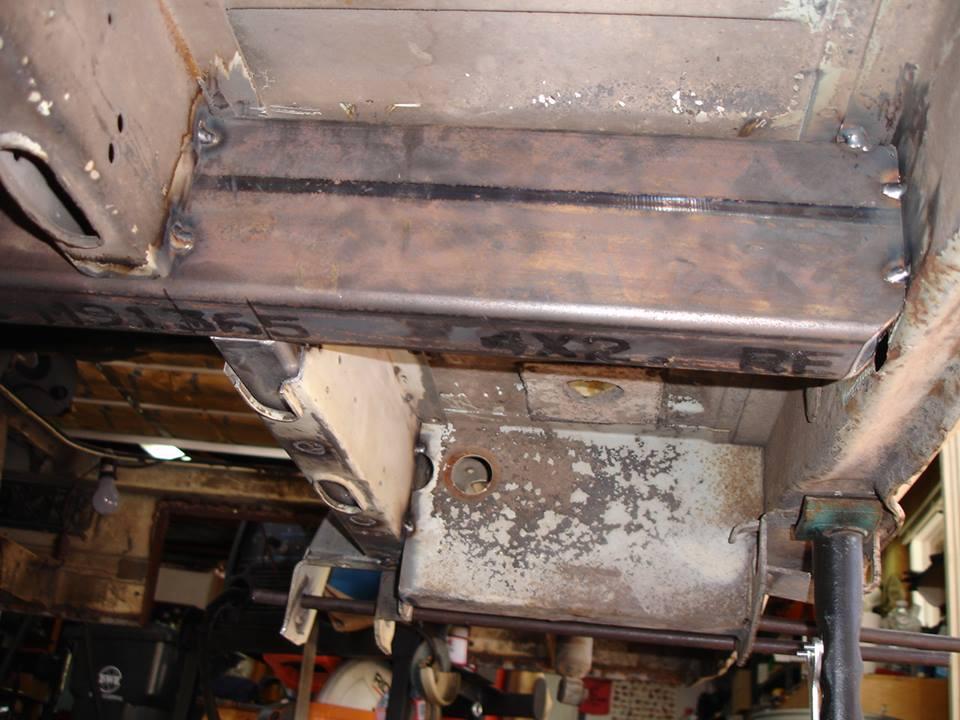
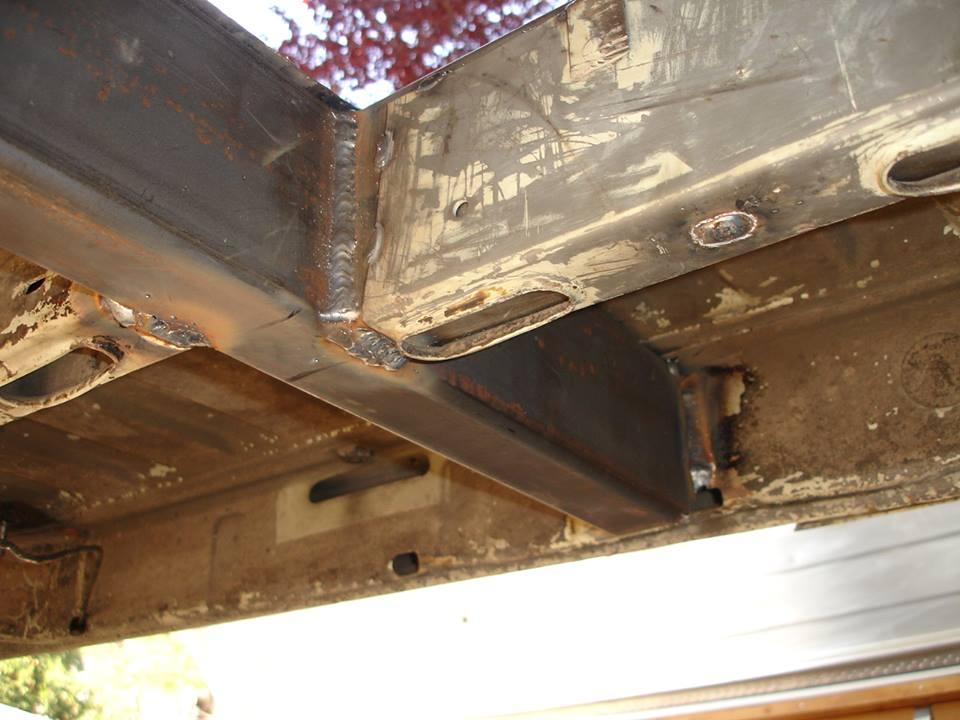
Final welding ( inner arm mounts not yet finished here, see other photos)

1

2
3

4

5

Here I placed rods through the arm mount holes so I could measure them

Clamped channel in rear arm mounting brackets so I could measure

Transferred those measurements here to wood template...
the rods are parallel, see the drawing below the arm...
It slices, it dices, the grinder-matic...

Section removed, plate added to weld each side to...
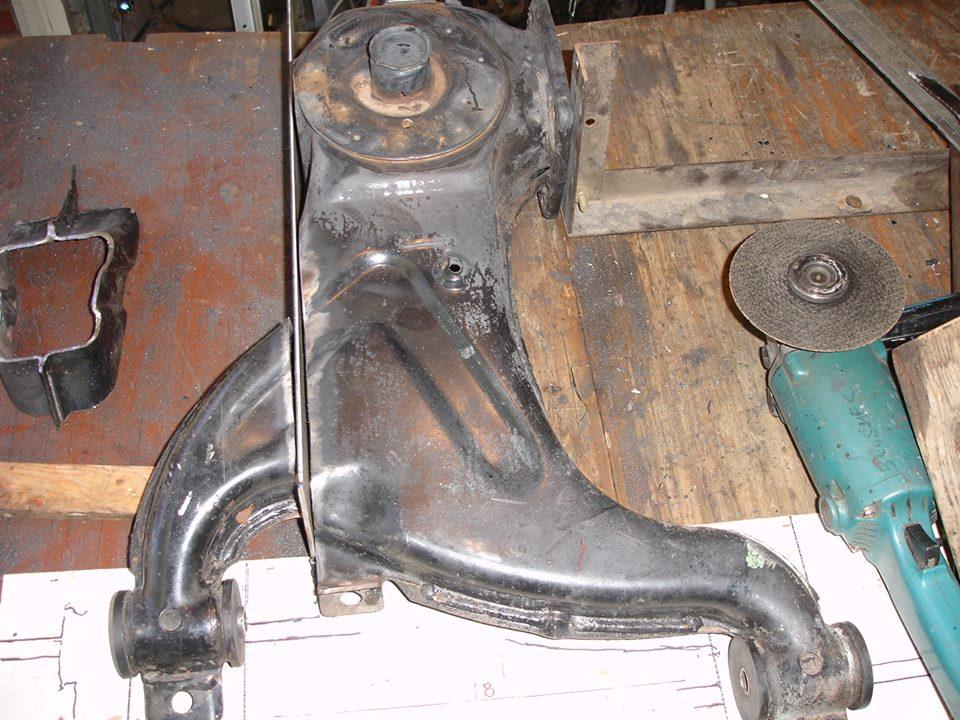
Welded back together...


1
fixed spring perch while I was at it...

Used old crown on new pipe
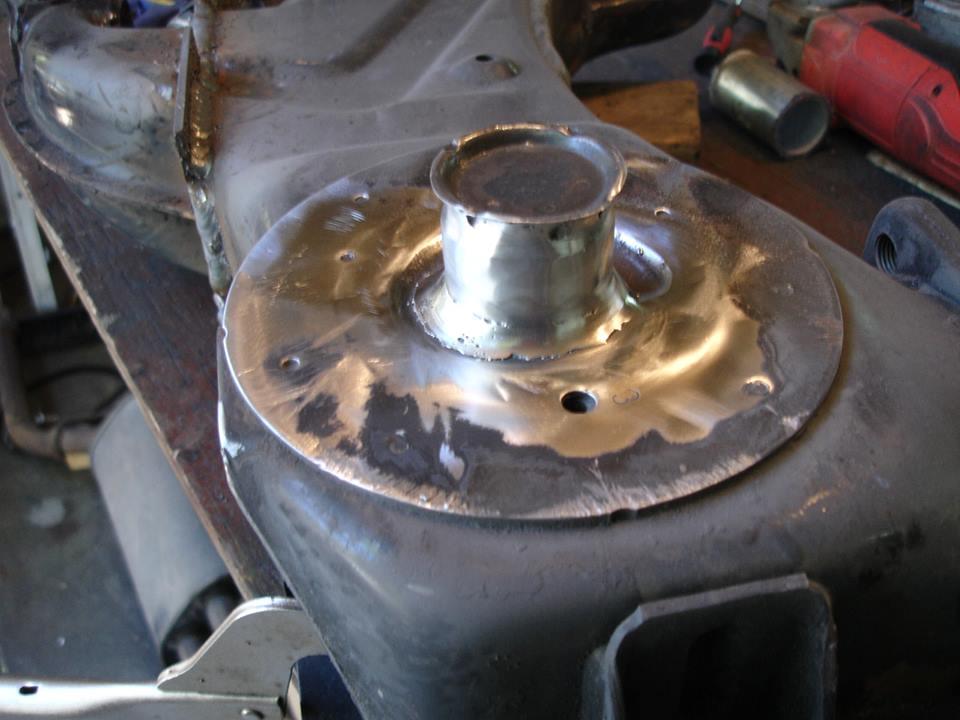
Removed pinch weld while at it, welded inside and added plate.
Inside rear arm mount, final version. Gusseted. STRONG. You cant see it but the front gusset I fabricated crosses below the framerail and is welded to the tubing I added inside.

1

2

Arm mounted on modified frame. You can see the 1" square tubing going around the engine opening here as well.

Mockup, more cutting to do

Measuring for valve cover removal clearance...
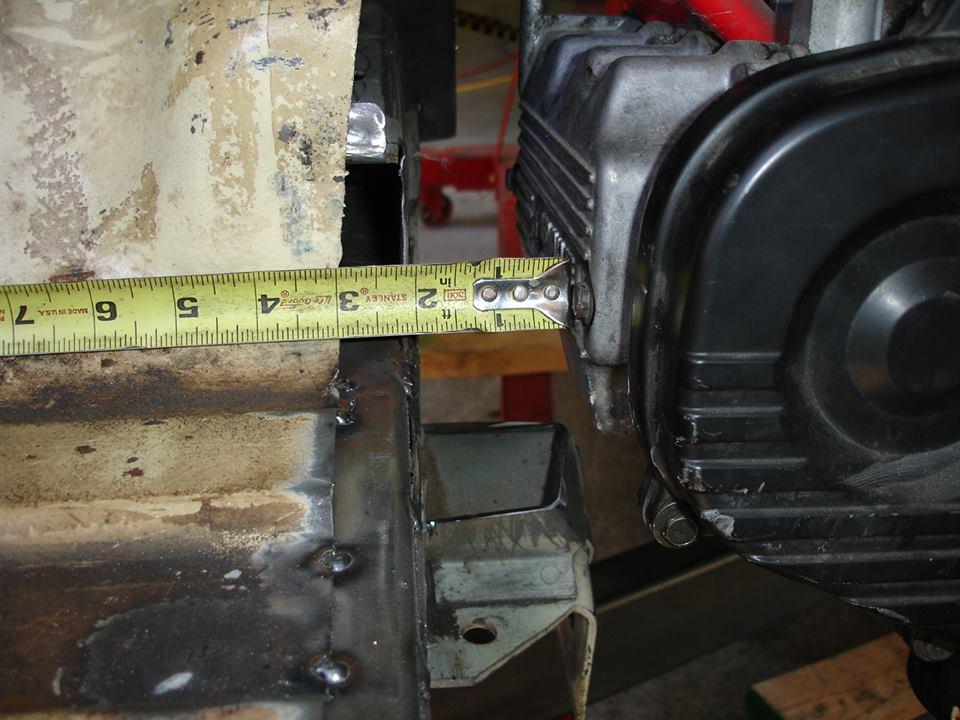
1
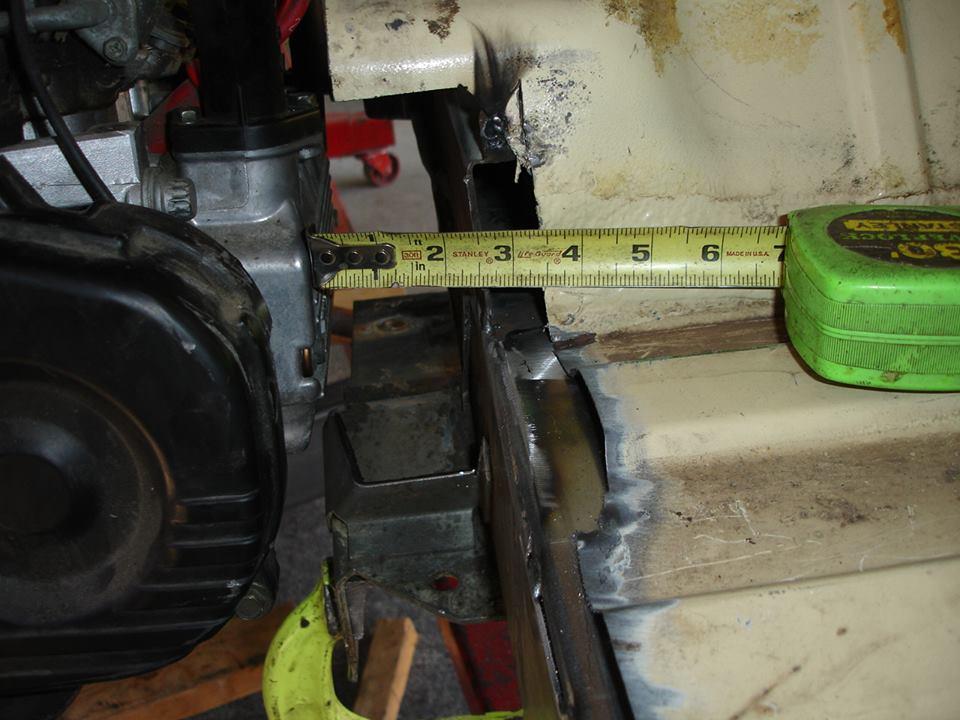
still trying to figure out the inner arm mount here. needed more space to remove valve covers in utero...

and here... as you can see in later photos ALL the top of that mount removed and gussets added to add strength to the BOTTOM instead.

this is a C shaped engine hanger I fabricated to hang the engine. I t can be jacked in but I need to do mockups with it hanging. This worked great.

Here the engine is in place. as you can see it could probably fit under the back seat if I had a used a front radiator, but what fun is that?

Here is the complex frame I built to mount the radiator. It is built to allow removal of condensor coil or radiator independently.

1

2

3

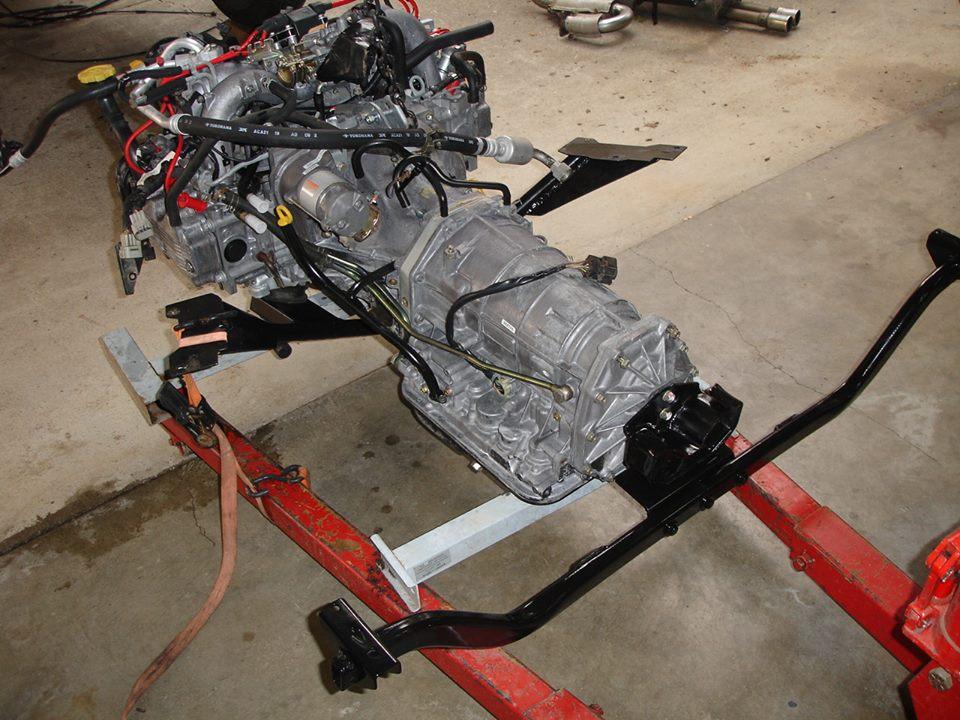
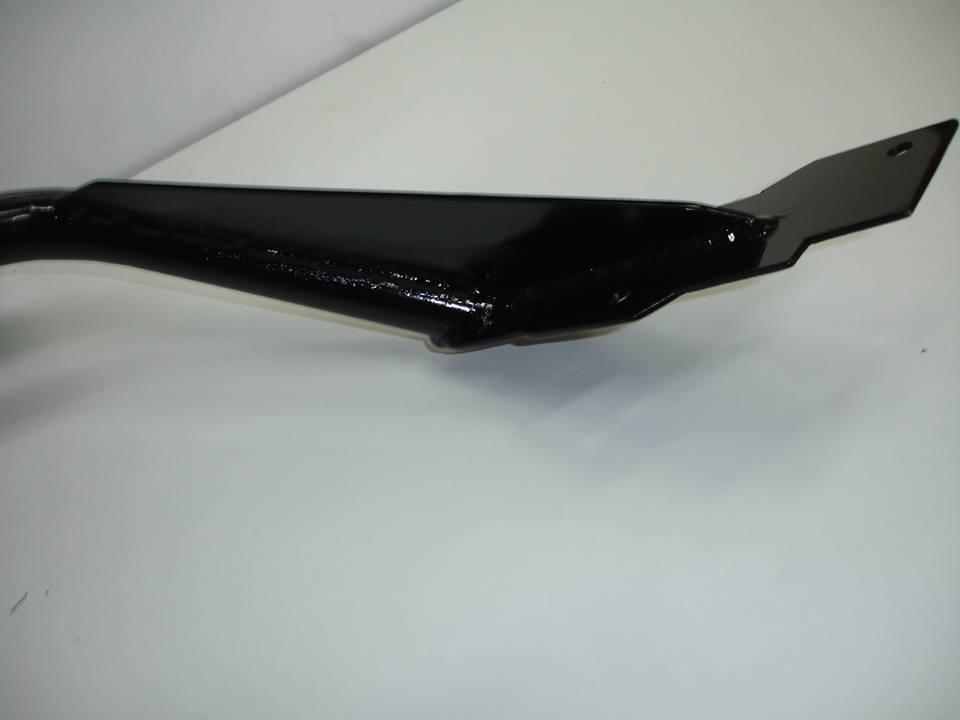
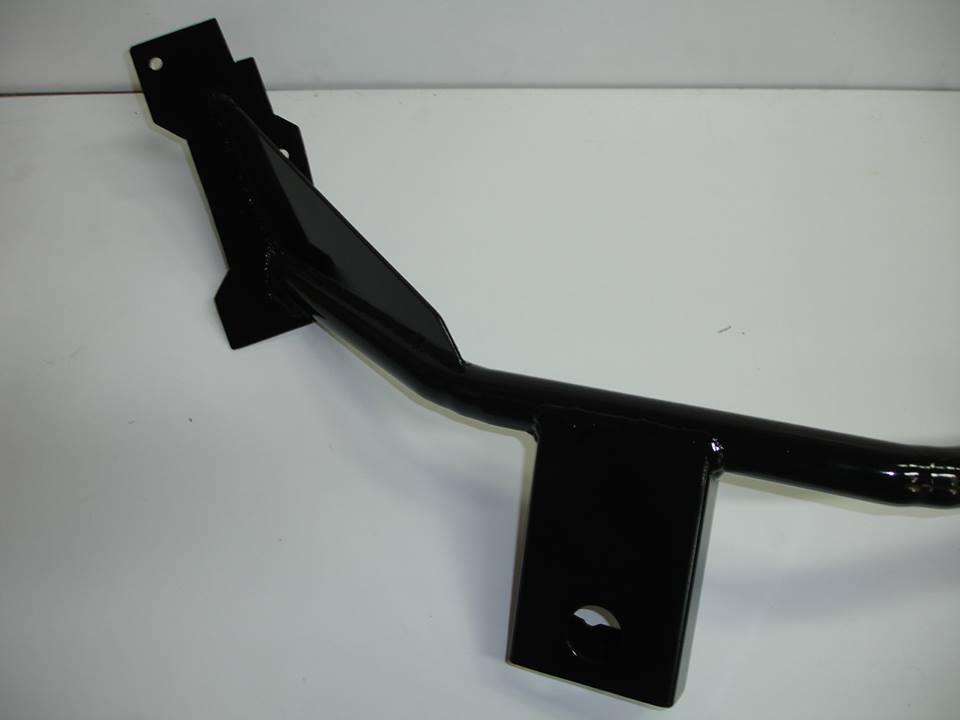
First attempt at carrier bar

1

2

second and final attempt at carrier bar (temporary hardware)
a.

1

2

3

4
5

6

7
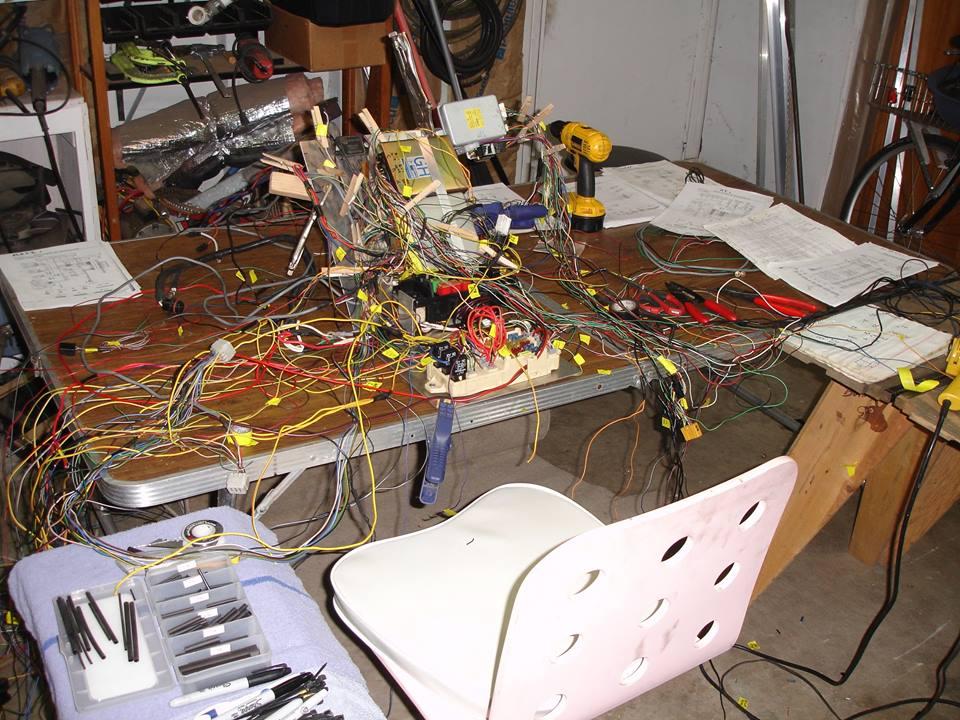
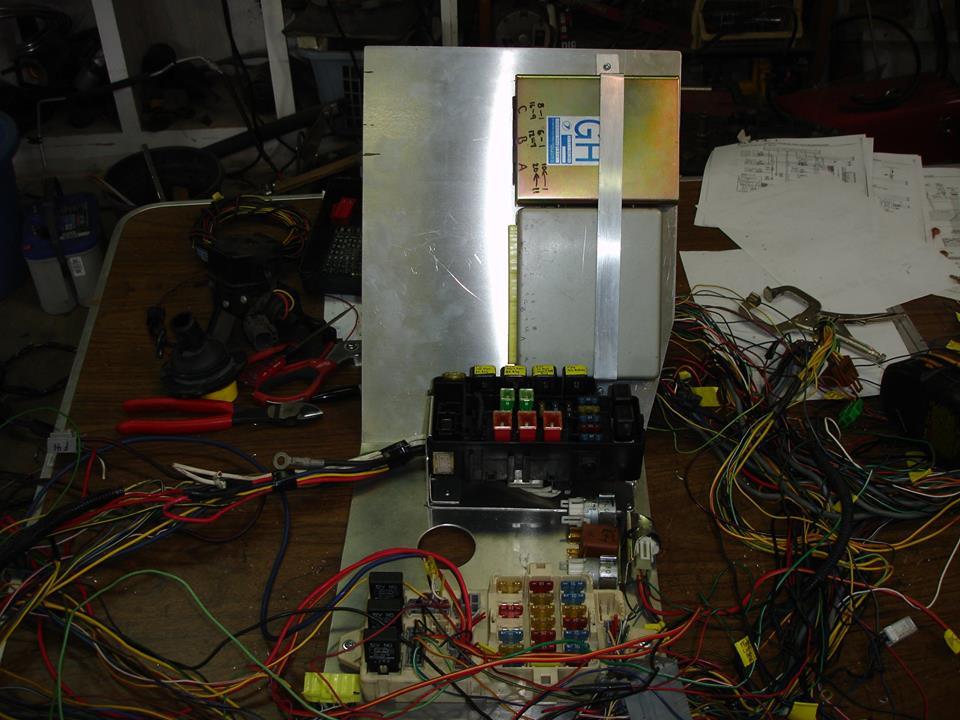
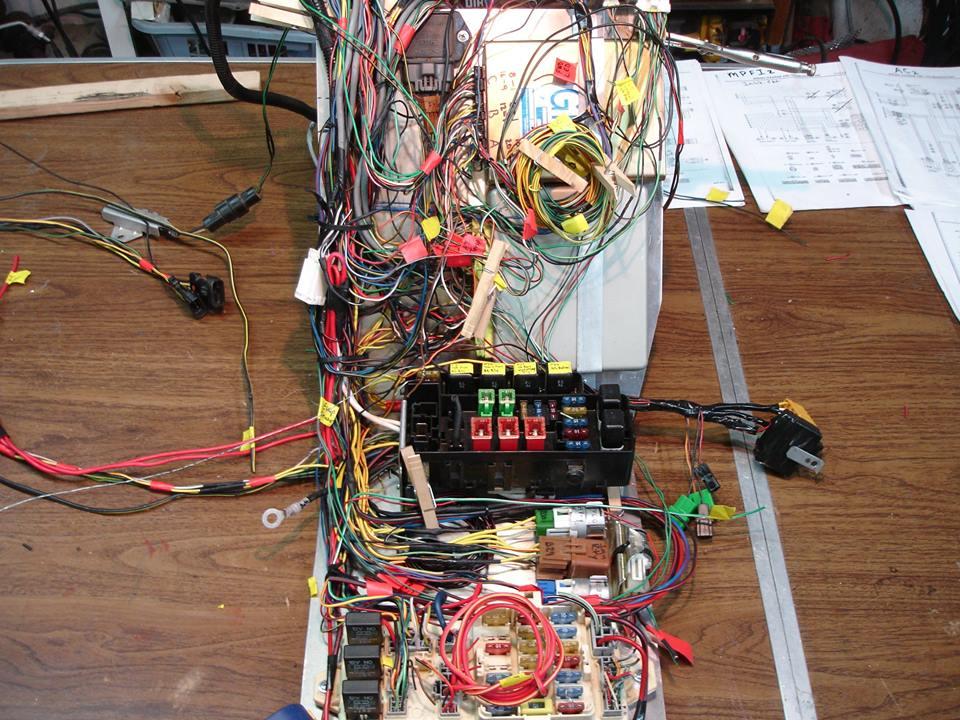
Wiring...
1

2

3

3.c
3.b

4
5

6

7
8

9

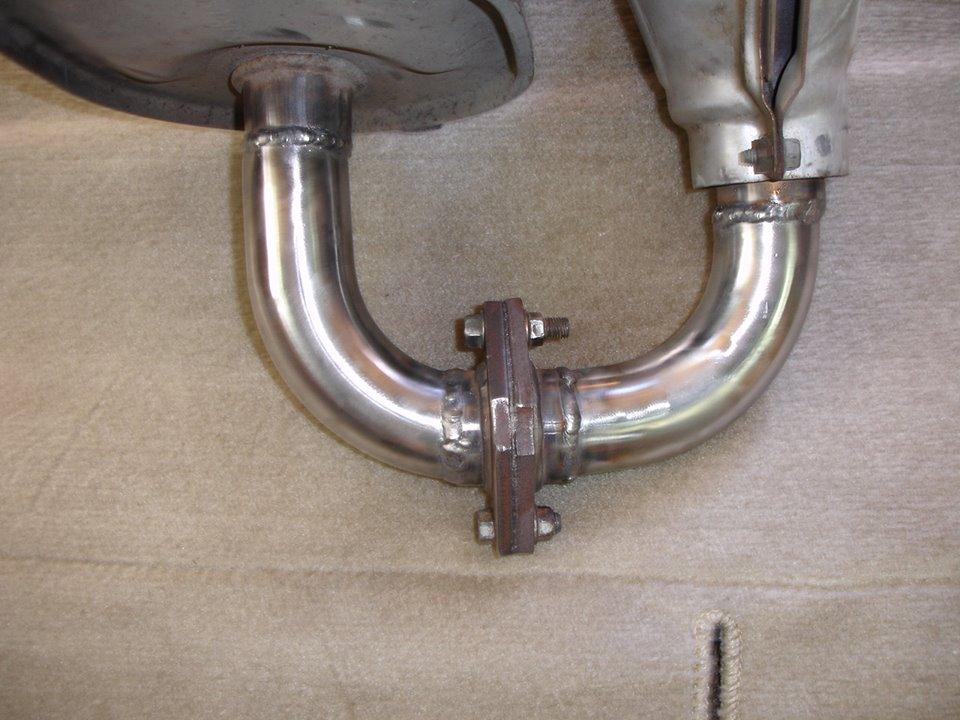
I used the ENTIRE exhaust from the Legacy, reconfigured...

1
2

3

4

5

6

7

8
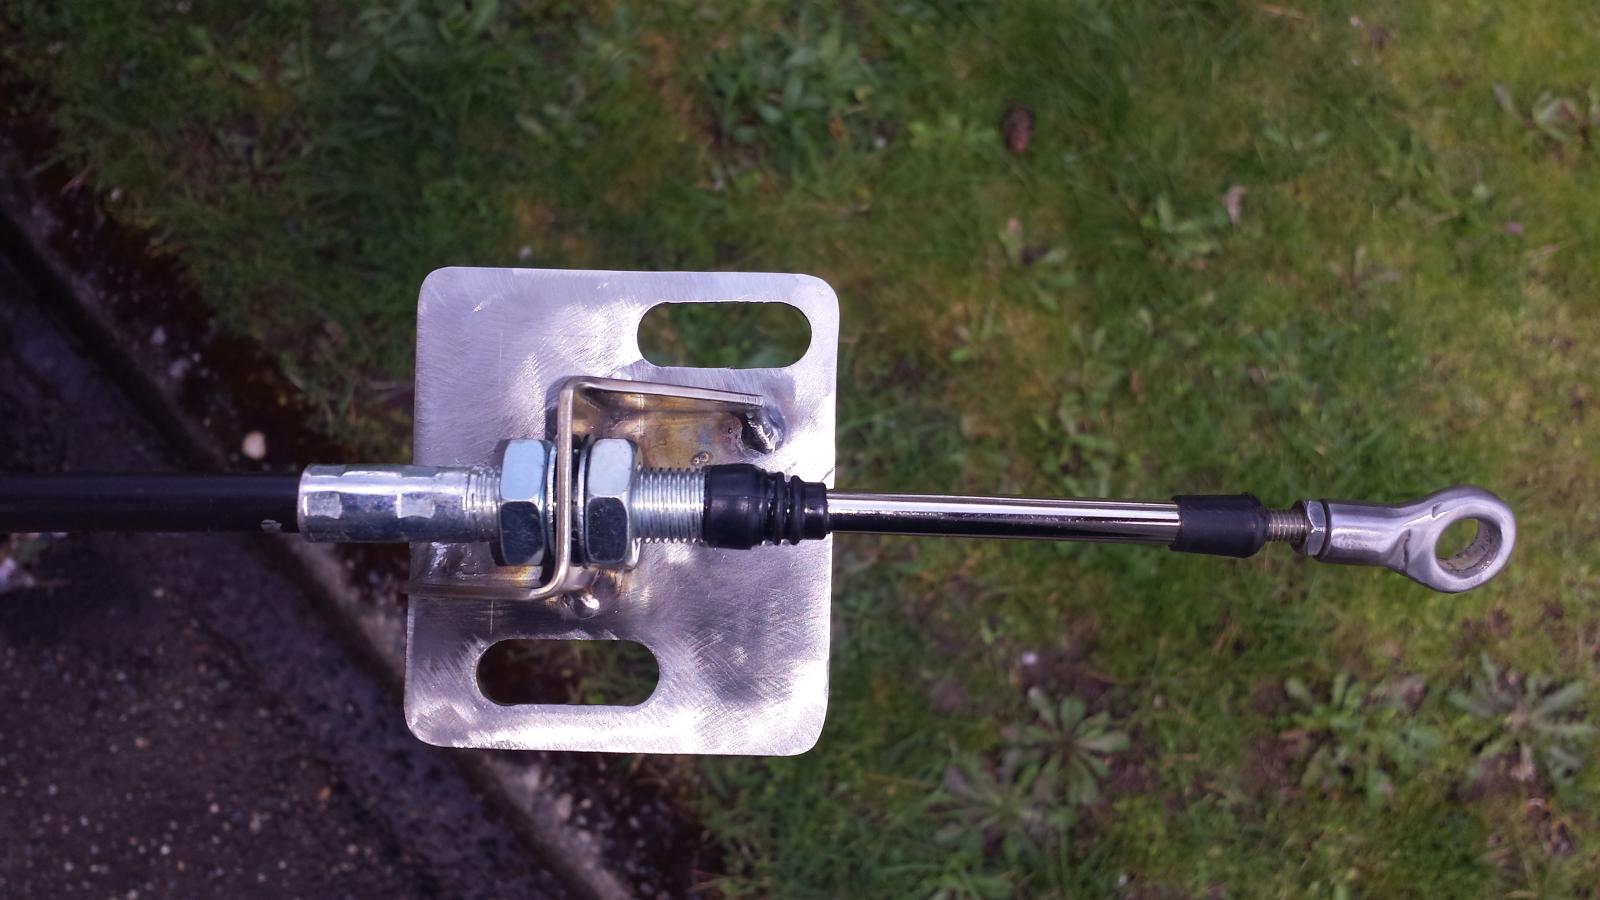
I couldnt use a van shifter because this is a 4 speed... so I bought a long ass cable and welded the old cable ends on, made brackets to hold cable.

1

2
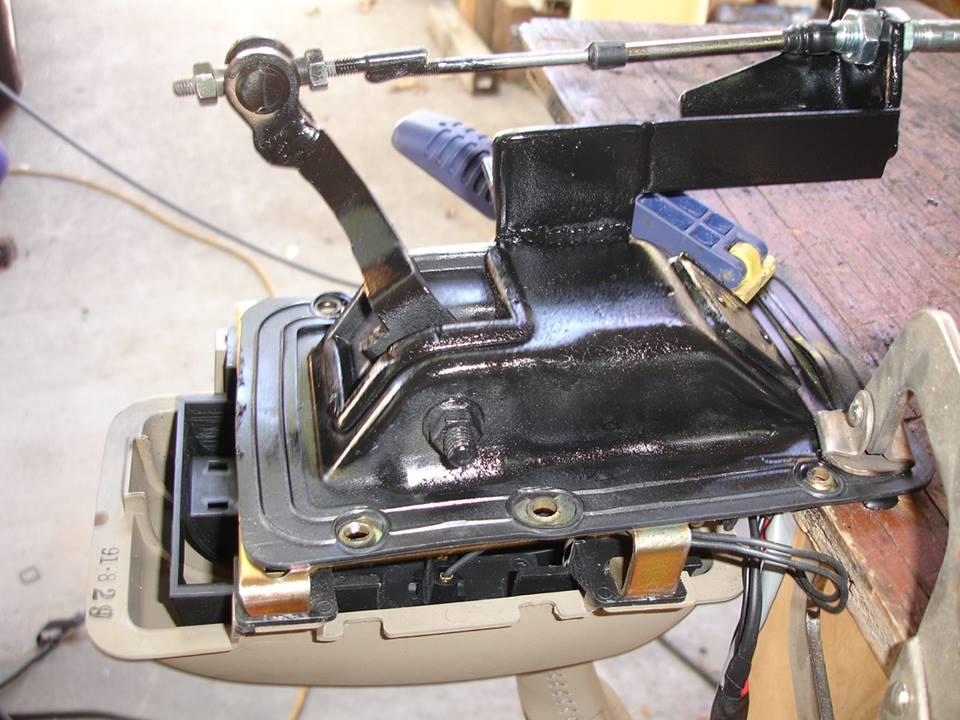
Originally I cut the end off the factory shifter cable and welded it on the new cable. This made the cable impossible to change without more welding.
This week I cut that apart, fabricated new ends that thread onto the cable and a new stainless, adjustable bracket for the transaxle end

1
1
2

Further down the rabbit hole...


2

3

4

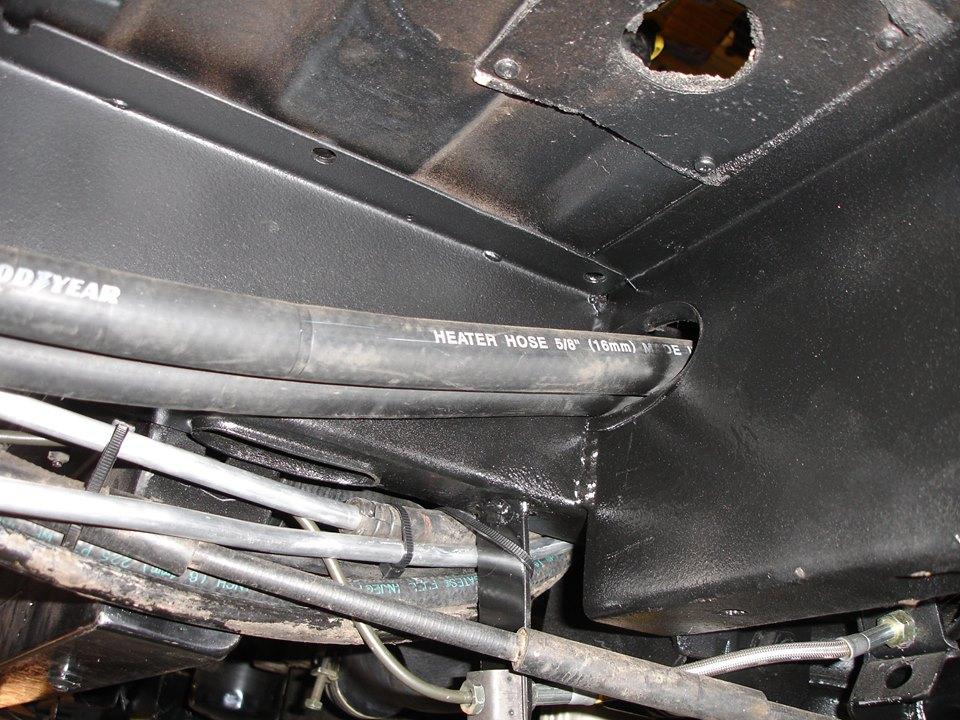
Here you can see the old HOLE in the rear from the old rear radiator, which cooled the van perfectly well, despite the naysayers

5

6

7

8

9

10

11

12
13

14

15
16
Daisy's patience was waning. Lets play with the BALL Neil...
Burley's axles, just cut down a bit...930 Porsche!

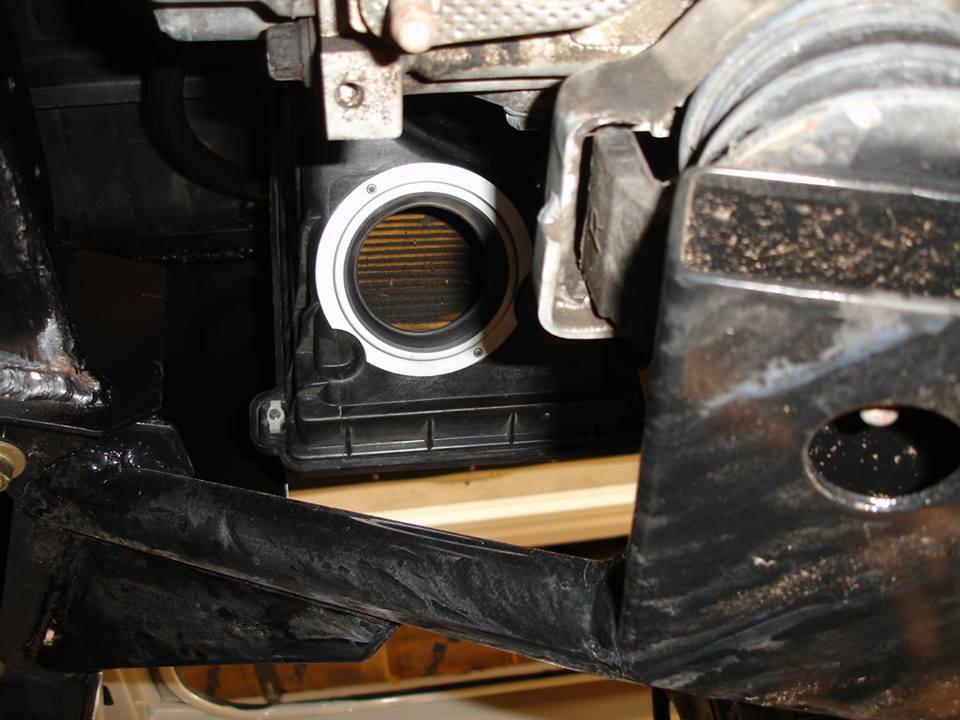
Stock air box. One day i will rum a tube to the front, maybe
1

2


.
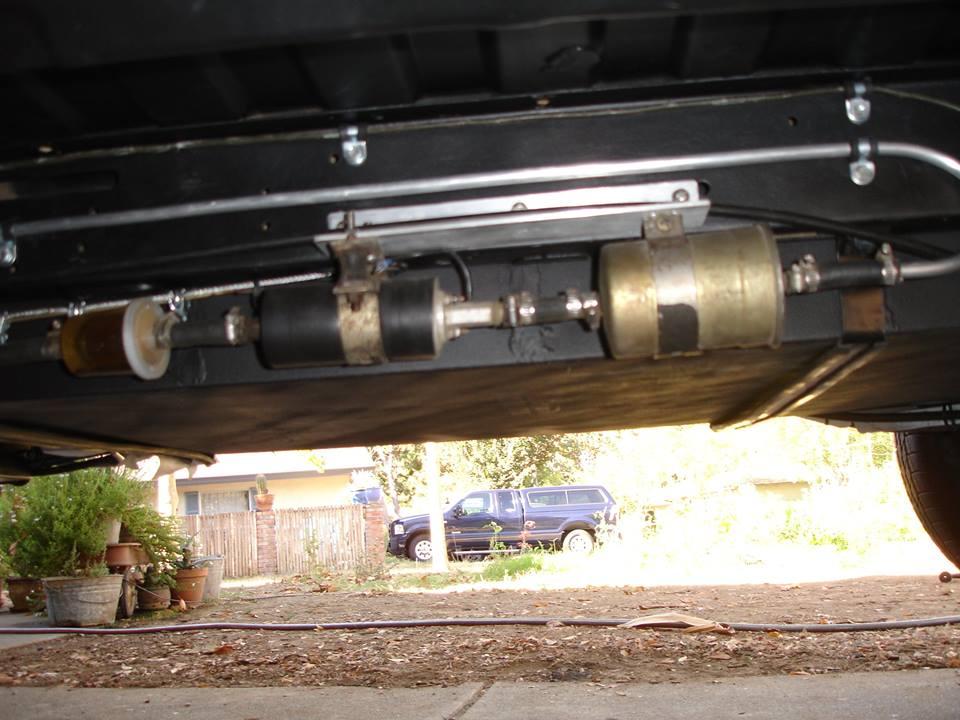
1
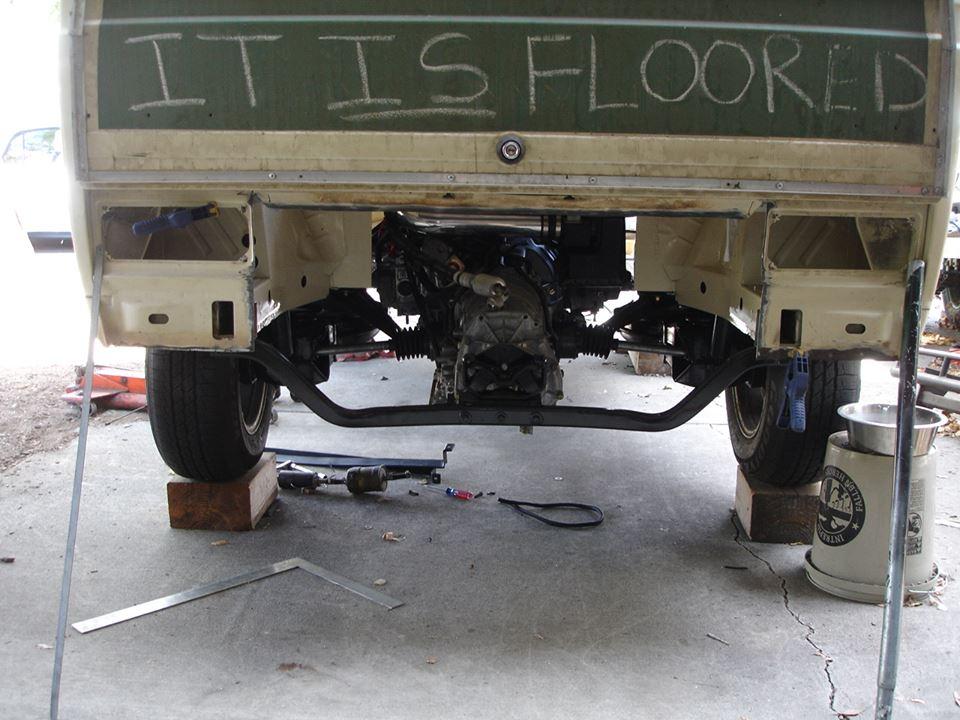
Doka door grafted on

1

Enclosure:
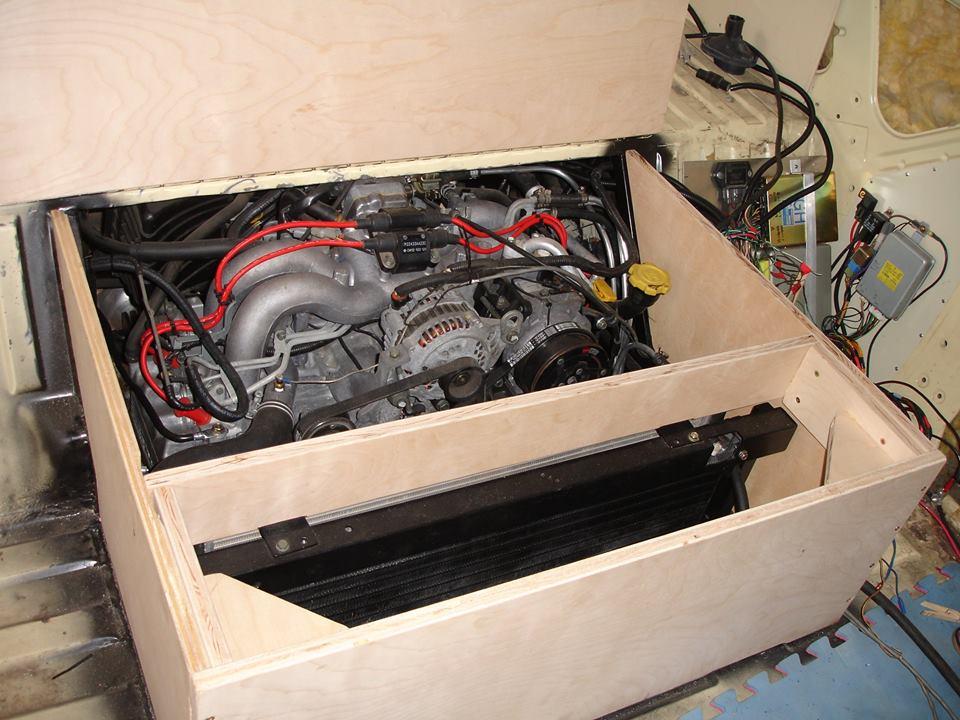
1

2

3

4
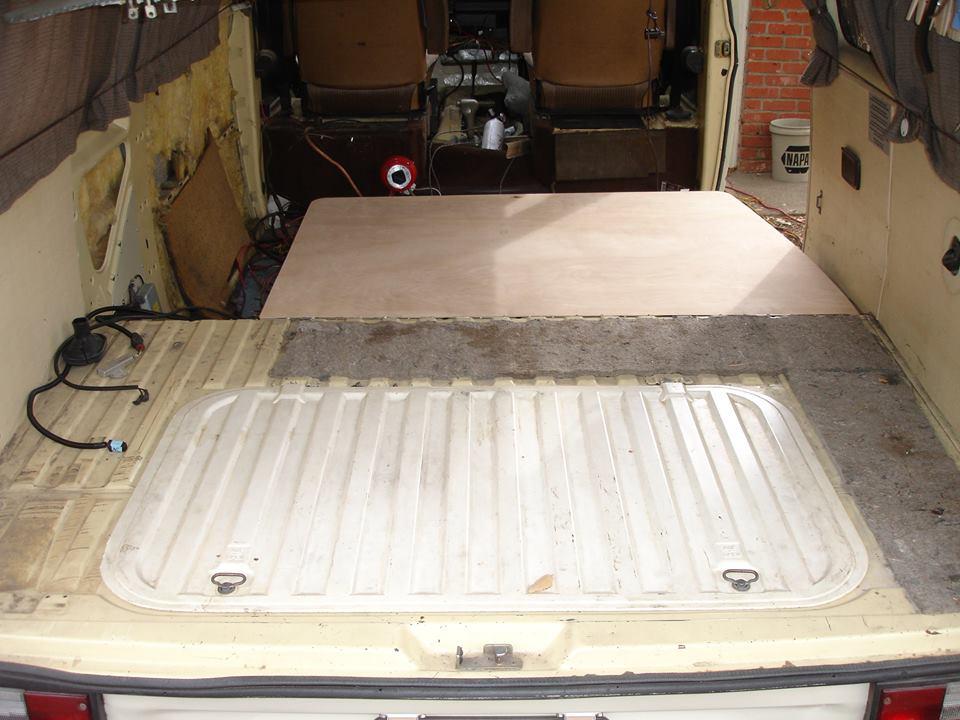
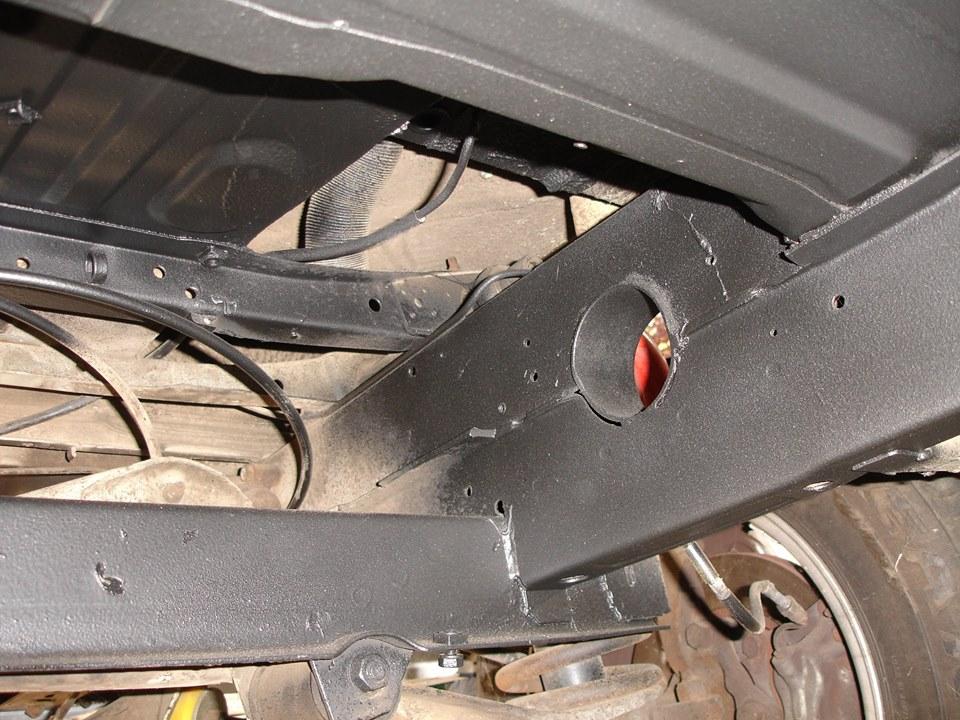
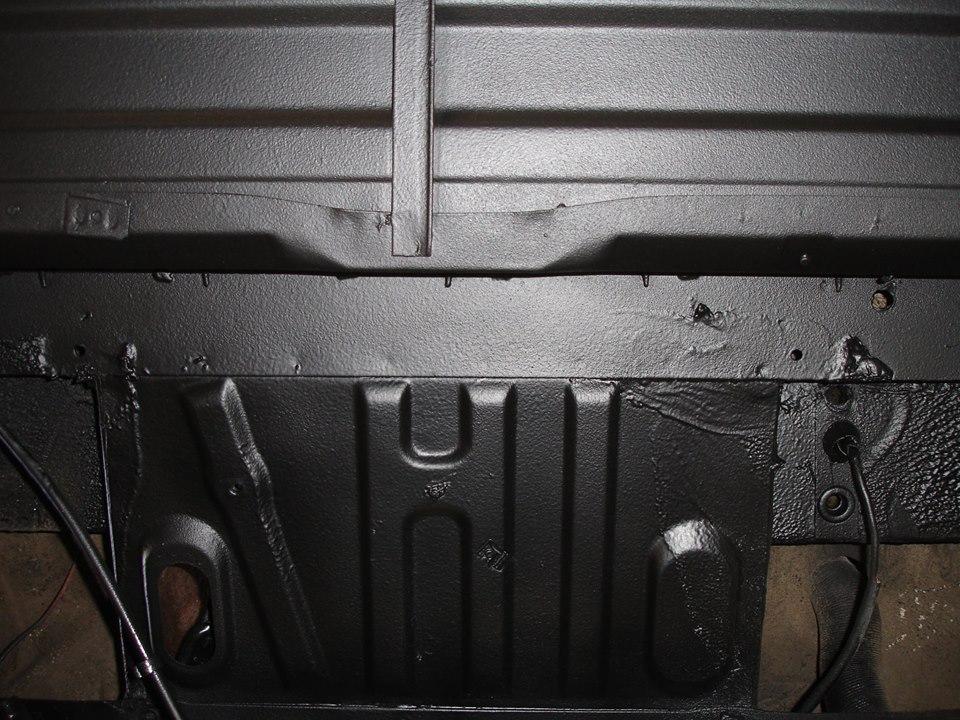
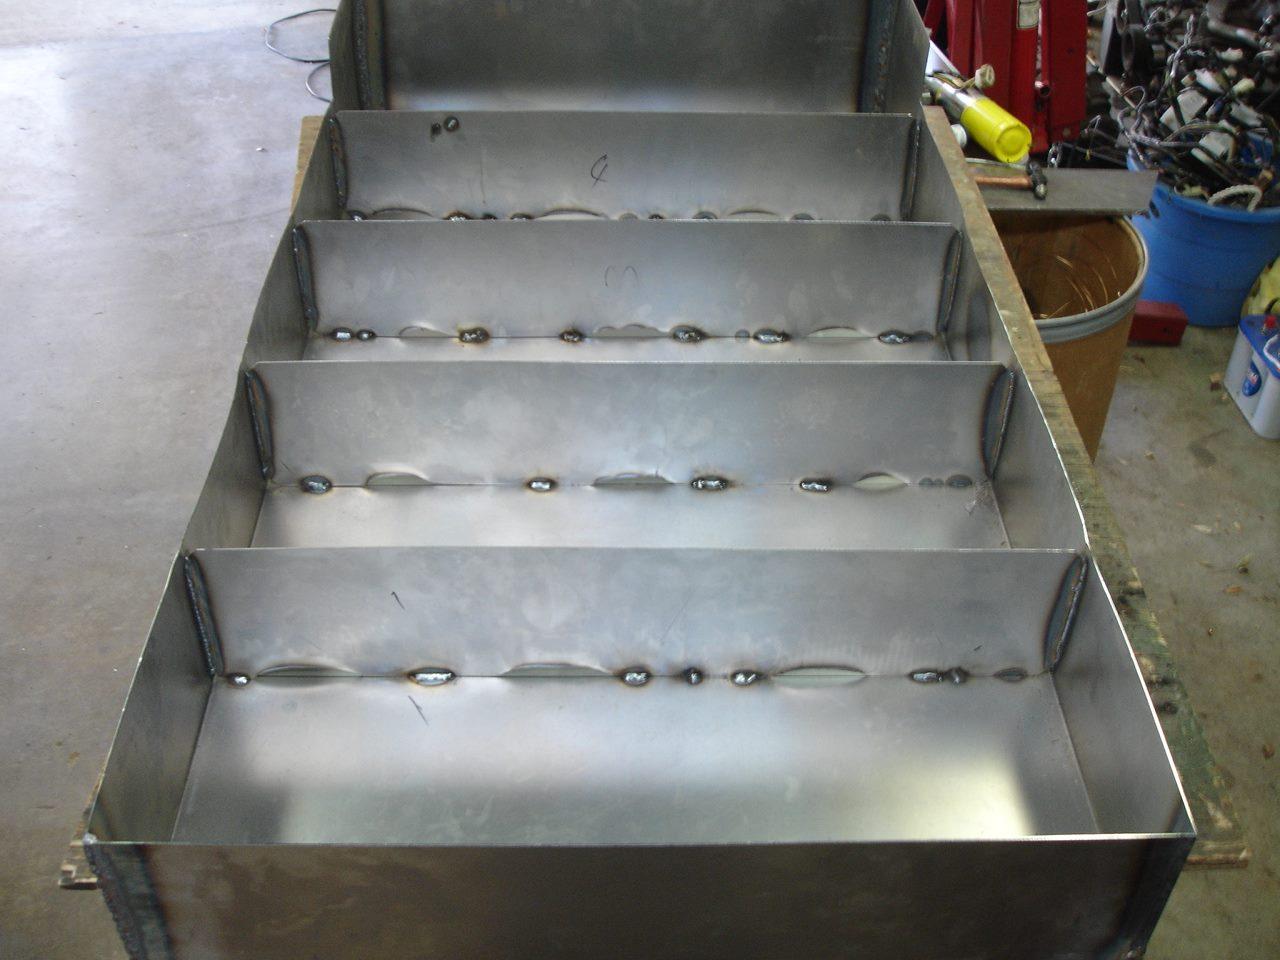
I fabricated a 40 gallon fuel tank.

1
2
3

4

5

6

7

8
Removable Kitchen. Ikea sink and bins for drawers.

1

2

3

5

6

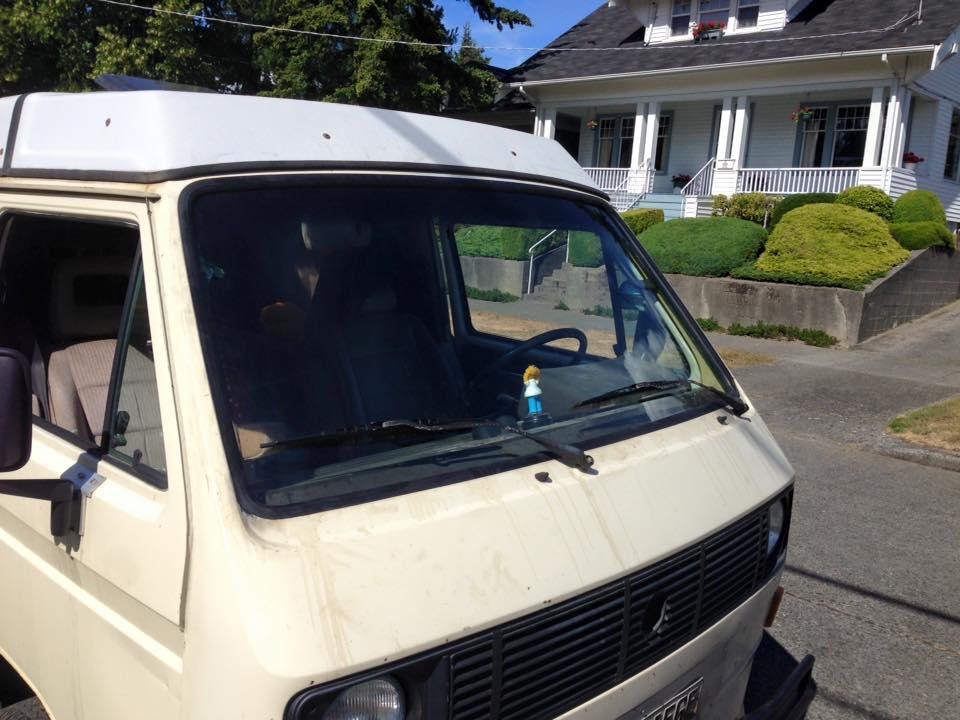
Installed an $80 windscreen with a new gasket
1

2
Make Vanagons Great Again!

Built a hitch with 1/2" plate brackets.

used CAD ( cardboard aided design)
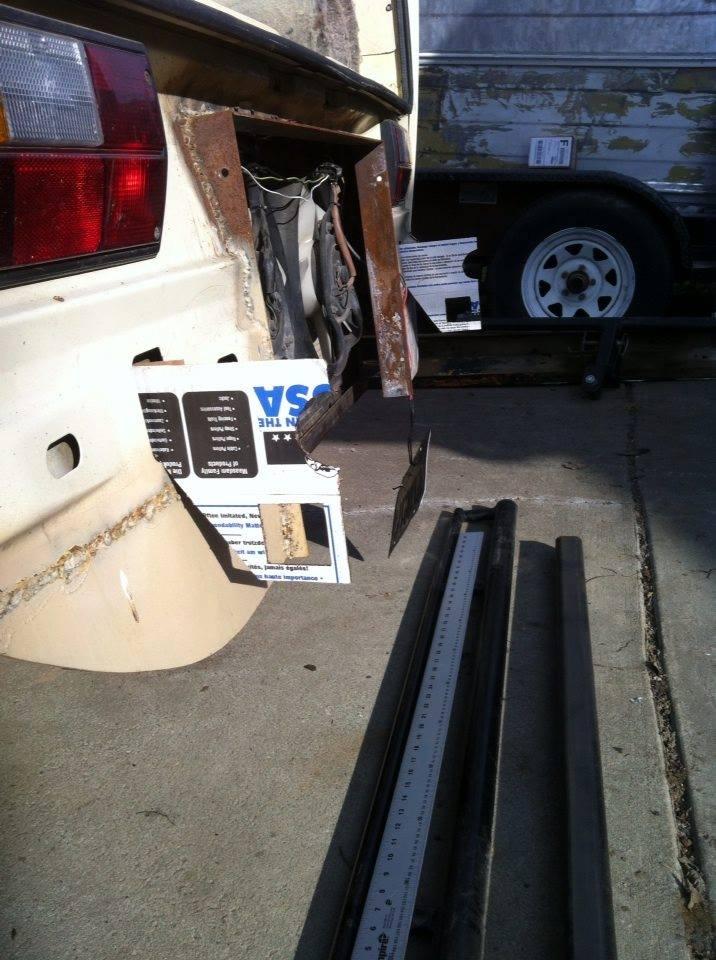
1
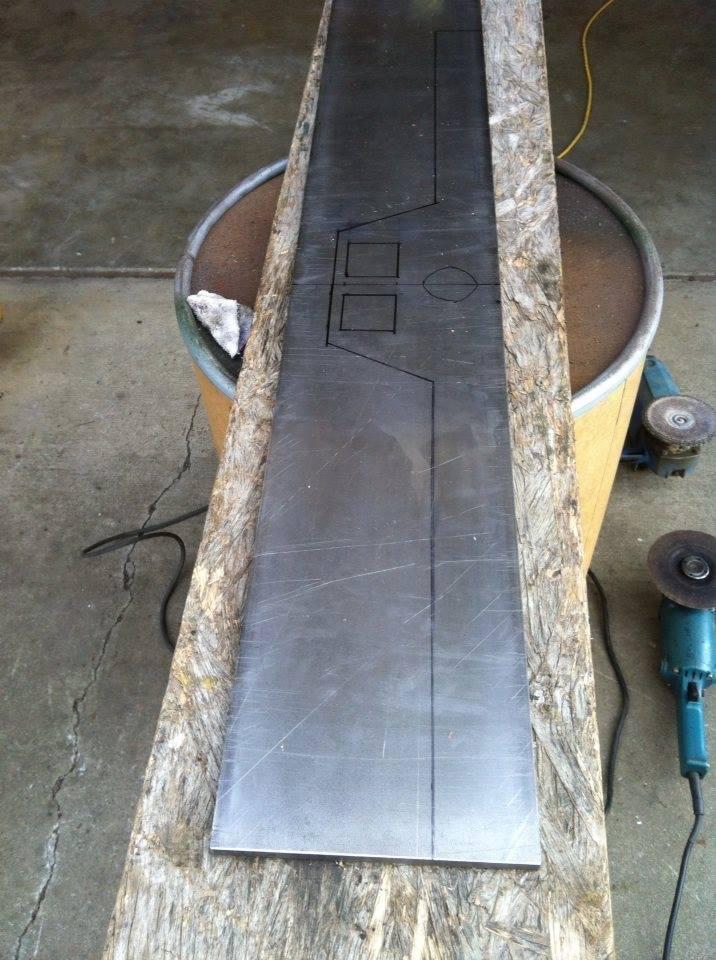
2

3

4

5
reaches the famous "3rd Hole", not to be confused with "The Shocker"

As you can see, the project was a nice challenge for one man with a few grinders and a borrowed welder. I can't remember how long or how much it cost. I believe it was 6 weeks and $2500 total, including the donor.
At the time I had just removed a "Frankenmotor" a brand new 2.5 block with 2.2 heads that had to be re-ringed and that really pissed me off. I know there are plenty of 2.5s out there without issue but the idea of having so many matched components from one car in my van was super appealing to me.
Also, the EJ22 is simply legendary in reliability., finding one with 50k on it had to be providence, and lastly I already had a BAR sticker for that engine in CA, which I planned to remain in until a headhunter found my wife and dragged us up to Seatown.
For me, the EJ22 has plenty of power.
I can not stress enough how much I wanted to get rid of the last of the garbage components from Smallcar that were left in my van. This build allowed me to do that and more.
I could build 10 vans like this for the amount of time, aggravation and money I spent on trying to make their garbage work.
I believe the only special items I bought were a throttle body wedge, cv adaptors and a 14' shifter cable.
I made the rest.
I know every single wire, bolt, etc.
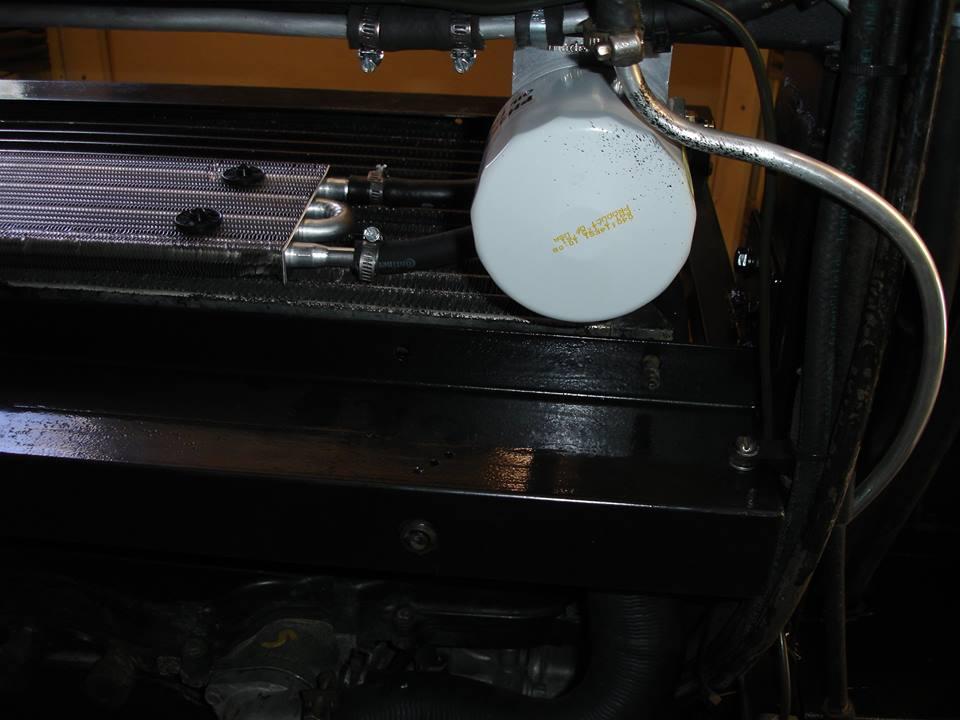
To answer the radiator question a little more fully; my entire front end has been heavily modified to accept the entire heating and air system from the Subaru, so mounting the radiator back up front would be difficult also, I loved the idea of using the entire cooling system (including fans, relays, controls, even the hoses!) from the legacy as well as mounting the condenser coil and accompanying hoses, unmodified as well.
Eventually I will be modifying the nose to be much more quiet. I have another thread on this (search "proboscis") preliminary testing demonstrated incredible results.
As to the reconfiguration of the interior; we love this configuration. It is a million times more versatile and functional for our purposes than it was before.
The bed is wider, we have more storage it's way quieter and with the removable bed leaving a nice flat platform and the kitchen removed I can haul a massive amount of stuff, including full sheets of plywood.
Try that with a Westy interior.
We are 2 people and do not need a rear seat. We need a bed, and we have one. s
Well; "HOW WELL DOES IT WORK " you ask...
It runs cool as a cucumber...
Tows my 19 foot Starcraft no problem...
Interior is further a long but not totally done. there is rattle trap everywhere and "EZ cool" insulation as well. 4 inthes of memory foam and a feather down topper. YES, the interior is quiet. the engine is SILENT.
1
Bobbie likes it (my neighbor adopted Daisy)
1
2
Van has been on many camping trips around the area; Baker, Rainier, Orcas Island, Olympic Peninsula... the 900+ mile fuel range does not suck...
1
and a special message to The Haters out there; I love my van. I built the way I wanted it. My wife loves, my dog loves it. It is super reliable, gets 26mpg, doesnt stink, can pass CA emissions, is easy to work on and basically everything I wanted it to be. So, go build your van the way you like.
Last edited by furrylittleotter on Wed Apr 12, 2017 7:01 pm; edited 15 times in total |
|
| Back to top |
|
 |
Sodo
Samba Member

Joined: July 06, 2007
Posts: 9613
Location: Western WA

|
 Posted: Fri Apr 07, 2017 10:19 pm Post subject: Re: Mid Engine Subaru Build with Subaru 4 speed Automatic Trans. Posted: Fri Apr 07, 2017 10:19 pm Post subject: Re: Mid Engine Subaru Build with Subaru 4 speed Automatic Trans. |
 |
|
Neil is NOTafraidofit!
_________________
'90 Westy EJ25, 2Peloquins, 3knobs, pressure-oiled GT mainshaft, filtered, cooled gearbox
'87 Tintop w 47k 53k, '12 SmallCar EJ25, cooled filtered gearbox
....KTMs, GasGas, SPOT mtb |
|
| Back to top |
|
 |
IdahoDoug
Samba Member

Joined: June 12, 2010
Posts: 10251
Location: N. Idaho

|
 Posted: Fri Apr 07, 2017 10:35 pm Post subject: Re: Mid Engine Subaru Build with Subaru 4 speed Automatic Trans. Posted: Fri Apr 07, 2017 10:35 pm Post subject: Re: Mid Engine Subaru Build with Subaru 4 speed Automatic Trans. |
 |
|
Mad skills!!!!!!! More pics!!
_________________
1987 2WD Wolfsburg Vanagon Weekender "Mango", two fully locked 80 Series LandCruisers. 2017 Subaru Outback boxer. 1990 Audi 90 Quattro 20V with rear locking differential, 1990 burgundy parts Vanagon. 1984 Porsche 944, 1988 Toyota Supra 5 speed targa, 2002 BMW 325iX, 1982 Toyota Sunrader |
|
| Back to top |
|
 |
Steve M.
Samba Member

Joined: July 30, 2013
Posts: 6833
Location: Fort Lauderdale, Fl.

|
 Posted: Sat Apr 08, 2017 4:22 am Post subject: Re: Mid Engine Subaru Build with Subaru 4 speed Automatic Trans. Posted: Sat Apr 08, 2017 4:22 am Post subject: Re: Mid Engine Subaru Build with Subaru 4 speed Automatic Trans. |
 |
|
How is the engine noise you hear in the drivers seat?
_________________
This free advice is worth exactly what you paid for it.
There are seven days in a week. Someday is not one of them. |
|
| Back to top |
|
 |
Gizmoman
Samba Member

Joined: September 10, 2011
Posts: 1554
Location: Nevada

|
 Posted: Sat Apr 08, 2017 5:03 am Post subject: Re: Mid Engine Subaru Build with Subaru 4 speed Automatic Trans. Posted: Sat Apr 08, 2017 5:03 am Post subject: Re: Mid Engine Subaru Build with Subaru 4 speed Automatic Trans. |
 |
|
| furrylittleotter wrote: |
Here the engine is in place. as you can see it could probably fit under the back seat if I had a used a front radiator, but what fun is that?
|
Your fab, electrical skills, and ingenuity are awesome, not to mention your perseverance!
IMHO, keeping the rad in front may have been less "fun", but you'd have more "van" 
Still, a well done retrofit that keeps the stock tranny, AC and other refinements. How well does the transmission handle the 16" Geolanders? Do you have a transmission cooler or need one?
Congrats!
_________________
82 Vanagon Westy - AAZ 1.9 TD, HE200 Holset, WAIC, 27.75 dia tires, Electric power steering, 5-speed AAP w/.078 5th
Oversize spare carrier - stock location (no longer for sale). |
|
| Back to top |
|
 |
wyldryce
Samba Member

Joined: August 14, 2011
Posts: 83
Location: Annapolis, MD

|
 Posted: Sat Apr 08, 2017 5:18 am Post subject: Re: Mid Engine Subaru Build with Subaru 4 speed Automatic Trans. Posted: Sat Apr 08, 2017 5:18 am Post subject: Re: Mid Engine Subaru Build with Subaru 4 speed Automatic Trans. |
 |
|
You are a mad scientist, with skills to match! I've always wondered how your rig looks, and was constructed. Thanks for taking the time to document it all. Great work. Bummed I never inquired about it to come check it out before I moved out of Seattle  |
|
| Back to top |
|
 |
Robw_z
Samba Member
Joined: April 28, 2007
Posts: 983

|
 Posted: Sat Apr 08, 2017 5:27 am Post subject: Re: Mid Engine Subaru Build with Subaru 4 speed Automatic Trans. Posted: Sat Apr 08, 2017 5:27 am Post subject: Re: Mid Engine Subaru Build with Subaru 4 speed Automatic Trans. |
 |
|
Before I clicked I didn't realize this was a build thread and was expecting a speculative thread of opinions, perhaps annoying ones, but wow you just did it and did it well!
It feels petty of me to have any negative comment in light of your obvious skill and hard work, but it was exciting to see a mid-engine build that seemed at first to have no down-side, no "catch", and then the radiator thing threw me off. I'm sure it functions fine there but it turns the van into a permanent rear-bed situation.
-Rob |
|
| Back to top |
|
 |
dhaavers
Samba Member
Joined: March 19, 2010
Posts: 7757
Location: NE MN (tinyurl.com/dhaaverslocation)

|
 Posted: Sat Apr 08, 2017 5:36 am Post subject: Re: Mid Engine Subaru Build with Subaru 4 speed Automatic Trans. Posted: Sat Apr 08, 2017 5:36 am Post subject: Re: Mid Engine Subaru Build with Subaru 4 speed Automatic Trans. |
 |
|
Nope. No way. Don't do it. It'll never work.

- Dave
_________________
86 White Wolfsburg Westy Weekender
"The WonderVan"
<EDITED TO PROTECT INNOCENT PIXELS> |
|
| Back to top |
|
 |
Ahwahnee
Samba Member
Joined: June 05, 2010
Posts: 9810
Location: Mt Lemmon, AZ

|
 Posted: Sat Apr 08, 2017 6:09 am Post subject: Re: Mid Engine Subaru Build with Subaru 4 speed Automatic Trans. Posted: Sat Apr 08, 2017 6:09 am Post subject: Re: Mid Engine Subaru Build with Subaru 4 speed Automatic Trans. |
 |
|
| dhaavers wrote: |
| Nope. No way. Don't do it. It'll never work... |
Well it works in practice -- but does it work in theory? |
|
| Back to top |
|
 |
jimf909 
Samba Member

Joined: April 03, 2014
Posts: 7472
Location: WA/ID

|
 Posted: Sat Apr 08, 2017 6:26 am Post subject: Re: Mid Engine Subaru Build with Subaru 4 speed Automatic Trans. Posted: Sat Apr 08, 2017 6:26 am Post subject: Re: Mid Engine Subaru Build with Subaru 4 speed Automatic Trans. |
 |
|
Perhaps the most interesting Samba post ever. I appreciate your willingness to cut, add (incl. a prosthetic nose), modify and experiment. Thanks for sharing this work.
About how long was it from first cut to rolling down the road?
_________________
- Jim
| Abscate wrote: |
Do not get killed, do not kill others.
|
Current: 1990 Westy Camper - Bostig RG4, 2wd, manual trans w/Peloquin, NAHT high-top, 280 ah LFP battery, 160 watts solar, Flash Silver, seam rust, bondo, etc., etc.
Past: 1985 Westy Camper - 1.9 wbx, 2wd, manual trans, Merian Brown, (sold after 17 years to Northwesty who converted it to a Syncro). |
|
| Back to top |
|
 |
vino de vano
Samba Member
Joined: September 10, 2016
Posts: 359
Location: columbia gorge

|
 Posted: Sat Apr 08, 2017 6:27 am Post subject: Re: Mid Engine Subaru Build with Subaru 4 speed Automatic Trans. Posted: Sat Apr 08, 2017 6:27 am Post subject: Re: Mid Engine Subaru Build with Subaru 4 speed Automatic Trans. |
 |
|
Looking great! Your design and fabrication skills are undeniable and bloody awesome. Keep it up and get-er done. You rock! Thanks for posting. Mark
_________________
what a long strange trip it's been |
|
| Back to top |
|
 |
bluebus86
Banned
Joined: September 02, 2010
Posts: 11075

|
|
| Back to top |
|
 |
wcdennis
Samba Member

Joined: July 20, 2004
Posts: 955
Location: Winston-Salem NC

|
 Posted: Sat Apr 08, 2017 6:39 am Post subject: Re: Mid Engine Subaru Build with Subaru 4 speed Automatic Trans. Posted: Sat Apr 08, 2017 6:39 am Post subject: Re: Mid Engine Subaru Build with Subaru 4 speed Automatic Trans. |
 |
|
| Deja view. Wasn't this build posted somewhere before? Seeing it again does not diminish how impressive it is. |
|
| Back to top |
|
 |
gears
Samba Member

Joined: October 28, 2002
Posts: 4391
Location: Tamarack, Bend, Kailua

|
 Posted: Sat Apr 08, 2017 7:43 am Post subject: Re: Mid Engine Subaru Build with Subaru 4 speed Automatic Trans. Posted: Sat Apr 08, 2017 7:43 am Post subject: Re: Mid Engine Subaru Build with Subaru 4 speed Automatic Trans. |
 |
|
Neil, working at a higher level .. Nice !!
_________________
aka Pablo, Geary
9.36 @ 146 in '86 Hot & Sticky
'90 Syncro Westy SVX
'87 Syncro GL 2.5
https://guardtransaxle.com |
|
| Back to top |
|
 |
Howesight
Samba Member

Joined: July 02, 2008
Posts: 3274
Location: Vancouver, B.C.

|
 Posted: Sat Apr 08, 2017 8:43 am Post subject: Re: Mid Engine Subaru Build with Subaru 4 speed Automatic Trans. Posted: Sat Apr 08, 2017 8:43 am Post subject: Re: Mid Engine Subaru Build with Subaru 4 speed Automatic Trans. |
 |
|
As a teenager, I stuffed a Chevy 350 into a Beetle with a mid-engine install and a Corvair transaxle installed backwards and reverse rotation. It might sound impressive, but all the parts were in a kit by Kelmark. (I couldn't even weld back then.) It was fast, but ate the first Corvair transaxle promptly. I gave up, replaced the transaxle and sold it along with a warning to "take it easy in first gear." I heard that the next owner went through a handful of those Saginaw gearboxes.
That experience made me fearful and conservative on almost all future projects and I went with the crowd after that, going to the 2180 cc Type 1, Berg parts, Rancho transaxle, etc etc. On my first Westy (1973), I went with Ford 2.3 power and a Kennedy adaptor. On my current Westy, an SVX.
Shame on me. Neil, you are a very brave soul. Your design and execution are very, very, impressive. Bravo! You and Thumper have done some amazing things with your mid-engine projects and I watch and read with great admiration. If I am not that brave, don't think I am a hater. I am an admirer.
_________________
'86 Syncro Westy SVX |
|
| Back to top |
|
 |
bluebus86
Banned
Joined: September 02, 2010
Posts: 11075

|
 Posted: Sat Apr 08, 2017 10:41 am Post subject: Re: Mid Engine Subaru Build with Subaru 4 speed Automatic Trans. Posted: Sat Apr 08, 2017 10:41 am Post subject: Re: Mid Engine Subaru Build with Subaru 4 speed Automatic Trans. |
 |
|
| Howesight wrote: |
As a teenager, I stuffed a Chevy 350 into a Beetle with a mid-engine install and a Corvair transaxle installed backwards and reverse rotation. It might sound impressive, but all the parts were in a kit by Kelmark. (I couldn't even weld back then.) It was fast, but ate the first Corvair transaxle promptly. I gave up, replaced the transaxle and sold it along with a warning to "take it easy in first gear." I heard that the next owner went through a handful of those Saginaw gearboxes.
That experience made me fearful and conservative on almost all future projects and I went with the crowd after that, going to the 2180 cc Type 1, Berg parts, Rancho transaxle, etc etc. On my first Westy (1973), I went with Ford 2.3 power and a Kennedy adaptor. On my current Westy, an SVX.
Shame on me. Neil, you are a very brave soul. Your design and execution are very, very, impressive. Bravo! You and Thumper have done some amazing things with your mid-engine projects and I watch and read with great admiration. If I am not that brave, don't think I am a hater. I am an admirer. |
i got a kelmark, rear engined car, although they also offered it in mid engine style.
on this van, did the subaru engine not fit the engine space? why mid motor?
_________________
Help Prevent VW Engine Fires, see this link.....Engine safety wire information
Stop introducing dirt into your oil when adjusting valves ... https://www.thesamba.com/vw/forum/viewtopic.php?t=683022 |
|
| Back to top |
|
 |
WestyBob
Samba Member

Joined: June 11, 2004
Posts: 2346
Location: Portland, Oregon

|
 Posted: Sat Apr 08, 2017 10:41 am Post subject: Re: Mid Engine Subaru Build with Subaru 4 speed Automatic Trans. Posted: Sat Apr 08, 2017 10:41 am Post subject: Re: Mid Engine Subaru Build with Subaru 4 speed Automatic Trans. |
 |
|
That has to be the longest continuous picture post I've ever seen in one thread.
Normally I'm one of those 'do not molest' guys but I have to say sometimes there's a higher calling or something like that that takes us into the twilight zone of alterations.
So with that I say kudos to the OP with only thoughts of doing it with a 2.5 L next time. |
|
| Back to top |
|
 |
ejimmi
Samba Member

Joined: May 18, 2015
Posts: 249
Location: Bellevue

|
 Posted: Sat Apr 08, 2017 11:12 am Post subject: Re: Mid Engine Subaru Build with Subaru 4 speed Automatic Trans. Posted: Sat Apr 08, 2017 11:12 am Post subject: Re: Mid Engine Subaru Build with Subaru 4 speed Automatic Trans. |
 |
|
| Whoa Neil! Ive heard rumors of your van, but i had no idea the level you took it. Solid work! |
|
| Back to top |
|
 |
yiucycle
Samba Member

Joined: August 22, 2007
Posts: 421

|
 Posted: Sat Apr 08, 2017 12:18 pm Post subject: Re: Mid Engine Subaru Build with Subaru 4 speed Automatic Trans. Posted: Sat Apr 08, 2017 12:18 pm Post subject: Re: Mid Engine Subaru Build with Subaru 4 speed Automatic Trans. |
 |
|
Wow mad skill, please post video. Love to see the interior and running.
_________________
1980 2.8LV6 Fiero ASI/Riviera Vanagon
"there is no point in being embarrassed of all the stupid shit i done and will continue to do"
Stop dead photo links! Post your photos to The Samba Gallery! |
|
| Back to top |
|
 |
0cean
Samba Member

Joined: February 29, 2012
Posts: 1149
Location: California

|
 Posted: Sat Apr 08, 2017 3:59 pm Post subject: Re: Mid Engine Subaru Build with Subaru 4 speed Automatic Trans. Posted: Sat Apr 08, 2017 3:59 pm Post subject: Re: Mid Engine Subaru Build with Subaru 4 speed Automatic Trans. |
 |
|
Wow, and I thought i was off my rocker.... great job and enjoy it. You have inspired me to work on my van.... Maybe we will see you at Syncro Fest next year...
_________________
I'm not a mechanic, I just play one on the internet
Cluster Rebuild:
http://www.thesamba.com/vw/forum/viewtopic.php?t=569920&highlight=
Left for Dead the Resurrection Story Build:
http://www.thesamba.com/vw/forum/viewtopic.php?t=613669
(Number of Different Donor VW Vans Body Parts Used: 12)
(Number of completely different vehicles parts used: 3) |
|
| Back to top |
|
 |
|

