| Author |
Message |
Rome
Samba Member
Joined: June 02, 2004
Posts: 9640
Location: Pearl River, NY

|
 Posted: Wed Oct 03, 2018 7:32 pm Post subject: Re: Heater Beater 1776 Posted: Wed Oct 03, 2018 7:32 pm Post subject: Re: Heater Beater 1776 |
 |
|
Really nice going, Clatter. Do you have a driveable VW in which you can do a test drive with the engine short-term?
Thanks for the excellent recent close-up shots of the valves, the seats, and the lapped-in ring contact areas.
Your sturdy plastic fresh air hoses were sold by Gene Berg years ago, probably by several other vendors in the '80's and '90's. They are held in place without hose clamps because they expand against the fan shroud outlet and the muffler/header. |
|
| Back to top |
|
 |
SBD
Samba Member

Joined: October 24, 2012
Posts: 3269
Location: SOUTH DAKOTA
|
|
| Back to top |
|
|
Clatter
Samba Member

Joined: September 24, 2003
Posts: 7537
Location: Santa Cruz
|
| Posted: Sun Dec 16, 2018 8:51 pm Post subject: Re: Heater Beater 1776 |
|
|
Months later, and I'm cleaning out under the bushes;
Raking leaves, getting ready for the rains..
And,
Whattaya know,
I chucked the Oberg filter over there, to keep the thing from leaking oil all over the cement.
This during disassembly, after test-fire of the 1776..
Cut it open, and all looks well.
An Oberg is great for break-in.
It does NOT have a bypass valve,
Which is a beautiful thing when you fire off a cold motor for your 10 minutes of cam break in.
An ordinary canister filter is going to be pumping most of the stuff you missed into your bearings!
Here we have a few clumps of break-in paste,
A chip of two from the case clearancing, porting, detail, etc.
And a few tiny mag or aluminum tiny flakes,
maybe from that cam gear or more left over from case work?
All in all, very nice and clean.. 
The motor sits under the bench,
Waiting for me to get ambition to pull the 1914 that's in my Oval,
And change out the trans, as it's a little bit noisy.
Not really enough to be an issue;
Maybe here in spring I'll get around to it.
Maybe.
_________________
Bus Motor Build
Whats That Noise?!? |
|
| Back to top |
|
|
Clatter
Samba Member
Joined: September 24, 2003
Posts: 7537
Location: Santa Cruz
|
| Posted: Sun Jun 06, 2021 7:53 am Post subject: Re: Heater Beater 1776 |
|
|
A couple of years later, and we decide to drag the car back out..
That kid got his learner's permit, and i found a "good used" trans for $100.
He doesn't need a 7500RPM motor for learning to drive stick,
So out it came.
He wanted to drive enough that he was willing to help,
But not to put on shoes.. 
Because i put a narrowed beam in, the rear suspension became relatively softer compared to the front.
Chopped front torsions are stiffer.
The rear would get upset and moved way too much with hard driving.
Hard driving on bumpy mountain roads..
Since i had a bunch of type 3 parts lying around,
We stabbed some torsions from a Squareback, and the bigger type3 rear brakes as well.
Also did a removeable apron. Don't know why i never did that before.
No more (OK, far less) struggle with that tiny Oval compartment..
So, we got the motor in and fired off, and drove it a bit,
And we'll document this in another post here,
Because it's a long story..
_________________
Bus Motor Build
Whats That Noise?!? |
|
| Back to top |
|
|
Clatter
Samba Member
Joined: September 24, 2003
Posts: 7537
Location: Santa Cruz
|
| Posted: Sun Jun 06, 2021 8:44 am Post subject: Re: Heater Beater 1776 |
|
|
We get the motor in, and fire it off.
Sounds decent enough..
We suss the basics, like clutch adjustment, another valve adjustment, karb sync, re-checking timing, all that stuff.
The motor is very, very smooth! 
Counterweighted crank and full spin-balance,
It's smooth as any of these motors i ever knew, and why not?
The Web 163 seems a great cam as well.
Was worried about it being too much,
But it's not.
Even with a 12# flywheel and a 1700# clutch,
it's easy enough to drive that a kid can learn with it.
Great choice, this cam.. Thanks, Torbin.
The karbs, however.. Ugh.
Here we begin the great deep dive into Kadrons.
Shoot me now..
Backing up years ago.. I found these karbs at the Pick-N-Pull on Berryessa Road in San Jose for $75.
Boy, those were the days! Stuff like that was at the Pick N Pull!
It was a komplete single-port setup that got run all over hell for years on a single-port motor, then a stock dual port motor, then a mild 1641, then a more-built 1641..
Finally, they got sent off to "Mr. Kadron" for all of his tricks,
And run quite a bit after that.
While they seemed to run decently enough, putting the wideband on made no sense, with numbers all over the place, from lean to rich and back with no rhyme/reason.
Always thought it was some kind of issue with my wideband,
And just ran it,
But now,
I'm not so sure..
The karbs got cleaned out and the idle set up,
But something was definitely rotten in Denmark.
So begins the deep dive back into the wonderful world of Kadron..
Started off reading any/all posts related to the subject,
Then moved on to the obvious.
Float level is supposed to be about .944" - fuel level to top of karb body, float in.
Several annoying on/off sessions to tweak float mount tabs and try to get levels correct took place.
Stacking washers, checking brass floats for leaks, finally one of the brass floats got bent too much and broke.
I have a self-regulated Carter electric pump -and- a Holley regulator -plus- a nice liquid-filled fuel pressure gauge in the compartment.
It's not a fuel pressure issue.. We know that much..
Next was installing fresh kits; along with some long ultrasonic bathing.
Something to learn about the Radke kits is that the floats included are nearly substandard.
There are these burrs that will hang up and prevent the floats from moving on their pin.
You can, however, file the burrs off and make them (sorta) work.
These are tapped for advance, and I'm running an older SVDA and pulse valve from ac.net.
It didn't seem to be doing a whole lot of vacuum advancing..
The carb body was plugged accordingly, (albeit rather crudely)
but the fitting used was a plastic one.
It's still holding together (for now).
Luckily, re-bushed throttle bodies are still tight.
Couldn't get the pump nozzles to quit dripping..! 
With the way their tips stick into the venturi, it's no wonder why..
Took some real mouth-screwing tweakage to get them squirting right at the edge of the butterfly,
And up out of the vent to stop dripping.
Even so, i broke one; the number stamped in is a weak spot.
Whenever JB weld is involved in a project,
You know things are going south..
All the while, on/off with Scat linkage involves using SAE nuts..
Why am i doing this, again?
Trying to cobble these things together so the kid can learn to drive,
it's almost like things are going away faster than i can gather them up..
_________________
Bus Motor Build
Whats That Noise?!? |
|
| Back to top |
|
|
Clatter
Samba Member
Joined: September 24, 2003
Posts: 7537
Location: Santa Cruz
|
| Posted: Sun Jun 06, 2021 9:09 am Post subject: Re: Heater Beater 1776 |
|
|
After driving easily around town and some highway cruising to get things broken in,
Another valve check and a change of oil,
Went ahead and rigged up the trusty ol' LM-1 wideband.
Pulling the decklid and the apron allows the use of a proper O2 bung at the collector - that i didn't get a pic of..
The old gal has helped so many friends tune their junk by now.. and always worked perfectly.
Until now..
Boy, that wasn't fun, and made no sense.
Thing got to pegging so rich it fell off the bottom end of the scale and just said "Too Rich"?? Never saw that before.
Then it threw an error 'sensor fail'.
Putting it into the tailpipe using the clamp like shown above it read like you might expect,
Way lean, because of the reversion pulling air in, likely from the other muffler on the other side..
WTF?
Looking at the directions, it says to never use it with leaded fuel.
Some race gas was in there to keep the karbs from gumming up,
And i forgot and left it on during cranking a couple times too.
Ordered another sensor, and we'll light a candle for the old girl.
Here's hoping she'll pull through. 
Meanwhile, i found Jeff at Kaddie Shack.
This guy's real hero in my book; god bless anyone who's willing to be seen standing next to a set of K-Dogs..
He sent me a pump nozzle,
but the base is too big where it presses in,
And there's no more available to get me another to match,
So the JB is going to have to do for now (so far so good).
Got a set of bigger vents as well. this motor seems like it could use 'em.
Might as well get those in before doing more jetting.
Stock vents in there were 28mm.
While i had some 32s, i decided 30s were the ones for this combo after doing some homework.
Still,
More driving and tuning and tuning and driving,
These things were NOT behaving after trying many many different combinations of jets and float levels and pump adjustments!
The thing would always 'burgle' and gag nudging it off the mark,
And it would 'nose over' initially trying to accelerate slightly on the highway.
Finally, it came to me. The air jets had been all fuggled up! 
The notorious "drywall screw" trick - "somebody" threading in a drywall screw to pull the emulsion tube had wallered it out WAY too big on one, and kind of a lot on the other.
After watching all of Jeff's videos and reading everything on his site and this one,
Went ahead and threw a couple more hunnerd bux at these POS Brazilian Jeep karbs.
Got e-tubes, his recommended jets, mixture screws, plus real Solex floats.
Clear back apart again, and all new stuff 100% as it 'should' be.
A test drive shows things running better,
but the wideband will (hopefully) tell the real story soon.
And a good story, of numbers that make sense.
If it decides to live again, that is..

_________________
Bus Motor Build
Whats That Noise?!? |
|
| Back to top |
|
|
Clatter
Samba Member
Joined: September 24, 2003
Posts: 7537
Location: Santa Cruz
|
| Posted: Sun Jun 06, 2021 10:02 am Post subject: Re: Heater Beater 1776 |
|
|
OK,
More ranting and prattling about the project... That nobody with a life would ever bother to read.. 
POS was leaking!
Because i always build type 4s, i forgot all the gyrations you have to do to get these Beetle motors to breathe.
There was that shiny breather box on the firewall,
and I'm like, duh.. Hello!
Something else was those krappy karbs were likely running pig-puke rich.
No doubt washing down the rings and fugging up the ring seal..
So much blow-by on a tiny breather wasn't a good deal at all.
Hopefully some correct jetting and hard running will get the rings to seat.
Hopefully..  
This isn't enough breather even for a mild 1776.
(At least not one with ruined rings)
Most obvious was the base of the alternator stand;
Oil was weeping out all around the base and by/through the nuts.
Pulled the shroud up to get the stand out..
Don't forget the thermostat!
There was this stupid little nub on the stand preventing the alt from sitting right.
It got die-grinded into oblivion..
Additionally, i had to clearance the bottom/rear of the thing to keep it from dragging on the karb linkage.
It was glued on using Curil when assembled.
No paper gaskets, just the stamped metal plate.
Was taught somewhere to not use the paper gaskets..
This time it got RTV'ed, still no paper.
Not the correct place for Curil, apparently..
Then, i decided to open up the hole in the fuel pump block-off for a breather.
Those people in China sure don't seem to like to work very hard tapping holes.
Maybe it's that they also really don't want to work very hard using a die to cut fitting threads either?
Either way, you gotta wonder how anyone would ever assemble things like this without a tap and die set.. 
Here's what i call an "everything but" bin.. 
ALL these fittings i hoard, and. sure enough, it'll take a trip to the store every time to get the one needed..
Since the top of the case where the pump sits wasn't totally flat,
We'll try a paper gasket with some RTV this time.
Plus a bit of 565 on the too-small fitting I'll run until we go by the hardware store..
Robbed a vented right-side valve cover off the other motor.
Gotta love a shitty aftermarket fitting where the o-ring just squishes out when you tighten it..
Plenty of RTV and I'm sure it'll still ooze..
The cork gaskets i had on before were too big all around the perimeter causing the valve cover 'suck-in' issue you'll sometimes see
(Another thing they fixed on the type 4  ). ).
Having three different kinds of gaskets came in handy to find a set that actually lay in the cover without bunching 'in'.
Still using Dirko all these years later; Because Jake said to.
Hard to get the hose to make this bend to the valve cover fitting without kinking; rendering itself useless (or sitting against the heater and melting).
I'm sure the hose'll pop off and get oil all over the exhaust as well.
Started ordering a set of those 'premium' fittings Empi sells now,
But I'm waiting on CIP to process an RMA for store credit first and it's taking forever..
Anyways, we'll give the whole story as it unfolds.
I'm sure thousands are at the edge of their seat waiting breathlessly to find out!
Pulling the shroud, i felt back there and didn't find the nut that goes in the Hoover bit.
Sure enough, it's sitting here in a box of random stuff.
Getting the tuning and breather right will either stop the main seal from leaking,
Or it won't.
We'll give it every chance.
If not,
The motor will have to come back out,
And it'll get it's Hoover bit..
Thanks for reading my lengthy tale of trial and struggle.
I put all this up here because it's real and it happened.
A build thread is really kinda worthless if you don't get to see what actually happened,
And what it takes to get some old POS on the road to running right.
Gotta pay your dues, people.
No way any pile of old junk parts is just going to go together and work right first time.
So we'll battle on until it happens!
_________________
Bus Motor Build
Whats That Noise?!? |
|
| Back to top |
|
|
67rustavenger 
Samba Member

Joined: February 24, 2015
Posts: 9754
Location: Oregon
|
| Posted: Sun Jun 06, 2021 11:26 am Post subject: Re: Heater Beater 1776 |
|
|
While you may think that nobody is reading along.
I can assure you, that I always enjoy reading your posts. Good fun and informative too.
Your writing style is unique in today's world. Not clipped and lacking details like so many other do. Me included in that category.
For whatever reason I have an interest in this build. From it's beginning I have been fascinated in the methods you have applied from the case prep to the "K" dog POS carb work.
Keep posting. And I'll keep reading!
_________________
I have learned over the years.
Cheap parts are gonna disappoint you.
Buy Once, Cry Once!
There's never enough time to do it right the first time. But there's always enough time to do it thrice.
GFY's Xevin and VW_Jimbo! |
|
| Back to top |
|
|
Clatter
Samba Member
Joined: September 24, 2003
Posts: 7537
Location: Santa Cruz
|
| Posted: Mon Jun 07, 2021 12:39 pm Post subject: Re: Heater Beater 1776 |
|
|
Thanks for the kind words, my man. Much appreciated.
We'll get up there to the PNW to enjoy a cool one and with Xevin one day..
Will go ahead and do a detailed write-up sometimes..
It's because, so many times, it's details that will hang up a new builder or novice mechanic.
All usually shown is the 'overall' picture - "I installed this carb" "switched fan shrouds" something like that.
Because I worked as a meachanic at 15 years old, and had four cars already by then..
Because i did about five years as a prototype machinist..
I figure i can bring something to the community by showing details about the way i work, and the way i dig in to solve a problem.
Done this enough that I'm not afraid to look a fool or post my mistakes.
No need to maintain appearances here, that's for sure.. 
The hope is, is that some day, somewhere, a person or people might get a feel for the overall approach and methodology to solving the many problems that always come up.
Especially with crappy aftermarket junk that accounts for the majority of parts these days..
So there you have it.
Maybe not the most interesting read for a veteran of the hobby.
Probably too detailed for a beginner to even bother with.
But still,
If i helped one guy with one trick, it'll be worth it.
ANyways...
The car went for a rip around the block and down the frontage road.
All of my top-side leaks appear stopped, and the main seal hasn't oozed again (yet).
The 'burgle' seems solved with new airs/e-tubes.
Doesn't nose-over anymore either! 
Dared take it past 6K for the first time as well,
And it's definitely still pulling hard heading towards 6500.. !
One thing still to suss is a fan noise.
Sounds like straight-cut cam gears or something.. Only above 2500RPM or so.
Sounds turbo or supercharge-ish,
Like WWhhizzzzzsshew! at the top between shifts.
It's the fan - goes away if i pull the belt.
Afromarket Scat bottom and CB top pulleys make it so you cannot get the fan belt tension right.
Had to make a couple of extra shims to get the belt slack enough that it wouldn't kill bearings.
Another test drive will show if i nutted that one.
Past testing on the big highway hill showed what appears to be a fuel starvation issue.
Car lost power after having my foot into it a bit in 4th for a few minutes.
Thing lost power like ti dropped a cylinder or something, but not like that, more evenly.
The wideband wasn't on, so i can't tell for sure,
Grabbing the next exit made the problem go away, like the pump topped the float bowls back up.
Here's hoping it's not sticking a bearing or piston or something serious.
Tank is vented, and i found a dirty fuel filter to change as well.
Fingers crossed..
We'll put the wideband on and go rip the hill again next week.
Might nudge the fuel pressure up a tad - hasn't been adjusted in maybe 10 years.. might be getting crusty.
So,
Still not sussed, still not to be trusted, still not able to be driven anywhere far..!
_________________
Bus Motor Build
Whats That Noise?!? |
|
| Back to top |
|
|
74 Thing
Samba Member
Joined: September 02, 2004
Posts: 7389
|
| Posted: Mon Jun 07, 2021 2:33 pm Post subject: Re: Heater Beater 1776 |
|
|
For that breather hose you need to get a 1/2" aluminum line and bend it not quite 180 degrees then add that between your hoses-at least that is how I did it.
I am sure it is on your to do list.
Great news that the breather hoses and alt stand sealant helped solve the oil leaks. |
|
| Back to top |
|
|
evanfrucht
Samba Member

Joined: July 24, 2016
Posts: 2180
Location: Laurel Canyon, CA
|
| Posted: Thu Jun 10, 2021 10:20 am Post subject: Re: Heater Beater 1776 |
|
|
This a good material right here. I'm sure it's going to good use. Well, maybe not good use... but people are trying I'm sure
It's funny how these kind of projects usually snowball into an endless shit show right up until, by some miracle, it comes together beautifully.
Dont take this the wrong way but I laughed so hard multiple times reading this. Thank you for that!
Those scat nuts... Good job, Scat  I think they might be named after wild animal excrement after all. I think they might be named after wild animal excrement after all.
The inevitable breather hose kink... like you needed more BS! I'm actually dealing with that on my new motor
The Empi fitting with the dough consistency O-ring... They purposely make it so shitty that you will buy their "premium" one. Just to find it even worse somehow
You are right about the cheap chinese threading job on the little junky cast poop-metal Empi parts. They make them so cheap you can't help but buy it. You think it looks reworkable and that you'll save money... just to find you have to fix some other issue with it you didn't even expect, or the threads are so crooked it needs to be oversized and then you have to buy a new tap... and then a new fitting......... Because, of course its not in the "everything but bin"
Yet as always... you had to check
_________________
1967 Bug ( the daily rod )
1964 Fury Wagon ( the pavement shredder ) |
|
| Back to top |
|
|
Clatter
Samba Member
Joined: September 24, 2003
Posts: 7537
Location: Santa Cruz
|
| Posted: Sat Jul 24, 2021 8:24 am Post subject: Re: Heater Beater 1776 |
|
|
Well the battle has been raging on over the past weeks.
I'll try to get caught up..
Here the CB alt pulley and the Scat crank pulley get blamed for a too-tight fan belt.
Ended up having to fabricate shims to get the belt loose enough.
Didn't want a too-tight belt to kill alt bearings..
Turns out, sometimes afromarket alternator stands are sometimes too tall!
So adding shims is a fix, bot not the correct fix.
Since the alt stand is glued down now it'll have to do.
FYI.
Here's the bushings in the cooling flaps.
Thrust-loading has worn a groove in the side of the bush.
Took and filed it away some more so the flaps move well enough,
But again, a halfass fix compared to getting new bushings made and installed.
Cut a little slot in the side of the flap axle for to monitor thermostat operation.
Put some paint in this slot afterwards..
Can now tell at a glance if the t-stat is all the way open or closed,
And avoid crawling on the ground under a hot car on the side of the road with a flashlight.
_________________
Bus Motor Build
Whats That Noise?!? |
|
| Back to top |
|
|
Clatter
Samba Member
Joined: September 24, 2003
Posts: 7537
Location: Santa Cruz
|
| Posted: Sat Jul 24, 2021 8:41 am Post subject: Re: Heater Beater 1776 |
|
|
Fan noise was annoying annoying.
Sounded like armageddon of some kind.
This old doghouse shroud had been mangled to clear the karbs years ago,
And the good 'ol USA Motorola alt had been run off and on for over 25 years.
I never paid any attention to it,
it always just got bolted on and run.
Here there was evidence of the fan hitting the inside of the shroud.
Taking the old fan off and tapping it against the benchtop,
it has this type a subtle rattle you could hear/feel.
The little crimps that hold the blades in and the fan together were clearly coming loose.
Got me a welded fan from Racin' Jason Eggum here and it came in looking like a nice piece.
The depth was a bit different than the fan i removed.
New fan would just bolt flat against the backing plate,
So i made up a spacer washer as below.
That led to a deep-dive i never did before and consulting scripture.
Shims between the fan and hub?
Huh?
What's that?? 
Zipping apart a couple other fan assemblies didn't show any shims either..
Tried to figure out if there were differences in backing plate parts,
Doghouse/non-doghouse, alt vs. gen..
Didn't seem to be any differences..
The little chinachina kit don't have no shims!
So there you have it.
In the end, you're supposed to get .080" between the backing plate and fan,
And that's what my little washer did,
So we called it good,
And came up with another kinda halfass fix.
But it works..'
And what works works, right?
_________________
Bus Motor Build
Whats That Noise?!?
Last edited by Clatter on Sat Jul 24, 2021 8:58 am; edited 1 time in total |
|
| Back to top |
|
|
Clatter
Samba Member
Joined: September 24, 2003
Posts: 7537
Location: Santa Cruz
|
| Posted: Sat Jul 24, 2021 8:55 am Post subject: Re: Heater Beater 1776 |
|
|
Something you might never guess unless you know..
A shitty aftermarket alt stand can do other mean things besides make your belt tight, kill alt bearings, and rub your fan on the shroud.
It can also crack a nice USA alt housing..!
Was going to take this other Motorola externally-regulated alt in good shape,
And swap all the guts or the regulator over to make one good one,
but in the end, i just pushed the easy button and got a chinachina alt from CIP.
We'll see what the issues are with that one..
One day when i get some time i'll rip these two USA alts down, blast the housings, but in new bearings, etc.
Hopefully this new alt doesn't die and force my hand sooner than later..
Since the new fan was bare metal and the backing plate parts were ugly,
I got the fan clear powder coated (my powder coater hung it flat for this)
And the rest done in black.
Blasted/zinc'ed the hardware and zipped it all back together.
Seems like the whizzing noise is gone.
Hopefully this means i can leave this fan and shroud assembled for another 25 years or so..
_________________
Bus Motor Build
Whats That Noise?!? |
|
| Back to top |
|
|
Clatter
Samba Member
Joined: September 24, 2003
Posts: 7537
Location: Santa Cruz
|
| Posted: Tue Jul 27, 2021 7:52 am Post subject: Re: Heater Beater 1776 |
|
|
Following up to completion here..
Got the car sussed out and it's time to put some miles on.
Went and picked the kid up from work.
It'll pull the hills without going enemic; looks like a fuel filter change was all it needed.
All kinds of weird noises have been eliminated by sussing out the fan.
Baseline jetting from Jeff seems to be really close.
Will run a couple tanks of gas thru to get rid of any traces of race gas before the wideband goes back on.
Car runs really cool on the highway, at least according to the gauges - boiling water test showed them reading a few degrees high at 212', so we'll assume they're about right.
Oil won't go above 180 here on hwy 1 at 70 or so, and the heads maybe got 370 on the big hill pull at speed.
The way it drives is really a joy.
This combo works well all-around.
It still has that puckety-puckety idle,
But the off-idle and tip-in is flawless with the SVDA.
Nudge it, and it springs into action without hesitation.
Took a dozen off/ons with the karbs, but we got there.
The pulse valve might have something to do with this.
Only improvements made could be to idle.
As it is there's no balance tube, and the wall between manifold runners hasn't been opened up.
We might try a couple tricks in a bit, but for now I've had enough of pulling/stuffing these karbs.
The mid-range is solid, and seems to pull right through without a dip.
It's really linear - you don't fell any 'come on the cam' surge as it revs.
Running it up past 6 it still keeps pulling.
VERY happy the top end revs out like it does.
Being so disappointed with a couple other mouse/heater combos before,
This one really works differently.
No doubt the bigger vents were a key move.
Anyways,
Thanks to everyone who had input into this combo.
Testing so far shows the best "Heater Box" motor I've ever driven.
It's really smooth, will easily crawl along in traffic, has no flat spots, and delivers a surprising amount of power up top.
Sometimes,
it's these little junky ones thrown together that end up being the most fun.
_________________
Bus Motor Build
Whats That Noise?!? |
|
| Back to top |
|
|
VWporscheGT3
Samba Member
Joined: September 01, 2006
Posts: 2076
Location: Gardnerville, NV
|
| Posted: Tue Jul 27, 2021 10:09 am Post subject: Re: Heater Beater 1776 |
|
|
Steve,
this is really a invaluable thread here. so much good information. I just wanted to say thank you for your efforts and how you show every little detail. really ,just killer dude.
_________________
Schnell, SCHNELL!
I like being wrong, Because, it is another opportunity to learn. If you stop learning from your mistakes than what is the point?
If you have any questions about Forged ICON 4032 VW pistons just shoot me a line. |
|
| Back to top |
|
|
Lingwendil
Samba Member

Joined: February 25, 2009
Posts: 3988
Location: Antioch, California, a block from the hood
|
|
| Back to top |
|
|
Clatter
Samba Member
Joined: September 24, 2003
Posts: 7537
Location: Santa Cruz
|
| Posted: Fri Sep 10, 2021 3:27 pm Post subject: Re: Heater Beater 1776 |
|
|
Thought I'd update the thread..
Been driving the tar out of the thing..
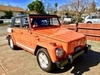
Taking kids to school:
Took Mom out into the hills to visit an animal rescue place as well as a couple of wineries:
In both of these scenarios calm, uneventful, low-speed and off-idle driving elegance are what it's all about.
Stoplights and idling in traffic, or low-speed dirt roads..
Really happy with how it behaves.
Even with a Stage1 and 12# flywheel it'll pretty much just tool around like a stocker.
One other thing,
When driving it really really hard in the hills here it had issues.
Roads here can be tight, bumpy and uneven.
The front beam had been narrowed, and that increased the spring rate in front.
The rear still had the stock torsions..
Now, I'd addressed all the other things; all bushings and bearings and whatnot were fresh.
Shocks, front disc brakes, drop spindles, swaybar, etc..
The biggest little thing to make it handle better was ball-joint adjusters that allow for more camber adjustment.
Yet,
Having the rear spring rate relatively lower than the front made the car misbehave at speed over rough roads.
The rear would squat or pogo or even do side-to-side stuff..
Additionally, the front/rear brake bias wasn't the best.
Fronts would lock considerably sooner than the rear.
Was going to get some fat Sway-way torsions and rear disks,
But wasn't sure about how stiff in the rear, and never liked the low pedal you can get with four-wheel discs (or the drag of residual valves).
So the square torsions and rear brakes were an experiment.
And a successful experiment at that..!
I'd say the square torsions are a good match to factory late leafs (leaves?) up front narrowed 2".
Driven hard, the car is WAY more balanced in how it reacts to bumpy corners.
If the rear torsions were too big, the front would show signs of being overpowered, and it's doesn't.
Additionally, a few test panic stops show better results without the front brakes locking so easily.
When riding over bumpy country roads with Mom, it's still not stiff enough to be annoying or tiresome.
So,
You just never know!
Sometimes, the reasonable application of some old factory parts can produce good results.
If you offered to trade me straight across for some aftermarket torsions and a China disk brake kit I'd decline.
Now that pretty much every trick has been done to the suspension,
the car is really, really nice to drive fast/hard,
Without being annoying when driven easily.
Factory parts rule!
So there's a big aside tangent,
but whatever,
Thanks for following along.
_________________
Bus Motor Build
Whats That Noise?!? |
|
| Back to top |
|
|
toxicavenger70
Samba Member

Joined: July 28, 2019
Posts: 871
Location: CO
|
| Posted: Fri Oct 22, 2021 12:27 pm Post subject: Re: Heater Beater 1776 |
|
|
| My front disc created a brake bias with rear drum brakes. When I installed a 2lb Empi residual valve it straightened it out. |
|
| Back to top |
|
|
txgunslinger
Samba Member
Joined: July 27, 2021
Posts: 25
Location: San Antonio, TX
|
| Posted: Thu Oct 28, 2021 7:24 pm Post subject: Re: Heater Beater 1776 |
|
|
| This entire thread was a 3 hour tangent to my day. Worth every minute lol |
|
| Back to top |
|
|
|


