| Author |
Message |
early
Samba Member

Joined: January 19, 2012
Posts: 185
Location: Glen Carbon, IL

|
 Posted: Thu Feb 27, 2020 11:13 am Post subject: Re: barn find westy so42 Posted: Thu Feb 27, 2020 11:13 am Post subject: Re: barn find westy so42 |
 |
|
Cargo Floor and short rocker welding:
we welded up the drain hole for the sink, since I don't have one and it's unlikely I would find one for a reasonable price. yikes these Westy parts are very dear!
_________________
early-
Barnfind westy project
https://www.thesamba.com/vw/forum/viewtopic.php?t=...highlight=
my 73 sports bug project build
http://www.thesamba.com/vw/forum/viewtopic.php?t=497088
Current Projects :
73 Sport Bug - L13M gone now
67 Westfalia
57 oval window ragtop - sold june 2021
61 sedan
68 Corvette Roadster - Small Block, 4 Speed
86 GMC Sierra Classic- 4x4, Shortbed
94 Harley Flstn |
|
| Back to top |
|
 |
srfndoc
Samba Member

Joined: August 21, 2010
Posts: 3274
Location: SoCal
|
| Posted: Thu Feb 27, 2020 11:19 am Post subject: Re: barn find westy so42 |
|
|
Yes, restoring a Westy is an adventure. Missing pieces are costly and rarely come up. Early Westy's are a whole other story. I'm conflicted with the cooler... one the one hand its nice to have when camping but it also makes it much roomier (especially in a walkthru) to take it out.
_________________
RPM=(MPH*336* (R&P*4th*1.26))/Tire Diameter in inches |
|
| Back to top |
|
|
early
Samba Member
Joined: January 19, 2012
Posts: 185
Location: Glen Carbon, IL
|
| Posted: Thu Feb 27, 2020 11:24 am Post subject: Re: barn find westy so42 |
|
|
Left side Work:
remove Rocker Panel, inner Rocker, floor sections , Left Dog Leg, 2 outriggers and top hats.
rusty rear top hat / outrigger / jack point
floor cutting
pile o metal:
new b pillar and uprights:
progress 
_________________
early-
Barnfind westy project
https://www.thesamba.com/vw/forum/viewtopic.php?t=...highlight=
my 73 sports bug project build
http://www.thesamba.com/vw/forum/viewtopic.php?t=497088
Current Projects :
73 Sport Bug - L13M gone now
67 Westfalia
57 oval window ragtop - sold june 2021
61 sedan
68 Corvette Roadster - Small Block, 4 Speed
86 GMC Sierra Classic- 4x4, Shortbed
94 Harley Flstn |
|
| Back to top |
|
|
early
Samba Member
Joined: January 19, 2012
Posts: 185
Location: Glen Carbon, IL
|
| Posted: Fri Mar 06, 2020 6:27 am Post subject: Re: barn find westy so42 |
|
|
progress updates:
been stripping paint with a Heat Gun and a Razor Blade. it works pretty good but you have to change razor blades as they get ragged quickly.
I have 3 different razor tools and keep rotating them out til I wear the blade out. as the blade gets ragged it scratches the metal which will take a little bit of sanding to remove.
so start out with a box of 100 razor blades and switch them out often. once you get going it moves along quickly, sure beats using chemical strippers or trying to find a media blaster
this week I swapped out the drag link and felt like attacking the Swing Lever bushing and pin project. whew that's fun but thanks to the Samba I was able to find proper procedures:
lower bushing was really worn as you can see the Pin was awful and the bushing had a lip around it where it was wearing.
reamer in action:
next up:
reassemble the front spindles, link pins , tie rod ends , so I can get the bus on the floor to roll out and do some sandblasting
install front floor, left side cargo floor, blast the rusty seams and get some epoxy primer on this thing.
cheers..
_________________
early-
Barnfind westy project
https://www.thesamba.com/vw/forum/viewtopic.php?t=...highlight=
my 73 sports bug project build
http://www.thesamba.com/vw/forum/viewtopic.php?t=497088
Current Projects :
73 Sport Bug - L13M gone now
67 Westfalia
57 oval window ragtop - sold june 2021
61 sedan
68 Corvette Roadster - Small Block, 4 Speed
86 GMC Sierra Classic- 4x4, Shortbed
94 Harley Flstn |
|
| Back to top |
|
|
velvetgreen
Samba Member

Joined: August 17, 2004
Posts: 2745
Location: Canada
|
| Posted: Fri Mar 06, 2020 7:41 am Post subject: Re: barn find westy so42 |
|
|
| nice job on paint stripping- can you get in to a bit more detail on how you are working the razor blade? Are you pulling or pushing the blade? Do you put some lubricant or other prep on paint before so that it doesn't dig in to OG paint etc etc? |
|
| Back to top |
|
|
early
Samba Member
Joined: January 19, 2012
Posts: 185
Location: Glen Carbon, IL
|
| Posted: Fri Mar 06, 2020 9:53 am Post subject: Re: barn find westy so42 |
|
|
| velvetgreen wrote: |
| nice job on paint stripping- can you get in to a bit more detail on how you are working the razor blade? Are you pulling or pushing the blade? Do you put some lubricant or other prep on paint before so that it doesn't dig in to OG paint etc etc? |
when Stripping Paint with a Heat Gun / Razor Blade you will remove all paint down to the Original Primer. it will not save the OG paint.
I use the Hand Held Razor blade On Edge, pushing the blade itself has to be very Flat to the surface and it will move right thru the paint once the surface is warm enough to lift. you have to heat the paint surface and keep the heat gun ahead of your blade and paint just peels off.
I am using 3 different Blade holders , short one for starting on radius portions, long handles for Long runs. hard part is holding the blade flat enough to get the paint, if you are working over a body line ( such as the perimeter line around the bus) the blade wont get flat enough so you have to come back down to it.
I wanted to save the OG paint but this bus has 2 paint jobs on top of the OG L87 Pearl white, so there was really no other way to save the OG , since it has repairs on both rear corners and various other spots.
I suppose somebody could have put the time in to save it, but it has so many little rust spots into the paint, I felt it was time to remove it. I am in the Midwest so if this was a Western bus things might have been different.
in this photo I started low on the door and pushed up to the perimeter body line, I left the few strips intact so you can see how it lifts the paint
this photo shows how it is hard to get into round , deep spots
thanks..
_________________
early-
Barnfind westy project
https://www.thesamba.com/vw/forum/viewtopic.php?t=...highlight=
my 73 sports bug project build
http://www.thesamba.com/vw/forum/viewtopic.php?t=497088
Current Projects :
73 Sport Bug - L13M gone now
67 Westfalia
57 oval window ragtop - sold june 2021
61 sedan
68 Corvette Roadster - Small Block, 4 Speed
86 GMC Sierra Classic- 4x4, Shortbed
94 Harley Flstn |
|
| Back to top |
|
|
velvetgreen
Samba Member
Joined: August 17, 2004
Posts: 2745
Location: Canada
|
| Posted: Fri Mar 06, 2020 9:36 pm Post subject: Re: barn find westy so42 |
|
|
| Thanks so much for the detailed description. I guess I thought you were trying to strip the paint back to original, I appreciate the advice anyway! Cheers |
|
| Back to top |
|
|
early
Samba Member
Joined: January 19, 2012
Posts: 185
Location: Glen Carbon, IL
|
| Posted: Wed Mar 18, 2020 8:41 pm Post subject: Re: barn find westy so42 |
|
|
Time for an update: since It looks like i'll be hanging out in the garage in my evenings;
I sand blasted the front wheel wells , just to clean things up so I could see how well the seams turned out, looked good sprayed some Epoxy on the front beam and on the wheel well, I will re spray the wheel wells white, after front end is back together
pulled the torsion bars, replaced the Seals, and got the Sway bar back on, that is really a fun job
got the drivers side floor Welded in, that KF floor is a little bit stiffer than the WW floor that I used on the Passenger side. the WW floor is fine, just thinner gauge than the KF.
attached the Drivers Side A pillar and installed the Dog Leg, I think it turned out really well. it Lines up nice with the door , gaps are good and im happy with the fit:
_________________
early-
Barnfind westy project
https://www.thesamba.com/vw/forum/viewtopic.php?t=...highlight=
my 73 sports bug project build
http://www.thesamba.com/vw/forum/viewtopic.php?t=497088
Current Projects :
73 Sport Bug - L13M gone now
67 Westfalia
57 oval window ragtop - sold june 2021
61 sedan
68 Corvette Roadster - Small Block, 4 Speed
86 GMC Sierra Classic- 4x4, Shortbed
94 Harley Flstn |
|
| Back to top |
|
|
MrPolak
Samba Member

Joined: June 20, 2004
Posts: 1337
Location: AG ,atnaltA
|
| Posted: Thu Mar 19, 2020 7:21 pm Post subject: Re: barn find westy so42 |
|
|
| Can you divulge what kind of welder are you using and at what settings? |
|
| Back to top |
|
|
early
Samba Member
Joined: January 19, 2012
Posts: 185
Location: Glen Carbon, IL
|
| Posted: Thu Mar 19, 2020 7:44 pm Post subject: Re: barn find westy so42 |
|
|
| MrPolak wrote: |
| Can you divulge what kind of welder are you using and at what settings? |
MrPolak, yes, we are using a Lincoln PowerMig 140C with a 75/25 argon/co2 mix, running a .024 wire with wire speed generally around 2 ,2.25, 2.5 and voltage at D D1/4 D1/2 up to E depending upon the thickness of the metal. the PowerMig is a 120v 90 amp unit, nothing too fancy but it really does a nice job on clean sheet metal body panels.
_________________
early-
Barnfind westy project
https://www.thesamba.com/vw/forum/viewtopic.php?t=...highlight=
my 73 sports bug project build
http://www.thesamba.com/vw/forum/viewtopic.php?t=497088
Current Projects :
73 Sport Bug - L13M gone now
67 Westfalia
57 oval window ragtop - sold june 2021
61 sedan
68 Corvette Roadster - Small Block, 4 Speed
86 GMC Sierra Classic- 4x4, Shortbed
94 Harley Flstn |
|
| Back to top |
|
|
early
Samba Member
Joined: January 19, 2012
Posts: 185
Location: Glen Carbon, IL
|
| Posted: Tue Apr 14, 2020 10:10 am Post subject: Barn find Westy SO42 |
|
|
Quarantine Time Updates:
spending a lot of time after work and on the weekends in the garage these days, with no where else to go. so here are some updates:
cleaned the cargo floor with W &G , mixed up a batch of white epoxy primer to paint the cargo floor and get the welds sealed up.
proceeded to fit the Cab Floor which went very well after some trial fitting. we decided to cut it into 2 pieces to surround the steering Column since the steering wheel would not budge with my puller, the puller was trying to destroy the wheel, so cut the floor with the Plasma cutter into 2 pieces, and weld it back up. actually went very well.
special thanks goes out to my buddy John the welder, he has been doing a fabulous job on the bus, he is putting in as much time as I have been:
scuffed with a red pad,cleaned with wax and grease remover and coated with epoxy primer as well:
reassembled the front end, steering knuckles with new king pins, link pins, new tie rod ends, drag link, and even adjusted the steering box an centered the steering wheel.
then we attacked the Corner, been holding off on this project mostly out of fear, getting the alignment right and just didn't want to make any mistakes, so we did pretty well, much welding to do as it is only tacked for now but it looks pretty good to me:
running the temporary engine on the floor for some hours to check for leaks, set the valves and tune up stuff while its out.
back to work...
until next time.
_________________
early-
Barnfind westy project
https://www.thesamba.com/vw/forum/viewtopic.php?t=...highlight=
my 73 sports bug project build
http://www.thesamba.com/vw/forum/viewtopic.php?t=497088
Current Projects :
73 Sport Bug - L13M gone now
67 Westfalia
57 oval window ragtop - sold june 2021
61 sedan
68 Corvette Roadster - Small Block, 4 Speed
86 GMC Sierra Classic- 4x4, Shortbed
94 Harley Flstn |
|
| Back to top |
|
|
LAGrunthaner
Samba Member

Joined: March 18, 2007
Posts: 5506
Location: 1st Coast
|
|
| Back to top |
|
|
crofty
Judas of the North

Joined: August 09, 2000
Posts: 19672
Location: Land of Whine and Phonies
|
| Posted: Wed Apr 15, 2020 7:56 am Post subject: Re: Barn find Westy SO42 |
|
|
Great work! Looks really good!
_________________
Your Vanagon sucks, Stop waving at me.
| HamburgerBrad wrote: |
I slept on crofty's tent once. I passed out drunk from two bottles of Everett's brother's wine. |
|
|
| Back to top |
|
|
early
Samba Member
Joined: January 19, 2012
Posts: 185
Location: Glen Carbon, IL
|
| Posted: Wed Jul 01, 2020 7:56 am Post subject: Barn find Westy SO42 |
|
|
I've failed to post updates, mostly because a lot of the steps in this project have already been done before in other projects and are well documented here on the samba (which has been very helpful to me on this project , but i just didnt want to post but now i felt the need to update).
so I'll try to catch things up.
while we have all been in quarantine, i have been quite busy in my after work hours in the garage, seems i spend every evening in the garage trying to get to the paint stage before the heat and humidity kick in.
a reference photo of the Pop Top documenting the awful condition of the fiberglass top.
outside after some DA'ing with 80 grit and followup with the sandblaster:
back in the garage for some SPI Epoxy Primer on the recently blasted parts:
engine compartment detail after the new corner, battery pan and custom made small panel, which i have no idea what it is for but was there originally. ( i'm speaking of the small bent metal bracket at the rear of the wheel tub.)
cut the bottoms of the cargo doors and welded the new panels in place - inside and out. this proved to be quite a project as the fit is not all that perfect and alignment might look a bit wanky but at this point it is what it is:
more blocking and epoxy primer:
decided to tackle the bumpers and ensure their fit beforehand, grinded paint and sandblasted where necessary - bumper blades, over riders, bars and wheels:
epoxy primer on all the bits:
and finally on to some actual color:
I have chosen to use the UTECH 500 Single Stage with Hardener from the Akzo Nobel line since it has a pretty good reputation and is compatible with the SPI Products i have been using thus far.
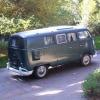
this is supposed to be L82 SilverWhite while i have my doubts it will be an actual match it is what it is . it is brighter in the sunlight outside:
and finally some nice finish on the ragged pop top.
this top is after 3 coats of epoxy primer, sanded then 2 coats of 2K urethane primer, sanded , then 2 more coats of 2K primer, sanded then with 220, 240, 320 and 400. 1 coat of reduced SPI Epoxy as a sealer, 2 coats of Single Stage UTECH 500 activated with hardner, followed by another coat of SS integrated with activated, reduced SPI Euro 2020 clear. (of course all within the recommended flash times)
I dont have any more recent photo's but after some more metal work around the corners and other bits and more epoxy primer, I am currently in 2K primer and blocking the Sides, front nose and top at this point and depending upon how that goes it will determine next steps.
when i get to the paint stage i will be using SPI Epoxy reduced as my sealer then the UTECH 500 L87 Pearl white with the Hardener and using the SPI Euro 2020 integrated in my final coat hoping for the best.
current plan is to paint the Inside, door jambs, engine compartment etc first, then when ready mask the body and paint the roof, the finally mask it off and continue on to the rest of the body. i'll keep you all posted as i get there.
thanks for watching along.
_________________
early-
Barnfind westy project
https://www.thesamba.com/vw/forum/viewtopic.php?t=...highlight=
my 73 sports bug project build
http://www.thesamba.com/vw/forum/viewtopic.php?t=497088
Current Projects :
73 Sport Bug - L13M gone now
67 Westfalia
57 oval window ragtop - sold june 2021
61 sedan
68 Corvette Roadster - Small Block, 4 Speed
86 GMC Sierra Classic- 4x4, Shortbed
94 Harley Flstn |
|
| Back to top |
|
|
EverettB 
Administrator

Joined: April 11, 2000
Posts: 69809
Location: Phoenix Metro
|
|
| Back to top |
|
|
Mr Margaret Scratcher
Samba Member
Joined: February 10, 2013
Posts: 245
Location: Cambridge UK
|
| Posted: Wed Jul 01, 2020 4:24 pm Post subject: Re: Barn find Westy SO42 |
|
|
| early wrote: |
engine compartment detail after the new corner, battery pan and custom made small panel, which i have no idea what it is for but was there originally. ( i'm speaking of the small bent metal bracket at the rear of the wheel tub.)
|
I've seen that little battery compartment/behind the wheel tub bracket on a couple of other buses - from memory I think it was a 67 only thing, or 12V only thing. |
|
| Back to top |
|
|
Thompson2
Samba Member
Joined: June 06, 2018
Posts: 659
Location: Portland, OR
|
| Posted: Wed Jul 01, 2020 5:30 pm Post subject: Re: Barn find Westy SO42 |
|
|
Solid work! I always amazes me how fast some of you guys can blaze through these repairs..
Last edited by Thompson2 on Wed Jul 01, 2020 5:52 pm; edited 1 time in total |
|
| Back to top |
|
|
LAGrunthaner
Samba Member
Joined: March 18, 2007
Posts: 5506
Location: 1st Coast
|
| Posted: Wed Jul 01, 2020 5:36 pm Post subject: Re: Barn find Westy SO42 |
|
|
I had to repaint mine as it was mentioned the plates should be clean aluminum and have no paint, also the handle screws & washers.
Before
after
_________________
American Red Cross Safe And Well:
https://www.redcross.org/about-us/news-and-events/...bsite.html
Maui Roadsters 
www.mauiroadsters.com
http://www.oacdp.org
| Lind wrote: |
| Have you considered simply starting with a nicer bus? I don't know what your skills are, but the race is easier if you can see the finish line. If you are not a runner, don't start off doing a marathon. |
|
|
| Back to top |
|
|
Major Woody
Samba Enigma

Joined: December 04, 2002
Posts: 9010
Location: Portland, OR
|
| Posted: Thu Jul 02, 2020 10:14 am Post subject: Re: Barn find Westy SO42 |
|
|
| The function of that little vertical piece in front of the battery on 12v buses is a mystery. It's very good at accumulating dust, water, grease and battery acid and then rusting away. |
|
| Back to top |
|
|
BarryL
Samba Member

Joined: November 01, 2004
Posts: 14258
Location: Casa de Oro, California
|
| Posted: Thu Jul 02, 2020 11:16 am Post subject: Re: Barn find Westy SO42 |
|
|
| Mr Margaret Scratcher wrote: |
| early wrote: |
engine compartment detail after the new corner, battery pan and custom made small panel, which i have no idea what it is for but was there originally. ( i'm speaking of the small bent metal bracket at the rear of the wheel tub.)
|
I've seen that little battery compartment/behind the wheel tub bracket on a couple of other buses - from memory I think it was a 67 only thing, or 12V only thing. |
| Major Woody wrote: |
| The function of that little vertical piece in front of the battery on 12v buses is a mystery. It's very good at accumulating dust, water, grease and battery acid and then rusting away. |
On the two '67s I own and have owned there are 2 small holes at the bottom that drain any water that might come down the vent opening. The holes exit above the wheelwell splash apron. Also if for some reason gas ran down there it could get away. A final guess to add is that in the event of impact the battery would hit that. |
|
| Back to top |
|
|
|


