| Author |
Message |
Dougster43
Samba Member
Joined: May 11, 2018
Posts: 183
Location: Texas

|
 Posted: Fri Jan 03, 2020 10:03 am Post subject: Bottom end restoration of 73 Thing has begun Posted: Fri Jan 03, 2020 10:03 am Post subject: Bottom end restoration of 73 Thing has begun |
 |
|
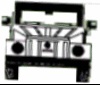
Here is my Christmas vacation project - new pans from TTS!! The old pans weren't terrible but there were some pinholes starting to show, and the PO did some back half pan repairs that were questionable.
Body is back on and its headed to have some sheet metal repairs in the engine compartment done. Then its body back off and chassis stripped down for powder coating.
Goal is to have it back driving by summer. I'm sure I will have lots of questions over the next few months...
|
|
| Back to top |
|
 |
hobie16
Samba Member

Joined: July 26, 2013
Posts: 244
Location: Maui
|
| Posted: Fri Jan 03, 2020 3:43 pm Post subject: Re: Bottom end restoration of 73 Thing has begun |
|
|
It's nice to have a big garage with a high ceiling. One day...
_________________
Don't be fooled by appearances. In Hawaii, some of the most powerful people look like bums and stuntmen.
--- Matt King
If anythings going to happen, its going to happen out there.
---Captain Ron |
|
| Back to top |
|
|
Dougster43
Samba Member
Joined: May 11, 2018
Posts: 183
Location: Texas
|
| Posted: Fri Jun 05, 2020 2:30 pm Post subject: Re: Bottom end restoration of 73 Thing has begun |
|
|
Parts are back from powder coater! Time to piece the puzzle back together.
|
|
| Back to top |
|
|
obus 
Samba Member

Joined: March 08, 2001
Posts: 11070
Location: just off Garden State Parkway Exit 81
|
|
| Back to top |
|
|
Dougster43
Samba Member
Joined: May 11, 2018
Posts: 183
Location: Texas
|
| Posted: Mon Aug 17, 2020 3:51 pm Post subject: Re: Bottom end restoration of 73 Thing has begun |
|
|
Well the bottom end is pretty much back together - just a little grease and a few small items to go. About as close to a brand new one as I could get!!
|
|
| Back to top |
|
|
Dougster43
Samba Member
Joined: May 11, 2018
Posts: 183
Location: Texas
|
| Posted: Mon Aug 17, 2020 3:55 pm Post subject: Re: Bottom end restoration of 73 Thing has begun |
|
|
Of course now that I have the "disease" I couldn't stop there. This was the body at the sandblaster the other day. I know I have a few places that need some metal grafted in but overall it looked promising. I guess I'll see what I find when I get it back to my shop...
|
|
| Back to top |
|
|
Semper_Dad
Samba Member
Joined: May 14, 2005
Posts: 3510
Location: Indiana
|
| Posted: Mon Aug 17, 2020 7:06 pm Post subject: Re: Bottom end restoration of 73 Thing has begun |
|
|
Took me a week to clear out all the media from mine. That "dustless" mud was stuck to everything. Once it had dried out, every inch needed to be brushed to loosen it. After that, blow, vacuum, repeat. Dry blasting doesn't do that.
I still had my chassis attached. Would have been a lot easier if it was body alone. End result about the same. "Discovered" some hidden repairs.
What's your priming plan? I picked up Eastwood's Ulitmate Optiflow package. Etch prime, guide spray, Epoxy primer. Supposedly you can roll it on.
Nice dolly setup
_________________
Walküre Restoration Thread: https://www.thesamba.com/vw/forum/viewtopic.php?t=737492 |
|
| Back to top |
|
|
Just_Me
Samba Member
Joined: January 28, 2019
Posts: 28
Location: Houston, TX
|
| Posted: Tue Aug 18, 2020 6:04 am Post subject: Re: Bottom end restoration of 73 Thing has begun |
|
|
I'm staring at that before picture, looking at that awesome paint job, and wondering a bit. I am at the same stage as you in my restore, but I elected not to have the body sandblasted using the dustless media blasting, instead I elected to send it to a ghetto body shop where my Thing body sits at the bottom of his list of priorities.
_________________
1973 Thing, In Mountains of Angel Fire, NM
1973 Thing undergoing body off restoration
1970 VW Split Bus (Brazilian) being imported |
|
| Back to top |
|
|
Dougster43
Samba Member
Joined: May 11, 2018
Posts: 183
Location: Texas
|
| Posted: Tue Aug 18, 2020 7:30 am Post subject: Re: Bottom end restoration of 73 Thing has begun |
|
|
I'm probably going to do a two part epoxy primer. Still working on that part...
I like the body dolly but it is too low. I am going to raise it up about 18" when I get the car back from the blaster to get it at a better working level for paint. Once the car is done I'll offer up the dolly to anyone that want to road trip to Dallas to get it. |
|
| Back to top |
|
|
Semper_Dad
Samba Member
Joined: May 14, 2005
Posts: 3510
Location: Indiana
|
| Posted: Tue Aug 18, 2020 8:47 am Post subject: Re: Bottom end restoration of 73 Thing has begun |
|
|
| Dougster43 wrote: |
| I'm probably going to do a two part epoxy primer. Still working on that part... |
DISCLAIMER: I know nothing about body or paint and I'm more or less going blind.
I'm still trying to find a body and paint person. Most commercial shops declined in favor of collision work (cheap and quick turnover?). Put some ads out looking for people wanting to do sidework or hobbyists. Getting crazy estimates between 8-10K even before they know what I want done. Not looking for concours level of work here.
I just took Eastwood's 2K epoxy primer rattle can for a test drive and not happy with the results. 2 cans were included in the kit I bought along with a gallon of the roll-on Optiflow. Supposed to be enough to do door jambs and such. You would probably need 4 or 5 cans if you wanted to spray the entire trunk area using just the rattlecans. Might be useful for the dash area (2 Cans?). Engine bay? (3-4 Cans?).
Not very much coverage. 2nd can sputtered and got even less coverage. I believe they recommend at least 3-5 coats. I think I'll need at least another two cans to accomplish that. The gray color makes it a bit difficult to see where you sprayed and what is still raw metal. $20 a can, with low coverage make this a spendy option. Might be good for small parts.
I haven't tried the roller application yet. Do yourself a favor and just have the body fully sprayed. No rattlecans, no rollers. Your situation should be a lot easier with the body removed.
Any body work can be done after the epoxy primer. Once the body work is completed the Urethane primer goes on. My kit included a gallon with catalyst, as well as 2 cans of the rattlecan version. Again, I'm not holding high hopes for the rattlecan. Recommend full spray.
_________________
Walküre Restoration Thread: https://www.thesamba.com/vw/forum/viewtopic.php?t=737492 |
|
| Back to top |
|
|
Dougster43
Samba Member
Joined: May 11, 2018
Posts: 183
Location: Texas
|
| Posted: Tue Aug 25, 2020 3:56 pm Post subject: Re: Bottom end restoration of 73 Thing has begun |
|
|
First coat of epoxy primer is on. I used Eastwood's grey low VOC epoxy after cleaning the whole body with an etching acid cleaner and then Prep All. The primer sprayed great using an HVLP gun, I just ran a little short with only 1/2 gallon of mixed primer. More on the way but Eastwood shipping is very slow.
Also I raised the body cart and it made life much easier!! The bottom of the body is roughly 30" from the ground and it is easy to get access to pretty much everything.
|
|
| Back to top |
|
|
Semper_Dad
Samba Member
Joined: May 14, 2005
Posts: 3510
Location: Indiana
|
|
| Back to top |
|
|
Dougster43
Samba Member
Joined: May 11, 2018
Posts: 183
Location: Texas
|
| Posted: Wed Aug 26, 2020 2:51 pm Post subject: Re: Bottom end restoration of 73 Thing has begun |
|
|
| No - I need to take them off. Thanks for the reminder! |
|
| Back to top |
|
|
Dougster43
Samba Member
Joined: May 11, 2018
Posts: 183
Location: Texas
|
| Posted: Sat Oct 03, 2020 3:43 pm Post subject: Re: Bottom end restoration of 73 Thing has begun |
|
|
Been a busy month or so!
Started out with the front left quarter panel. The original was in bad shape and I was able to get one from TTS.
|
|
| Back to top |
|
|
Dougster43
Samba Member
Joined: May 11, 2018
Posts: 183
Location: Texas
|
| Posted: Sat Oct 03, 2020 3:46 pm Post subject: Re: Bottom end restoration of 73 Thing has begun |
|
|
On to the rockers next. I had already replaced the left inner rocker but after sandblasting found the right inner was in bad shape. Once I got the panel off I saw that the rear part of the outer rocker had some questionable repairs...
All better now though!!
|
|
| Back to top |
|
|
Dougster43
Samba Member
Joined: May 11, 2018
Posts: 183
Location: Texas
|
| Posted: Sat Oct 03, 2020 3:47 pm Post subject: Re: Bottom end restoration of 73 Thing has begun |
|
|
The front fenders needed work - especially the right side. Got busy with the metal stretcher and worked from there...
|
|
| Back to top |
|
|
Dougster43
Samba Member
Joined: May 11, 2018
Posts: 183
Location: Texas
|
| Posted: Sat Oct 03, 2020 3:49 pm Post subject: Re: Bottom end restoration of 73 Thing has begun |
|
|
Did a quick fit of the fenders on the car after all the new pieces and repairs. Everything seemed to fit ok...
|
|
| Back to top |
|
|
Dougster43
Samba Member
Joined: May 11, 2018
Posts: 183
Location: Texas
|
| Posted: Sat Oct 03, 2020 3:54 pm Post subject: Re: Bottom end restoration of 73 Thing has begun |
|
|
Had to cut out and repair a bunch of other areas - both sides of the windshield cowl, some areas on the right quarter panel, a bunch of the gutters around the trunk, etc. Then sanded and got everything back in epoxy primer. Have a few more small things to take care of and reprime before starting on blocking and sanding. My take a little break but I think I would get bored fast...
|
|
| Back to top |
|
|
Dougster43
Samba Member
Joined: May 11, 2018
Posts: 183
Location: Texas
|
| Posted: Mon Nov 09, 2020 8:07 pm Post subject: Re: Bottom end restoration of 73 Thing has begun |
|
|
Things are progressing. Got most of the blocking and sanding done on the outside of the body and its back in epoxy primer now. Still a few areas that need some work and I'm about to move to the interior sheet metal next. My body and paint guy should be ready for it in a week or two!
I also rebuilt the main wire harness. When my coil went bad it melted the ignition wire pretty good, all the way through most of the harness but fortunately didn't damage any other wires. While I was redoing the harness I added some extra wires - an amplifier turn on lead, extra battery power wire to the dash, rear speaker wires, and ran the reverse light power wire from the coil through the harness (not sure why VW didn't do that?).
I was going to buy aftermarket replacement door handles, but the quality just didn't seem to match the original, so I had everything rechromed (ignore the smudges and fingerprints, the chrome shop did a fantastic job!
|
|
| Back to top |
|
|
jakokombi
Samba Member
Joined: August 15, 2010
Posts: 779
Location: Milwaukee
|
| Posted: Mon Nov 09, 2020 8:24 pm Post subject: Re: Bottom end restoration of 73 Thing has begun |
|
|
Nice work, and wow! Those handles look like jewelry!
_________________
70 Sunroof Kombi
85 Motherfukinvanagon
73 Thing
72 Baja |
|
| Back to top |
|
|
|


