| Author |
Message |
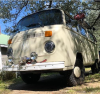
ImAddicted
Samba Member
Joined: April 24, 2012
Posts: 1195
Location: Unorganized Territory, Maine

|
 Posted: Mon Dec 21, 2020 10:32 am Post subject: Re: Crusher - next to go in when saved Posted: Mon Dec 21, 2020 10:32 am Post subject: Re: Crusher - next to go in when saved |
 |
|
| cmonSTART wrote: |
| Jetfxr69 wrote: |
Matt, gonna call and talk to you about doing those doglegs. Another time vs. effort decision to make. We have them in hand, just not sure if I want to spend the time necessary to do them or just patch em up. |
In hindsight I would have fixed my existing dog legs if it were possible. The new dog legs don't fit quite right and have a different curve, and really aren't saving you any work. That said, mine were beyond saving for the most part so I really had no choice.
Both the VW Brazil and Klokkerholm leg assemblies are a pain in the rear to deal with. I hate them both equally. |
I had replacements, I ended up scavenging metal and repairing the originals, the replacements would have needed as much - if not more - work to fit than fixing what I already had.
_________________
1979 Transporter (sold)
KC1MUR
| strfish7 wrote: |
| Original condition, which means something different on this forum than anywhere else! |
|
|
| Back to top |
|
 |
Jetfxr69
Samba Member
Joined: December 28, 2018
Posts: 1293
Location: White mtns nh
|
| Posted: Mon Feb 08, 2021 6:03 pm Post subject: Re: Crusher - next to go in when saved |
|
|
Been hit and miss to get some more bodywork done over the last couple months. We had just got the pax side rear arch and corner welded in, and then had to make an emergency roadtrip out west.
Once the box repair was done, cleaned up and hit the whole area with some Masterseries before welding big panel over the top. Hit all the weld seams with some Allmetal and then after grinding and sanding, a skim coat of filler to finish.
Took alot of sanding and refilling before I was comfortable with the reults.
About the time I got that done, my kid in Tahoe called that her jeep died just as the snow was starting to fly. Found a decent little Subi here locally that got head gaskets, struts, exhaust repair, etc, etc, etc. and some brakes. Made a 3200 mile roadtrip to deliver.
Of course we had to get in a few days of skiing at Heavenly and Kirkwood while there.
Anyways, got back here a couple weeks ago and started tearing into the left side. The learning curve has definetely started to flatten out with this welding thing.
Drivers side box post was just as bad as pax side, so it got rebuilt as well. Also both bumper mount attach points were toast, so they got cut out, new nut plates and doublers were welded back in. I didnt take any pics of that as my welding is ugly and didnt feel like laying on my back one more time. Trust me when I say they are rugged, as im sure at some point, she will be towing it out of a hole in the dessert by the bumper some day. Ryan has talked me into adding some tow hooks just to the side of the box frame.
Hope to finish up driver side, and then the rear valance cover last. Once all that rear work is done, engine bay gets painted and tank goes back in. At least thats how the dream goes anyways.
_________________
You can't be a real country unless you have a beer and an airline. It helps if you have some kind of a football team, or some nuclear weapons, but at the very least you need a beer. Zappa
77 westy Seamus
76 tintop Crusher
77 westy The Judge
72 tintop bastard westy Hudson |
|
| Back to top |
|
|
cmonSTART
Samba Member

Joined: July 15, 2014
Posts: 1915
Location: NH
|
| Posted: Mon Feb 08, 2021 6:28 pm Post subject: Re: Crusher - next to go in when saved |
|
|
Nice work - looking really good!
_________________
'78 Bus 2.0FI
de K1IGS |
|
| Back to top |
|
|
Abscate
Samba Member
Joined: October 05, 2014
Posts: 22670
Location: NYC/Upstate/ROW
|
| Posted: Mon Feb 08, 2021 7:18 pm Post subject: Re: Crusher - next to go in when saved |
|
|
Looking great. Keep those little piggies warm.
See you In the Fall, may the Creator so allow.
_________________
.ssS! |
|
| Back to top |
|
|
orwell84
Samba Member

Joined: May 14, 2007
Posts: 2539
Location: Plattsburgh, New York
|
| Posted: Wed Feb 10, 2021 8:06 pm Post subject: Re: Crusher - next to go in when saved |
|
|
Are you spot welding or seam welding?
I find grinding as I go helps. Turning the welder up a little to get the welds flatter. Still ugly but Im good at grinding |
|
| Back to top |
|
|
Jetfxr69
Samba Member
Joined: December 28, 2018
Posts: 1293
Location: White mtns nh
|
| Posted: Thu Feb 11, 2021 6:00 am Post subject: Re: Crusher - next to go in when saved |
|
|
| orwell84 wrote: |
Are you spot welding or seam welding?
I find grinding as I go helps. Turning the welder up a little to get the welds flatter. Still ugly but Im good at grinding |
Spot welding the doubler/backer only. Figure thats enough to hold it together. Holes are about 1/2 from each other. Thats also the reason I use Allmetal filler there. Whatever small gaps or voids there may be between the bodypanel and backer strip, ( I get it pretty damn tight using the clecos), the allmetal works into and fills. It also fills the gap between og panel and replacement one. I didnt try to cut the panels to be butt tight. Theres about a 1/8-1/4 gap between them.
On the box repairs its a little of both. In spots i used a doubler, so spot welded. And in other areas of the boxes, I seam welded. I dont care too much about the finish look of the boxes since they get covered up. I do want them solid and as structural as I can, just not too interested in a finish grind, as evident from some pictures.
The underside frame repair for the bumper attach nuts got seam welded as it was plate steel and could take the heat without blowing through. Its solid, but ugly. My ocd will probably get the better of me, and I will be grinding them to clean up soon enough.
The Miller welder im using is Ryans and it has an auto selection for wire diameter of .030. I just leave it there for 90% of the welds. Im learning to control the puddle by color and flow. When the plate steel comes into play, I turn it up manually a bit. Great machine! Does a nice job for a novice to learn on. 75/25% Ar-CO2 gas.
_________________
You can't be a real country unless you have a beer and an airline. It helps if you have some kind of a football team, or some nuclear weapons, but at the very least you need a beer. Zappa
77 westy Seamus
76 tintop Crusher
77 westy The Judge
72 tintop bastard westy Hudson |
|
| Back to top |
|
|
orwell84
Samba Member
Joined: May 14, 2007
Posts: 2539
Location: Plattsburgh, New York
|
| Posted: Thu Feb 11, 2021 6:18 am Post subject: Re: Crusher - next to go in when saved |
|
|
| Thatll work. Looks great. |
|
| Back to top |
|
|
Jetfxr69
Samba Member
Joined: December 28, 2018
Posts: 1293
Location: White mtns nh
|
| Posted: Thu Feb 11, 2021 8:37 am Post subject: Re: Crusher - next to go in when saved |
|
|
heres a look at the doubler from the inside. as you see, the penetration is great on some, and not so great on others.
working on being more consistent with the puddle. will be hitting some of them from the inside again.
the gap is intentional and will be filled in as i said above. probably should have used some seam sealer underneath, but wasnt sure if it would create voids or inhibit weld penetration.
_________________
You can't be a real country unless you have a beer and an airline. It helps if you have some kind of a football team, or some nuclear weapons, but at the very least you need a beer. Zappa
77 westy Seamus
76 tintop Crusher
77 westy The Judge
72 tintop bastard westy Hudson |
|
| Back to top |
|
|
Jetfxr69
Samba Member
Joined: December 28, 2018
Posts: 1293
Location: White mtns nh
|
| Posted: Wed Feb 24, 2021 7:04 am Post subject: Re: Crusher - next to go in when saved |
|
|
Took the next plunge by diving into,the cargo floor rot.
Its as bad as expected, but have a parts bus out back to cut the replacement floor piece out of.
The three piece sill below the slider is pretty bad. The main structure that holds the lower track in place is ok, but the inner and outer are both junk and getting replaced. Along with the lower section of the forward bulkhead. A couple small crossbeam repairs as well. Pics of that to come.
_________________
You can't be a real country unless you have a beer and an airline. It helps if you have some kind of a football team, or some nuclear weapons, but at the very least you need a beer. Zappa
77 westy Seamus
76 tintop Crusher
77 westy The Judge
72 tintop bastard westy Hudson |
|
| Back to top |
|
|
ImAddicted
Samba Member
Joined: April 24, 2012
Posts: 1195
Location: Unorganized Territory, Maine
|
| Posted: Wed Feb 24, 2021 9:34 am Post subject: Re: Crusher - next to go in when saved |
|
|
Keep it coming, Jay!!
_________________
1979 Transporter (sold)
KC1MUR
| strfish7 wrote: |
| Original condition, which means something different on this forum than anywhere else! |
|
|
| Back to top |
|
|
Jetfxr69
Samba Member
Joined: December 28, 2018
Posts: 1293
Location: White mtns nh
|
| Posted: Fri Feb 26, 2021 6:09 am Post subject: Re: Crusher - next to go in when saved |
|
|
Made a small patch for the rotted crossmember and lower inner corner of the post.
The corner was tricky due to the multiple planes involved. Made a little multi-piece part to go inside the box and pick up both the interior vertical and bulkhead piece. Once in place and welded, the lower bulkhead panel will go on to close up the big opening and tie it all together.
Everything in the area got osphod last night and I will wait till the real welder has time to come zip it together for me. He works for beer, so how do you loose on that deal?
_________________
You can't be a real country unless you have a beer and an airline. It helps if you have some kind of a football team, or some nuclear weapons, but at the very least you need a beer. Zappa
77 westy Seamus
76 tintop Crusher
77 westy The Judge
72 tintop bastard westy Hudson |
|
| Back to top |
|
|
Jetfxr69
Samba Member
Joined: December 28, 2018
Posts: 1293
Location: White mtns nh
|
| Posted: Sat Feb 27, 2021 9:57 pm Post subject: Re: Crusher - next to go in when saved |
|
|
I shouldnt be uodating right now, cause ive been drinkin, but what better time to show what I spent all day doing. This 76 is already a bastard bus, with the early model interior and such, so why not build in a convienent table setup.
I figure that before the floor gets closed up, i might as well build in a workable table system. I cut the OG pipe end off, and rewelded it back to the opposite end. It would have been way to high in its standard height to work outside the bus.
This height change also allowed the arm to act as a stowage arm for transport. Punched a hole through the bulkhed for the table mount base stem to protrude, and create a flat, stowable, secured table. The hole in the bulkhead is in dead space at the lower back of the pax seat, so no interference there.
I had the benefit of needing to repair this whole floor area, so why not screw around a bit? Im digging this set up so much, that im gonna source a spare westy table and arm setup to add this to my camper.
_________________
You can't be a real country unless you have a beer and an airline. It helps if you have some kind of a football team, or some nuclear weapons, but at the very least you need a beer. Zappa
77 westy Seamus
76 tintop Crusher
77 westy The Judge
72 tintop bastard westy Hudson |
|
| Back to top |
|
|
Jetfxr69
Samba Member
Joined: December 28, 2018
Posts: 1293
Location: White mtns nh
|
| Posted: Sat Feb 27, 2021 10:11 pm Post subject: Re: Is this correct interior 76 tintop camper |
|
|
| kinggeorge13 wrote: |
For example, this is one I'm guilty of changing in order to help save it. It was originally a 1978 Riviera with the straight-up large poptop It was completely gutted when I got it. All cabinets long-gone. I managed by pure fluke to find a person locally selling just the main cabinet (with icebox, sink, etc) from a Riviera. We installed that and built every other thing in there, including the walls, the other side/rear cabinets, the top headbanger, the bed, the floor, the lighting and all the camping electrical, the upper side wall trims, the ceiling. Everything. I was pretty stoked with the results.
Everyone we met, loved it. The only thing I didn't like (and still don't) is I used the super-common and modern RV light you can buy at an RV store for over the sink area. I wish I'd spent the time to find something a little more 70's. We used it for a short time and was the last bus my dad got to ride in with me but meanwhile my little fleet of buses was growing and we found a family with little kids that loved her and we sold her so she could be used and enjoyed.
But the point is, we saved the bus and it was a functioning, loved camper once again. I personally would go after the one you are looking at and save it too, especially if it's the right price. Add cabinets as you may or may not want. Enjoy it.
And cork flooring by the way is way warmer on bare feet that composite or natural wood. I've used that a couple times now.
|
Just re-read this entry and maybe I missed the point about the cork flooring. Emily has already decided she wants some kind of wood or tile floor vs. carpet in order to minimize the dirt, sand, mud, snow that will eventually befriend this bus. Cork sounds like a smart floor option for rugged use, anyone else have an opinion on cork? Not wether you would or wouldnt, but more in line with, I have done it, and here is why or why not I would again
_________________
You can't be a real country unless you have a beer and an airline. It helps if you have some kind of a football team, or some nuclear weapons, but at the very least you need a beer. Zappa
77 westy Seamus
76 tintop Crusher
77 westy The Judge
72 tintop bastard westy Hudson |
|
| Back to top |
|
|
calvinater
Samba Member

Joined: September 06, 2014
Posts: 3333
Location: 802 The Pointless Forrest
|
| Posted: Sun Feb 28, 2021 5:15 am Post subject: Re: Crusher - next to go in when saved |
|
|
Hydro cork , if you can find it. Never used it in a bus , but have had good luck in high traffic residential use .
_________________
"Albatross"! |
|
| Back to top |
|
|
Jetfxr69
Samba Member
Joined: December 28, 2018
Posts: 1293
Location: White mtns nh
|
| Posted: Tue Mar 02, 2021 7:07 pm Post subject: Re: Crusher - next to go in when saved |
|
|
Got the frame repair and bulkhead work mostly done.
Ground out the welds and covered with allmetal to smooth out. That area will get covered with some vinyl anyways, so wont be seen. Just want it smooth. The floor I cut out of the parts bus wasnt in as good as shape as I thought. Had to build a small angle shelf for the floor to ride on because the edge of the donor was pretty weak.
Finishing the inner sill piece while I have access from above. Almost done with that and then the floor gets welded down. Outer sill will get tacked on last.
Also worked some small areas in the back. Some wicked shitty PO hacks needed addressing. They attached the bed brackets with some sheetmetal screws that ripped out big holes. Had to fab some steel nut plates and welded them in.
And cut the fuel sending unit hack out. Cleaned up the old area and created an access panel for the future. When ready to close up, will just rtv the access panel down so its easily removed later by someone.
_________________
You can't be a real country unless you have a beer and an airline. It helps if you have some kind of a football team, or some nuclear weapons, but at the very least you need a beer. Zappa
77 westy Seamus
76 tintop Crusher
77 westy The Judge
72 tintop bastard westy Hudson |
|
| Back to top |
|
|
Jetfxr69
Samba Member
Joined: December 28, 2018
Posts: 1293
Location: White mtns nh
|
| Posted: Tue Mar 09, 2021 5:50 pm Post subject: Re: Crusher - next to go in when saved |
|
|
Moved back to the cargo floor refresh. Everytime I turn around, more rot bites me right in the ass! Crusher indeed. Its crushing me.
This little section of shit had to be dealt with. Its only part of the floor tray and floats just above the frame rail, so luckily the frame underneath was uneffected. It still had to be addressed.
Cut and bent some replacement pieces and then cut all the garbage out and welded in. A copious slathering of allmetal nicely hid all my horrible welds.
Got the aft section of the pax side, sliding door inner sill plate cut and welded up.
Put a jog in the repair panel and that made easy welding back to og steel.
Things got real when I cut up the pax side dogleg today. Wasnt planning on going back to seam, but found a nice crease in the seat frame pan that was caused whenever it got hit. Without cutting the leg out, I wouldnt have been able bang out the crease cause the leg tension aouldnt have allowed it to go back to shape.
Once the dogleg was off, the crease banged right out and kicked the whole pan back out a bit where it should have been.
Since the floor was solid, decided to leave the factory attach points in tact. I will use some doubler straps to reattach the new piece back to solid og metal.
Once the replacement floor panel was welded in, went over all the seams and gaps with some all metal. Will sand smooth and then lay a strip of fiberglass over the top of that to finish.
_________________
You can't be a real country unless you have a beer and an airline. It helps if you have some kind of a football team, or some nuclear weapons, but at the very least you need a beer. Zappa
77 westy Seamus
76 tintop Crusher
77 westy The Judge
72 tintop bastard westy Hudson |
|
| Back to top |
|
|
orwell84
Samba Member
Joined: May 14, 2007
Posts: 2539
Location: Plattsburgh, New York
|
| Posted: Tue Mar 09, 2021 6:10 pm Post subject: Re: Crusher - next to go in when saved |
|
|
| Youve got a good thing going with your welder friend. You are really moving along. Shit, if I lived down the road, Id come over and weld it up after you did all the hard part. I love just running beads on stuff all set up making little pieces one big piece. |
|
| Back to top |
|
|
Jetfxr69
Samba Member
Joined: December 28, 2018
Posts: 1293
Location: White mtns nh
|
| Posted: Wed Mar 10, 2021 5:09 am Post subject: Re: Crusher - next to go in when saved |
|
|
Ive been weening myself off needing his welding skills. I do call when something real important needs attention, like structural items, but for small pieces and re-spot welds, I have been learning and doing myself. The biggest hurdle is trying to weld inside the cab, and catching the undercoating on fire below. This stuff is so flammable that after a couple seconds of heat, I have to jump out and look underneath with my spray bottle of water. Had my daughter sit on the stool and fire watch for me the other day. This one is about as good as I get right now.
Learning where to drag the heat/puddle between 1/4 plate and 18 gauge sheet without blowing through and getting proper penetration has been fun. Frustrating at times. Thank god for my sanding discs and Allmetal.
_________________
You can't be a real country unless you have a beer and an airline. It helps if you have some kind of a football team, or some nuclear weapons, but at the very least you need a beer. Zappa
77 westy Seamus
76 tintop Crusher
77 westy The Judge
72 tintop bastard westy Hudson |
|
| Back to top |
|
|
orwell84
Samba Member
Joined: May 14, 2007
Posts: 2539
Location: Plattsburgh, New York
|
| Posted: Wed Mar 10, 2021 6:20 am Post subject: Re: Crusher - next to go in when saved |
|
|
Your welding will improve with practice. I have found that even with thicker metal on the bus, the welding technique is the same; tacking it in place, adding more tacks, then joining them with short beads. Thinner metal is mostly adding tacks until it is all welded. It is always stitch welding. The only thing that changed is how much I turn up the welder.
I tried out a push welding technique on 2mm deformation panel I was welding and it just burned through. Thats more of a plate technique and everything on a bus is too thin to be considered plate.
For places where burn throughs are likely or the joint has big gaps, I back up with copper.
Also, changing the arc length and tip angle will make a cooler weld. The more it is angled, the less penetration you will get, which is good for filling a hole or building up a thin area. |
|
| Back to top |
|
|
cmonSTART
Samba Member
Joined: July 15, 2014
Posts: 1915
Location: NH
|
| Posted: Wed Mar 10, 2021 6:24 am Post subject: Re: Crusher - next to go in when saved |
|
|
Hey that looks pretty good!
_________________
'78 Bus 2.0FI
de K1IGS |
|
| Back to top |
|
|
|


