| Author |
Message |
Marinablau703
Samba Member

Joined: January 09, 2021
Posts: 169
Location: Hudson Valley/LI, NY

|
 Posted: Sat Jan 09, 2021 8:14 am Post subject: Introduction/progress thread Posted: Sat Jan 09, 2021 8:14 am Post subject: Introduction/progress thread |
 |
|
Hello! I've lurked here for a few months after buying my car, but decided to join and post, providing some give rather than just take.
After 38 years, I've finally acquired a type 1: a 1970 with a lot of '73 parts. The vehicle is in remarkably good shape, all things considered, especially for the price IMO. I drove it home from the seller's house, and have since adjusted the valves, performed a full tune-up, replaced the belt (with spare in a tool bag in the car), changed the oil (10w-40, with a half cup of MMO), replaced the screen (which was pretty clean and clear, but I always establish a new baseline on every machine I buy), installed the heat riser tube to the air cleaner, replaced the brake shoes and adjusted them, replaced the tank sending unit, high-beam and wiper switches (on the column), and changed the transaxle fluid. In another couple hundred miles, I plan on changing the oil again, and installed a 1970 screen cover with a drain plug.
When I got it, the turn signals didn't work, and the hi-beams would click on and off every time the wheel was jockeyed, and the reverse lights didn't work. Replacing the hazard switch solved the turn signal issue (the ground spade was broken off) and replacing the hi beam switch (along with a nylon spacer to prevent the horn contact ring from touching the worn hi beam contact on the switch) solved the hi beam issues. The horn sounds every once and a while, but a new contact ring should solve that (the copper ring on the current ring isn't flat and true to the wheel) and the horn wire keeps falling off the horn button, presumably contacting the metal wheel frame. Even the radio works (original AM radio). The glove box is intact.
The engine is a '73 AK, with oil-bath air cleaner. The engine was swapped who knows when, and they'd never connected the reverse light switch wire to the coil +, so I did that last night and solved that. The ignition key didn't fit the door handles, so the cheapest solution was to simply order new handles with their own keys; I have separate keys for ignition and doors, but that's ok. The car came with only one ignition key; ordering a blank and having it cut is on the to-do list.
This weekend's project include replacing the from ball joints (the boots are torn, but there isn't much play in them, but nonetheless I want to get them done lest one wear and separate). I've noticed a couple of degrees of axial play on the distributor shaft, so if I'm up to it, I have a pertronix SVDA distributor (electronic) and accompanying coil to install. I also have a new carb to replace in kind (which I *think is a 34Pict3, IIRC; I purchased the same as what is on it) because of a slight vacuum leak on the throttle shaft bushing.
The engine starts instantly with 2 pumps of the throttle and runs pretty smooth, but after a 2nd gear warm up a 1/2 mile leaving my house in the current sub zero temps, occasionally stalls coming to a stop (off throttle, coast in neutral) until a few more miles of warming up. The car sat for a year or more before I bought it and took a while to fire when I bought it, but the fuel was old, and presumably the carb needed a cleaning, so I opted to replace the carb, rather than pull to clean and still have the vacuum leak.
The muffler was Sunday (quite holy), but some JB weld and muffler cement solved that for now, restoring the "fweem." The tires are good, and the interior clean.
As far as rust, the pan is unmolested, and clean. The heater channels have a couple of smaller holes, mostly on the passenger side below the battery, which I can easily patch. Same goes for the spare tire well (whose tire may be original). The washer tank is missing, and the vacuum lines to the switch were cut. The heat and defroster work, and work quite well (at least on the driver's side)! So well, I actually have to adjust the temp down to avoid over-heating myself. The passenger side hose from the heater box to the chassis was missing, and the '73 hose is too long, so I need to order a '70 hose; I discovered the heater box valve on that side wired closed, and has been that way for so long it is now frozen in that position.
But most importantly for me, it runs and drives great, and I drive it every chance I can. I've put about 250 miles on it since I bought it on 11/12/20.
And yes, the crescent vents point to '71 as do some other features (like the steering wheel), but the dash VIN says '70; IIRC it was produced in the last month of '70 production. The front bumper is gray-market special. 
I have an original Bentley for the car (orange cover) that was my father's back in the '70s (complete with fossilized greasy finger prints). My dad owned several of these back in the day, and also a Squareback. He was quite surprised when he saw the car, but enjoyed driving it; so much so, that he's now on a mild hunt for one himself, a cabrio. I look forward to continuing to learn about these amazing little machines; now I just need to move that old E21 out of here!!
Last edited by Marinablau703 on Sat Jan 09, 2021 8:27 am; edited 1 time in total |
|
| Back to top |
|
 |
Buggeee
Samba Member

Joined: December 22, 2016
Posts: 4416
Location: Stuck in Ohio
|
|
| Back to top |
|
|
Marinablau703
Samba Member
Joined: January 09, 2021
Posts: 169
Location: Hudson Valley/LI, NY
|
| Posted: Sat Jan 09, 2021 8:30 am Post subject: Re: Introduction |
|
|
| Buggeee wrote: |
| It looks to be in very good condition. Congratulations! |
Thanks! And I agree, which is why I couldnt say no for the price. Its non-stock, but Im ok with that, because nothing I do will violate purity. Id rather them running than rotting. |
|
| Back to top |
|
|
Tom K.
Samba Member

Joined: March 10, 2005
Posts: 1605
Location: Central Pennsylvania
|
|
| Back to top |
|
|
VW_Jimbo 
Samba Member

Joined: May 22, 2016
Posts: 9966
Location: Huntington Beach, CA
|
| Posted: Sat Jan 09, 2021 9:18 am Post subject: Re: Introduction/progress thread |
|
|
Very cool! Looks like there is a lot of work to be done to it. Are the first 3 digits of your VIN 110? VW has a history of using whatever parts were on the floor during production. Your car represents a 72, based off of the tail lights (reflector is MIA) and decklid (4 sets of louvres) but the dash has the features of a 71. The stamping of the trunk floor looks like a 70. It will be interesting to see what your first 3 are!
Looking forward to the upcoming story, as you create it!
_________________
Jimbo
There is never enough time to do it right the first time, but all the time necessary the second time!
| TDCTDI wrote: |
| Basically, a whole bunch of fuckery to achieve a look. |
| 67rustavenger wrote: |
| GFY's Xevin and VW_Jimbo! |
|
|
| Back to top |
|
|
AutoMechanic
Samba Member
Joined: December 28, 2019
Posts: 483
Location: Roanoke Virginia
|
| Posted: Sat Jan 09, 2021 9:31 am Post subject: Re: Introduction/progress thread |
|
|
| Steering wheel must of been replaced too that is not a 1970 steering wheel thats a 72 and up one. Also the wiper switch appears to be moved. But a nice car either way I love blue beetles. |
|
| Back to top |
|
|
Marinablau703
Samba Member
Joined: January 09, 2021
Posts: 169
Location: Hudson Valley/LI, NY
|
| Posted: Sat Jan 09, 2021 9:56 am Post subject: Re: Introduction/progress thread |
|
|
Thanks for the kind words. The Dashboard and floor VINs match and begin with 110, so any non 70 stuff was def changed. The 73 heater hoses dont fit but the 70s should (I forget when the change occurred. Who knows what body panels were replaced? For the cleanliness of the vehicle, Im assuming some cutting and welding was already done. The wires behind the dash appear unmolested and original. When I ran the VIN, the number puts it as the last month of 70s, and the local VW guy told me that some of the late 70s started to get 71 stuff. Beyond that, I dont really care, as it runs and drives as it should, and thats what matters.
I have the trim and new seals to install, but am waiting for warmer weather to compound and polish the paint (at least where the trim will sit) before I install.
Now it all time to do some ball joints. 20*F and it fired instantly to pull into into my shop. I do plan on putting an addition on my barn to keep it dry, because my 442 stakes claim to the garage. 😁 |
|
| Back to top |
|
|
Michael Ambrozik
Samba Member
Joined: October 17, 2020
Posts: 631
Location: San Jose, CA
|
| Posted: Sat Jan 09, 2021 10:00 am Post subject: Re: Introduction/progress thread |
|
|
| Looks like the floor is '73 and the body a '72 may have '71 tail lights euro front bumper (due to turn signals) '73 deck lid (4 row louvers 7-6-6-7). |
|
| Back to top |
|
|
AutoMechanic
Samba Member
Joined: December 28, 2019
Posts: 483
Location: Roanoke Virginia
|
| Posted: Sat Jan 09, 2021 10:04 am Post subject: Re: Introduction/progress thread |
|
|
| Great. Ball joints is one of my favorite repairs to do especially on these I need to redo the whole suspension on mine I have all the service records for mine. Post some pictures of the repair if you can. |
|
| Back to top |
|
|
gt1953
Samba Member
Joined: May 08, 2002
Posts: 13848
Location: White Mountains Arizona
|
| Posted: Sat Jan 09, 2021 10:23 am Post subject: Re: Introduction/progress thread |
|
|
Welcome to the franken bug era. Have to love the interchangeability of components. Good work keep going regardless of what it is.
_________________
Volkswagen: We tune what we drive.
Numbers Matching VW's are getting harder to find. Source out the most Stock vehicle and keep that way. You will be glad you did.
72 type 1
72 Squareback
({59 Euro bug, 62, 63, 67, 68, 69, 73 type ones 68 & 69 type two, 68 Ghia all sold}) |
|
| Back to top |
|
|
Marinablau703
Samba Member
Joined: January 09, 2021
Posts: 169
Location: Hudson Valley/LI, NY
|
| Posted: Sat Jan 09, 2021 3:28 pm Post subject: Re: Introduction/progress thread |
|
|
Well that was fun. Passenger side lower arm was installed cocked on the leaves and had to be beaten off; I removed the leaves. Passenger joints pressed out and been ones in, drivers side joints pressed out. Those arms are so cruddy I have them soaking in gasoline over night for cleanup. The sway bar was hose clamped on, so Im going to order a bushing/clamp set. The car has a 1/2 front sway bar, is it worth upgrading to a 3/4 bar? I wont be tracking it or anything, but do enjoy a spirited drive.
Then again, the might as wells can pile on... if I were to convert to front disks, getting the disk spindles, would I need to swap master cylinders or add a proportioning valve? Thanks in advance. |
|
| Back to top |
|
|
Rome
Samba Member
Joined: June 02, 2004
Posts: 9651
Location: Pearl River, NY
|
| Posted: Sat Jan 09, 2021 5:01 pm Post subject: Re: Introduction/progress thread |
|
|
Welcome to the Samba and coming actively into the Beetle world. Looks like you picked your car carefully; hope you have many years of enjoyment with it.
The seat adjusters on the center tunnel point to '73 floor pans that utilize the 3-point mounting system. Have you checked that the "110..." chassis# is the same as on the center tunnel? Stamped into the top of the tunnel, which you can see when you lift up the rear seat cushion?
The right heater box bellows that connects the heater box to the body should be the same size from '68 thru '74, Beetle and Ghia. Left and right are same. Before you install one, you may want to blow through the heater channel in the body by sticking a vacuum cleaner hose or leaf blower with funnel into the rear body channel (where the front of the belows fits) to blow out any debris. Even better if you do this from the front flex pipe that comes out into the trunk so that the force of the air does not blow that flex pipe off the heater channel way down in that quarter panel corner that you cannot reach by hand. 
Nearly 30 years ago I bought a Marina Blue '72 for very cheap a few towns over. I patched the rust in various areas (e.g., lower quarter panels, sills) by cutting it out and riveting on patch panels. Used several hundred rivets, but the floors were generally solid and may have only needed small patches. During a business trip to Germany, a FLAPS had touch-up spray paint so I brought back a few cans to spray over the patched areas. Drove it for a few years as a weekend car, then sold it to a friend who drove it a few more years. Reminds me... I should add a few photos of that car to my photo gallery here.
To "fix" the washer system on that one, I bought a VW Rabbit rear window wiper plastic reservoir from junkyard (they were still around then; Scirocco also worked) that also had a 12 V pump. Placed it inside the spare wheel, with the wheel turned around so that the bowl faced forward. Used a short bungee cord to hold it in place. Worked well.
Sway bar: Only install a thicker front swaybar if you also add a bar to the rear. Installing a thicker front bar with nothing in the rear causes understeer. Having both F & R makes a significant improvement with cornering ability. If you are considering a rear bar, come back here before you buy so we can advise you. There are 2 different styles whereby one style is better IMO.
Front discs: try to find a set based on OG Ghia spindles, instead of ones that use a bracket to install on your existing spindles. Also try to find a set that use the Ghia's stock dust shield. Replace the rubber hoses from the M/C to the calipers. You can use either rubber hoses, or upgrade to braided steel. I don't remember if I replaced the M/C on my '72 back then, or if I simply added the Ghia disc set to the existing M/C.
In what part of New York are you? |
|
| Back to top |
|
|
Marinablau703
Samba Member
Joined: January 09, 2021
Posts: 169
Location: Hudson Valley/LI, NY
|
| Posted: Sat Jan 09, 2021 5:20 pm Post subject: Re: Introduction/progress thread |
|
|
Thanks for the info and kind welcome!. Yes, both VINs match the 110. The brake hoses were replaced before I got it as they are pretty new. Id always thought the stiffer front bar would induce oversteer, but I probably had that reversed. If you have a suggestion for a rear bar Id love to hear it, I have no problem getting one too.
As for the heater hose: I have a new one for a 73, as per the engine, but it is FAR too long. According to the J Bugs website, the 70 takes a shorter one. Compared to my existing hose, the 73 is definitely longer. In the meanwhile, I have dryer duct installed just to keep cold rear air from coming into the cabin.
Its a 50 year old car that 2 years ago was at auction, that I know. Before that, it sat for decades. The drivers door has maintenance sticker taped to it. In the mid 1980s, it had only 15k less miles than now. Maintenance stickers stop in the late 1990s. Its a running and driving project; unlike my E21, this one runs and drives, which is huge!
Rome, I'm just north of you, in the Hudson Valley.
Last edited by Marinablau703 on Sun Jan 10, 2021 7:14 am; edited 3 times in total |
|
| Back to top |
|
|
Marinablau703
Samba Member
Joined: January 09, 2021
Posts: 169
Location: Hudson Valley/LI, NY
|
| Posted: Sat Jan 09, 2021 7:29 pm Post subject: Re: Introduction/progress thread |
|
|
After pulling the wheel. Little bit of rot in the inner fender (don't they all?) that's been filled with spray foam. I'll eventually cut it out and patch it.
Port side, lower leaves out. Chassis condition isn't terrible.
Using the ball joint press in a vice to remove the first one I tackled; for the rest, I used my 20 ton shop press. The C clamp worked fine, but when it popped free, I preferred the hydraulic cushion of the shop press.
Holding the hub so I could double-wrench the ball joint nuts... those suckers were on tight!
|
|
| Back to top |
|
|
Rome
Samba Member
Joined: June 02, 2004
Posts: 9651
Location: Pearl River, NY
|
| Posted: Sat Jan 09, 2021 9:51 pm Post subject: Re: Introduction/progress thread |
|
|
Rear swaybar: First type attaches the bar to the torsion bar tubes using urethane bushings and sturdy clamps. The clamps should be slid as far outboard as possible for best stability; about 3' apart. No drilling needed; purely a bolt-on kit. I have this type on my '77 Standard Beetle, together with a 3/4" front bar. http://vwparts.aircooled.net/Rear-3-4-Sway-Bar-IRS-Type-1-and-Type-3-p/rear-sway-bar-t1-t3.htm
There used to be another type which was cheaper. The bar attached to the chassis at the two tunnel forks that support the transmission. You had to drill 4 holes, approx. 1/2" diameter into the underside of the forks, 2 on each fork. The kit came with 2 shallow "C" bolts that you fed into one of the holes and the other end came out the other hole. Then you bolted the bar bushings and clamps to those. Clamps were approx. 1' apart. I installed such a kit onto a '69 Beetle about 15 yrs ago, also along with a 3/4" front bar.
IMO the 2nd type was not as effective because the torsion of the rear suspension was not absorbed as well by the mounting. The bar mounts were much closer together than on the 1st type. Concept is similar to holding a baton (or baseball bat) horizontally with your arms outstretched. If somebody pushes up on the baton, you are able to resist the bar movement much better if your hands hold the baton close to the ends, than if they are close to the center.
Good reading for planning: https://www.aircooled.net/vw-handling-suspension-tuning/ |
|
| Back to top |
|
|
Evil Clown
Live

Joined: January 08, 2009
Posts: 1347
Location: Wacky Macs
|
| Posted: Sat Jan 09, 2021 10:21 pm Post subject: Re: Introduction/progress thread |
|
|
| Marinablau703 wrote: |
And yes, the crescent vents point to '71 as do some other features (like the steering wheel), but the dash VIN says '70; IIRC it was produced in the last month of '70 production. The front bumper is gray-market special.
|
| Tom K. wrote: |
| Hmm, doesn't appear to be a '70. The crescent vents and windshield wiper stem were added in 1971. |
Yeah, it is a '71 standard model I'm thinkin'...
Manufactured in late '70.. nice find 
Almost thought it was a '73 w/ early lights added 
_________________
CARRY ON
| Quote: |
| I'll take a Happy Meal with Prozac please |
| Quote: |
| kiss my airy VW ass |
| Quote: |
German word for constapation:
Farfrompoopin |
| Quote: |
Chinese word for constipation:
Hung Chow Chow.. & it was GR8! |
|
|
| Back to top |
|
|
Marinablau703
Samba Member
Joined: January 09, 2021
Posts: 169
Location: Hudson Valley/LI, NY
|
| Posted: Sun Jan 10, 2021 7:12 am Post subject: Re: Introduction/progress thread |
|
|
Thanks for the info. That one is the one I was looking at; it's been saved in my wish list to be ordered in a few weeks. Just ordered a bunch of front end parts; project creep has taken over. New front beam seals, grub screws/lock nuts, 3/4" front sway bar and stainless clamps, steering damper, and a lower starboard side torsion arm. Upon inspection of the old one, it took such a beating (literally) to get off, the seal flange is deformed; it may have been fine, but I'd rather not get it back together to find out it isn't, and have to separate it again. So, I don't have to do much to the front end except press in a couple of ball joints; reassembly will wait until the parts arrive, which I'm ok with. My shoulders are singing today after swinging the 3lb lump hammer so much yesterday, I didn't really feel like doing much under there today. A nice easy distributor and coil swap seems like a good idea for today. |
|
| Back to top |
|
|
Marinablau703
Samba Member
Joined: January 09, 2021
Posts: 169
Location: Hudson Valley/LI, NY
|
| Posted: Fri Jan 15, 2021 7:28 am Post subject: Re: Introduction/progress thread |
|
|
This past Sunday, took a break from the suspension and installed the electronic Pertronix and Flamethrower coil. After realizing how much further I needed initial advance, she fired up and ran nicely. As the stern was facing the garage wall, I wasn't going to get it up to operating temperature to set the final timing yet; I'll wait until the front end is done and the car again driving before I pull it back out. I have a new 34PICT carb (same as what's on it) to install (worn throttle shaft bushings) so I'll have to fine-tune the timing again, but I wasn't going to install the carb until I have it timed right with this distributor (too many variables to trace if it didn't start immediately). While I'm awaiting the new torsion arm, the other 3 have been fully cleaned and painted, and will receive some joints hopefully this weekend if the parts arrive. I ordered joints again, because the one cheap Vaico that I'd installed split its boot with the suspension at full droop on a test fit.
In the meanwhile, I sold the BMW E21 project yesterday, and promptly went down to my friend's local air cooled VW shop and bought this '71 Super Vert for my dad, who's been re-bitten by the Bug (pun intended). It'll need some work: port side strut tower, quarter/floor beneath the top, etc. The shop owner is going to take care of that "heavy lifting" and a few other items to ensure it is safely streetable, and then my father will take over the rest. All 3 VINs match. The shop owner already pulled the engine (non-original) to clear the inevitable vermin nests from the shroud and get it running; it runs pretty good, considering the car was last registered in 2003 and signs point to this engine never having run in this vehicle (clutch/plate are new, fresh, and have never slipped against each other).
I also picked up a set of torsion arms from a Bus that need new ball joints for a friend; hopefully I'll get to them this weekend as well.
|
|
| Back to top |
|
|
Marinablau703
Samba Member
Joined: January 09, 2021
Posts: 169
Location: Hudson Valley/LI, NY
|
| Posted: Sat Jan 16, 2021 5:42 pm Post subject: Re: Introduction/progress thread |
|
|
The Pertronix distributor.
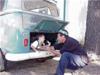
Now that's a look of anger! Olds is not happy to be stuck outside in sub-zero temps. I can only imagine the imaginary conversation between a 1.6L VW and a 5.7L Oldsmobile. 
Attempted to do some Bus ball joints for a friend of mine, failed miserably. Had the sucker in my 20 press until the pump handle was starting to bow and let it sit for an hour, even applying heat. i don't have an Oxy torch though, which clearly was necessary. Bus arms are clearly more robust than the Beetle's.
Decided to install Zerc fittings to my new lower ball joints to make them serviceable.
Now I'm not a professional body guy, but somehow I don't think spray foam is the correct way of dealing with body rot. Cut it out on both sides, ground it smooth, hit it with Ospho, and voila! Weldable metal again. I'm always amazed at how well the Ospho works; note the front beam. All I did was descale it and spray it.
|
|
| Back to top |
|
|
David Grason
Samba Member

Joined: January 13, 2005
Posts: 103
Location: Princeton, Kentucky
|
| Posted: Sun Jan 17, 2021 12:20 am Post subject: Re: Introduction/progress thread |
|
|
What is "Ospho?"
It may be a silly question, but I've never heard of that before.
_________________
¡Siempre Viven Los Vochitos!
That means: "Little Volkswagens Live Forever!"
Do each day a little more than expected and soon you'll be expected to do more. |
|
| Back to top |
|
|
|


