| Author |
Message |
DuncanS
Samba Member
Joined: October 17, 2013
Posts: 4583
Location: New Hampshire

|
 Posted: Sun Jun 06, 2021 11:35 pm Post subject: Tintop to Ragtop Posted: Sun Jun 06, 2021 11:35 pm Post subject: Tintop to Ragtop |
 |
|
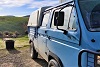
Let me introduce myself. I'm Duncan and have had VW's of every single stripe except for a notchback dating from back in the Cretaceous epoch. First bus was a maroon and brown 1957 with 28 hp. Have had them almost continuously since then. Barn doors, Bays and a bunch of my favorite T3s. Current is a '91 GL Weekender which has lived with me for 8 years. Came with 140k and is now at 200. He/She/It is a daily driver as have been all my Dubs. Winter with salt-cringe-and summer. Try to keep the salt off as best as possible and so far have done reasonably well. This fall, body work will take care of the DS pillar area where there is a 50 cent piece size hole in the rocker just aft of the pillar. Some seam rust, but not bad. The rear hatch window and DS rear window had rusted seal lips, but they have been cut out and new steel been put in.
In terms of user, the car is a bit of everything. A daily driver car to get groceries, A tool van to go down and work on my saltwater boat,a dump vehicle to take construction debris away, a dinghy and boat stuff hauler,
a Christmas tree transport vehicle and a stash for Christmas presents to hide from the curious, a warehorse for transition projects which the admiral forbids from entering the work area until the number of Outstanding projects falls below my age. And a camping/motel. In short, I tell everyone it's everything except a Ferrari.
Unfortunately, I have an incurable progressive disease, CMD. I can't leave anything alone. Bikes, and cap guns as a kid and then row and small sail boats as a teen, and then houses, boats and cars as an adult. Well, many will say adult might be pushing it from a mental point of view. Compulsive Modification Disease. Inherited from my mother's side. She had a brother who in about 1955 stripped a bug down to the chassis and built what we would now call a Baja Bug. A sporty topless runabout for his 16 year old daughter.
Anyhoo, although I have made well over a hundred modifications to my current Orly friend, I always look back to my '87 bought new on the tourist delivery program. Had a factory sunroof which I loved. It made loading heavy and awkward objects much easier as it was possible to stand up and stick bulky things through the roof to aid in getting them in. When the car was a couple of years old, with two of my sons and a friend we drove from Vermont to Oshkosh for the AirVenture plane meet. Rigged a sling chair with ropes and hooks from the track and put a curved plexiglass windshield at the forward edge of the opening. It was a favorite place to ride for the view and breeze. In retrospect, it wasn't the safest, but it was the funest.
So ever since I have dreamed of taking some of the '87's offspring and turning one of them into an opening roof model. Unfortunately, the '87 was never undercoated and as a daily driver, by '97 it could no longer be inspected due to the salt roads which ate suspension mounts, the body and she was euthanized. But not before I cut the roof off to graft on to a later version. When I first brought it back to the US, I bought a Sears generic sunroof and stuck it in. So the saved roof had both the Sears and factory items intact. The roof leaned agains the garage wall through 3 or 4 more T3s, but never was called and sat on the bench until the head coach said it had to be cut from the team. Because I hadn't cut the pillars and saved all the complicated roof structure intact, I realized the job was just too monumental. So I salvaged the Sears and took the rest to the dump. Still pains me to think of it. But by then I wanted a bigger hole than the OG system anyway. Finally, when Orly showed up the Sears was grafted in.My sunroof isn't quite as elegant as this '92???, but it works just fine thank you very much. Easy to remove and replace, so on good days the glass comes out and memories of the trip to Oshkosh live on.
It's kinna late and the bus need my energy for tomorrow, well actually later today, and so I'm going to cash it in for now, but promise to pick up the thread again tomorrow.
Duncan |
|
| Back to top |
|
 |
dobryan
Samba Member

Joined: March 24, 2006
Posts: 16501
Location: Brookeville, MD
|
|
| Back to top |
|
|
DuncanS
Samba Member
Joined: October 17, 2013
Posts: 4583
Location: New Hampshire
|
| Posted: Mon Jun 07, 2021 9:49 am Post subject: Re: Tintop to Ragtop |
|
|
Crap--A lengthy second chapter just evaporated. OK, let's try again.
I really liked the light the '87 open roof gave and also the ventilation. Now and again the sun glare would be to much. A baseball hat wudda solved that, but I'm not a hat guy. Grabbed a pair of kiddy side window screens and with minor mods, they do the job just fine, I have another with suction cups which I stick on the DS window at night when driving long distances and since it is a WBX, I occasionally get overtaken and lots of times they don't dim their lights and the outside mirror blasts my corneas as they pass.
Built a house skylight from scratch once, well I didn't make the glass, and bought stock window shades and duct taped mylar to the wood spring loaded roller. Worked great. You can still see somewhat through the mylar and it admits light, but just not the heat so I wasn't worried about solar gain.
So toyed around with a bunch of different ideas. Designed a plexiglass system complete with gutters and so on which would get added to a purpose designed scratch built pop top. Became all invigorated by a topic posted by the High Schooler with a Passion and came up with: From a previous thread.
The drawing has some sections at the metal roof intersection. The lower half will be fiberglass which will hide some of the C pillar bracing as I want nothing going across the opening. Don't like the inside look of the Westy while driving around, so don't want struts and tenting flopping around. One thought shown in the transverse section is to have a full length window shade roller with the tent sides on that so they stow easily without tangling in the lifting mechanism and are out of sight when the top is down. The back tent end with fold onto of the AC roof section and not be seen. There front will have to be rolled up somehow as there are only a few inches between the back edge of the sunroof and the new opening.
But my use is 95% daily driver and 5% camping and maybe 5% of the 95 would be useful to be able to stand up. I only have 7" of clearance over the roof, so a permanent hightop is out of the question
And this was the idea to have no height increase, but just sliding glass panels for light and standing up also from 10º North's thread.[quote="DuncanS"]10ºN--Love the drawings showing the heights and "person" standing inside. The gas struts and mechanism from the video certainly look like the way to go. It will take some geometry experimentation to figure out, but looks very promising. Skip the electric jacks, although the one Amazon one:
Question: When it is extended all the way, how high is it? When folded up, how tall.
Answer: When it is fully extended it is around 2 feet tall, give or take an inch or two
When folded, it is around 6 inches tall.
In other words, about an 18" extension capability.
Gas struts are much cleaner than the electric scissors and at <$50 I'll bet they are prone to fail soon anyway.
This is a piece of pine, since painted blue, to see what a hight increase might look like. Because I want to gain 1½" I'm going to need to go up more than the board. All it did was get up to the top of the crown of the roof. I will need a flat roof for the glass/plexi slider. There was one hightop where the plane was broken about 4" up from the gutter which helped prevent the sides from being too "slabby". This seems like it may have some qualities and so my sketches reflect a break in the side plane.
Some of my requirements and noodling. Want to keep it low because the garage will not allow more than a 5" height increase. Want to have it go up and be level when deployed. Want to have a sliding glass roof on the top so it can be open when driving or not camping in order to assist with loading awkward items aboard. Want to raise the roof over the AC by at least an inch and a half to eliminate visual obstruction out the rear window while driving. Want it to look OK. Willing to settle for OK rather than wonderful as any addition is sure to compromise the design at some level.
Since I've owned a ton of splitters and feel nostalgic about them, thought I'd try a visor where the roof overhang creates it. a couple of my splitters had vents in the overhang soffit which then were rain free fresh air. It may be noisy and prevent good airflow over the windshield, so will strap a chunk 'o ply on the roof and go for a drive. But don't know how it would look or work, so the other drawings don't have it.
Even looked carefully at the curved tempered glass used in the side of the interstate buses. The problem with plexi is it grows significantly in heat so the seals get tricky. Then gave up on the curved idea and thought about flat either tempered or safety laminated glass.
The problem with all of this is it's a two year project and I don't want to wait two years. I want to do stand-up camping with my wife this year. And besides with only a small percentage of use, why do I need the long term pop top project anyway.
Just after the ice age ended a bunch of us were sitting around after work having a few with a Hemmings as we all liked antique cars. This actually may be a requirement for being involved with a T3 as from an engineering perspective they certainly are not modern. I noticed this.
This isn't the one, but it had the same paint job. A 1937 Yellowstone National Park tour bus convertible. $4500 Within 30 minutes the money had been wired and we bought it and had it trucked up from Florida. To give you an idea about how crazy we all were, it was off loaded (no PPI) and immediately 20 of us jumped aboard with a couple of cases and set off on a ride around Vermont's hills and back farms. Condition of the brakes? Never occurred to even check them out after a 20' drive in the parking lot.
Had it for years and did redo the brakes along with a bunch of other stuff. Even built a wood gasification system and drove it on wood. Miles per cord? Don't know. We had company picnics and invited the public and everyone wanted a ride. Four side doors on the other side (Starboard). no aisle and big aft luggage zone which would have made a great circular bar area. Oh, well.
Anyway this was my inspiration and I said to myself, "just whack to roof out and try some canvas like the yellow bus had. How tough is that?"
So I did. |
|
| Back to top |
|
|
Yota-toy
Samba Member
Joined: June 11, 2015
Posts: 20
Location: NH
|
| Posted: Mon Jun 07, 2021 4:37 pm Post subject: Re: Tintop to Ragtop |
|
|
There was only a handful of these busses built, I think 2 or 3, I'm probably wrong but I did recently read an article about them.. You likely had the last of the good one(s).
Funny how there is always something to 'improve' on with,,,errr, everything. I have one car atm with no modifications (out of 10, currently, I couldn't possibly account for all of them in this reply), but it's days as a stocker are limited:).
One favorite was a winch bumper on a toyota pickup pre-internet. Petersons and 4 Wheeler magazines were not enough inspirations so I cut the front crossmember our of the truck and sat there until I had a plan...since it was my ride home. Came up with something, never completed it but my plan worked as I had no choice.
I hope you've kept all of your notebooks and sketches to relish in both the ridiculous and revolutionary ideas you've had. It always hurts to see an idea taken to fruition by another but hey, they had the time and money right!!!! |
|
| Back to top |
|
|
djkeev
Samba Moderator

Joined: September 30, 2007
Posts: 32584
Location: Reading Pennsylvania
|
|
| Back to top |
|
|
DuncanS
Samba Member
Joined: October 17, 2013
Posts: 4583
Location: New Hampshire
|
| Posted: Mon Jun 07, 2021 7:16 pm Post subject: Re: Tintop to Ragtop |
|
|
Sorry about the blue box question marks.
A shot showing the starboard side doors. And a bunch of crazies just like we were having fun. A fully restored one just sold for a MILLION,5
The roof was in terrible condition with the clear coat totally gone and down to the primer in spots. Bought it like that and never did anything as you can't really see the roof. So first I hit it with 220 on the random orbital and then washed the car a couple of times wiping it down, Then masking.
And then the paint. Interlux Hattaeras Off White. A little too Navahoy white and so next time will brighten it up a little. Don't want hospital white however.
Ripped into the head liner and took out the insulation bats and the wires which hold it up so I could explore the interior structure and determine where the cut should go. Drill up from underneath and used the holes as markers for the layout.
Old speaker magnets are great clamps to hold things. They have two speeds. Strong toward the front and weaker if the back goes down to the steel. As every roof cutout thread I've read says, measured a thousand times. Probably anxiety forestalling the irreversible.
And then the point where it's too late to go back now. Yes, that is light you can see showing through the cut line.
And in the garage awaiting the next adventure. It was surprisingly heavy. Wonder what my new gas mileage will be?
And looking to the sky for the first time. A couple of loose ends to tie up before I take a 700 mile trip in a few days. Used a battery powered drill nibbler attachment I read about in one of the Vanagon threads about cutting the hole. A very efficient item with no sparks and a really good rate of cutting. Maybe 3' per minute? However it does leave gillions of super sharp tiny crescent moons of metal that really want to go into you skin. Wish I had spread out a sheet or removed the carpet first to catch the "sawdust". Hope I don't step on one in the middle of the night in my bare feet somewhere later this summer. Or worse, she does.
|
|
| Back to top |
|
|
Zeitgeist 13
Samba Member

Joined: March 05, 2009
Posts: 12115
Location: Port Manteau
|
| Posted: Mon Jun 07, 2021 11:39 pm Post subject: Re: Tintop to Ragtop |
|
|
If you go with this design, you absolutely have to paint the van orange with a gold top. |
|
| Back to top |
|
|
DuncanS
Samba Member
Joined: October 17, 2013
Posts: 4583
Location: New Hampshire
|
| Posted: Tue Jun 08, 2021 7:09 am Post subject: Re: Tintop to Ragtop |
|
|
Casey--Great subtle comment.
And the sides would have a 'Mercan flag covering the whole area under the windows. But my guess is the vanity plate of choice would be already taken. |
|
| Back to top |
|
|
PDXWesty
Samba Member

Joined: April 11, 2006
Posts: 6243
Location: Portland OR
|
| Posted: Tue Jun 08, 2021 9:35 am Post subject: Re: Tintop to Ragtop |
|
|
Ok....what am I looking at with the cords and pulleys?
_________________
89 Westy 2.1 Auto |
|
| Back to top |
|
|
DuncanS
Samba Member
Joined: October 17, 2013
Posts: 4583
Location: New Hampshire
|
| Posted: Tue Jun 08, 2021 9:45 am Post subject: Re: Tintop to Ragtop |
|
|
Another lengthy post lost to the ether. I guess it doesn't pay to write something and then "finish it up later".
This also won't cover any real work as It's the middle of the day and things need to happen. But sorry about the blue boxes. The phots uploaded just fine and inserted OK, but they came off the internet and so maybe they were a weird file Samba couldn't recognize--or maybe they were edited out because they weren't about Vanagons. In this was they were about my Vanagon. But, anyhoo, the first photo showed the four side doors with open onto full width bench seats. The second showed the canvas pulled back and a bunch of young people standing and waving and having a good time.
https://www.yellowstonenationalparklodges.com/conn...llowstone/
Once the tin was out of the way the real work began. First up was to do some serious grinding to reduce the flange interference with the headliner where gussets provide the connection to the cross members at the B and C pillars. Even so there is bunching at the C pillar which will get eliminated in the fall, but will take some serious work to keep the bodywork stiff and so for the time being I'll live with it.
The patch here is because the grinder ate some of the headliner when I wasn't watching. I have since ground off the flanges from the C pillar cross member which almost eliminated the headliner puckering and reduces the apparent bulk of it so it is now far more acceptable. Still a head knocker. When the flanges went away, so did the spot welds holding the tops and bottoms together. I only have a beefy stick welder, however I've developed a technique for limited thin metal welding. I take a heavier piece of scrap and electrically and mechanically bond it right next to the area to be welded. Clamps. I strike an arc on the scrap and get a bead going and get the tip of the rod nice and hot. Then I am able to just lightly touch the rod to the work and get a small bond without burn through. Keep repeating until there is enough strength. Sometimes I use a copper backing, but in a hollow member, this is not possible to use. So this way I was able to structurally restore most of the strength. Given engineering overdosing, I figure I'm still OK.
I also took out the rest of the areas where the pressed in "ribs" in the roof were in the way of a single plane. The first front rib has the opening cut going through the middle of it so I had to cut and sculpt it so the U channel trim would go on without jumps in the edge. Then spliced extensions into the cross feed wires for the interior lighting. it was rerouted aft of the AC and all the way around to the other side. Tucked up the headliner and put on the U channel and it got me to:
The longitudinal batten is just a temp guide to make sure all the bows were fitted to be the same height and is not part of the final program.
Before I even started to take out the roof, I scribed a 2 x 8 with the curve and bandsawed it out. I used this as a mold to epoxy laminate thin strips of ash into bows to hold up the canvas/headliner/whatever. After fitting I made some stainless pieces which would keep them from falling out. Stainless above and a wood flange underneath. The stainless was drilled and the burrs hammered flat and then the holes were beveled with a counter sink. An epoxy mayonnaise bedded the stainless and bonded them to the ash. After curing. ground down the excess so they are both epoxy bonded and "riveted' to the wood.
One last try:
|
|
| Back to top |
|
|
DuncanS
Samba Member
Joined: October 17, 2013
Posts: 4583
Location: New Hampshire
|
| Posted: Tue Jun 08, 2021 8:10 pm Post subject: Re: Tintop to Ragtop |
|
|
So now I have a convertible, but one which won't convert. The real R & D is about to begin. I had hoped the Yellowstone tour bus would be the solution, but I'll find out in the next two weeks.
While waiting for the heavy canvas to show up, I made a practice top out of some brown/silver reinforced plastic. But first, how to hold it down? I didn't want to put a ton of permanent clips into the roof just above the gutter, it it were to turn out that canvas is not a viable solution. Gutter hooks. Went on line. I already have a couple with straps to use as emergency roof load binders. Whoa!! Stop the car! Did you see that? A guy back there has a Zubaloy 5000 in his front yard for sale. Let's go get it! They are just a piece of flat stock bent and dipped in a rubber compound to save the gutter paint. No biggie, they can't be that expensive. https://modernstudio.com/products/gutter-hook What? $22 each? Found others, but the cheapest was around $4 and they were only good for straps. I'm going to use nylon cord for lacing. I'll need quite a few. And the front and back ones will want to pull towards the middle, so the design needs to resist those forces.
With the Mapp torch I was able to beat some 3/16ths flat stock and weld it to some J hooks also heated and bent to shape. Then I ground them to look somewhat decent and painted them with Rustoleum as I don't want rust streaks down the side of the car.
Here they are as a first shot. Figure I may need 16--8 each side.
Plastidip is used to protect stuff and it came in blue, so I figured given the Orly blue this is what was needed. Didn't realize the blue could be so garish as to be unusable. So then bought some black and watered down the color to the best match possible. Not a match at all, but at least it doesn't jump; out and throw a dart in you eye.
So here are a few with the modified color. There are two end ones which are made to withstand the sliding towards each other. And different hooks which either are innies our outies as i wasn't sure which would grab the gutter better. Turns ou innies work better as the hook tips out and grabs more of the gutter underneath. The middle of the three regular ones is an innie. And no, I never mounted the cleats as I didn't have enough experience tyet to know exactly how they would get used.
Now to work on the tarp. First a piece roughly cut to figure out the finished size.
I then sewed it up with a strong polyester cord hemmed in on the edges and the plastic folded over 4 times. A bunch of grommets and the first try.
There were some wrinkles, but very encouraging. The back edge needs lacing too, but figured to worry about that after resolving the lacing schedule first. Tried another grommet spacing, but had run out of the brass parts to make them. Luckily, because of the poly cord, I was able to burn small holes in the hem behind the cord and there was no tear through, so the grommets were not needed after all.
Note in this pic the concave curve in the leading edge which I added after the first driving test with the grommet lacing. There was some flapping at the front edge and a huge amount of air was coming in at 80--a down hill test of course. Air coming in means rain coming in.
There is a system in sail making to exactly correct this flapping on the edge of a sail. With the mainsail--the big sail behind the mast--the back/aft edge, called the leech has a prominent outward curve to get as much sail area as possible. The outer part would flap and be useless so it is supported by battens which extend into the main body of the sail. The outward or convex curve is called roach. For the jibs--the smaller triangular sail at the bow there is no roach or battens as it would make the sail too difficult to get past the mast when the dirrection is changed and the sail needs to go to the other side. So to prevent flapping. the sail is cut with negative roach or a hollow concave curve. In addition, a line is sewn into the hem of the back edge--leech. It's loose in the hem and fixed at the top so it can be pulled out through a hole in the bottom of the hem and tightened to help eliminate any flutter wihich might occur.
So this is what I did for the second try on the leading edge. Negative roach and a leech line, but it was fixer and not adjustable. |
|
| Back to top |
|
|
dobryan
Samba Member
Joined: March 24, 2006
Posts: 16501
Location: Brookeville, MD
|
|
| Back to top |
|
|
jimf909 
Samba Member

Joined: April 03, 2014
Posts: 7465
Location: WA/ID
|
| Posted: Tue Jun 08, 2021 11:21 pm Post subject: Re: Tintop to Ragtop |
|
|
| DuncanS wrote: |
Another lengthy post lost to the ether. I guess it doesn't pay to write something and then "finish it up later".
|
As my dad said, hit "save" whenever you don't want to re-enter what you've entered. "finishing up later" w/out first hitting save will often result in sadness.
How many times do you mix up a good pile of two-part epoxy, leave it in the tub and then walk away hoping to "finish it up later"?
This sounds like the third or fourth lengthy post you've lost. If you don't mind re-keying the post then all is well. If you'd prefer not doing the same thing twice then it's probably time to consider keying your posts into a file with auto-save or just one where you can save your work. A word processing file such as Word is a good place to compose, save, compose, save, etc. until it's time to copy and paste into the samba.
Alternatively, if you love composing in the samba app just click <submit> to create a post and save your work and then select <edit> to continue editing. The drawback there is we'll all see your incomplete posts. No big deal.
It pays to walk away, collect your thoughts, and return to complete the work...as long as you click <save> before walking away.
_________________
- Jim
| Abscate wrote: |
Do not get killed, do not kill others.
|
Current: 1990 Westy Camper - Bostig RG4, 2wd, manual trans w/Peloquin, NAHT high-top, 280 ah LFP battery, 160 watts solar, Flash Silver, seam rust, bondo, etc., etc.
Past: 1985 Westy Camper - 1.9 wbx, 2wd, manual trans, Merian Brown, (sold after 17 years to Northwesty who converted it to a Syncro). |
|
| Back to top |
|
|
DuncanS
Samba Member
Joined: October 17, 2013
Posts: 4583
Location: New Hampshire
|
| Posted: Wed Jun 09, 2021 4:21 am Post subject: Re: Tintop to Ragtop |
|
|
Exactly what I did last night. Quit in mid sentence and went to bed.
For some reason when I hit save, after a while it goes away. If I minimize the file and then call it up later, the message is gone. You're right about putting the copy someplace and then transferring, but I like to work around the pics and it they're not there................
Anyhoo. The first lacing schedule had the grommets pretty close together and I wanted to stabilize the edge and keep the spacing of the lacing--Spacing of the Lacing--a top ten song form the '50's? more uniform. So in the negative roach photo
you can see where the holes are equally spaced along the edge. Quickly discovered the gutter hooks have to be attached to the lacing line or they would be gone if one comes off so you see the whipping line I used to tie each one on with. Making these puppies was a pain and so didn't want to lose a single one. And it took more than just 8 per side.
Took one of the rods which is sprung into place above the OG headliner and stuck it through a purpose left hole in the corner of the front edge to see if it would help hold the front down at speed. Much better at 80, but still some air and would be rain coming in.
And this is three different attachment experiments on the same tarp. Forward is the last one with equal spacing of about 5 ½ inches. The next has hols every 4" and the one at the back aft edge has thievery 4 inches, but with a zig-zag lacing schedulle. This is what Yellowstone had and from the ability to equally distribute an even load would be the best. Buy OMG, look at ho many hooks are needed! You can see the quickie ones I made to try it out with.
Instead of holes I tried this as I wanted the line to not have to go under the tarp and lift it slightly at the grommets where rain could possibly enter. Clearly a disaster.
So in terms of spacing this seems to be OK. And besides, if I have three or 4 layers of 22 oz duck at the edge, it wouldn't dare to pucker. Would it? If the plastic has only slight pucker between the hold downs, then the canvas should be OK.
The hook in the middle is a mock-up of a possible permanent fixed hook. This would her far better as it would get the attachment point lower and farther from the canvas with a better pull angle. A bent chunk 'o 3/16th super glued to some tape and just stuck on for the photo. But still, unless the whole canvas top is not a raging success, I don't want to look like a porcupine for no reason.
There is one last issue with the whole nylon or any type of line lacing, even if I were to use Dyneema. Should the line stretch out at any one point or a hook slip off, the slack created could cause the entire tarp to go overboard in the bat of an eye at speed. Our Yellow Bus had shock cord. I ordered enough in both 5/16th and 3/8th's to do both sides. But it couldn't go through holes or grommets, so I sewed loops on the hems and this was the first try.
Far better in terms of the amount of force and an equal load on each hook with far less time to put it on. The 5/16ths was fine. 3/8ths would be too bulky and overkill. Clearly the way to go and now time to open up the sail loft and get sewing on the real? item.
|
|
| Back to top |
|
|
dobryan
Samba Member
Joined: March 24, 2006
Posts: 16501
Location: Brookeville, MD
|
|
| Back to top |
|
|
4Gears4Tires
Samba Member
Joined: October 08, 2018
Posts: 3019
Location: MD
|
| Posted: Wed Jun 09, 2021 6:28 am Post subject: Re: Tintop to Ragtop |
|
|
The yellowstone bus canvas wraps down across the front of the roof. Combined with the much lower top speed of this bus (45mph?), I think that was a fairly air/water proof set up.
Since you're laying the canvas flat on the roof, I am wondering if it would be beneficial to add a strip of wood/fiberglass in front of the canvas that is same height as the canvas. If you've ever seen a classic convertible top, the canvas sits on top of the windshield metal. Starting in the 90s, manufacturers switched to having the roof meet at a 45 degree. This way the leading edge of canvas is not prone to having air come up under it. So to replicate this idea, the strip of wood basically acts like a little spoiler in front of the canvas.
_________________
'87 Syncro
Ferric Oxyhydroxide Superleggera Edition |
|
| Back to top |
|
|
R. Deschain
Samba Member

Joined: June 02, 2021
Posts: 43
Location: Seattle, WA
|
| Posted: Wed Jun 09, 2021 6:41 am Post subject: Re: Tintop to Ragtop |
|
|
Man, I love these! Really nicely done, especially the directionals!
_________________
'87 Syncro Adventurewagen
'80 Syncro Doka
'86 CJ-7
https://www.youtube.com/mattofmanytrades |
|
| Back to top |
|
|
jimf909
Samba Member
Joined: April 03, 2014
Posts: 7465
Location: WA/ID
|
| Posted: Wed Jun 09, 2021 7:30 am Post subject: Re: Tintop to Ragtop |
|
|
This is my final post on editing suggestions so this thread can focus on the remarkable ragtop build...
DuncanS, the posts you're building are long and likely require editing as you construct what you want to share. Editing around the photos is helpful for my brain too. Here's a suggestion: consider composing in something like Word, pasting photos of what you're working with (so you can see them) and also entering the html code that the samba requires to display the photo. Then when you're done, copy to words along with HTML code and paste that into the samba post, e.g. :
This would be in the Word file. I deleted the final bracket (]) to show the text you'd see in Word.
| Quote: |
words words words...
[img]https://www.thesamba.com/vw/gallery/pix/2154340.jpg[/img
words words words...
|
The posts you're assembling are notable and should be saved. By using Word, you can save all of your posts in a single file on your pc and reference that in the future v. multiple posts in thesamba.
Apologies for the intrusion of a great thread. Back to the regularly schedule programming...
| DuncanS wrote: |
Exactly what I did last night. Quit in mid sentence and went to bed.
For some reason when I hit save, after a while it goes away. If I minimize the file and then call it up later, the message is gone. You're right about putting the copy someplace and then transferring, but I like to work around the pics and it they're not there................
|
_________________
- Jim
| Abscate wrote: |
Do not get killed, do not kill others.
|
Current: 1990 Westy Camper - Bostig RG4, 2wd, manual trans w/Peloquin, NAHT high-top, 280 ah LFP battery, 160 watts solar, Flash Silver, seam rust, bondo, etc., etc.
Past: 1985 Westy Camper - 1.9 wbx, 2wd, manual trans, Merian Brown, (sold after 17 years to Northwesty who converted it to a Syncro). |
|
| Back to top |
|
|
tarandusVDub
Samba Member
Joined: August 27, 2010
Posts: 1649
Location: Between Here and There
|
| Posted: Wed Jun 09, 2021 8:06 am Post subject: Re: Tintop to Ragtop |
|
|
Love your thought process and mock up progression. Learning neat stuff. Thanks for sharing and looking forward to the final result!
_________________
1990 Syncro 16" DoppleKabine 2.1 DJ 112i
________________________
Sold: 1972 Bay Campmobile; 1984 Westy, base model, 2WD. |
|
| Back to top |
|
|
DuncanS
Samba Member
Joined: October 17, 2013
Posts: 4583
Location: New Hampshire
|
| Posted: Wed Jun 09, 2021 8:54 am Post subject: Re: Tintop to Ragtop |
|
|
Thanks for the edit comments.
I may be crazy, but I never start an irreversible project without having a back up option. There are always plans B, C, D and so on and also plan X. X is: if worse comes to worse what do I do to save the car/boat/house so that it still works?
In this case, plan X would be plywood screwed down with 5200 and painted. A bevel at the front to prevent whistling and keep using the car. Plan <X would be to have the ply with insulation and a head liner with a pair of these pieces of glass which I have. butterflied and mounted with 5200
Plan Jish is https://www.sunroofsource.com/vw-sliding-ragtops/
SPOILER ALERT--Don't look at the next photo as some may find it disturbing. |
|
| Back to top |
|
|
|


