| Author |
Message |
NUG637
Samba Member
Joined: March 27, 2012
Posts: 84
Location: Australia

|
 Posted: Sat Jul 23, 2022 2:34 pm Post subject: Re: Mallee Notch Posted: Sat Jul 23, 2022 2:34 pm Post subject: Re: Mallee Notch |
 |
|
Thanks mate, Im at about 6 years of tinkering every once in a while before something else comes up. I started on this just before we went traveling, then we got married and renovated our first house and had our first child. Then bought another house that was everything we wanted but was in ruins so spent another year renovating that until we had our second child. So Im only just coming up for air now with our kids playing and entraining each out a little and the house renos all complete. So its not unheard of for the notch to of been untouched for 12 months at a time these past few years  |
|
| Back to top |
|
 |
Bobnotch
Samba Member

Joined: July 06, 2003
Posts: 22422
Location: Kimball, Mi
|
| Posted: Sat Jul 23, 2022 10:08 pm Post subject: Re: Mallee Notch |
|
|
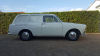
Really nice work, but I have to ask, what year is that car? I'm only asking as Aus did things differently than Germany did as far as our cars go. I originally thought it was an early car with slotted rims, but the lower front apron is telling me it's a 68 (the round indents are pre-bumper bar that got added in 69). Unfortunately, you never mentioned what year it is.
A lot of the rust you replaced looks like standard rust from what I've seen on these cars over the years. Nice work on the repairs though, as that takes dedication. On the front rear edge of the fenders, is a wall, that often gets missed when welding in upper and lower patches (the "A" post area's), and causes rust to come back, as the inner section doesn't get fixed when the outer section is getting fixed (so it starts to bubble as it's a dirt trap). I'm sure you've found a few spots that are dirt traps already on these cars.
Nice work on the car itself, and I'm sure your wife will enjoy it once you're done messing with it.  Thanks for the update, story and pics. Thanks for the update, story and pics.
_________________
Bob 65 Notch S with Sunroof
71 Notch ...aka Krunchy; build pics here;
http://www.thesamba.com/vw/forum/viewtopic.php?t=249390 -been busy working
64 T-34 Ghia...aka Wolfie, under construction... http://www.thesamba.com/vw/forum/viewtopic.php?t=412120
| Tram wrote: |
| "Friends are God's way of apologizing for relatives." |
| Tram wrote: |
| People keep confusing "restored" and "restroyed". |
|
|
| Back to top |
|
|
NUG637
Samba Member
Joined: March 27, 2012
Posts: 84
Location: Australia
|
| Posted: Fri Aug 05, 2022 4:08 am Post subject: Re: Mallee Notch |
|
|
Thanks Bobnotch, im lead to believe its a late 63/64 change over car. It still has the push button pressing and hole in the dash but has a VW Australia factory plastic blank off plate to suit the later model switches. See below
im predominantly a Type 1 guy with this being my first ever type 3 so im not completely up to speed with the year model changes but i do know Aussie type 3s were quite different to the rest of the world with just using up what was left over stock from the year before a lot of the time. But to answer your question it is a relatively early car for here in Aus
Got that patch burnt in under the passenger seat
Time to begin stripping the running gear so i can prep the underside
|
|
| Back to top |
|
|
NUG637
Samba Member
Joined: March 27, 2012
Posts: 84
Location: Australia
|
| Posted: Wed Feb 08, 2023 4:44 am Post subject: Re: Mallee Notch |
|
|
Progress on the notch had once again slowed but for good reason....
With the decision to stay in our current house for a few more years it was decided we NEED a shed for a few reasons and one of them being so i can bring the notch home and hopefully utilizes the spare moments i find here and there rather then having to go to mum and dads to tinker and be away from the kids etc etc
so with that has come 3 months of shed construction and of course it couldnt just be a tin shed.... been good to be back on the tools again
I wanted to get the pan in paint before bringing it to my new shed just so i didnt have to annoy the neighbours with hours of wire wheeling, so back to dissasembly
I was a little nervous to wire wheel this bad boy
. I had to chase a few pins holes that had appeared during the hammer and dolly-ing on the repair sections which lead to a few 50 cent size replacement pieces being patched in to get some thicker metal in there
And for any new players
the old weld an nut to a broken off stud trick works nearly every time. How anyone could attempt any kind of work on an old car without a welder
. You would feel defeated before you even got to the hard bit IMO
|
|
| Back to top |
|
|
NUG637
Samba Member
Joined: March 27, 2012
Posts: 84
Location: Australia
|
| Posted: Wed Feb 08, 2023 4:46 am Post subject: Re: Mallee Notch |
|
|
A few hours each week has seen me Wire wheel and rust convert
Metal prime and then paint in satin black epoxy enamel
|
|
| Back to top |
|
|
Bobnotch
Samba Member
Joined: July 06, 2003
Posts: 22422
Location: Kimball, Mi
|
|
| Back to top |
|
|
NUG637
Samba Member
Joined: March 27, 2012
Posts: 84
Location: Australia
|
| Posted: Sat Apr 22, 2023 10:16 pm Post subject: Re: Mallee Notch |
|
|
Thanks bobnotch
The wire wheeling and painting of miscellaneous parts and hardware is never ending but we are finally moving towards some reassembly
The tunnel of the pan was full of mice nests and after going through the flood at mum and dads place last year I thought its probably a good idea to treat it while I have access. A piece of conduit tapped to the vacuum sucked up 90% with compressed air through the conduit moved the rest, then a thorough soaking with deodorised fish oil - which still makes the shed smell like a brothel.
Mounted up the rear torsion housing and found the local hardware stock rubber washers which are used predominantly through type 3s
Wire wheeled and degreased the gearbox, mounted the spring plates with new bushes and then mounted the gearbox
A little before and after of the rear end
Then I nearly had 2 nervous break downs fitting $15 solid axle boots but manage 2 for 2 without splitting them
|
|
| Back to top |
|
|
NUG637
Samba Member
Joined: March 27, 2012
Posts: 84
Location: Australia
|
| Posted: Sat May 06, 2023 5:05 am Post subject: Re: Mallee Notch |
|
|
It was time to strip this bad boy
..
Type 3 shit is whack
.
Upon disassembly I noticed one of the upper control arm needle bearings had collapsed which may explain why the Bakelite thrust pad was cracked and later disintegrated while trying to remove the shot bearing
Made up a tool to remove said bearing with left over stuff from the shed build
What once was a thrust pad
What it should look like
I never knew these beams ran a bakerlite thrust pad until now and after doing some research they are rather hard to obtain in usable condition and the same goes for the needle roller bearing
. ISPwest state they stock good used thrust pads and new Chinese needle bearing which is the way I was likely to go until I managed to successfully remove some from the early push button dash notch I pulled off Stradbroke island over a decade ago. Everything on that car was toast so I didnt hold high hopes but it proved me wrong!
A good used VW bearing was retrieved and installed successfully
A slight difference between thrust pads between the two beams but I believe it will still function the same
Beam is now ready for duty!
I also cleaned up the torsion arm seals, slight signs of compressions in areas but I recon Im gonna run them until the split.
While waiting for paint to dry I thought I would start fitting some new parts I had sitting on the shelf
|
|
| Back to top |
|
|
andybla
Samba Member
Joined: March 03, 2014
Posts: 630
Location: BE
|
| Posted: Sun May 07, 2023 3:09 pm Post subject: Re: Mallee Notch |
|
|
looking good  |
|
| Back to top |
|
|
Bobnotch
Samba Member
Joined: July 06, 2003
Posts: 22422
Location: Kimball, Mi
|
| Posted: Mon May 08, 2023 9:08 am Post subject: Re: Mallee Notch |
|
|
Very nice work. Sometimes recycled old parts are better quality than new parts as you've found. They even fit correctly. The pan and beam looks sweet though. It might take you a little longer to get it done, but it'll look fantastic once it's back together.
_________________
Bob 65 Notch S with Sunroof
71 Notch ...aka Krunchy; build pics here;
http://www.thesamba.com/vw/forum/viewtopic.php?t=249390 -been busy working
64 T-34 Ghia...aka Wolfie, under construction... http://www.thesamba.com/vw/forum/viewtopic.php?t=412120
| Tram wrote: |
| "Friends are God's way of apologizing for relatives." |
| Tram wrote: |
| People keep confusing "restored" and "restroyed". |
|
|
| Back to top |
|
|
NUG637
Samba Member
Joined: March 27, 2012
Posts: 84
Location: Australia
|
| Posted: Tue May 23, 2023 4:20 am Post subject: Re: Mallee Notch |
|
|
Thanks gentlemen, Im quietly loving this preservation style resto
. Cleaning everything up. 2 guesses which beam bush I started to de grime
I have picked up a bit of weekend work which has helped the car fund immensely with the first hall of parts coming to help piece the pan together
.
Decided to stay focused on the rear end once I mounted the front beam and installed the trailing arms.
After having run sealed bearing in the rear of the my oval for nearly a decade and never once having trouble I decided to go that route again. With the rear camber I feel it can only help
In the new parts hall came some rear brake cylinders, pulled them apart and greased the moving parts with some rubber grease. Had the original rear brake shoes relined and then ground to match the new rear drums as the old ones were really badly worn. Im sceptical on the quality being Brazilian drums but for $100 each I thought I would give them a shot and have torqued the shit out of them so they shouldnt be coming loose anytime soon.
Before
.
After
The inside of the original drums which I have kept just in case but are currently outside the wear tolerance
Feel like Im finally getting somewhere bolting stuff back on! New hand brake cables, New hard and soft brake lines, new oil filled shocks, gear shift coupler and new front ball joints waiting to be fitted as I work my way forward
|
|
| Back to top |
|
|
Bobnotch
Samba Member
Joined: July 06, 2003
Posts: 22422
Location: Kimball, Mi
|
| Posted: Tue May 23, 2023 5:12 pm Post subject: Re: Mallee Notch |
|
|
You might want to check that the new drums were cut on center. This is a problem with the currently available aftermarket drums for type 3s. If they're good, then go ahead and run them. If not you'll want to talk with a machinist.
_________________
Bob 65 Notch S with Sunroof
71 Notch ...aka Krunchy; build pics here;
http://www.thesamba.com/vw/forum/viewtopic.php?t=249390 -been busy working
64 T-34 Ghia...aka Wolfie, under construction... http://www.thesamba.com/vw/forum/viewtopic.php?t=412120
| Tram wrote: |
| "Friends are God's way of apologizing for relatives." |
| Tram wrote: |
| People keep confusing "restored" and "restroyed". |
|
|
| Back to top |
|
|
Peters Van
Samba Member
Joined: March 27, 2014
Posts: 357
Location: Goulburn NSW Australia
|
| Posted: Wed May 24, 2023 12:29 am Post subject: Re: Mallee Notch |
|
|
what has to be done to run a sealed bearing ?????
_________________
1965 Type 3 Panel Van
1963 EH Holden Station Wagon |
|
| Back to top |
|
|
NUG637
Samba Member
Joined: March 27, 2012
Posts: 84
Location: Australia
|
| Posted: Wed May 24, 2023 1:44 am Post subject: Re: Mallee Notch |
|
|
Absolutely no mods to fit sealed bearings. Some guys take out the back seal of the bearing so it gets oil from the gear box
I was running the oval I built at 2 splines and questioned how much oil it would actually get so left the rear seals in and it had been from Brisbane to Melbourne and back, Brisbane to valla twice and general everyday driving and never had a trouble so figured i would go that route again as I would like this notch to have a little stance to
That car is now being enjoyed by a new owner and they have put a heap of trouble free ks on it also |
|
| Back to top |
|
|
NUG637
Samba Member
Joined: March 27, 2012
Posts: 84
Location: Australia
|
| Posted: Wed May 24, 2023 1:47 am Post subject: Re: Mallee Notch |
|
|
| Bobnotch wrote: |
| You might want to check that the new drums were cut on center. This is a problem with the currently available aftermarket drums for type 3s. If they're good, then go ahead and run them. If not you'll want to talk with a machinist. |
Ive just dropped off the master cylinder, front wheels cylinders and front drums in to be resleeved and rebuilt. When I got to pick them up I think I might get them to check the rear drums
|
|
| Back to top |
|
|
Bobnotch
Samba Member
Joined: July 06, 2003
Posts: 22422
Location: Kimball, Mi
|
| Posted: Wed May 24, 2023 9:42 am Post subject: Re: Mallee Notch |
|
|
| NUG637 wrote: |
| Bobnotch wrote: |
| You might want to check that the new drums were cut on center. This is a problem with the currently available aftermarket drums for type 3s. If they're good, then go ahead and run them. If not you'll want to talk with a machinist. |
Ive just dropped off the master cylinder, front wheels cylinders and front drums in to be resleeved and rebuilt. When I got to pick them up I think I might get them to check the rear drums
|
Good idea. I only mentioned it, as it has become a real problem, and it's not limited to any one manufacturer. It's also not just the wide 5 type 3 drums either, but also the 4 lug type 3 drums.
_________________
Bob 65 Notch S with Sunroof
71 Notch ...aka Krunchy; build pics here;
http://www.thesamba.com/vw/forum/viewtopic.php?t=249390 -been busy working
64 T-34 Ghia...aka Wolfie, under construction... http://www.thesamba.com/vw/forum/viewtopic.php?t=412120
| Tram wrote: |
| "Friends are God's way of apologizing for relatives." |
| Tram wrote: |
| People keep confusing "restored" and "restroyed". |
|
|
| Back to top |
|
|
Erik G
Samba Member

Joined: October 16, 2002
Posts: 13280
Location: Tejas!
|
| Posted: Wed May 24, 2023 12:54 pm Post subject: Re: Mallee Notch |
|
|
| NUG637 wrote: |
| Type 3 shit is whack
. |
You misspelled badass... you'll see when you drive it
Great work, good looking car, turquoise type 3's are so awesome it's a wonder why Germany didn't do that. Got a part number for the sealed bearing? I can cross reference to timken or something
_________________
Stop dead photo links! Post your photos to The Samba Gallery! |
|
| Back to top |
|
|
NUG637
Samba Member
Joined: March 27, 2012
Posts: 84
Location: Australia
|
| Posted: Thu Jun 01, 2023 5:56 pm Post subject: Re: Mallee Notch |
|
|
 I see what you did there. i hope your right cus it would of been cheaper for me to go type 1 beam and brakes then to have all this stuff rebuilt but i want to experience a type 3 for what it is I see what you did there. i hope your right cus it would of been cheaper for me to go type 1 beam and brakes then to have all this stuff rebuilt but i want to experience a type 3 for what it is
part number for these exact sealed bearings is from what i can find 6306ZZC3NSK hope that helps.
In the past we have done new brake lines a few different ways from either buying the kits from cip1 or buying a role of tubing and then making them all up and getting the ends flared on them at the brake shop etc. but a while ago my brother bought a brake flare tool so I went to town on making all new lines.
I did notice that the new brake line ends are a little different to the originals with a big bevel seat in the end. This made me hesitant to run the new ones on the hard to get to lines like the front to back line and the one that runs over the top of the gearbox. I ended up cleaning up and painting some original ends for these 2 just in case
Some Aussie VW detail
Me little mate spreading everything and anything from one end of the shed to another
Then got onto pulling the front drums down to see what needed to be done there
. Had to use a mates trick of eucalyptus oil on seized parts to get the adjuster screws out of some of the front wheel cylinders, that worked a treat.
Came across a little surprise on the front passenger spindle  something must have happened on this side in the past as its the same side that had the bad beam bearing and perished thrust pad. Started off with a bearing lock nut that just kept spinning and spinning and under closer inspect the thing was all over the place
. something must have happened on this side in the past as its the same side that had the bad beam bearing and perished thrust pad. Started off with a bearing lock nut that just kept spinning and spinning and under closer inspect the thing was all over the place
.
Back to pilfering parts off the old rusty straddie notch
the spindle had been out in the elements for quite some time but with a light blasting I think it will be ok, Ill check it with bearings fitted shortly
Ended with dropping the front drums, pads, front wheel cylinders and master cylinder in to get rebuilt
. $1000 later |
|
| Back to top |
|
|
Bobnotch
Samba Member
Joined: July 06, 2003
Posts: 22422
Location: Kimball, Mi
|
| Posted: Fri Jun 02, 2023 9:06 am Post subject: Re: Mallee Notch |
|
|
| NUG637 wrote: |
Came across a little surprise on the front passenger spindle something must have happened on this side in the past as its the same side that had the bad beam bearing and perished thrust pad. Started off with a bearing lock nut that just kept spinning and spinning and under closer inspect the thing was all over the place
.
Back to pilfering parts off the old rusty straddie notch
the spindle had been out in the elements for quite some time but with a light blasting I think it will be ok, Ill check it with bearings fitted shortly
Ended with dropping the front drums, pads, front wheel cylinders and master cylinder in to get rebuilt
. $1000 later |
WOW!! Now that really sucks. At least you had a spare that you could clean up and use as a replacement. Seems like these cars all tell a story of things from their past. Usually you find that on disassembly, but you hadn't quite gotten that far at the time. It happens, and at least you were able to move on. That's not really something you normally see, as that part of the spindle is hardened steel versus the soft nuts that lock the bearing adjustment.
Nice progress on the car though, and getting the little one out to "help you" is a nice bonus.
_________________
Bob 65 Notch S with Sunroof
71 Notch ...aka Krunchy; build pics here;
http://www.thesamba.com/vw/forum/viewtopic.php?t=249390 -been busy working
64 T-34 Ghia...aka Wolfie, under construction... http://www.thesamba.com/vw/forum/viewtopic.php?t=412120
| Tram wrote: |
| "Friends are God's way of apologizing for relatives." |
| Tram wrote: |
| People keep confusing "restored" and "restroyed". |
|
|
| Back to top |
|
|
Qldelsie
Samba Member
Joined: September 22, 2019
Posts: 518
Location: Queensland Australia
|
| Posted: Fri Jun 02, 2023 3:51 pm Post subject: Re: Mallee Notch |
|
|
| Love that Kangaroo VW sign on that brake line T piece !!! Will have to inspect mine more closely next time I am under there !! |
|
| Back to top |
|
|
|


