| Author |
Message |
bigfish6025
Samba Member
Joined: August 30, 2019
Posts: 29

|
 Posted: Sun Oct 30, 2022 3:35 pm Post subject: 1967 Squareback- starting the journey for a proper DIY paint job Posted: Sun Oct 30, 2022 3:35 pm Post subject: 1967 Squareback- starting the journey for a proper DIY paint job |
 |
|
As the title says, my goal is to get as good a result as I can doing a DIY paint job bringing the car back to its original color. This will be a daily driver type car, from April-October only. A quick background synopsis- I bought this car in 1998 when I was 17. I'm the 3rd owner. 2nd owner had the car painted, kept original color, then accidentally rear ended someone like 2 mos. after the paint job. Bummer! I drove it until 2002, where then I parked it in a barn and started thinking about prepping it for paint. I made the mistake of giving the car a rattle can primer job though. double bummer! Fast forward to 2022 and I've moved the car up to Alaska and I'm looking to pick up where I left off. I'm a little older, somewhat wiser, and have a pretty wide range of DIY skills, attention to detail, and desire to do things the right way, or as close to it as possible.
A friend up here has painted some VWs before, and says he'll help me next summer. I have all winter to sand, fill, sand some more, pull windows, panels, whatever it takes to do the right preps. I also need to source and procure primer and paint. My friend advised me to pull panels and windows, but said we can leave my roll-down windows in place and mask it off.
Right now though, I just need to get all this rattle can primer off the car. I've started hand sanding using 220 grit. The primer comes off and reveals the old paint. There are 2 coats underneath the primer, the original and the one done in 1990 or whenever. I read the stickied post on doing a paint job by Chilkoot, and The Bug Shop FAQ (http://thebugshop.org/bsfqpnt.htm). So I feel more educated now on a lot of these things, but need some advice specific to my scenario.
Some questions I have are:
Do I need to take it down to bare metal? I'd rather not if I don't have to. If not, then when can I stop sanding so that I can fill a couple spots (pic below) and then be ready for my real coat of primer?
Actually I think that is my main question right now. I have plenty of sanding work ahead just getting this crappy primer off the car.
I need to look up paint codes for this original color and find a source for the paint. Any recommendations? How much paint do I need to do a squareback? I'll buy extra, but I definitely don't want to go overboard.
Here's what I did to the car in my youth. Could be worse...
Progress pictures. Do I need body fill for those dings on the roof?
Close up of roof- a lot of whats underneath the primer comes out looking like this. Its very smooth to the touch, but there's visible cracks/crazing. Can I just primer over this and paint over it? I now know that I need to buy a primer compatible with the paint I will end up using...
Here is the OG color under the hatch.
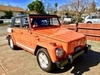
Here is the car right after I bought it back in '98.
Thanks in advance to anyone reading this and willing to share their knowledge. |
|
| Back to top |
|
 |
wheel607
Samba Member
Joined: May 30, 2004
Posts: 1847
|
| Posted: Sun Oct 30, 2022 11:39 pm Post subject: Re: 1967 Squareback- starting the journey for a proper DIY paint job |
|
|
| Your paint has cracked under the primer. I understand your want to finish the car, but you will NEVER have a good paint job by sanding over this old paint by not taking it off. You may sand it and get a couple years paint job before it shows the signs of cracking. If you have the time, I would take ALL painted surfaces down to bare metal, only then epoxy prime. Otherwise you are just wasting time and money if you plan on keeping the VW. Also, fill the dents! What you see will only be magnified by fresh paint. Remember you have TWO paintjobs under that primer. The way to do it right is to remove what has been placed on there by others. |
|
| Back to top |
|
|
Braukuche
Samba Member
Joined: September 03, 2004
Posts: 10997
|
| Posted: Mon Oct 31, 2022 8:10 am Post subject: Re: 1967 Squareback- starting the journey for a proper DIY paint job |
|
|
As Wheels said the safest course of action is to take it down to metal. The second is down to factory paint, but the paint must be solid, no cracking or crazing. Looking at the picture its impossible to say what is cracked, the second or original paint job.
You also need to invest in some tools. A compressor large enough to power a DA and provide enough air for a HVLP gun is mandatory. You can get stick on disc for a DA that will make life much easier when doing body work and stripping.
If you choose to strip the car down to metal use chemical strippers. Much less work and mess than sanding.
Use decent quality products. I use TCP Global, they ship anywhere. If you are just shooting the outside of the car a gallon plus hardener and reduce of color is enough. Youll need a quart of epoxy sealer, a gallon of high build primer, I prefer Polyester primer myself, probably a gallon of filler. And a roll of 180, and a roll of 320 dry.
_________________
Go Reds! Smash state!
Retirement is here!
1956 Ghia
1959 SO-23 Westfalia
1960 double cab
1960 Baja Bug
1963 stretched double cab
1962 Golde sunroof Ghia
1963 356 B coupe
1963 Notchback
1967 21 window less rusty now |
|
| Back to top |
|
|
bigfish6025
Samba Member
Joined: August 30, 2019
Posts: 29
|
| Posted: Mon Oct 31, 2022 12:16 pm Post subject: Re: 1967 Squareback- starting the journey for a proper DIY paint job |
|
|
| Thanks for the replies, its news I was sort of expecting to hear. The task ahead seems daunting, but I'm stubborn AF and have been wanting a nice paint job on her for like 20 years so I better getter. I think I'll try hand sanding on that spot with the crazing and see if I can get down to some solid paint, just for the sake of checking it out. Looks like I'm already down to metal in those 2 spots on the roof that need filled. There are a handful of other little dingers on the car, but the body is straight otherwise. The main damage occurred on the front apron when PO rear ended someone. That got "fixed" by some shady body guys who approached me in a parking lot and did the work in my driveway. 20 odd years ago. I had to sand their work down a bunch and then smooth it a little more. I know that is gonna need some more attention, they bondoed right over the fender beading. Aside from removing the front and rear panels, am I looking at removing the front apron too as part of this? I feel like I need to in order to replace the beading anyway, and then I can really tune up that spot. |
|
| Back to top |
|
|
bigfish6025
Samba Member
Joined: August 30, 2019
Posts: 29
|
| Posted: Mon Oct 31, 2022 12:27 pm Post subject: Re: 1967 Squareback- starting the journey for a proper DIY paint job |
|
|
| Braukuche wrote: |
If you choose to strip the car down to metal use chemical strippers. Much less work and mess than sanding.
Use decent quality products. I use TCP Global, they ship anywhere. If you are just shooting the outside of the car a gallon plus hardener and reduce of color is enough. Youll need a quart of epoxy sealer, a gallon of high build primer, I prefer Polyester primer myself, probably a gallon of filler. And a roll of 180, and a roll of 320 dry. |
I ordered a roll of 320 and a roll of 400. Should I send the 400 back? I just put in an order for the 180. I have to rely heavily on mail order, I live in a small town. Any recommendations for stripper? My only experience with that was recently restoring an old 1920s panel door. I used some Strypeeze and then when I ran out I tried some 3M safe strip that I had found in my shop. I tell you, the Strypeeze was way more effective than the 3M safe strip on my door, the paint came off with little effort, but it was smelly and caustic. Maybe its different on automotive paint? Would prefer using the less caustic the better because I am working in my garage, which I need to heat, therefore I'd like to not have to ventilate the space at this point in the process. I mean, I'll crack a window or do whatever the safety label says, but I know that with the strypeeze I'd have to open all the doors, turn on a fan, etc... |
|
| Back to top |
|
|
67ctbug
Samba Member

Joined: January 24, 2016
Posts: 3619
Location: CT
|
| Posted: Mon Oct 31, 2022 8:43 pm Post subject: Re: 1967 Squareback- starting the journey for a proper DIY paint job |
|
|
I would recommend at the very least stripping it to its original paint. Fix every dent you can find. You only want to do this once. I'm of the belief of epoxy before plastic work, but going over original paint it probably wouldn't be as necessary, but do definitely use epoxy before the high build. I don't know what availability is like in Alaska, but what paint system do you plan? Single stage or base/clear? With base clear, you could use a "Lower Quality" base and a higher end clear for a complete job and get fine results. For stripping, I'd get an air or electric orbital sander with 80 and go to town. Mark any dents with tape and a PENCIL. Don't let a sharpie near the paintwork.
_________________
'67 Beetle L41
'74 Westfalia
'69 Plymouth "Adam-12"
'63 Ragtop
'73 914
'73 Dodge W200
'72 Dodge Wrecker
Go Cubs!
World Series Champions 2016
| KentPS wrote: |
...or the PO envied the terrorists' bus in "Back to the Future".  |
| mukluk wrote: |
| He's fine, just waiting for the dragon in winklepickers to move out of his lane. |
|
|
| Back to top |
|
|
jinx758
Samba Member
Joined: October 04, 2014
Posts: 688
Location: Texas
|
| Posted: Wed Nov 02, 2022 8:58 am Post subject: Re: 1967 Squareback- starting the journey for a proper DIY paint job |
|
|
Greetings from Texas
Chemical strippers must be fully neutralized after use.
Sanding produces heat & could cause warping or "oil canning".
Back in 2011 I stripped to metal my 1994 Dodge Ram 1500 & painted it L334 Glacier Blue cuz I was tired of keeping the PW7 (Polar White #7) clean. Harbor Freight body tool set was used for the door dings by me as a YouTube certified dent banger with a hair dryer to heat the metal. I shot self etch primer, skimmed body filler, high build primer, sealer coat, then 3 coats of base, & 3 coats of HS (high solids) clear. I then wet sanded, used cutting compound, & polish compound, waiting 30 days for drying & off gassing. I wish I had shot 6 coats of clear. I got results I could live with.
I wrapped a chain around the axle & attached it to a rebar in the ground to stop any static electricity.
When I was taping off I used a plastic putty knife to lift the window rubber & slid a 14 gauge electrical wire under the weather stripping. Then I folded about a 1/4" of tape under the rubber. After drying & carefully removing tape & wire the result looked like I had taken the windows out.
I premeasured extra paint, hardener, & reducer and kept them on a small table inside the "booth". That way I didn't have to leave it to refill the spray gun, just combining & mixing well. I did the same for the clear.
That was my experience and hope some of these Redneck tips help you get the best results.
Would love to see a thread started so we can follow along.
Best of luck ... stay safe
jinx
_________________
" It's not valuable unless you learn something from an experience. " Henry Ford
It's not unlike the same difference
You can't push a rope
VALVES (cold)
POINTS
TIMING
CARB (fully warmed engine)
SCRAPE ALL GROUNDS
My Craigslist rescued 100 footer :
1971 Standard Bug
1776cc dual port
034 distributor
38mm EGAS Carburetor |
|
| Back to top |
|
|
74 Thing
Samba Member
Joined: September 02, 2004
Posts: 7389
|
| Posted: Wed Nov 02, 2022 9:26 am Post subject: Re: 1967 Squareback- starting the journey for a proper DIY paint job |
|
|
These types of discs work great on a grinder and don't heat and warp the panels
https://www.youtube.com/watch?v=hNRaHFcu7G4 |
|
| Back to top |
|
|
67ctbug
Samba Member
Joined: January 24, 2016
Posts: 3619
Location: CT
|
| Posted: Wed Nov 02, 2022 1:28 pm Post subject: Re: 1967 Squareback- starting the journey for a proper DIY paint job |
|
|
Those definitely get hot, I use them all the time.
_________________
'67 Beetle L41
'74 Westfalia
'69 Plymouth "Adam-12"
'63 Ragtop
'73 914
'73 Dodge W200
'72 Dodge Wrecker
Go Cubs!
World Series Champions 2016
| KentPS wrote: |
| ...or the PO envied the terrorists' bus in "Back to the Future". |
| mukluk wrote: |
| He's fine, just waiting for the dragon in winklepickers to move out of his lane. |
|
|
| Back to top |
|
|
74 Thing
Samba Member
Joined: September 02, 2004
Posts: 7389
|
| Posted: Wed Nov 02, 2022 3:15 pm Post subject: Re: 1967 Squareback- starting the journey for a proper DIY paint job |
|
|
| 67ctbug wrote: |
Those definitely get hot, I use them all the time. |
I used the disc to strip a fender and it did not heat up the metal from what I could tell. It did make a mess though. |
|
| Back to top |
|
|
viiking
Samba Member
Joined: May 10, 2013
Posts: 2668
Location: Sydney Australia
|
| Posted: Wed Nov 02, 2022 5:04 pm Post subject: Re: 1967 Squareback- starting the journey for a proper DIY paint job |
|
|
As long as the panel doesn't get so hot you can't put your hand on it, then it won't be an issue.
Hell, in summer time when the temperature hits 120F you don't see cars driving down the road with warped panels. But you can fry an egg on one.
The problem is just concentrating too much heat in one place. Move around the panel especially a big flat panel like a door skin.
_________________
1968 1500 RHD Lotus White Beetle since birth. In the hospital for major surgery
1966 Lancia Flavia Pininfarina Coupe - in the waiting room
Discharged: 1983 Vanagon, 1974 1800 Microbus,1968 Low Light,1968 Type 3 |
|
| Back to top |
|
|
bomberbob
Samba Member
Joined: May 17, 2015
Posts: 688
Location: Iowa
|
| Posted: Fri Nov 04, 2022 10:48 am Post subject: Re: 1967 Squareback- starting the journey for a proper DIY paint job |
|
|
I use my electric DA, with 6 inch hook and loop discs, 60 grit. I am working through two layers of paint, with epoxy primer. I just bought a box of the discs off amazon. When you can tell the disc is starting to wear and its not eating the paint off like it should, rip it off and slap a new one on there.
_________________
1968 Beetle (storage)
1990 Jetta GLI megasquirted, burning E85 (currently in heavy maintenance)
2004 Jetta turbo GLI
Marion, Iowa |
|
| Back to top |
|
|
bigfish6025
Samba Member
Joined: August 30, 2019
Posts: 29
|
| Posted: Mon Nov 07, 2022 2:49 pm Post subject: Re: 1967 Squareback- starting the journey for a proper DIY paint job |
|
|
| bomberbob wrote: |
| I use my electric DA, with 6 inch hook and loop discs, 60 grit. I am working through two layers of paint, with epoxy primer. I just bought a box of the discs off amazon. When you can tell the disc is starting to wear and its not eating the paint off like it should, rip it off and slap a new one on there. |
I'd like to get away with using the tools I have, and I already own a DeWalt random orbital sander and I already have a bunch of 60 and 80 discs. One of the hard things for me is finding out what I can get away with without having results suffer. I almost said "what corners I can cut", but I'm not a corner cutter really...you know what I mean?
OK so one of the lessons I learned the hard way in my woodworking is to watch out for those orbital sanders leaving swirl marks on your wood. Sucks when you sand all the way down to 320 and stain the wood, only to notice swirl marks afterward. So I've learned the proper techniques to avoid that outcome.
OK, translate that to auto body work- do I need to be concerned about swirl marks at this point in the process when I'm only trying to remove all the paint down to bare metal? It seems to me like it wouldn't be a concern because I'm priming, guide coating, sanding, etc.. doing all this build up before I put the finish coats of paint on it.
Basically, if I knew that it was OK to use my electric orbital with the discs I have, then I could get to work right now as opposed to researching the best paint stripper to use, sourcing a pneumatic sander, etc etc.
I should add as my signature "lives in small town in Alaska and has limited access to tools and supplies" cause thats the lens I'm always looking at things through, you know? Everything's done over mail order or I go to Anchorage about 4 times a year, Alaska doesn't have Harbor Freight, etc.. I still have it a lot better than many Alaskans- at least I'm on the road system!
Thanks to everyone for responding, I am very grateful for the help. I'll start a build thread for my car once I actually get to working on it. I'm caught up in the planning portion, hopefully not for too much longer. |
|
| Back to top |
|
|
bomberbob
Samba Member
Joined: May 17, 2015
Posts: 688
Location: Iowa
|
| Posted: Mon Nov 07, 2022 3:21 pm Post subject: Re: 1967 Squareback- starting the journey for a proper DIY paint job |
|
|
If you are sanding down to bare metal, 60/80 grit discs work fine. Yes there will be swirl marks in the metal. Thats fine, you are going to lay down primer, and depending on if you have dents maybe a skim coat of bondo, maybe a sealer over that, and then your single stage paint or your base coat. If you are going to put some high build primer over it and then block sand it nice and straight, there is another layer of paint. The 60 grit swirl marks are going to provide "teeth" for that first layer of primer to grab on to. Are you going to put any master series silver primer on? I think they recommend putting some teeth down for it to adhere to.
When it's all said and done, those 60/80 swirls will not mean anything. I understand your concern, I work with wood also. Some folks actually take a grinder to their car, those grind marks are harder to cover up without additional work.
_________________
1968 Beetle (storage)
1990 Jetta GLI megasquirted, burning E85 (currently in heavy maintenance)
2004 Jetta turbo GLI
Marion, Iowa |
|
| Back to top |
|
|
viiking
Samba Member
Joined: May 10, 2013
Posts: 2668
Location: Sydney Australia
|
| Posted: Mon Nov 07, 2022 3:44 pm Post subject: Re: 1967 Squareback- starting the journey for a proper DIY paint job |
|
|
If youre worried about 60-80, go over it with finer grit.
However it will be the first paint layer that determines how rough the texture should be to ensure adhesion. You need to decide on that first. That is, what primer will you use?
Remember however that the original VW sheet metal would have been straight run flat mill steel so it would have been pretty smooth.
_________________
1968 1500 RHD Lotus White Beetle since birth. In the hospital for major surgery
1966 Lancia Flavia Pininfarina Coupe - in the waiting room
Discharged: 1983 Vanagon, 1974 1800 Microbus,1968 Low Light,1968 Type 3 |
|
| Back to top |
|
|
gzaharatos67
Samba Member
Joined: September 07, 2018
Posts: 68
Location: CO
|
| Posted: Sun Jan 22, 2023 8:04 pm Post subject: Re: 1967 Squareback- starting the journey for a proper DIY paint job |
|
|
Look into Eastwood's polyester primer as opposed to using high build. High build shrinks over time and can show body work even when you swear to g-d that you blocked it flat.
Get down to bare metal using 80 on a DA sander. Hammer out and then fill in any obvious low spots and then hit it all with 2-3 coats of poly primer. Guide coat and block it with 120 and you'll see all your imperfections.
Fill em in, sand em, 2-3 more costs of poly and this time when you block it off you should be flat as can be. On the second round of poly I usually start with 220 wet sand and go up to 400. Then it's ready for epoxy sealer and inspection before color. |
|
| Back to top |
|
|
|


