| Author |
Message |
npbusguy
Samba Member

Joined: February 08, 2006
Posts: 1666
Location: Budapest, Hungary

|
 Posted: Mon Oct 06, 2008 6:40 pm Post subject: Posted: Mon Oct 06, 2008 6:40 pm Post subject: |
 |
|
Here are some more pictures of the progress. We started installing the wiring harness this weekend...
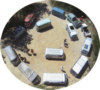
We also wanted to replicate the factory overspray and looked at old pictures of the original paint on the bus as well as other original paint buses from the same era. This is the basic idea of what we came up with....
|
|
| Back to top |
|
 |
hazetguy
Samba Member

Joined: April 06, 2001
Posts: 10804
Location: the past
|
| Posted: Mon Oct 06, 2008 6:42 pm Post subject: |
|
|
push-on terminal ends on the wires??  |
|
| Back to top |
|
|
npbusguy
Samba Member
Joined: February 08, 2006
Posts: 1666
Location: Budapest, Hungary
|
| Posted: Mon Oct 06, 2008 6:45 pm Post subject: |
|
|
| hazetguy wrote: |
| push-on terminal ends on the wires?? |
Sorry Jon, that is what wiring works makes. You should know that the ends will be removed and soldered because they won't fit in all my screw terminal components. |
|
| Back to top |
|
|
npbusguy
Samba Member
Joined: February 08, 2006
Posts: 1666
Location: Budapest, Hungary
|
| Posted: Mon Oct 06, 2008 6:47 pm Post subject: |
|
|
Todd Williams (gatorwyatt) rolled by to drink some beers and ended up putting the vent flaps together.....
|
|
| Back to top |
|
|
hazetguy
Samba Member
Joined: April 06, 2001
Posts: 10804
Location: the past
|
| Posted: Mon Oct 06, 2008 6:50 pm Post subject: |
|
|
| npbusguy wrote: |
Sorry Jon, that is what wiring works makes. You should know that the ends will be removed and soldered because they won't fit in all my screw terminal components. |
i am not a mind reader or fortune teller, but i am glad to hear that.  |
|
| Back to top |
|
|
npbusguy
Samba Member
Joined: February 08, 2006
Posts: 1666
Location: Budapest, Hungary
|
| Posted: Mon Oct 06, 2008 6:54 pm Post subject: |
|
|
Here are the basic steps of vent wing assembly.
1. Rivet the latches in place.
2. Press glass and rubber in place using a special "Mark Rafferty" press.
3. Start trumming excess rubber
4. Finished vent wing ready to be installed.
|
|
| Back to top |
|
|
twinwindows
Samba Pimp

Joined: December 08, 2000
Posts: 4086
Location: So.Cal. Highland Park GFK!
|
| Posted: Mon Oct 06, 2008 7:10 pm Post subject: |
|
|
| npbusguy wrote: |
| hazetguy wrote: |
| push-on terminal ends on the wires?? |
Sorry Jon, that is what wiring works makes. You should know that the ends will be removed and soldered because they won't fit in all my screw terminal components. |
Not true bro, My loom was custom made with no connectors and extra wires put into it for other things i`m doing from wiring works. Nice work on the bus.
_________________
CRG
My builds
BAD TEMPER 11
CHRISTINE
GFK LIFER!
| myzamboni wrote: |
| Yeah, everyone's now doing it GFK style . . . everythinig is covert until the finished product is revealed. |
|
|
| Back to top |
|
|
Rain's Westy
Samba Member

Joined: February 27, 2004
Posts: 498
|
| Posted: Mon Oct 06, 2008 7:14 pm Post subject: |
|
|
This is a really inspiring project to see come together! CB/SWR buses are the king of the hill in my book...that paint job really rocks!!!
great to see it come together... I am trying to catch up to you on mine!  |
|
| Back to top |
|
|
buddyparks
Samba Member

Joined: September 07, 2007
Posts: 143
Location: Lunada Bay, CA
|
| Posted: Mon Oct 06, 2008 7:27 pm Post subject: |
|
|
very nice work! 
_________________
1954 23 deluxe
1959 mango standard
1960 grey so 23
1960 dove blue so 23 |
|
| Back to top |
|
|
twinwindows
Samba Pimp
Joined: December 08, 2000
Posts: 4086
Location: So.Cal. Highland Park GFK!
|
| Posted: Mon Oct 06, 2008 7:34 pm Post subject: |
|
|
| npbusguy wrote: |
Here are the basic steps of vent wing assembly.
3. Start trumming excess rubber
|
How did you cut the rubber where the rain deflector is?
_________________
CRG
My builds
BAD TEMPER 11
CHRISTINE
GFK LIFER!
| myzamboni wrote: |
| Yeah, everyone's now doing it GFK style . . . everythinig is covert until the finished product is revealed. |
|
|
| Back to top |
|
|
npbusguy
Samba Member
Joined: February 08, 2006
Posts: 1666
Location: Budapest, Hungary
|
| Posted: Mon Oct 06, 2008 8:33 pm Post subject: |
|
|
| twinwindows wrote: |
| npbusguy wrote: |
Here are the basic steps of vent wing assembly.
3. Start trumming excess rubber
|
How did you cut the rubber where the rain deflector is? |
With the special tool found in the "Local Manufacture Book". It is illustration number 22 of tool #VW737. It looks like a bent file with a sharpened end.
This picture is a little out of focus, but shows the trimmed area behind the rain deflector well enough.
Regarding the wire ends - What I have is all that Bob at Wiring Works had available at the time. They will be trimmed off and soldered as they should be. We even have some of the little brass caps for the really small wires. |
|
| Back to top |
|
|
j.pickens
Samba Member
Joined: December 03, 2002
Posts: 9831
Location: Exit 7, New Jersey
|
| Posted: Mon Oct 06, 2008 8:54 pm Post subject: |
|
|
Outstanding, Neil!
Just about one month until I head South to see your bus.
BB here I come.
_________________
Founder and Chairman Emeritus, ECMSAS
BBX BBXII and BBXXI Long Distance Award Winner
| BeaterBarndoor wrote: |
i wish more people would actually drive their vws rather than just talking about what they have in the garage. |
| Red Fau Veh wrote: |
If you've seen one sunroof swivel seat kombi, you've seen them all!  |
|
|
| Back to top |
|
|
zimblewinder
Samba Member

Joined: January 22, 2004
Posts: 900
Location: Australia
|
| Posted: Tue Oct 07, 2008 3:00 am Post subject: |
|
|
Great stuff Neil. Can you tell me how much rubber flap overhangs the vent flap sides and the free end of the flap and also around the vent wings. I have to trim mine up yet and I dont have any measurements to go by. Your bus is a great inspiration for me to get on with my 58 23.
Thanks alot
Dale
_________________
58Euro 23 343208 The Ultimate Zimblewinder Machine.
59 mango standard
Wanted- splash pan supports, og pressed bumper coach bolts, ivory blaupunkt knobs (early), armrest alloy strips, NOS door mechanism |
|
| Back to top |
|
|
BeaterBarndoor
Samba Member

Joined: December 15, 2000
Posts: 842
Location: North Carolina
|
| Posted: Tue Oct 07, 2008 10:35 am Post subject: |
|
|
here is a 'blue print' of the rubber trimming tool. instructions say to make a wooden handle for it as well as "harden" the cutting end. i never got around to making a handle,i just put vise grips on it and go to town.im also not sure about the blue print reading 14mm for the hook. mine is 30mm to fully reach under the early/deep swoosh i may have modified for that or used a different set of blue prints when i built this.its a tricky process but its sure nice to not see a clumpy bundle of rubber from the inside of the window.
_________________
https://www.flickr.com/photos/128070606@N02/albums/
Whaaaaat? |
|
| Back to top |
|
|
Braukuche
Samba Member
Joined: September 03, 2004
Posts: 11236
|
| Posted: Tue Oct 07, 2008 11:18 am Post subject: |
|
|
I like all the little details you are showing. I don't even want to think about the number of man hours put into that thing, mostly because I can't count that high.
--Dan |
|
| Back to top |
|
|
EverettB 
Administrator

Joined: April 11, 2000
Posts: 71995
Location: Phoenix 602
|
|
| Back to top |
|
|
jeremyrockjock
Samba Towbar Builder

Joined: January 01, 2002
Posts: 5009
Location: Richmond, Verjinya
|
| Posted: Tue Oct 07, 2008 4:17 pm Post subject: |
|
|
Candy. Very nice
_________________
Why buy what you can build.
Step away from the fiberglass and no one gets hurt!! |
|
| Back to top |
|
|
faster
Samba Member

Joined: September 25, 2005
Posts: 1386
Location: Ga.
|
| Posted: Tue Oct 07, 2008 4:44 pm Post subject: Re: 58 15 window restoration progress - WWMRD? |
|
|
| npbusguy wrote: |
I thought I might share the progress of my 58 with you guys.
Side Profile
Fun House Roof - Rafferty is on the left.
It was a bare metal restoration.
As I bought it almost 20 years ago.
Thanks for looking and thanks to Mark Rafferty for polishing the turd that no one thought could be restored.
Neil |
Damn. So start to finish how long has it been? And I didn`t think Illinois had any busses. |
|
| Back to top |
|
|
Fred Squicciarini
Samba Member
Joined: July 25, 2005
Posts: 85
Location: Rochester, NY
|
| Posted: Tue Oct 07, 2008 5:55 pm Post subject: Mark R Press |
|
|
The vents look great. How much stretching of the rubber was done before the glass is pressed into the frame? Any guidance would be appreciated.
_________________
What is the feeling when you're driving away from people, and they recede on the plain till you see their specks dispersing? -it's the too huge world vaulting us, and it's good-bye. But we lean forward to the next crazy venture beneath the skies. - Jack Kerouac
Current rides: '57 oval, '58 SC, '77 Suzuki, GS750B, '08 Passat, '08 New Beetle |
|
| Back to top |
|
|
mr. warehouse
Samba Member

Joined: February 27, 2001
Posts: 5002
Location: Nor Cal 707
|
| Posted: Tue Oct 07, 2008 9:55 pm Post subject: |
|
|
Ridiculous attention to detail!!
Awesome work.
I got a project for you when this one is done Mark. |
|
| Back to top |
|
|
|


