| Author |
Message |
benw82
Samba Member

Joined: January 12, 2009
Posts: 170
Location: Nashville, TN

|
|
| Back to top |
|
 |
fusername
Samba Member

Joined: March 15, 2006
Posts: 2899
Location: Boston MA
|
 Posted: Sat Mar 07, 2009 5:00 pm Post subject: Posted: Sat Mar 07, 2009 5:00 pm Post subject: |
 |
|
maybe a socket would be the right size?
_________________
[email protected]
Need something custom bent up? shoot me an email, maybe we can make it work!
FORSALE: Thrust cut T4 and 1.9 main bearings
| obnoxiousblue wrote: |
| Maybe Ben Pon's ghost comes and vomits NOS stampings for your bus, but not mine! |
|
|
| Back to top |
|
|
catsinthewelder
Samba Member
Joined: December 24, 2008
Posts: 37
Location: Ludlow England
|
| Posted: Sat Mar 07, 2009 5:11 pm Post subject: |
|
|
I suppose you could look round a scrapyard for a bit of pipe the right size but you surely an angle grinder is'nt that expensive? Its probably the tool that gets the most action on my bus 
Don't forget to get goggles as well  |
|
| Back to top |
|
|
skills@eurocarsplus
Samba Peckerhead

Joined: January 01, 2007
Posts: 17761
Location: sticksville, ct.
|
| Posted: Sat Mar 07, 2009 5:24 pm Post subject: |
|
|
| real easy. get a piece of threaded 1/2 in rod, with some nuts and washers. place the rod thru the center pin bushings, thread on a nut, then a washer, then a nut (make sure the washer is a little less than the dia of the bushing). with the 'stud' hanging out of the bottom of the front end, take a huge (36mm socket) slide that over the 'stud' with another nut and washer. what you have made is a press that will evenly pull both bushings oth the bottom and drop down into the socket. if it sounds confusing, i will dig it up and take a pic for you |
|
| Back to top |
|
|
SGKent 
Samba Member

Joined: October 30, 2007
Posts: 41814
Location: at the beach
|
| Posted: Sat Mar 07, 2009 5:29 pm Post subject: |
|
|
Here is a warning. You can use the old pin from the bottom up to drive in the new bottom bushing. Do NOT use it on the top as it will easily clear parts to start the top bushing but not come out straight up without a cutoff wheel to cut it in half.
You might try this. Use a socket with a piece of all thread through it to start pulling the top bushing in. Or you can put the bottom bushing in first then slide the old pin all the way in from the bottom and hold it up with tape or a helper. Drop the top bushing on it to help center it. Use a small hammer and a piece of wood to pound down on the bushing and pin until the top bushing is started. As soon as the bushing is started, drop the pin and slide your all thread up through the lower bushing and out the top. Use a strong flat metal plate with a hole in it. Side the all thread through that and use it to pull the bushing in. Be sure to two feeler gauges set at .043" to stop the plate from pulling the top bushing all the way in as it shows in the Bentley and the Orange book.
_________________
"Most people don't know what they're doing, and a lot of them are really good at it." - George Carlin |
|
| Back to top |
|
|
benw82
Samba Member
Joined: January 12, 2009
Posts: 170
Location: Nashville, TN
|
| Posted: Sat Mar 07, 2009 11:14 pm Post subject: |
|
|
| skills@eurocarsplus wrote: |
| i will dig it up and take a pic for you |
could you find this pic? thanks!!! |
|
| Back to top |
|
|
sodbuster
Samba Member
Joined: August 08, 2004
Posts: 1114
Location: wherever my baywindow takes me.
|
| Posted: Sat Mar 07, 2009 11:53 pm Post subject: |
|
|
A type 1 IRS stub axle with a few mods makes a fine drift for driving out the center pivot bushings. if your working on the ground the bottle jack method like the one shown in the above links will work well with the modified stub axle. If you have access to a proper car hoist a BFH (Big Frickin' Hammer) works just fine too.
Take the stub axle and cut off the drive flange portion. then using a grinder grind down the spline portion as evenly as possible to the size of the center pivot bore. (You wont need to grind much down.) Remember thats the center pivot bore of the beam not the bushing. try and leave the threaded portion untouched. the idea is that the threaded portion of the old stub indexes it into the bushing and the step up to the splined portion sits against the bottom edge of the bushing.
then you drive out both bushings at once from the bottom out through the top. 
I know you said you don't have a grinder. Maybe you can borrow one. or take the stub axle to a local shop to have it ground. Be sure to bring one of the new bushings along for sizing.  |
|
| Back to top |
|
|
Desertbusman
Samba Member

Joined: June 03, 2005
Posts: 14655
Location: Arizona
|
| Posted: Sun Mar 08, 2009 2:33 am Post subject: |
|
|
What ever size socket it was, that just fit in the bore, I first ground it flat on the end to get rid of the chamfer. The chamfer would not have pushed squarely on the end of the bushing and probably swedged it outward. Initially I used a bottle jack to push the bushings out. It didn't work, just raised the bus up in the air. So actually that method is limited to only 1,500# force or so. The all-thread did it no problem. With a large washer on the end of the housing, when tightening the nut, it kept trying to walk off to the side and not pull straight down. So I used another socket that just fit inside to keep it centered. 3/8" drive sockets fit nice on the 3/8" all-thread.
_________________
71 Superbug
71 Westy |
|
| Back to top |
|
|
SGKent
Samba Member
Joined: October 30, 2007
Posts: 41814
Location: at the beach
|
| Posted: Sun Mar 08, 2009 9:55 am Post subject: |
|
|
another option is to spend the bucks and get the genuine VW bushing tool.
_________________
"Most people don't know what they're doing, and a lot of them are really good at it." - George Carlin |
|
| Back to top |
|
|
RZAR
Samba Member
Joined: September 01, 2007
Posts: 725
|
| Posted: Sun Mar 08, 2009 10:18 am Post subject: |
|
|
| I used an old socket and extension to pound them out and in. Worked great |
|
| Back to top |
|
|
busman78
Samba Member
Joined: August 17, 2004
Posts: 4640
Location: Oklahoma City, OK
|
| Posted: Sun Mar 08, 2009 10:52 am Post subject: |
|
|
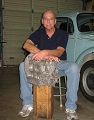
Made these out of 4140 steel, the top one is for use with a hammer, the lower was tapped so an adpater could be screwed on for use with an air hammer. To date I have not had to use the air hammer one.
|
|
| Back to top |
|
|
benw82
Samba Member
Joined: January 12, 2009
Posts: 170
Location: Nashville, TN
|
| Posted: Sun Mar 08, 2009 9:04 pm Post subject: |
|
|
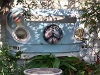
thanks for all the help. went and spent 5 bucks at home depot and came up with this(i already had the 32mm socket):
used a 12" piece of 1/2" all thread, 5 nuts, 3 washers, and 1 lock washer.
the 32 mm socket i had couldn't have fit any better.
worked perfectly and steering slop is GONE! sweet!
Last edited by benw82 on Sat Mar 28, 2009 4:18 pm; edited 5 times in total |
|
| Back to top |
|
|
fusername
Samba Member
Joined: March 15, 2006
Posts: 2899
Location: Boston MA
|
| Posted: Sun Mar 08, 2009 9:06 pm Post subject: |
|
|
the hippy fix strikes again! well done.
_________________
[email protected]
Need something custom bent up? shoot me an email, maybe we can make it work!
FORSALE: Thrust cut T4 and 1.9 main bearings
| obnoxiousblue wrote: |
| Maybe Ben Pon's ghost comes and vomits NOS stampings for your bus, but not mine! |
|
|
| Back to top |
|
|
ChuxBus
Samba Member

Joined: March 19, 2005
Posts: 297
Location: East Atlanta, GA
|
| Posted: Sat Mar 21, 2009 8:37 am Post subject: |
|
|
| benw82 wrote: |
| used a 12" piece of 1/2" all thread, 4 nuts, 3 washers, and 1 lock washer. |
looks like 5 nuts... thanks for posting pics... off to my neighborhood hardware store...
_________________
-Chuck
1978 Bus & 1969 Bug
"Don't make a fuss, just get on the bus" -Frank Zappa |
|
| Back to top |
|
|
busmania
Samba Member

Joined: October 13, 2006
Posts: 1934
Location: Here
|
| Posted: Mon Mar 30, 2009 11:21 am Post subject: |
|
|
| I like the homeade tool. I am about to do this job and have a question. Do both bushings come out the bottom or the top? Im having a hard time visualizing the bushings. Thanks. |
|
| Back to top |
|
|
SGKent
Samba Member
Joined: October 30, 2007
Posts: 41814
Location: at the beach
|
| Posted: Mon Mar 30, 2009 12:40 pm Post subject: |
|
|
One bushing is at the top of the tube and one at the bottom. The pin is vertical. You either drive them up with a drift and hammer like he made, or pull them down with all thread like the photo. (1) Be sure you remember to pull the zerk fitting. (2) Be sure you remember to pull the zerk fitting. (3) Be sure you remember to pull the zerk fitting.
I pulled them down and it was pretty straight forward with a piece of all thread and the right sided washers. You can take the new bushing to the hardware store to help you find the right all thread and washers. I think 3/8 is what we used.
_________________
"Most people don't know what they're doing, and a lot of them are really good at it." - George Carlin |
|
| Back to top |
|
|
rustybutterknife
Samba Member

Joined: June 06, 2003
Posts: 488
Location: Georgetown, IN
|
| Posted: Mon Apr 13, 2009 8:57 am Post subject: |
|
|
Thanks everyone for this thread, I used the threaded rod style tool but instead of 1/2 inch rod I used 3/8 and a socket on the top to pull the bushings out because I kept wrecking washers. Once the socket was used it went very nice. I pulled them both through the bottom and pulled the new upper one from the top with a larger socket so it would bottom out when seated. As for the lower one i just tapped it in from the bottom. Without that tool I would have been screwed trying to do that job.
_________________
What, they don't sell purple locktite? Just mix the red and the blue together. |
|
| Back to top |
|
|
busman78
Samba Member
Joined: August 17, 2004
Posts: 4640
Location: Oklahoma City, OK
|
| Posted: Mon Apr 13, 2009 9:03 am Post subject: |
|
|
| The top bushing is not suppose to seat flush. |
|
| Back to top |
|
|
rustybutterknife
Samba Member
Joined: June 06, 2003
Posts: 488
Location: Georgetown, IN
|
| Posted: Mon Apr 13, 2009 7:33 pm Post subject: |
|
|
| busman78 wrote: |
| The top bushing is not suppose to seat flush. |
Please do explain, I'm waiting on parts and have not yet done the final assy. I would like to know before I try finishing the job I have it flush with the top of the housing, like the bottom was with the bottom of the housing.
_________________
What, they don't sell purple locktite? Just mix the red and the blue together. |
|
| Back to top |
|
|
busman78
Samba Member
Joined: August 17, 2004
Posts: 4640
Location: Oklahoma City, OK
|
| Posted: Mon Apr 13, 2009 7:47 pm Post subject: |
|
|
| Upper bushing should stick out past the housing by 1.10mm which is .043", yep it is a bitch to measure too! I use a flat bar and a .040 + .003 feelers to measure. |
|
| Back to top |
|
|
|


