| Author |
Message |
FNGRUVN
Samba Member

Joined: October 27, 2007
Posts: 2237
Location: Fort Collins, CO

|
 Posted: Tue Jan 06, 2009 6:34 pm Post subject: Posted: Tue Jan 06, 2009 6:34 pm Post subject: |
 |
|
Here's a tach I got at JC Whitney for $40. Works good and fit the space between the steering wheel and the dash(barely). I didn't feel like adapting an OEM tach.
|
|
| Back to top |
|
 |
wildenbeast
Samba Member

Joined: April 04, 2008
Posts: 680
Location: Colorado
|
| Posted: Fri Jan 09, 2009 9:42 am Post subject: |
|
|
I really liked Dragonfly's gauges but after speaking with him, it was apparent that you can't get those PVC bends anymore without the stamps they now put on them. I went with this $10 pod instead (mounted in a similar location). This pod allows you to adjust the angle of the gauges so that anyone driving the van can see them. The shift lever does not hit the gauges whatsoever. I am going to switch out my boost gauge to one that reads more psi once I break in the engine.
|
|
| Back to top |
|
|
RevKevin
Samba Member

Joined: April 07, 2007
Posts: 246
Location: Seattle
|
| Posted: Thu Feb 26, 2009 11:20 pm Post subject: |
|
|
So I'm looking at installing some gauges and was looking for some input.
Here's what I'm thinking:
Cyberdyne Digital Oil Pressure
VDO Cylinder Head Temp (I'm air cooled)
VDO Voltmeter, the GTI/Cab style with the Red/Green display
The first two I was going to purchase from eGauges, the Voltmeter I was going to pick up off ebay.
As far as installing them from what I understand there's only room to install two gauges on the heater cover, I don't like the idea of drilling 2 1/8" holes in my dash by the cig lighter.
I'm definitely leaning towards dash mount and like the look of the slightly modified wrx pod:
But it looks like the place doesn't sell that style anymore.
What I was thinking was something like this:
I'm just not sure how well the pod and dash angles will match up and don't want to end up with downward facing gauges.
I was also wondering if some of the air cooled folks have found any creative and easy ways to relocate the Oil Pressure Sender, or since the 10mx1 Adapter hoses are no longer available am I pretty much just stuck getting the foot long 1/8" NPT hose and a bunch of 10mx1 to 1/8" NPT adapters?
Opinions, advice, ideas? |
|
| Back to top |
|
|
westyventures
Samba Member

Joined: December 29, 2004
Posts: 2338
Location: Oregon Outback
|
| Posted: Thu Feb 26, 2009 11:57 pm Post subject: |
|
|
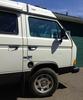
As installed in the latest customer's m-TDI conversion. My feeling is that gauges should be placed where easily monitored without moving your eyes from the road. The location behind the rear view mirror seems perfect. Not exactly the easiest place to run wire, but wasn't as bad as I thought it would be.
_________________
1990 Syncro 16" sunroof Reimo highroof conversion
1990 Westy Multivan 112i automatic
1992 LT31 Karmann Distance Wide 'La Tortuga'
2014 Touareg X TDI |
|
| Back to top |
|
|
RevKevin
Samba Member
Joined: April 07, 2007
Posts: 246
Location: Seattle
|
| Posted: Fri Feb 27, 2009 1:03 am Post subject: |
|
|
| westyventures wrote: |
As installed in the latest customer's m-TDI conversion. My feeling is that gauges should be placed where easily monitored without moving your eyes from the road. The location behind the rear view mirror seems perfect. Not exactly the easiest place to run wire, but wasn't as bad as I thought it would be. |
That's a pretty cool idea, but like you said it would be a PITA to run the wiring. One of the things about dash mount that I find appealing is that I can just run the wiring through the hole for the ash tray, and it's another location where your eyes don't have to travel too far from the road, which is why I decided to not go with the universal swivel pod behind the gear shift, though it's still a pretty neat idea.
I was also wondering if there was something like a Krylon Fusion plastic spray paint that was close to the color of my dash so I could paint my pod brown to match. |
|
| Back to top |
|
|
jalopyjockey
Samba Member

Joined: June 29, 2005
Posts: 357
Location: avl, nc
|
| Posted: Fri Feb 27, 2009 7:15 am Post subject: |
|
|
| kevin....when i put my oil press sender in i just opened up the hole in the tin a little wider so that it cleared the can......um i found that kona brown is a pretty close match, maybe slightly darker but close enough to look ok, i believe its a rustoleum color and they do make it in the plastic paint i think......my only other suggestion is to run the cht to #1 cyl, puttin it on 3 is a relic left over from when the cooler got in the way.....good luck |
|
| Back to top |
|
|
RevKevin
Samba Member
Joined: April 07, 2007
Posts: 246
Location: Seattle
|
| Posted: Fri Feb 27, 2009 9:41 pm Post subject: |
|
|
| Unfortunately the Cyberdyne oil pressure sender only comes as a single so I need to rig up a T-fitting for their sender and the idiot light. |
|
| Back to top |
|
|
mrbisset
Samba Member
Joined: March 19, 2005
Posts: 17
|
| Posted: Sat Mar 07, 2009 9:35 pm Post subject: |
|
|
| what are you posters using for oil pressure hose extension to allow for the OP sending unit location to be away from the engine block and fit outside the engine tin cover? |
|
| Back to top |
|
|
RevKevin
Samba Member
Joined: April 07, 2007
Posts: 246
Location: Seattle
|
| Posted: Sun Mar 08, 2009 10:54 pm Post subject: |
|
|
There used to be a foot long 10m x 1m thread hose and mounting bracket made by VDO so you could relocate your sender:
[img]http://www.germansupply.com/home/image.php?productid=16240[/img]
Now most of the hoses you find are 1/8" NPT, even the ones marked 10m x 1m.
Egauges.com has one and a pretty decent selection of adapter fittings:
http://www.egauges.com/vdo_indA.asp?PN=CON-016
A few folks have said you can go to your local NAPA or other FLAP and have them whip one up as well. |
|
| Back to top |
|
|
mrbisset
Samba Member
Joined: March 19, 2005
Posts: 17
|
| Posted: Mon Mar 09, 2009 5:12 am Post subject: |
|
|
RevKevin,
thanks for the info. So 1/8 NPT fits into the engine block and my VDO sending unit will screw into it also? Cool! |
|
| Back to top |
|
|
jackbombay
Samba Member

Joined: October 19, 2007
Posts: 2725
Location: Portland Oregon
|
| Posted: Mon Mar 09, 2009 8:59 am Post subject: |
|
|
My van came a few gauges along the top edge of the windshield, and while you don't have to move your eyes far, you do have to significantly refocus your eyes as the gauges are so close to you. After many hours behind the wheel I found it to be less than ideal. $.02
I mounted mine like this.
Home made from PVC, bondo and spray paint.
_________________
Gas struts to pop your top easily!
Pop Top strut kits now available for late Bay window Westies 
Samba ad here.
DIY artificial rain gutters (ARGs) |
|
| Back to top |
|
|
tencentlife
Samba Member
Joined: May 02, 2006
Posts: 10147
Location: Abiquiu, NM, USA
|
| Posted: Mon Mar 09, 2009 9:19 am Post subject: |
|
|
| Quote: |
| thanks for the info. So 1/8 NPT fits into the engine block and my VDO sending unit will screw into it also? Cool! |
I've been after this for a long time. There's no need to get hung up on keeping it metric here. 1/8"-27 NPT is interchangeable with M10x1.0 for this purpose. The thread interference is 6% (27/25.4), but you won't be running enough threads for the error to come into play, since NPT is a tapered pipethread. The MPT fitting will screw cleanly into the case hole and the thread taper will bottom after a few turns, without screwing all the way in like the M10 machine thread would.
This gives you a good grounding contact for the sender if from there you continue with hard plumbing; if you switch to rubber hose from there you will need to add grounding at the sender. Usually whatever bracket used to mount the sender does the job; just be sure not to insulate the sender from the bracket or there won't be a circuit.
When you thread M10 into 1/8" FPT, the machine thread will bottom in the female taper as well. It works well on both ends, and no thread damage results at all on either end as long as you torque responsibly.
So the fancy fittings you need to extend senders and switches are as close as the home supply store. So easy.
_________________
Shop for unique and useful Vanagon accessories at the Vanistan shop:
https://intrepidoverland.com/vanistan/
also available at VanCafe.com!
Please don't PM here, I will not reply.
Experience is death to doctrine. |
|
| Back to top |
|
|
mr_vanagon
Samba Member
Joined: March 31, 2005
Posts: 589
Location: Southern Illinois (GO SALUKIS)
|
| Posted: Mon Mar 09, 2009 7:40 pm Post subject: |
|
|
| Quote: |
| This gives you a good grounding contact for the sender if from there you continue with hard plumbing; if you switch to rubber hose from there you will need to add grounding at the sender. Usually whatever bracket used to mount the sender does the job; just be sure not to insulate the sender from the bracket or there won't be a circuit |
And if you're worried about a good ground for the sender, you can get the same sender but intended for marine uses. Fiberglass boats use senders with a dedicated ground terminal. This is what I was planning before I gave up on the project in favor of an engine swap.
My (directly related) ad:
http://www.thesamba.com/vw/classifieds/detail.php?id=752549
_________________
'68 Autostick Bug Mom bought new
'89 Tintop Vanagon Dad bought new |
|
| Back to top |
|
|
1621
Samba Member
Joined: May 15, 2006
Posts: 2174
|
| Posted: Mon Mar 09, 2009 8:57 pm Post subject: |
|
|
Finally took pictures of the Cyberdyne digital voltmeter connected to the auxiliary battery. It's run off a switch on the side of the cabinet (one of the switches just above the Yandina 150 in the picture below). The little button next to the gauge face is for high and low memory recall. When the gauge is switched off, it's simply a black face.
_________________
'85 Westy |
|
| Back to top |
|
|
kendalwoolf
Samba Member

Joined: January 20, 2006
Posts: 68
Location: Fayette, MO
|
| Posted: Mon May 18, 2009 9:28 am Post subject: |
|
|
Here are some pictures of my gauges in my 86 1.6td Vanagon. Used a 5 dollar ebay gauge pod and cut it to fit in the ashtray. Used JB weld to attach metal brackets to hold it in place. I like the location and No putting holes in my dash. Check out more pictures of the Vanagon conversion here:
http://picasaweb.google.com/kendalwoolf/Vanagon16TurboDieselConversion#
|
|
| Back to top |
|
|
ThorAlex
Samba Member

Joined: August 31, 2006
Posts: 620
Location: Norway
|
| Posted: Thu Jun 04, 2009 3:32 pm Post subject: |
|
|
heres mine:
volt meter and rev counter, both gauges and pods are cheep stuff from my local auto supply store but they work fine. |
|
| Back to top |
|
|
kpbo
Samba Member

Joined: July 10, 2006
Posts: 40
Location: Fort Collins, CO
|
| Posted: Tue Feb 02, 2010 5:46 pm Post subject: |
|
|
photos of the gauges in my TDI conversion project:
clock deleted, installed Westach dual sweep EGT / turbo boost gauge:
VDO Vision oil temp and oil pressure gauges:
lighting (sorry for bad pic). I'm planning to convert the rest of lights to blue LEDs as well...
_________________
1987 Syncro Westfalia w/ 'AHU' TDI |
|
| Back to top |
|
|
danfromsyr
Samba Member

Joined: March 01, 2004
Posts: 15324
Location: Syracuse, NY
|
| Posted: Wed Feb 03, 2010 8:06 am Post subject: |
|
|
Heya Kpbo, that's a NICE tach with the green part, what car is that from? where'd ya get it?
my TD tachs from mid 80s quantums & jettas don't have the grrn bit on the 2-2.5k portion.
also slick install on the EEGT/Boost gauge,
I was going to put a digital EGT there but I wasn't sure there's the back spacing with the master cylinder there.
Also Here's a WAVE from Syracuse,
our Empire State VW camping Club p[asses thru Ithaca alot in the summer & Fall www.empirevwcamping.org
_________________
| Abscate wrote: |
| These are the reasons we have words like “wanker” |
|
|
| Back to top |
|
|
kpbo
Samba Member
Joined: July 10, 2006
Posts: 40
Location: Fort Collins, CO
|
| Posted: Wed Feb 03, 2010 8:25 am Post subject: |
|
|
Thanks neighbor!
The tach is just a stock Vanagon tach with a photo overlay laminated to the face. On the TDI-conversion Yahoo group site, there are various digital image files of tach faces that folks have generously shared, along with instructions on how to modify your tach to receive the signal from the ECU. The only thing I did different was to photoshop a "D" on the fuel pump symbol 
I'm not all that happy with how it currently looks--you might have noticed that the overlay is peeling away from guage face at the bottom... too bad the tach is such a PITA to get to.
And yes--the fit behind the clock space is tight. I grafted on a square piece of PVC (~1/4" thick) to space the gauge 'out' a bit, as well as provide a smooth mounting surface for the bezel.
_________________
1987 Syncro Westfalia w/ 'AHU' TDI |
|
| Back to top |
|
|
90Doka_Guy
Samba Member

Joined: April 08, 2007
Posts: 550
|
| Posted: Sat Feb 13, 2010 2:20 pm Post subject: |
|
|
A gauge, just not on the dash.
|
|
| Back to top |
|
|
|


