| Author |
Message |
dubstar
Samba Member
Joined: January 17, 2009
Posts: 1438
Location: New York

|
 Posted: Wed Jul 04, 2012 10:00 am Post subject: 1963 Type II Kombi L380 Turkis Posted: Wed Jul 04, 2012 10:00 am Post subject: 1963 Type II Kombi L380 Turkis |
 |
|
I am going to migrate earlier posts from another forum here and update from this point forward...
Posted: Mon Jan 25, 2010 11:56 pm
pre-delivery shipping nonsense:
http://www.dasvolks.com/phpBB3/viewtopic.php?f=4&t=2168
when it gets here, we can discover what's wrong with it 
still on the truck somewhere...along with another headache I'm not even going to discuss right now...but I did get the insurance and here are a few more photos  : :
the bus arrived this morning...thanks to my dad who took delivery when I couldn't due to work
of course, I would have preferred to see the bus in person before purchasing...my schedule and finances, however, pretty much eliminated that possibility...the price I paid was reasonable and leaves room for necessary repairs and parts
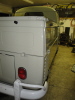
overall, I think it looks pretty good...definitely some issues, and the rear corner is a drag (looks like some old crunchiness up inside, as well) , but speaking with glenn and bill tonight put that into perspective...the roof damage, which was a big concern, is pretty much a non-issue...it's there, but the rack diverts your attention and makes it a "who cares" issue...front seats need some additional securing...aside from rear corner, bus "seems" solid underneath...hard to tell in the twilight, however
small things like rear hatch not locking, engine hatch driver's side bolts striped out, leaking passenger front door, loose mirror, broken interior door handles (cheap plastic) all seem like relatively easy fixes...also could not get the windshield wipers to work (new 12v conversion, so they should work), but maybe a fuse blew...lights and turning signals all OK except rear passenger running light and possibly brake light...turning signal works but looks like the battery knocked the running light wire off...once again, hard to tell in the rain and dark
I'll need some assistance in checking out the engine, clutch, brakes, etc...accelerator pedal seems a bit clunky / wonky, but also could be just how it is...did not drive it, but started right up and seemed to be running smoothly
new tires, hubcaps...new paint actually looks "aged", as the seller added a touch of matte finish...the bus is definitely a looker and has character...primer in the rear, but original travel stickers on the driver's bulkhead taped off and left unpainted...does not seem to have an m-plate
damage in wheel well:
damage:
full album here:
http://s782.photobucket.com/albums/yy109/dubstar1971/1963%20Volkswagen%20Kombi/
to be continued...
(original thread here: http://www.dasvolks.com/phpBB3/viewtopic.php?f=44&t=2587)
_________________
1963 Type II Kombi
1977 Type I Fuel Injection
http://instagram.com/john_aka_dubstar/
http://web.stagram.com/n/john_aka_dubstar/
"you could transport really tall things too, like a giraffe"
Last edited by dubstar on Wed Jul 04, 2012 11:20 am; edited 1 time in total |
|
| Back to top |
|
 |
dubstar
Samba Member
Joined: January 17, 2009
Posts: 1438
Location: New York
|
| Posted: Wed Jul 04, 2012 10:07 am Post subject: |
|
|
found the m-plate:
25 10 2
374 080 195
UA 231 GREEN 1018758
automated m-plate decoder says:
M-Plate content
Model Type 2 (T1) mod. 231 :
- Kombi
- Cargo doors right
- LHD
Chassis number 1018758
Serial number 231018758
Model year 1963
Planned production date October 25 ,1962
Paint color L380 - Turquoise
Interior color (doorpanels and seats) 80 - Grey
Destination USA, Los Angeles
M-CODES
M-CODE Description Concerned models From chassis number To chassis number
080 Split front seats (walk-through) Kombi and Panel
195 Adjustable bench seat/backrest (until 1963) -
374 North American equipment. Includes 6 popouts
http://www.vw-mplate.com/mcode.php
Posted: Wed May 19, 2010 9:21 pm
front cab cleaned up nicely today...got the windshield wipers working...battery tray rusted to hell
Today, we discovered why the battery moved around so much during shipping (aside from the fact that it wasn't secured):
The loose battery not only smashed the sheet metal / bondo, but also dented the taillight bucket, knocked the bulb out of the bucket, and disconnected the ground:
Fixing the wires and reseating the bulb:
There was absolutely no way to securely place the battery where it normally goes without potentially causing more damage, so we moved it temporarily to the other side. Here's Bill working on replacing the cable to the starter:
Temporary set up (new fuel filter will be installed soon and the extra one eliminated):
I removed the seats and cleaned everything:
Original travel stickers:
rubber mat cleaned and shabby Bay seats covered up for now:
We also got the two driver's side pop-out windows to open, and made a quick fix to the side view mirror. Thanks to Bill for all the assistance so far!
More to come...
_________________
1963 Type II Kombi
1977 Type I Fuel Injection
http://instagram.com/john_aka_dubstar/
http://web.stagram.com/n/john_aka_dubstar/
"you could transport really tall things too, like a giraffe" |
|
| Back to top |
|
|
dubstar
Samba Member
Joined: January 17, 2009
Posts: 1438
Location: New York
|
| Posted: Wed Jul 04, 2012 10:13 am Post subject: |
|
|
"That battery tray is harsh. Did the seller mention it?"
no mention of it...a lot of work was obviously done to the bus, so this is puzzling...I can only imagine it seemed sorta-kinda OK and the unsecured battery finished off the job sooner than anticipated 
definitely should have been mentioned, however; at the very least, I could have a new tray here already
I used the baby powder (read about it on the samba last week)
updates as they develop!
DMV nightmare begins:
http://www.dasvolks.com/phpBB3/viewtopic.php?p=40152#p40152
if you can't bring the bus to the BBQ, bring the BBQ to the bus...
_________________
1963 Type II Kombi
1977 Type I Fuel Injection
http://instagram.com/john_aka_dubstar/
http://web.stagram.com/n/john_aka_dubstar/
"you could transport really tall things too, like a giraffe" |
|
| Back to top |
|
|
dubstar
Samba Member
Joined: January 17, 2009
Posts: 1438
Location: New York
|
| Posted: Wed Jul 04, 2012 10:17 am Post subject: |
|
|
Posted: Thu May 27, 2010 8:39 pm
DMV insanity continues:
http://www.dasvolks.com/phpBB3/viewtopic.php?p=40166#p40166
latest addition tonight:
I think this might be my bus...the person who posted it owned my bus prior to the person I bought it from...eventually I'll get around to asking:
back to the fun stuff...at least five types of glass in the bus
Sigla:
Sekurit:
Sekurit-1:
Durvit A (there is also a piece without the A):
GGM:
Delog (bummed this one is cracked):
rear panel is not labeled...
_________________
1963 Type II Kombi
1977 Type I Fuel Injection
http://instagram.com/john_aka_dubstar/
http://web.stagram.com/n/john_aka_dubstar/
"you could transport really tall things too, like a giraffe" |
|
| Back to top |
|
|
dubstar
Samba Member
Joined: January 17, 2009
Posts: 1438
Location: New York
|
| Posted: Wed Jul 04, 2012 10:20 am Post subject: |
|
|
Posted: Tue Jun 01, 2010 7:17 pm
temporary fix inspired by the master (manny):
Plasti-Dip on the front rack clamps:
Wednesday...
in the meantime:
1 211721621 ACCELERATOR PEDAL PUSH ROD BOOT, seals push rod as it exits floor, fits all Buses through 1972, made by Wolfsburg West $4.75 $4.75
2 113119571 FRESH AIR TUBE RUBBER GROMMET, seals fresh air tube as it exits breast plate, Feb'63-1969 Bug, 1963-1971 Bus, made by Wolfsburg West, each $2.75 $5.50
2 211721383B BRAKE AND CLUTCH PEDAL SEALING PAD, installs onto inside portion of front cab, between the floor and rubber floor mat and prevents air and moisture from entering cab area when pedals are depressed. Fits 1960-1979 Bus, two required, made by Wolfsburg West, each $1.50 $3.00
1 211711183B SHIFT ROD BOOT, 1957-1979 Bus, 2 required per car, Wolfsburg West reproduction, each $5.50 $5.50
1 113823581B FRONT HOOD HANDLE SEALS, 1968-1979 Bug $1.75 $1.75
1 211837821AWW SLIDING WINDOW LATCH, fits 1967 and earlier Bus. This style latch mounts through the glass. Show quality chrome plating, made by Wolfsburg West, left side $23.95 $23.95
1 113837640AWW VENT WINDOW LOCK, fits right side for 1956-1964 Beetles, and left side for Mid'55-1967 Buses. This is a quality Wolfsburg West reproduction, featuring quality chrome plating and features identical to the original German version. $13.95 $13.95
2 211841387 CARGO DOOR CHECK STRAP, includes cleat, fits all Buses through 1960, 1961-1974 double cab models, black, each, Wolfsburg West reproduction $8.50 $17.00
1 211841389 CARGO DOOR CHECK STRAP CLEAT, fits all Buses through 1967, each $3.00 $3.00
6 N114801 BUS CHECK STRAP SCREWS, secures for check strap cleat to door, fits all Buses through 1967, set of 2 $1.00 $6.00
1 211837215 SPRING, door handle return, fits 1961-1964 Bus (1964 Bus, through chassis # 1222025), fits left and right, made by Wolfsburg West, each $3.00 $3.00
1 ZVW16A LICENSE PLATE CLAMPS, mounts license plate to U.S. style front bumper, 1958-1967 Bus, set $4.95 $4.95
1 ZVW113 BATTERY MAT, Protect your Bug or Bus from harmful battery acid with the aid of The Battery Mat. Once installed, The Battery Mat will trap and neutralize any battery acid that leaks from the terminals or top side of the battery, thus preventing corrosion and expensive damage. The Battery Mat is the world's only acid-neutralizing mat designed for use under any lead-acid battery and it is manufactured in the United States of 100% U.S. origin components. Black in color, sold in 8"X12" sections. Fits all Beetle and Bus models through 1979. $5.50 $5.50
1 261827575 ENGINE LID KEY COVER, covers engine lock access hole, 1955 (1955 Bus, starting at chassis # 20-117903) -1965 Bus, made by Wolfsburg West $9.95 $9.95
1 261827579 ENGINE LID KEY COVER SEAL, seals key cover to engine lid, Wolfsburg West reproduction $1.00 $1.00
1 261829573 ENGINE LID HINGE SEALS, also fits single cab side compartments, 1955 (1955 Bus, starting at chassis # 20-117903) -1976 Bus, set of 2 $6.00 $6.00
1 211829191A REAR HATCH BEAD, seals rear hatch hinge to body, black plastic, fits through 1963 Bus $13.00 $13.00
1 211829193BWW REAR HATCH SEAL, 1955 (1955 Bus, starting at chassis # 20-117903) -1963 Bus, original style grey sponge rubber, made by Wolfsburg West $17.00 $17.00
1 211827711 ENGINE LID SEAL, 1955 (1955 Bus, starting at chassis # 20-117903) -1979 Bus, made by Wolfsburg West $18.00 $18.00
1 261827361 ENGINE LID STAY/SIDE COMPARTMENT DOOR STAY, allows engine lid and single cab truck side compartment door to stay in the open position, fits Mar'55-1964 Bus (1964 Bus through chassis # 1222025), quality reproduction unit, includes spring, primered $38.00 $38.00
8 211841529 CARGO DOOR HINGE PLUG, plugs exterior portion of hinge from moisture, -1967 Bus, made to the original specifications by Wolfsburg West, each $1.00 $8.00
8 211841549 CARGO DOOR SCREW HOLE PLUG, original cloudy-clear, covers door hinge screw, 8 required per car, 1963-1967 Bus, made by VW, each $1.25 $10.00
1 241841823AWW CARGO DOOR WEATHERSTRIP, seals side cargo doors, 9 piece set, fits all Buses through 1967 (except for double cab models), original style grey sponge rubber, made by Wolfsburg West $55.00 $55.00
1 211415617 STEERING COLUMN SEAL, seals lower portion of tube to floor, fits through 1967 Bus $2.00 $2.00
1 113425021 STEERING DAMPER, 1960 (1960 Bug, starting at chassis # 2921552) -1977 std. Beetle $27.00 $27.00
2 N128101 DOOR HANDLE DOWEL PIN, secures inner door handle to remote, fits all Beetles through 1967, Buses through 1964 (1964 Bus through chassis # 1222025) Bus, each $0.60 $1.20
2 211837225 FRONT DOOR HANDLE, inner, beige, 1960-1964 (1964 Bus through chassis # 1222025) Bus, made by Wolfsburg West, each $7.00 $14.00
2 211837235GY FRONT INNER DOOR HANDLE COLLAR, fits under inner door handle, 1959-1965 Bus, grey $3.50 $7.00
2 111837229 SPRING, inside door handle and winder, mounts underneath door panel, Bug and Bus, each $2.25 $4.50
4 211831449 DOOR SCREW HOLE PLUG, cloudy-white, 4 required per Bus, fits 1963- 1967 Buses, also functions as a screw hole plug for convertible Beetle models, and hole plug for area behind the license plate housing for 1964-1973 Beetles, each $1.25 $5.00
1 211841641GY CARGO HANDLE, inner, grey, each $7.00 $7.00
1 211837677 MIRROR ARM AND VENT WINDOW LOCK PLATE, secures nuts used to fasten round style mirror arm to door hinge, and for the vent window tensioning nuts, fits 1967 and earlier Bus models, each $0.90 $0.90
2 111837231 BUFFER, rubber, stops door handle rattle, through 1967 Bug, through 1964 Bus (1964 Bus, through chassis # 1222025), each $0.30 $0.60
1 111127591A Fuel Line Grommet, seals metal fuel line to firewall engine tin, fits 8mm metal fuel lines $0.75 $0.75
1 111937555 FUSE BOX COVER, 8 fuse, 1961-1966 Beetle, 1960 (1960, Bus starting at chassis #614456) -1967 Bus, made by Wolfsburg West, PLEASE NOTE; fuse box pictured is not included with this cover. $8.00 $8.00
1 111209147 FUEL FILTER, in-line plastic translucent style, fits 1971-1974 Beetle, also works for generic applications for all non-fuel injected Beetle and Bus models $1.95 $1.95
1 211863615 DOOR PANEL SCREW AND WASHER SET, secures interior door panels, set of 60 screws and washers, fits all Buses through 1964, made by Wolfsburg West $16.00 $16.00
Parts Subtotal = $369.70
_________________
1963 Type II Kombi
1977 Type I Fuel Injection
http://instagram.com/john_aka_dubstar/
http://web.stagram.com/n/john_aka_dubstar/
"you could transport really tall things too, like a giraffe" |
|
| Back to top |
|
|
dubstar
Samba Member
Joined: January 17, 2009
Posts: 1438
Location: New York
|
| Posted: Wed Jul 04, 2012 10:27 am Post subject: |
|
|
Posted: Sat Jun 12, 2010 2:19 am
THANK YOU, MOM & DAD!
parental assistance at Massapequa DMV while I was at work...sixth time's the charm
steering feels a little loose, brakes might be pulling a bit, and there may be some "interesting" noises coming from the RGBs or brakes, but super fun to drive and engine feels strong...out to Bellmore with Bill, met up with Mel and Glenn A, homebrews and pizza, almost a two-bus crash due to someone deciding to park in the left lane but situation dealt with by GA's off-roading, over to Manny's and the CRB, tearing around Freeport at 12:30 AM with GA at the wheel, back home on the Meadowbrook to the loop at 55...need to get a bit more used to the feel before I hit 60 LOL
oh yeah, my bus has dents in the roof 
Posted: Sat Jun 12, 2010 7:09 pm
bad tie rod end...off the road until mid-week...I need this if you have an extra for sale:
http://wolfsburgwest.com/cart/DetailsList.cfm?ID=131415811
we tried Gene, but he only had right hand thread...too late for the other parts places
Posted: Mon Jun 28, 2010 10:30 pm
done:
1) inner left tie rod end replaced - thanks, bill
2) water barrier installed on driver and passenger doors, panels cleaned up, fiber washers installed to prevent tearing due to warping
3) passenger door handle and collar installed - thanks, bill
4) driver's door handle and collar installed
5) rear hatch - new seals installed
6) clutch, brake, steering column - floor seals installed
7) engine hatch seal installed - only the top seal, as it won't close with all 4 installed 
vintage YOM plate application sent to Albany
9) period Grundig FM radio obtained from Germany
10) replaced various plastic bits - bolt covers, hinge tops, etc.
11) cargo door handles replaced w/ proper silver beige - one reproduction, one off a '62 from williamblanda - thanks, william
12) stock oil bath obtained - thanks manny
13) installed engine hatch lock cover
14) cargo door check straps installed - wrong size
to do:
1) replace outer left tie rod end
2) replace right tie rod (non-adjustable)
3) replace steering damper
4) replace swing lever
5) install radio and speaker - bracket and speaker ordered
6) install new cargo door seals
7) fix gas gauge
install passenger mirror arm - thanks GA
9) fix horn
10) change gear oil
11) change oil
12) check valves
13) check timing
14) find out what the rear end "clunk" is
15) proper tire pressure
16) install new rubber tubing on rack feet
17) install cigarette lighter / aux power
1 install rear hatch top seal
19) install engine lid stay
long-term:
1) replace battery tray and repair rear corner 
2) install 3-point seatbelts
3) recover front seats in proper Kombi gray
4) remove middle bench seat (find a 2/3 seat?)
5) recover rear bench in Kombi gray or find proper $$$ split rear
6) install Z-Bed brackets...or just remove rear bench when camping?
7) oil temp / pressure gauges?
?
_________________
1963 Type II Kombi
1977 Type I Fuel Injection
http://instagram.com/john_aka_dubstar/
http://web.stagram.com/n/john_aka_dubstar/
"you could transport really tall things too, like a giraffe" |
|
| Back to top |
|
|
EverettB 
Administrator

Joined: April 11, 2000
Posts: 71867
Location: Phoenix 602
|
| Posted: Wed Jul 04, 2012 10:30 am Post subject: |
|
|
Looks pretty nice in the pics, congrats on the purchase.
Bummer about the battery tray but if the battery was unsecured... I have seen that same thing too.
I had a bus with a crusty original battery tray arrive with the battery punched 1/2 way through the tray. This was actually better than bouncing around as the battery was stuck so it didn't dent up the corner.
_________________
How to Post Photos
Everett Barnes - [email protected] | My wanted ads
"Water is the only drink for a wise man" | "Communication prevents complaints"
Stop dead photo links! Post your photos to The Samba Gallery! |
|
| Back to top |
|
|
dubstar
Samba Member
Joined: January 17, 2009
Posts: 1438
Location: New York
|
| Posted: Wed Jul 04, 2012 10:38 am Post subject: |
|
|
Posted: Tue Jun 29, 2010 9:54 pm
removed the old, crusty cargo door seals tonight...mainly solid underneath, but the bottom edges of the doors, especially the rear, are going to need work before I install the new seals...any recommendations on rust neutralizers prior to painting?
door panel reinstalled showing gray fiber washers...looks better in real life, as the warping and water damage is less visible:
Posted: Fri Jul 02, 2010 10:27 pm
installed vintage Grundig FM 12V radio (roughly period-correct)...had to drill WW speaker bracket, as the existing holes were only big enough for a toothpick...got the speaker here:
http://www.turnswitch.com/speakers.htm
sounds pretty good for a single speaker...tried to use the ipod, but needs to be charged
looks pretty good installed...I'll probably change the knobs, but it's fine for now...listened to some jazz and beatles while cleaning up and enjoying a frosty Red Oval...the stars were visible from inside as I finished the beer
the speaker bracket is only visible because of the flash...also installed silver-beige dash handle
took the bus over to gene to check out a perceived increase in noise while driving this past weekend...wheel bearings had been suggested, but during the test drive, gene loaded up the wheels from side to side and there was no change in noise...fairly constant and increases with speed...hopefully he'll have time to get it in the yard next week to check front wheel bearing first, then pull apart the reduction gear boxes to check the bearings...he also mentioned the possibility of it being the differential, which would be much more of a hassle...seems to shift very well, so hopefully it is one of the upper bearings in the RGBs, as that would be much easier to replace...hopefully this is not a result of the low transmission fluid level we found last week (check yours)
so it looks like the bus will most likely not be making it to trailbash, only short trips to bbqs and such 
on a positive note, he said it drove well and the "clunk" in the rear seems to be external and possibly a broken spot weld or something similar, which is what Bill thinks...this would be vastly preferable to a worn fulcrum plate, which he says he has rarely seen
turns out ALL wheel bearings were shot and simply repacked with fresh grease
Posted: Mon Oct 18, 2010 9:13 pm
I put some miles on the bus... 
tonight's order:
Your Wolfsburg West Shopping Cart
Part # Description Price Qty. Total Adjust Qty.
211857513
OUTSIDE MIRROR, round, highly polished aluminum backing as original. Requires arm and clamp for proper mounting, which are sold separately, fits left and right, made by Wolfsburg West, each
$21.95 1 $21.95
211841387A
CARGO DOOR CHECK STRAP, includes cleat, 1961-1967 Bus, 1958-1961 double cab models, black, each, Wolfsburg West reproduction
$8.50 1 $8.50
211817757
AIR DUCT FLAP SEAL, seals inner flap located inside fresh air duct, 1955 (1955 Bus, starting at chassis # 20-117903) -1967 Bus
$6.00 1 $6.00
N177222
DASH LIGHT BULB, fits all illuminated dashinstruments, 12 volt, each
$1.25 2 $2.50
N177252
BUS DOME LIGHT BULB, 12 volt, 5 watt, 2 required per dome light for Mid'55-1967 Bus, 1 required per dome light for 1968-1975 Bus, each
$1.60 3 $4.80
111209147
FUEL FILTER, in-line plastic translucent style, fits 1971-1974 Beetle, also works for generic applications for all non-fuel injected Beetle and Bus models
$1.95 2 $3.90
N17121116
FUSE, 16 amp, red, each
$0.25 4 $1.00
N1712118
FUSE, 8 amp, white, each
$0.25 4 $1.00
211809297
CARGO DOOR CHECK STRAP RELEASE PIN, white enamel coated steel, identical to original, fits all Buses through 1967, and 1959-1979 double cab models, made by Wolfsburg West, each
$4.00 1 $4.00
211945245A
TAILLIGHT SEAL, seals taillight assembly to body, fits 1962-1971 American style (red lens) tail lights, fits left and right, Wolfsburg West reproduction.
$12.00 2 $24.00
211857551A
SUN VISOR, off-white padded, fits all Buses through 1967, fits left and right, made by Wolfsburg West, pair
$48.00 1 $48.00
131721551
ACCEL CABLE BOWDEN TUBE, 66-71
$19.95 1 $19.95
111721365
BOOT, tip of bowden tube, all years Bug and Bus
$1.25 2 $2.50
111298101A
HEATER CABLE CLAMP, late style, fits all Beetles and Bus, each
$7.50 2 $15.00
211721555A
ACCELERATOR CABLE, Mar'55-1965 (1965 Bus through chassis # 215036650) Bus, German, 3564mm/140.3 inches
$7.00 1 $7.00
111711691
HEATER CABLE SEALS, seals heater cables as they exit chassis, -1965 Bug, -1967 Bus, set of 2, made by Wolfsburg West
$3.50 1 $3.50
211955425C
WIPER BLADE, silver, fits all Buses through 1967, fits left and right, Made by Wolfsburg West, sold each
$14.00 2 $28.00
ZVW180BUS
ACCESSORY DASH BASKET, Looking for a safe place to store your cold soda or cup of joe while driving your early Bus? Our new accessory baskets are the perfect anecdote for taming your beverages, and room to spare for stowing your munchies. Made of durable steel wire frame, and coated with soft Plasticoat to prevent dashboard marring. White, fits all mid'55 - 1967 Buses
_________________
1963 Type II Kombi
1977 Type I Fuel Injection
http://instagram.com/john_aka_dubstar/
http://web.stagram.com/n/john_aka_dubstar/
"you could transport really tall things too, like a giraffe" |
|
| Back to top |
|
|
dubstar
Samba Member
Joined: January 17, 2009
Posts: 1438
Location: New York
|
| Posted: Wed Jul 04, 2012 10:40 am Post subject: |
|
|
| EverettB wrote: |
Looks pretty nice in the pics, congrats on the purchase.
Bummer about the battery tray but if the battery was unsecured... I have seen that same thing too.
I had a bus with a crusty original battery tray arrive with the battery punched 1/2 way through the tray. This was actually better than bouncing around as the battery was stuck so it didn't dent up the corner. |
thanks, everett! I actually have had the bus for about 2 years now...just consolidating all the various thread into one comprehensive one...hopefully some useful information for people...despite the damage and other issues, the price was right...I was told that this also happened with one of the original paint mango buses that belongs to a regular samba member out here on the east coast 
_________________
1963 Type II Kombi
1977 Type I Fuel Injection
http://instagram.com/john_aka_dubstar/
http://web.stagram.com/n/john_aka_dubstar/
"you could transport really tall things too, like a giraffe" |
|
| Back to top |
|
|
dubstar
Samba Member
Joined: January 17, 2009
Posts: 1438
Location: New York
|
| Posted: Wed Jul 04, 2012 10:45 am Post subject: |
|
|
Posted: Fri Oct 29, 2010 10:50 pm
sun visors installed; pivot points greased prior to installation:
visors installed with NOS VW screws, thanks to anonymous benefactor :
drink basket; tested on Englishtown trip (removable):
cheap tail light lenses and bezels replaced by original VW parts; proper fitting seals installed:
proper late bus cargo check strap installed (I actually might prefer the earlier, longer strap, however); proper white enamel pin to replace IKEA allen wrench LOL (chipped and scraped during installation for "authenticity" ):
original style wiper blades installed:
original vinyl VW dealer folder for owner's manual purchased:
my bus was imported though the Port of LA, so theoretically it could have been sold through this LA area dealer...good enough until I find one from a New York dealer
http://www.thesamba.com/vw/archives/info/dealers/vokesmotors_sanfernando_ca.php
transmission checked and gear oil topped off...disgusting stuff
all doors, locks, and hinges greased
new fuel filter installed
oil leak identified at pressure sensor
washed and waxed
bus aligned...new drag link ordered to properly center steering wheel
1 113115193 OIL DRAIN PLUG, engine, 1961-1979 Bug, 1961-1971 Bus $2.00 $2.00 (for Bill)
2 113198031 OIL STRAINER GASKET SET, fits all 40 h.p. - 1600 cc engines $1.25 $2.50
2 221801419 SEAT MOUNT BRACKET, through 1967 Bus, each $6.00 $12.00
1 113115179 OIL STRAINER COVER, 1961-1979 Bug, 1961-1971 Bus $9.00 $9.00 (for Bill)
1 211415701D DRAG LINK, connects swing lever to steering box drop arm, 1955 (1955 Bus, starting at chassis # 20-117903) -1967 Bus $54.00 $54.00
1 111919081A OIL PRESSURE SENDING UNIT 1 0 $5.50 $5.50
Before heading to Englishtown, I took a ride down to the nature preserve in Lido...I haven't been there in a while and I highly recommended a visit...a few photos now and more later:
thanks for looking...
_________________
1963 Type II Kombi
1977 Type I Fuel Injection
http://instagram.com/john_aka_dubstar/
http://web.stagram.com/n/john_aka_dubstar/
"you could transport really tall things too, like a giraffe" |
|
| Back to top |
|
|
dubstar
Samba Member
Joined: January 17, 2009
Posts: 1438
Location: New York
|
| Posted: Wed Jul 04, 2012 10:53 am Post subject: |
|
|
bus bbq specialty:
Posted: Sat Oct 30, 2010 6:52 pm
today I attempted to get the turn signal indicator on the speedometer to work...changing the bulb had no effect, so tomorrow I will follow-up on this:
hazetguy wrote:
i use german made 3 prong turn signal relays. the incredibly common ones found on just about every VW since 1970. new ones are about $10.
wiring is as follows:
3 prong relay, 12v, common
terminal 31: ground to body
terminal 49: + from + on fuse block (powered only when key is on, 2nd from right)
terminal 49a: (blue) wire to turn signal indicator bulb in speedometer *and* blk/grn/white from turn signal switch (piggybacked on the same terminal)
the bus has been sleeping in the garage overnight for the last month or so...tight fit, but it's in there...I was going to move something out of the corner of my garage and I didn't, so now I am looking for L82 silver white paint to touch up the front bumper...
englishtown trophy 
(fun, but not really on my list of important things)
one afternoon, I ran into this '68 Ghia from Oceanside:
Posted: Sat Oct 30, 2010 10:26 pm
just missed a free split middle seat
Posted: Sun Oct 31, 2010 5:41 pm
getting back to my bus...
here are the aforementioned screws that were donated...thanks again:
fun stuff
OKAY!
Posted: Sun Nov 14, 2010 10:09 pm
some more updates...
I picked up a mileage counter / fuel reminder...made in Germany...I glued a small magnet to the back and keep it on the metal parcel shelf when driving:
new white plastic end caps on the rack to match the front:
2/3 bay window middle seat installed (thanks to Gibbs for the donation CORRECTION: I TRADED ONE USED PENCIL FOR THIS SEAT)...works much better than the full seat with the walk-through...eventually I hope to either replace with a real split 2/3 middle, or have it recovered:
cleaned and installed original-style oil bath air cleaner...part #261129613 dated 5/64...close enough for jazz (thanks to Manny for the part):
out with the old:
in with the new (battery temporarily located on driver's side, so it's a bit cluttered):
Jesse stopped by with his R32 Turbo AWD...one word: fast:
the old oil pressure switch was leaking from the plastic center, so I replaced it:
replaced broken pop-out window latch with original part (thanks to Matt Cuddy for the part):
new steering dampers and all tie rod ends and non-adjustable tie rod (passenger side) replaced (thanks to Bill for the assistance):
center pin replaced (thanks to Bill for the assistance and Glenn A for the tools):
new Koni GR-2 front shock absorbers installed by Gene's Volksworld:
bus aligned, new drag link installed, splash pan re-drilled and mounted, and grease job by K's Automotive in Mineola...big improvement, perhaps Vanco 8s next to complete the job?:
radio grille cloth installed from vintage 60s speaker found in the trash...subtle difference, but looks much better:
rear hatch lock adjusted to fit existing front door and cargo door key...not sure why I was told this could not be done at one of the summer shows, but it works now...not perfect, but at least I can lock the rear hatch now...I got the cargo door key working smoothly, as well, but the sliding pin / bar that actually causes the door to lock is broken off on the bottom, so it doesn't really work...I think I will check with the locksmith shop in Oceanside:
still haven't sorted out the speedometer flasher indicators...
thanks for looking!
_________________
1963 Type II Kombi
1977 Type I Fuel Injection
http://instagram.com/john_aka_dubstar/
http://web.stagram.com/n/john_aka_dubstar/
"you could transport really tall things too, like a giraffe" |
|
| Back to top |
|
|
dubstar
Samba Member
Joined: January 17, 2009
Posts: 1438
Location: New York
|
| Posted: Wed Jul 04, 2012 11:03 am Post subject: |
|
|
Posted: Sun Nov 14, 2010 10:47 pm
I forgot to add that I also picked up two overhead light assemblies for the covers, which were melted and cracked on the ones that came with the bus...installed proper 12V bulbs and the covers and it makes a nice difference:
Posted: Sun Nov 28, 2010 8:44 pm
starting problems over the last few days confirmed as a bad battery...thanks for helping sort that out, bill
the bus is now on the samba archives:
http://www.thesamba.com/vw/archives/info/dealers/fivetowns_lawrence_ny.php
next up:
paint passenger mirror arm to match driver's side and install w/ mirror (paint on the way)
paint front bumper damage from garage (paint on the way)
install preheat hose
order battery tray
finish repairing cargo door lock
install backup light (finally got the nut off with heat)
find and purchase third brake light, then install
(thanks snoop bob for the paint)
Posted: Sat Dec 04, 2010 7:14 pm
nice Optima red top purchased and installed for $130
not a moment too soon, as I discovered that the battery tray had deteriorated quite a bit since I last checked...I've read some threads that buses are especially susceptible, as the side vents allow rain and moisture in, which hastens the demise of a failing battery...so you might want to check, because the damage was not readily visible until I removed the battery...anyway, I rinsed the area and sprinkled several coats of baking soda over the acid residue, rinsing it away after allowing the acid to be neutralized...I think I got most of it out, but I will return to the area and fix it correctly in the near future...bus started right up with the new battery
also installed the pre-heat tube from the oil bath down through the tin...anyone know approximately how far down the stovepipe the tube should go?
I'm going to meet bill and the BBQ bus in about an hour and cruise over to a photography opening in Oceanside...
cruised around last night with bill and some others and the preheat seemed to help prevent stalling at lights, which is sometimes a problem when the engine is still warming up...late night pizza in RVC after the photography opening
new battery installed and secured:
EDIT: I notice I didn't remove the promotional coupons
fabricator seems to be the key DVG word this week, so lest anyone doubt my fabrication skills, today I made and installed a temporary "battery tray" to keep the road debris and winter air out of the engine compartment...cut by eye and almost a perfect fit :
it's actually strong enough to support the weight of the red top :
took a drive and stopped for a photo with this new Westfalia that appeared recently in town; no sign of the owner:
Posted: Mon Mar 14, 2011 10:57 pm
3/12/11
Ocean Parkway
GA photo:
Posted: Sun May 08, 2011 10:04 pm
with bill's assistance, I was finally able to get the passenger mirror arm installed...first, I painted the arm with Krylon Jade Green, which was graciously supplied by snoop bob from the samba...the color is a good match and I am happy with the results:
next, I tried unsuccessfully to remove the remove the door pin, which would not budge...I did cut the paint seal between the pin and the hinge, which was helpful later...bill's dad recommend using the following:
as it was sprayed, we could see it seeping in between the pin and the hinge walls, which does always happen, according to anecdotal information on the samba...after letting it sit for a while, we used blankets and blue tape to protect the paint and windows...bill then used an air hammer to free the pin...it took a while, but out it came:
hopefully, the other pins never have to be removed, as the bottom ones would not be fun to to deal with 
it took a while to adjust the arm position and mirror angle, but I think it is decent now...the mirror is fairly stable, but nowhere near as useful a view as the driver's side, which is extremely clear and accurate in distance scale...it does offer a good previously unavailable view of the blind spot, however, which is the main reason I installed it...hopefully, this will prevent any Vespa riders from being run over
initially, I did not have the metric nuts (8M 1) and I was going to order from WW...however, Ace in Island Park had them, so now both sides have the proper nuts and fiber friction washers...only the passenger side has the bendable lock washer, but I'll probably pick one up for the driver's side to make it complete (they aren't really necessary)
thanks again to busbbq bill and his dad for the assistance and hospitality
to be continued...
_________________
1963 Type II Kombi
1977 Type I Fuel Injection
http://instagram.com/john_aka_dubstar/
http://web.stagram.com/n/john_aka_dubstar/
"you could transport really tall things too, like a giraffe" |
|
| Back to top |
|
|
dubstar
Samba Member
Joined: January 17, 2009
Posts: 1438
Location: New York
|
| Posted: Wed Jul 04, 2012 11:05 am Post subject: |
|
|
Posted: Tue May 10, 2011 8:31 pm
following the installation of the mirror, we moved on to the accessory reverse light...thanks to manny, I had a nice condition hella light with glass lens to mount through an existing hole in my rear bumper:
it took forever, but after much effort, I removed the superfluous bracket and returned it to manny....I then found an original bosch reverse switch, shift rod bracket, wiring harness, and hooded light (need to check brand) for $45 and asked the seller to bring it to englishtown:
the switch and bracket alone often go for above $100, so I was very happy with the purchase...the trick now was to mount it underneath the bus...from what I can tell, these were much more common on type 1 and ghias, so some work was needed on the mounting...although I did my homework and knew where everything needed to go, my lack of proper tools and experience prevented any further progress...once again, bill and his dad (former VW and eastern airlines mechanic) came through
test fitting the switch and bracket location:
fabricating the bracket:
installed and engaged in reverse:
wired up...harness installed, ran through engine compartment, connected to coil, and back out rear corner (an inline fuse will be installed, but was temporarily misplaced):
let there be light:
tools of the trade:
later that night:
stay tuned for our next installment...
_________________
1963 Type II Kombi
1977 Type I Fuel Injection
http://instagram.com/john_aka_dubstar/
http://web.stagram.com/n/john_aka_dubstar/
"you could transport really tall things too, like a giraffe" |
|
| Back to top |
|
|
dubstar
Samba Member
Joined: January 17, 2009
Posts: 1438
Location: New York
|
| Posted: Wed Jul 04, 2012 11:11 am Post subject: |
|
|
Posted: Sat May 28, 2011 11:05 pm
continuing from the 3rd brake light thread...
straightening the bracket:
bending the bracket:
(this worked well, despite what someone had to say in another thread...I also researched butane temps and and steel / heat properties...regardless, it made it easier to bend)
adding ground wire:
essentials:
red tape used for lens (my dad's idea)...looks fairly good, but might redo it or look for an actual red lens:
I think it came out pretty well, but I lost the daylight and rushed at the end...consequently, I have a few issues and things to clean up tomorrow...
1) bracket needs to be bent back a bit more, as well as fit a bit tighter
2) the red tape has a few micro rips...redo and look for real red lens
3) I thought I was tapping into the main brake line, but I must have read the diagram incorrectly, as the 3rd light now blinks when the left flasher is engaged...this actually looks OK and definitely catches your attention...however, I'm not sure if it is legal, and I would have to tape both brake lights so it flashes L and R if I keep it this way
4) related to #3 and the previous conversation, where should I be tapping into the brake wiring to prevent this? I though the main wire went into the left then over to the right, but I obviously got that wrong...at first, I couldn't get the new light to work and switched the wiring over to the right side, thinking it might be a wiring or ground issue...turns out to have been a loose bulb, but I might have tested the flasher when wired to the right and not the left...anyway, suggestions welcome, as well as detail of how the relay mike offered would work...I'll also go back to the bentley and the samba threads
5) it also seems that my brake lights are engaging late...can the switch be adjusted, or does this require that a new one be installed? there's a few threads I can check on this...also need someone to drive behind me
thanks
(realized that there is no other way for the light to function, given the way I wired it..however, I actually like the third brake light blinking on left turns, as that a left can more dangerous than simply making a right without having to wait for an opening in traffic...pretty safe to say I will never be motivated to change it)
I'm going to leave it for the present and research a relay later...and I can always just run it from the brake switch
brake light engaging late was found to be loose contacts between bulb and base...
_________________
1963 Type II Kombi
1977 Type I Fuel Injection
http://instagram.com/john_aka_dubstar/
http://web.stagram.com/n/john_aka_dubstar/
"you could transport really tall things too, like a giraffe"
Last edited by dubstar on Wed Jul 04, 2012 11:28 am; edited 2 times in total |
|
| Back to top |
|
|
dubstar
Samba Member
Joined: January 17, 2009
Posts: 1438
Location: New York
|
| Posted: Wed Jul 04, 2012 11:18 am Post subject: |
|
|
Posted: Sun Jun 12, 2011 7:04 pm
registered and on the road exactly one year now:
continued thanks to all those who have assisted
Posted: Sun Jun 12, 2011 8:09 pm
oil change today w/ zinc additive...
Order Date: Jun:10:2011 8:05:PM PST Order Number: 150115251 Ship Method: Ground
Quanitity Number Description Price Total
1 113127521A FUEL LINE, metal, 6mm, chassis to fuel pump, includes fittings, fits all 40 h.p. engines $14.00 $14.00
1 111837211 DOOR HANDLE SEALS, through 1959 Bug, through 1964 Bus (1964 Bus, through chassis # 1222025), set of 2, Wolfsburg West reproduction $1.90 $1.90
2 211841637 CARGO DOOR HANDLE SEAL, seals cargo door handle escutcheon to cargo door, plastic injected as original, fits Mar'55-1967 Bus. *Please note: This seal fits German made handles only. For Brazilian aftermarket handles, please use 111827581 $3.00 $6.00
2 113101481F VALVE COVER GASKET, 40 h.p. - 1600cc $0.95 $1.90
1 111127591 Fuel Line Grommet, seals metal fuel line to firewall engine tin, fits 6mm metal fuel lines $0.75 $0.75
4 111209185 RUBBER FUEL LINE, original cloth covered, sold by the foot, German $2.00 $8.00
adjust valves, check timing, etc.
front 3-point retractable seat belts
looking a battery tray so the rear corner can be fixed
better adhesive for the cargo door seals
improve sleeping arrangements...either with z-bed or figure out better way to use coleman SUV air mattress
front seat covers
middle and rear seat covers
new tires
dual master cylinder
accessory battery?
???
no money for any of it
Posted: Sun Jun 12, 2011 9:08 pm
I have a backlog of VW photos to post, so here's a post-update from a few weeks back...
next to the clutch bowden tube, a thinner bowden tube was installed for the accelerator cable...I read on the samba that a frequent issue is the accelerator cable cutting into (sawing back and forth) the transmission case...sure enough, when I checked I found the same issue
we had to shorten the cable by about an inch, which was mentioned in the original samba thread...details for type 2 aficionados here:
http://www.thesamba.com/vw/forum/viewtopic.php?t=301768&highlight=bowden+tube+accelerator+cable
http://www.thesamba.com/vw/forum/viewtopic.php?t=444048&highlight=bowden+tube+accelerator+cable
as often is the case, thanks to bill for the assistance...
Posted: Thu Jun 30, 2011 9:27 am
inspection time a few weeks ago...
GA photos...returning from Litchfield:
Posted: Wed Jul 06, 2011 8:37 pm
installed front door handle seals:
they were actually quite difficult to install...perhaps the tolerances were extremely tight from the factory and the repaint added just enough thickness to prevent the handle plus seal from sliding back into the door easily...very difficult to tighten the screws, as well, as the seal needed to compress before the angle of the screw being tightened returned to normal...they look pretty good, however
also installed cargo door and rear hatch handle seals...
Posted: Tue Aug 23, 2011 9:45 am
a visit to the land of the SPVC...
here's a good one
Posted: Sun Dec 04, 2011 4:25 pm
while pulling in the garage this afternoon, a mischievous old typewriter that was foolishly being stored against the wall decided to leap into the side of my bus...
http://www.thesamba.com/vw/forum/viewtopic.php?t=490727&highlight=typewriter

_________________
1963 Type II Kombi
1977 Type I Fuel Injection
http://instagram.com/john_aka_dubstar/
http://web.stagram.com/n/john_aka_dubstar/
"you could transport really tall things too, like a giraffe"
Last edited by dubstar on Wed Jul 04, 2012 11:54 am; edited 1 time in total |
|
| Back to top |
|
|
dubstar
Samba Member
Joined: January 17, 2009
Posts: 1438
Location: New York
|
| Posted: Wed Jul 04, 2012 11:20 am Post subject: |
|
|
up to date, with a few exceptions I'll possibly post later...
greasing the front end...
arriving soon to replace the '67 tag...
to do:
finish lubrication
check and replace transmission fluid with GL4
check steering box fluid and top off
check and adjust brakes
paint muffler and damper
install new fuel lines, filter, and run proper metal line through firewall
change oil in oil bath
change oil
install NOS muffler bracket kit
adjust valves
check timing
check fuel pressure
plan and complete partial removable camper interior (jump seat, table, ?)
correct commercial grey seat covers from matt miller
M502 kombi panels from clara
medium size vintage style awning
rebuild carb
etc.
some of this I'll need assistance with, but I'm doing what I can now...
_________________
1963 Type II Kombi
1977 Type I Fuel Injection
http://instagram.com/john_aka_dubstar/
http://web.stagram.com/n/john_aka_dubstar/
"you could transport really tall things too, like a giraffe" |
|
| Back to top |
|
|
volkswagenut
Samba's Big Jerk
Joined: November 12, 2002
Posts: 3543
Location: Tennessee
|
| Posted: Wed Jul 04, 2012 11:20 am Post subject: |
|
|
Nice looking bus man.
_________________
We are a Republic, NOT a Democracy |
|
| Back to top |
|
|
dubstar
Samba Member
Joined: January 17, 2009
Posts: 1438
Location: New York
|
|
| Back to top |
|
|
cactuskombi
Samba Member
Joined: November 12, 2004
Posts: 20
Location: Auckland,New Zealand
|
| Posted: Thu Aug 09, 2012 2:36 pm Post subject: |
|
|
dubstar you've done well with this van. More updates please.
_________________
Aircooled fan since 1988. Over 50 VW's and some Porsches over that time. Max 21 aircooled. These days some aircooled with a splash of water. |
|
| Back to top |
|
|
dubstar
Samba Member
Joined: January 17, 2009
Posts: 1438
Location: New York
|
|
| Back to top |
|
|
|


