| Author |
Message |
oldeskooloval
Samba Member

Joined: September 13, 2002
Posts: 168

|
 Posted: Fri Oct 14, 2005 5:09 am Post subject: Dog Leg Replacement Posted: Fri Oct 14, 2005 5:09 am Post subject: Dog Leg Replacement |
 |
|
| I am in the process of replacing the doglegs on a 63 split bus. Does anyone have any good hints/tricks/tips that they could share? Heard of any turtorials on this site or others? I have used the search but, to no ado. I am specifically looking for the optimal places to cut and then subsquently weld in the new legs. Thanks for any info.. |
|
| Back to top |
|
 |
arthurnugen
Samba Member

Joined: January 11, 2005
Posts: 3082
Location: The PNW, where "going green" means rolling with moss.
|
| Posted: Fri Oct 14, 2005 12:38 pm Post subject: |
|
|
I just did the passenger side. I am sure I have seen a thread about this somewhere. Anyway, make sure the replacement doglegs have the correct dimensions. The one I got from WW had the channel for the rubber seal about 1/4' too wide in places. Had to take out the spot welds and reposition. Some other trimming at the rear was necessary.
Just cut out the old one where it is attached. It's a pretty straightforward process. When welding the new one in, it was tough because my replacement piece seemed slightly warped. Also, make sure the door properly opens and closes and you have the right gap between door and dogleg when closed! Take your time and good luck. I will try and post some pics when I get home tonight.
Arthur
_________________
| cdennisg wrote: |
| Lawyers don't deserve buses. |
| zozo wrote: |
| Don't worry too much. You can always trust a lawyer. |
ALWAYS WEAR STEEL-TOE BOOTS IN THE GARAGE!
1965 Bus (Riviera camper)
1972 Bug 'vert
1967 Bug sunroof
1961 Ghia 'vert
1957 DKW 3=6: 3 cylinder 2 stroke! |
|
| Back to top |
|
|
novetti
Samba Member
Joined: August 15, 2004
Posts: 469
|
| Posted: Fri Oct 14, 2005 4:37 pm Post subject: |
|
|
Hi oldeskooloval !
I replaced the both doglegs in my bus. Took a few time but nothing impossible. I uploaded a couple of pictures in the gallery you might check out.
First, take the old dogleg out. Drill the upper spot welds first, then welds inside the wheelwell, and the welds in the front.
You need a helper to hold the front section in the right position, firstly using clamps. I the fit is ok, dogleg length with a right fitting in the back section, drill a hole and rivet it by section. You will do it several times the cycle (clamp, check length, alignment, clamp again , drill, rivet, go ahead) until you reach the back end of the dogleg.
you need a good quality rivet, because you will need to push the back section of the dogleg in, and a weak rivet will twist,loose or break. A good rivet is also important because the dogleg needs to stay fixed in the bus, since you will need to open and close the door several times to verify the door gap and the fitting.
You need to check the door gap. This can only be done before welding with the dogleg riveted in place, or if you have cleco's the better.
When decide it's adjusted, WELD IT!!!
BTW this is the first dogleg I replaced ever. Is not that difficult.
Hope this may help you.
Good luck
Julio |
|
| Back to top |
|
|
pyrOman
Fire Master

Joined: July 21, 2003
Posts: 12570
Location: Over 2002 posts deleted!
|
| Posted: Fri Oct 14, 2005 4:41 pm Post subject: |
|
|
Dyum, Julio! 
Not only is that a good job but a great tutorial too!!! 
_________________
Some people are so busy being clever they don't have time enough to be wise. |
|
| Back to top |
|
|
oldeskooloval
Samba Member
Joined: September 13, 2002
Posts: 168
|
| Posted: Sat Oct 15, 2005 7:00 am Post subject: |
|
|
| That is awsome, thanks Julio and arthurnugen! Thaks for comming through. I am hopefully going to be doing this in the next week. I really appreciate the responses. |
|
| Back to top |
|
|
arthurnugen
Samba Member
Joined: January 11, 2005
Posts: 3082
Location: The PNW, where "going green" means rolling with moss.
|
| Posted: Sat Oct 15, 2005 9:58 am Post subject: |
|
|
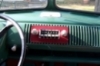
Happy to help! I don't have any pics showing the process, but here is a pic when the piece was in. (More welding is still necessary, though):
_________________
| cdennisg wrote: |
| Lawyers don't deserve buses. |
| zozo wrote: |
| Don't worry too much. You can always trust a lawyer. |
ALWAYS WEAR STEEL-TOE BOOTS IN THE GARAGE!
1965 Bus (Riviera camper)
1972 Bug 'vert
1967 Bug sunroof
1961 Ghia 'vert
1957 DKW 3=6: 3 cylinder 2 stroke! |
|
| Back to top |
|
|
novetti
Samba Member
Joined: August 15, 2004
Posts: 469
|
| Posted: Sat Oct 15, 2005 6:50 pm Post subject: |
|
|
You're welcome buddy!
Happy to help too. |
|
| Back to top |
|
|
j.pickens
Samba Member
Joined: December 03, 2002
Posts: 9831
Location: Exit 7, New Jersey
|
| Posted: Sat Oct 15, 2005 8:45 pm Post subject: |
|
|
I was reading this thread and started seeing the part about pop rivets, and thought "OH NO!". But then there was the explanation about using the rivets to align and adjust before welding. That is really clever. I've seen this done with myriad clamps, but this pop-rivet technique seems really simple.
Thanks for the tutorial.
_________________
Founder and Chairman Emeritus, ECMSAS
BBX BBXII and BBXXI Long Distance Award Winner
| BeaterBarndoor wrote: |
i wish more people would actually drive their vws rather than just talking about what they have in the garage. |
| Red Fau Veh wrote: |
| If you've seen one sunroof swivel seat kombi, you've seen them all! |
|
|
| Back to top |
|
|
kenshapiro2002
Samba Member

Joined: April 26, 2013
Posts: 1826
Location: Bawlmer Hon
|
| Posted: Wed Aug 21, 2013 6:43 pm Post subject: |
|
|
| I just got the lower dogleg only from KF, as the upper part of mine are fine. It cam in two pieces...inner and outer. The legs in the above segments seem to be all in one piece? Should I join the two parts before install or install the inner first...then the outer? |
|
| Back to top |
|
|
novetti
Samba Member
Joined: August 15, 2004
Posts: 469
|
| Posted: Wed Aug 21, 2013 7:59 pm Post subject: |
|
|
If the dogleg is in two halves, I think will be hard for you to weld them together out of the car without a jig to be sure you will be keeping it in the correct shape and curvature and with the correct seal gaps etc.
The inner will have to be welded first, because the outer skin doesn't attach to the body in the seal perimeter (it is the inner that is welded to the car in that section and the outer on the side of it).
I would drill beforehand all the holes to plugweld the inner+outer before, so after the inner is tack welded in you only need to be sure the seal gap is correct with the door alignment. Weld that first and for last the front section lip at the A pillar and the B pillar for last... |
|
| Back to top |
|
|
kenshapiro2002
Samba Member
Joined: April 26, 2013
Posts: 1826
Location: Bawlmer Hon
|
| Posted: Wed Aug 21, 2013 8:07 pm Post subject: |
|
|
| novetti wrote: |
If the dogleg is in two halves, I think will be hard for you to weld them together out of the car without a jig to be sure you will be keeping it in the correct shape and curvature and with the correct seal gaps etc.
The inner will have to be welded first, because the outer skin doesn't attach to the body in the seal perimeter (it is the inner that is welded to the car in that section and the outer on the side of it).
I would drill beforehand all the holes to plugweld the inner+outer before, so after the inner is tack welded in you only need to be sure the seal gap is correct with the door alignment. Weld that first and for last the front section lip at the A pillar and the B pillar for last... |
Sure wish I understood what you meant! Lol. There will be no welding to the "B" pillar as these are only the lower dog legs...just from the "A" pillar to part of the way up where it rises up alongside the seat pedestal. I do understand about installing the inner part separately though. Thanks. |
|
| Back to top |
|
|
busdaddy
Samba Member

Joined: February 12, 2004
Posts: 53200
Location: Surrey B.C. Canada, but thinking of Ukraine
|
| Posted: Wed Aug 21, 2013 8:19 pm Post subject: |
|
|
Predrill and clean as Novetti says and install the inner first so it fits the floor, front pillar and existing dogleg, then install the outer so it lines up with the doorskin and existing outer dogleg, those prewelded ones never fit exactly right and usually require drilling apart to do the job properly, Mr.G. saved you the trouble.
_________________
Rust NEVER sleeps and stock never goes out of style.
Please don't PM technical questions, ask your problem in public so everyone can play along. If you think it's too stupid post it here
Stop dead photo links! Post your photos to The Samba Gallery!
Слава Україні! |
|
| Back to top |
|
|
kenshapiro2002
Samba Member
Joined: April 26, 2013
Posts: 1826
Location: Bawlmer Hon
|
| Posted: Wed Aug 21, 2013 8:27 pm Post subject: |
|
|
| busdaddy wrote: |
| Predrill and clean as Novetti says and install the inner first so it fits the floor, front pillar and existing dogleg, then install the outer so it lines up with the doorskin and existing outer dogleg, those prewelded ones never fit exactly right and usually require drilling apart to do the job properly, Mr.G. saved you the trouble. |
My floor is out. Would you do the dogleg work first, or should I at least screw the new floor in prior to the dogleg work to make sure it lines up with the floor well? |
|
| Back to top |
|
|
novetti
Samba Member
Joined: August 15, 2004
Posts: 469
|
| Posted: Wed Aug 21, 2013 9:17 pm Post subject: |
|
|
| I would weld the floor first then the dogleg. |
|
| Back to top |
|
|
glideking
Samba Member

Joined: February 02, 2013
Posts: 990
Location: California
|
|
| Back to top |
|
|
rebapuck
Samba Member
Joined: May 17, 2007
Posts: 1023
Location: Chapel Hill NC
|
| Posted: Thu Aug 22, 2013 4:40 pm Post subject: |
|
|
Once it's in, keep it dry. After driving in the rain one day, I noticed water through the holes. It didn't drain until I poked through with a flexible wand. Water poured out at the jack point. AHHH! That's why they rot out.
_________________
Judy
1966 Camper "Hannah"
1967 SingleCab "Khady" |
|
| Back to top |
|
|
kenshapiro2002
Samba Member
Joined: April 26, 2013
Posts: 1826
Location: Bawlmer Hon
|
| Posted: Tue Aug 27, 2013 1:51 pm Post subject: |
|
|
Cut my old dog leg out just now. Have to repair the A-Pillar. Gonna be tedious making sure I trim the new dog leg correctly. I'll certainly cut it too large and work my way down!
|
|
| Back to top |
|
|
kenshapiro2002
Samba Member
Joined: April 26, 2013
Posts: 1826
Location: Bawlmer Hon
|
| Posted: Tue Aug 27, 2013 1:55 pm Post subject: |
|
|
Tomorrow's work before attempting dog leg patch:
|
|
| Back to top |
|
|
zozo
Samba Member

Joined: October 15, 2005
Posts: 5216
Location: South of Ol' San Antonio
|
| Posted: Tue Aug 27, 2013 2:40 pm Post subject: |
|
|
| Hats off to you Ken. To rip into this thing like you have, without having any welding skills, is ballsy to say the least. You and glideking deserve some kind of "never say die" award. Looking forward to the next installment. |
|
| Back to top |
|
|
kenshapiro2002
Samba Member
Joined: April 26, 2013
Posts: 1826
Location: Bawlmer Hon
|
| Posted: Tue Aug 27, 2013 2:46 pm Post subject: |
|
|
| I figure anything I eff up can be fixed, and hopefully somebody here will let me know! Going for "conserved" vs. "restored" also takes the pressure off...patina stays, only cancer gets cut out. |
|
| Back to top |
|
|
|


