| Author |
Message |
Sodo
Samba Member

Joined: July 06, 2007
Posts: 10813
Location: Western WA

|
 Posted: Sat Jul 14, 2007 12:36 am Post subject: installed (Syncro): big brakes + Audi 15" Wheels Posted: Sat Jul 14, 2007 12:36 am Post subject: installed (Syncro): big brakes + Audi 15" Wheels |
 |
|
Here is my installation story on a Syncro.
- Smallcar.com's "10.8" brakes" (Audi brakes modified to fit a Vanagon)
- 15" Audi 5000 Turbo wheels
- 215/75R15 BFGoodrich A/T KO tires
The short story:
1) I modified the Syncro FRONT hubs to fit the Audi 5000 wheels.
2) Smallcar 10.8" brakes install was pretty straightforward, but you have to design and fab your own support for the brake line (or use zipties).
and.....ugggggggh......
3) Audi 5000 Wheels (ET45) are not compatible with smallcar's Audi 5000 brakes (? unless wheel spacer can be used)
4) Where to get Ball-nuts for the Audi wheels? (update - from 'loogy')
5) Fitting the spare to the original carrier
It was a fight, but now the brakes are GREAT, the wheels are great, the BFG A/T KOs are great and short wheelbase 4X4 campers are great!
==========================
The blow by blow:
The first problem was figuring out how to fit the center hole to fit the 66mm Syncro hub.
I ground the Syncro hub tapered at 45 degrees to fit into the Audi wheels center hole. This part wasn't so bad, it was almost fun, challenge-wise. I jacked up one front and one rear tire (I did LF and RR so the van remained level). Start the engine and put it in Granny, and the LF and RR hubs spin at a perfect rate for shadetree CNC. Using a "reduced diameter" grinding wheel, I finessed it in there between the rotating wheels studs and machined a nice taper, just enough so the wheel can be installed.
I 'reduced' a new 4 1/2" grinding wheel by grinding rocks embedded in the cement in my driveway, ending up at diameter 3.65 inches which seemed like a good size to get in there between the studs (with a steady hand requred!). The grinding wheel 'reduces' quickly on rocks. There is about 50% of the hub collar remaining, the outer 50% is now a 45 degree taper.
Then the bigger surprise. Which I remember reading before on Samba (Dogpilot), but due to the vastness of data on "Wheels", it did not sink in.... The audi wheels have "spokes" on the backside, and they interfere with the big brake calipers. The calipers are spacer-ed outward, thus nestle in between a couple of the 5 spokes. Thus the wheel clunks back and forth about 10 degrees. You can see where it hits, thus you can see what you have to "clearance".
I had to grind about 1/8 inch thickness ( over a large area) off the Audi brake calipers (Girling 60). It took a 6 hours chunk out of my $500 wheels savings and was no fun either.....
In retrospect I would have bought Smallcar's wheels that already fit with the brakes, but the knowledge came too late to fit my schedule, which was to go camping for 5 nights (a "tomorrow departure!"). It might have been sensible to grind the wheels just a little too but you'd have to grind all 5 wheels.
(UPDATE: Or use 15mm spacers to move the ET45 wheels outward to the proper (ET30) position. But the downside is that now you have....ugh.... 'spacers'.)
=================
Wheels:
Audi 5000 Turbo and Quattro have 5-lug wheels, which can be fitted to the Vanagon with some effort. i found 5 for $25 each from a guy who had lots of them and was selling them for their scrap aluminum value.
The Audi wheel bolts are "ball end". So you will need "M14 X 1.5 Ball end nuts". But I could not find these in the time allotted, and a VW junkyard guy told me that VW does not use ball-nuts anywhere. NAPA has some ball nuts that are NOT the same ball as the Audi bolts. When you get your wheels, get a sample bolt from the Audi - you will need it to locate the proper nuts. I used ball-nuts "of the wrong ball" and am not happy about it because they don't 'seat' tight, they kind of squish their way into the wheel. They 'seated' further the first 100 miles, then again after a severe off-road jaunt, and now remain tight. But I will change them if I can find the proper nuts.
(UPDATE - I got correct ball nuts from "Loogy", what a relief, they seat correctly and you KNOW it when you tighten it, doesn't 'squish' in like a 'wrong nut, it seats tight immediately as it bottoms out). They are 17mm so you need a different lugwrench too.)
The Syncro studs could be 5mm longer for aesthetics....but they are long enough - there is more than one diameter's engagement, which is plenty strong for a nut.
Mounting the rear wheels was easy, just remove the little screws holding the drum to the hub, the Audi wheel does not have a cutout for the heads of these bolts.
=================
Brakes:
The brakes are just a little bigger than stock, but they are vented, and have dual pistons. It looks like substantially more pressure-area. And vented is good, really good.
The www.smallcar calipers are installed with a spacer pushing them outward about about 5/16 inch, which explains why Audi 5000 calipers no longer fit an Audi 5000 wheel.
The brake hose had to be re-shaped a little, but it fits just fine. Except there is no hose support for it, which is not OK. That will have to be fabricated later. Smallcar should include a couple photos like this with their brakes. Installation is easy enough but it would help if they had a suggestion what to do about the brake hose support.
(UPDATE: used zipties...until I can find time for a better solution See below)
The brake disk does NOT fit tightly around the hub, it's about .75mm larger, which means that while the wheel stud bolts are being tightened, it's hanging low, "off-center" about half that amount. I didn't like that, and tried various ways to center it. I tried to swell it inward with centerpunch peens, but they just broke off. Ended up just installing it hanging low, intending to solve it later......
About 1/4 inch needs to be cut off the end of the disc brake shroud.
I just let the calipers fill with fluid by gravity, just running in slowly from the main reservoir, until fluid was running out the bleeder screw. They filled completely in about 3 minutes. When I went to bleed the air, there was no bubbles, about the easiest bleed I've ever done.
Aside from the brake hose bracket which still needs fabrication, the brakes were 'easy'. smallcar.com included a couple copper crush-washers for a banjo-bolt, but my brake hoses screwed directly into the calipers (no banjo).
=================
The Result:
The van looks nice with the bigger wheels, but the new BRAKES TAKE THE CAKE! The new brakes 'bang' like a real car, what a difference to be "normal". I would say going to 15" wheels and the bigger brakes it allows is a huge safety bonus.
I drove it 1000 miles and I can say I'm very happy with this mod. The non-centered brake discs did not make the vibrations that I was worried about. I will try to find a way to center them, but it does not seem to be a requirement.
I hope my story is useful.
Tom
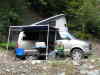
PS:Here it is the next day, at a 4WD only camp. Gallaher Head Lake, in Washington's central Cascades, 5760ft elevation. Very rocky road with lots of scraping on the way in - next time I go there I'll need about an inch more ground clearance and no front air dam.....
_________________
'90 Westy EJ25, NEW oil rings (!) 2Peloquins, 3knobs, SyncroShop pressure-oiled pinion-bearing & GT mainshaft, filtered, cooled gearbox.
'87 Tintop w 47k 53k, '12 SmallCar EJ25, cooled filtered original gearbox
....KTMs, GasGas, SPOT mtb
Last edited by Sodo on Sun Jan 27, 2008 9:31 pm; edited 12 times in total |
|
| Back to top |
|
 |
Sodo
Samba Member
Joined: July 06, 2007
Posts: 10813
Location: Western WA
|
| Posted: Sun Jul 15, 2007 6:18 pm Post subject: |
|
|
Today I modified the spare carrier to put the 215/75R15 BFG A/T KO in the original location. It functions exactly as original.
The 215/75R15 may be the largest tire that will fit without clearancing the frame rails. If it was 1/8" bigger it wouldn't fit. It rests on the front Syncro frame member, and doesn't touch the steering shaft. The cooling hoses rest on top of the tire, under their own weight. The pan operates as normal. The Shifter does not touch (it is possible that my shifter is not stock). The tire is at FULL inflation.
Also, this might be a good reason to use 6" wide Audi wheels. A 6.5 or 7" wide wheel might be more difficult to fit. But a wider wheel does not change the diameter, which is most critical.
NOTE: The spare tire cavity of the Syncro has a lot of flanges, weldments and other non-precise features protruding into it. It is very reasonable that the cavity size could vary by 1/2 inch from Syncro to Syncro! And crash damage might affect it too. On mine, if the cavity was 1/8" smaller the (new) tire probably would not fit.
In other words, the fit is so tight, its reasonable to assume that a BFG A/T KO 215R75X15 could fit in some Syncros and not others.
And here it is from the side
First I cut the hinges off.
Then fabricated new hinges that drop the pan down allowing the tire to rest on the front Syncro frame member.
This photo shows how tight the 215/75R15 fits in there.
This photo shows the steering shaft is not touching the tire. The black bands (on the undercoating) on the shaft were caused during testing - I had it crammed up tight at first.
I removed these un-nameable parts, and did not re-install.
Well I hope this helps someone else out there. I think a little more angle on the hinges could accomodate a slightly larger tire (225 or 235) with a nylon sleeve over the steering shaft and the frame rails trimmed (but don't cut off the spotwelds!)....but I'm not going to try it. The tire sits on the forward Syncro crossmember, and that's the limit.
Tom
_________________
'90 Westy EJ25, NEW oil rings (!) 2Peloquins, 3knobs, SyncroShop pressure-oiled pinion-bearing & GT mainshaft, filtered, cooled gearbox.
'87 Tintop w 47k 53k, '12 SmallCar EJ25, cooled filtered original gearbox
....KTMs, GasGas, SPOT mtb
Last edited by Sodo on Fri Sep 12, 2008 7:26 pm; edited 3 times in total |
|
| Back to top |
|
|
wbx
Samba Member

Joined: April 11, 2005
Posts: 1254
Location: Monterey, CA
|
| Posted: Mon Jul 16, 2007 12:16 am Post subject: |
|
|
Very nice and detailed posts - quality stuff! That is definitely the most clearly documented Audi big brake upgrade i've seen.
Thanks,
-Damon
_________________
'84 Westy (first owner).......but my daily driver has pedals
My "perspective" mantra:
A Volkswagen Vanagon is just a material thing,
As such, it is of the earth,
And if i need to, I can let my Van go. |
|
| Back to top |
|
|
Bern
Samba Member
Joined: March 08, 2004
Posts: 152
Location: Issaquah, WA
|
| Posted: Mon Jul 16, 2007 1:49 am Post subject: |
|
|
hey tom! good to see you here on the samba. looks like you did well on the wheels! sorry i couldn't help you out on that aspect. Van looks good! We'll have to meet up sometime.
I am curious about that camping location, is it really Gallaher head lake? or did you mean Gallager head lake? I know of a gallager head lake that is up in the cascades behind the cle elum area. I used to ride horses and whatnot back up that way, Lake Anne is beautiful! Anyhow, that looks like the same spot, and I always wondered how it was accessible by car, I've seen the roads, but don't know where they start. Do share. Of course if this is a completely different spot then nevermind and disregard  . . |
|
| Back to top |
|
|
Sodo
Samba Member
Joined: July 06, 2007
Posts: 10813
Location: Western WA
|
| Posted: Mon Jul 16, 2007 1:30 pm Post subject: |
|
|
Update,,,,,, you can't just cram the spare in. If it touches the knuckle of the steering shaft, the knuckle clunks past a side-knob when you turn, producing an oscillating friction, which is quite annoying when driving.....
When placing the spare tire in the holder -----> BEFORE tightening the bolt at front <----- you have to lever it towards the passenger side so it does not touch the steering shaft, especially the knuckle. ----> Then tighten the front bolt.
Tom
_________________
'90 Westy EJ25, NEW oil rings (!) 2Peloquins, 3knobs, SyncroShop pressure-oiled pinion-bearing & GT mainshaft, filtered, cooled gearbox.
'87 Tintop w 47k 53k, '12 SmallCar EJ25, cooled filtered original gearbox
....KTMs, GasGas, SPOT mtb
Last edited by Sodo on Mon Sep 03, 2007 10:18 am; edited 1 time in total |
|
| Back to top |
|
|
Sodo
Samba Member
Joined: July 06, 2007
Posts: 10813
Location: Western WA
|
| Posted: Sun Sep 02, 2007 10:28 am Post subject: |
|
|
UPDATE, after a month or so, the spare has NOT migrated back to touch the steering shaft knuckle - so if you lever it away from the steering, it seems to stay put.
Also here is how I decided to secure the brake line, with 2 zip-ties. The goal is to prevent the steel line from flexing/cycling under road knocks. And to keep it "in tight" that road debris can't get behind it. I would like a better arrangement but it seems very secure like this.
mumbo-jumbo alert!!! ----> I decided against a metal bracket, because to enlist an existing brake bolt to perform a "second function" might result in a net loss of reliability.
And here is the final photo of the Syncro with Audi wheels. My final advice to those who want to use the Audi wheels is that if installed without spacers, the Van will have a narrower track (15+15=30mm). My van drives perfectly though. Perhaps more important is to locate the correct lugnuts. These Audi wheels are not necessarily a low-cost 15" wheel - there are lots of little tasks and bits to pay for to get them on.
_________________
'90 Westy EJ25, NEW oil rings (!) 2Peloquins, 3knobs, SyncroShop pressure-oiled pinion-bearing & GT mainshaft, filtered, cooled gearbox.
'87 Tintop w 47k 53k, '12 SmallCar EJ25, cooled filtered original gearbox
....KTMs, GasGas, SPOT mtb |
|
| Back to top |
|
|
brooklynvanagon
Samba Member
Joined: September 05, 2007
Posts: 177
|
| Posted: Thu Nov 29, 2007 10:00 pm Post subject: |
|
|
One of our own, username: Loogy
Has ball radius nuts... very knowledgable about application. |
|
| Back to top |
|
|
Sodo
Samba Member
Joined: July 06, 2007
Posts: 10813
Location: Western WA
|
| Posted: Thu Jul 02, 2009 11:43 pm Post subject: |
|
|
| brooklynvanagon wrote: |
One of our own, username: Loogy
Has ball radius nuts... very knowledgable about application. |
BALL RADIUS NUTS! I agree! Who could possibly know SO MUCH about VW wheels. Anyway I was very thankful that somebody knew what fits, and furthermore HAD them, and sent them to me!
_________________
'90 Westy EJ25, NEW oil rings (!) 2Peloquins, 3knobs, SyncroShop pressure-oiled pinion-bearing & GT mainshaft, filtered, cooled gearbox.
'87 Tintop w 47k 53k, '12 SmallCar EJ25, cooled filtered original gearbox
....KTMs, GasGas, SPOT mtb |
|
| Back to top |
|
|
Astro Guy
Samba Member
Joined: July 17, 2008
Posts: 116
Location: Bellingham, Wa
|
| Posted: Fri Jul 03, 2009 12:25 am Post subject: |
|
|
| Bern wrote: |
hey tom! good to see you here on the samba. looks like you did well on the wheels! sorry i couldn't help you out on that aspect. Van looks good! We'll have to meet up sometime.
I am curious about that camping location, is it really Gallaher head lake? or did you mean Gallager head lake? I know of a gallager head lake that is up in the cascades behind the cle elum area. I used to ride horses and whatnot back up that way, Lake Anne is beautiful! Anyhow, that looks like the same spot, and I always wondered how it was accessible by car, I've seen the roads, but don't know where they start. Do share. Of course if this is a completely different spot then nevermind and disregard . |
Yes, I realize that this question is two years old, and please pardon me for jumping in. I too recognized the area right away from the photo.. The location Tom speaks of is the Cle Elum location that you think it is. Many years ago, Washington State was redoing old maps and saw the name Gallaher Head Lake and thought it must be a typo and should obviously be Gallagher Head Lake, so they changed it. A few generations later, the Gallaher grand kids went to the state with evidence and were able to change it back.
It is now officially Gallaher Head Lake, again.
Fortune Creek trail is the trail that leads up to the lake. Its rated Easy 4x4 trail. The first time I did it was in my van at night following a couple Land Rovers. Didn't see how beautiful the area was till we awoke in the morning.
Great thread indeed.
_________________
'03 Chevy Astro w/ NP233C 4x4 electronic shift transfer case, 4-5" Overlandvans lift kit, 4:10's w/ Detroit Locker, Rancho 9000 adjustable shocks w/ in-dash remote & onboard air compressor, 255 70R16 AT's, GTRV pop top w/ sleeper, Carefree Awning, Guacho couch, Coleman Fridge, and tons of Thule |
|
| Back to top |
|
|
Jim Norris
Samba Member
Joined: June 16, 2004
Posts: 13
Location: Canton. oHIo
|
| Posted: Mon Aug 24, 2009 8:44 pm Post subject: 15 inch Steel Wheels for your Brake conversion for sale |
|
|
| A complete set of 15" Audi V8 Q, wheels for sale. Two of the wheels have been machined to fit the front hubs on 2 whl dr, Vanagons. Install bigger and better tires and upgrade your brakes. Fifty bucks each plus shipping. Zip Code 44647 NE Ohio Tel. 330 832 8344 |
|
| Back to top |
|
|
UngaWunga
Samba Member
Joined: May 18, 2016
Posts: 172
Location: NH
|
| Posted: Tue Oct 17, 2017 5:12 pm Post subject: |
|
|
| Sodo wrote: |
Today I modified the spare carrier to put the 215/75R15 BFG A/T KO in the original location. It functions exactly as original.
The 215/75R15 may be the largest tire that will fit without clearancing the frame rails. If it was 1/8" bigger it wouldn't fit. It rests on the front Syncro frame member, and doesn't touch the steering shaft. The cooling hoses rest on top of the tire, under their own weight. The pan operates as normal. The Shifter does not touch (it is possible that my shifter is not stock). The tire is at FULL inflation.
Also, this might be a good reason to use 6" wide Audi wheels. A 6.5 or 7" wide wheel might be more difficult to fit. But a wider wheel does not change the diameter, which is most critical.
NOTE: The spare tire cavity of the Syncro has a lot of flanges, weldments and other non-precise features protruding into it. It is very reasonable that the cavity size could vary by 1/2 inch from Syncro to Syncro! And crash damage might affect it too. On mine, if the cavity was 1/8" smaller the (new) tire probably would not fit.
In other words, the fit is so tight, its reasonable to assume that a BFG A/T KO 215R75X15 could fit in some Syncros and not others.
And here it is from the side
First I cut the hinges off.
Then fabricated new hinges that drop the pan down allowing the tire to rest on the front Syncro frame member.
This photo shows how tight the 215/75R15 fits in there.
This photo shows the steering shaft is not touching the tire. The black bands (on the undercoating) on the shaft were caused during testing - I had it crammed up tight at first.
I removed these un-nameable parts, and did not re-install.
Well I hope this helps someone else out there. I think a little more angle on the hinges could accomodate a slightly larger tire (225 or 235) with a nylon sleeve over the steering shaft and the frame rails trimmed (but don't cut off the spotwelds!)....but I'm not going to try it. The tire sits on the forward Syncro crossmember, and that's the limit.
Tom |
awesome and helpful post. I tried this today, worked 95%. I need to remake the brackets with a larger angle as my steering knuckle is tweaking one of the treads of my tire now. Its close, so remaking them with a 45deg angle should do it. Thanks again. |
|
| Back to top |
|
|
Sodo
Samba Member
Joined: July 06, 2007
Posts: 10813
Location: Western WA
|
| Posted: Tue Oct 17, 2017 9:36 pm Post subject: |
|
|
| UngaWunga wrote: |
| awesome and helpful post. I tried this today, worked 95%. I need to remake the brackets with a larger angle as my steering knuckle is tweaking one of the treads of my tire now. Its close, so remaking them with a 45deg angle should do it. Thanks again. |
That happened to me too, then I learned to shove the wheel away from the steering knuckle (towards the passenger side) before cranking the shell down (up). Alternatively you can pry the wheel away, with a lever after it's tightened down. It stays where you put it, doesn't move back and touch the steering.
Also I tested a 15x7.5 Rhein wheel with BFG215/75R15 and it fit. A word of caution though, a 15" wheel is very close to the limit and any variations in tire size (or VW) might not fit together. But if it fits, congrats, you have made use of the spare carrier! I like that the clamshell protects from cutting the lower front of the sidewall.
_________________
'90 Westy EJ25, NEW oil rings (!) 2Peloquins, 3knobs, SyncroShop pressure-oiled pinion-bearing & GT mainshaft, filtered, cooled gearbox.
'87 Tintop w 47k 53k, '12 SmallCar EJ25, cooled filtered original gearbox
....KTMs, GasGas, SPOT mtb |
|
| Back to top |
|
|
UngaWunga
Samba Member
Joined: May 18, 2016
Posts: 172
Location: NH
|
| Posted: Mon Oct 23, 2017 2:41 pm Post subject: |
|
|
| Sodo wrote: |
| UngaWunga wrote: |
| awesome and helpful post. I tried this today, worked 95%. I need to remake the brackets with a larger angle as my steering knuckle is tweaking one of the treads of my tire now. Its close, so remaking them with a 45deg angle should do it. Thanks again. |
That happened to me too, then I learned to shove the wheel away from the steering knuckle (towards the passenger side) before cranking the shell down (up). Alternatively you can pry the wheel away, with a lever after it's tightened down. It stays where you put it, doesn't move back and touch the steering.
Also I tested a 15x7.5 Rhein wheel with BFG215/75R15 and it fit. A word of caution though, a 15" wheel is very close to the limit and any variations in tire size (or VW) might not fit together. But if it fits, congrats, you have made use of the spare carrier! I like that the clamshell protects from cutting the lower front of the sidewall. |
Yeah, I wanted the clamshell to protect the tire as well. Having it out on the complete open with the extended wire type carriers didn't seem like a good solution. I did end up using a piece of pvc tubing to cover the steering rod to protect the tire from rubbing.
Pic of my setup;
I made up two sets, one with a larger angle. Ended up not using it. Someone make an offer + shipping and its yours. I'll even include the bit of 1" pvc tubing to cover the steering rod. Ugly but strong welds. You'll want to paint them since they're just mild steel.
|
|
| Back to top |
|
|
Sodo
Samba Member
Joined: July 06, 2007
Posts: 10813
Location: Western WA
|
| Posted: Wed Jun 27, 2018 5:19 pm Post subject: Re: installed (Syncro): big brakes + Audi 15" Wheels |
|
|
Got a PM today about my wheels so I decided to post an epilogue on my Audi 5000 wheel project. I got them for $25 each back in 2007 which I thought was a great deal. I gotthem on the van, but they are ET45, and the van needs ET30, so this resulted in my van track being 15+15=30mm=1.25" narrower than a normal van.
I drove it like that for 9 years then 2 years ago made it right. You will need 15mm spacers, longer studs, and the special ball-seat nuts. Getting all this stuff and removing your hubs etc, pressing out/in the longer studs etc could cost more than other NEW wheels that simply bolt on.
For 2WD you may need to have the wheels machined, but possibly the spacers will allow them to fit 2WD fronts without machining the wheels. I don't know anything about 2WD, only what I heard sometime years ago.
I ground down my (4wd front) hubs to fit the wheels, then later adding the spacers, the grinding was not necessary. If you want to install longer studs on the 4WD, note that you have to buy NEW front wheel bearings because you destroy your bearings getting the hubs off (to change studs). It's a BIG job to put longer studs on a Syncro front. The rear was fairly easy (same as 2WD).
Also I had to buy two hubcaps on eBay.
Contact Samba member T3Technique for the studs and spacers and special nuts.
_________________
'90 Westy EJ25, NEW oil rings (!) 2Peloquins, 3knobs, SyncroShop pressure-oiled pinion-bearing & GT mainshaft, filtered, cooled gearbox.
'87 Tintop w 47k 53k, '12 SmallCar EJ25, cooled filtered original gearbox
....KTMs, GasGas, SPOT mtb |
|
| Back to top |
|
|
|


