| Author |
Message |
JeffRobenolt 
Samba Member

Joined: February 25, 2007
Posts: 1531
Location: Wisconsin

|
 Posted: Sat Jan 24, 2009 5:59 pm Post subject: Pic's of mounting holes for Jumpseats? Posted: Sat Jan 24, 2009 5:59 pm Post subject: Pic's of mounting holes for Jumpseats? |
 |
|
I Just bought a pair of jump seats and would like a pic of the mounting holes if anyone has them. I heard to weld 5/8 nuts to the floor, but I wanted to see the factory holes first.
Thanks Jeff
_________________
For OEM Subaru and SixStar parts and harness modications
AVsubaruconversions.com |
|
| Back to top |
|
 |
1621
Samba Member
Joined: May 15, 2006
Posts: 2174
|
| Posted: Sat Jan 24, 2009 6:21 pm Post subject: |
|
|
Don't have the factory holes, but you can check my gallery to see what I did. 5/8" nut welded to steel plate, welded to the floor. Sounds like that's the direction you'll need to go anyway. The stock holes look like a small piece of tube in the floor.
_________________
'85 Westy |
|
| Back to top |
|
|
binger59
Samba Member

Joined: December 09, 2007
Posts: 237
Location: Oswego, NY
|
| Posted: Sat Jan 24, 2009 6:28 pm Post subject: |
|
|
I also went the 5/8 nut idea but i jb weld them to the floor worked out perfect. Check out my gallery if you'd like also
_________________
Binger
1984 Westy
1986 7 Pass R.I.P. Donor van
2019 Jetta
2014 Passat R.I.P
2025 Atlas
2006 Passat R.I.P.
1998 Jetta R.I.P.
1984 Vanagon R.I.P. |
|
| Back to top |
|
|
JeffRobenolt
Samba Member
Joined: February 25, 2007
Posts: 1531
Location: Wisconsin
|
| Posted: Sat Jan 24, 2009 8:49 pm Post subject: |
|
|
Thanks guys that is what I needed. How did you guys decide to put the back bracket? Do you just center the jumpseat with the front passenger seat?
Thanks Jeff
_________________
For OEM Subaru and SixStar parts and harness modications
AVsubaruconversions.com |
|
| Back to top |
|
|
1621
Samba Member
Joined: May 15, 2006
Posts: 2174
|
| Posted: Sat Jan 24, 2009 9:47 pm Post subject: |
|
|
I mounted the bracket last. However you decide to mount the seat, make certain you set the bottom holes first. I centered the seat on the passenger seat and made certain there was enough clearance between the armrest and the slider (I used a captains chair). That will determine where you mount the bracket to the van. After all is welded up and secure, then put the seat back in and align the bracket based on where the seat lines up. Then simply drill the holes and mount the bracket with appropriate hardware. Forgot what size I used, but it was the largest and strongest metric bolts I could find that would fit. Also used big ass fender washers on the back side to keep things from potentially pulling through. Lastly, make certain you pull out your battery and move your gas filler neck (2wd) out of the way before you start drilling.
_________________
'85 Westy |
|
| Back to top |
|
|
goffoz
Samba Member
Joined: May 09, 2007
Posts: 1486
|
| Posted: Sat Jan 24, 2009 10:15 pm Post subject: |
|
|
| 1621 wrote: |
| Lastly, make certain you pull out your battery and move your gas filler neck (2wd) out of the way before you start drilling. |
If you have a 2wd, the breather tanks are in the way!!!
remove them, before you drill!
The original mount is Not centered on the front seats...its inboard about 50mm
..but centered is better,in my opinion, and works just fine.
I welded black iron pipe,(3/4" I think) to stock middle seat rails...
I cut one seat rail in half..that way I could fudge the position until it was perfect.
I was replacing the middle seats anyhow
...then I bolted the rails sections thru the floor...three bolts each.
********Be careful of the AC lines/ coolant lines/ and wiring*****
.....depending on year and placement
I also made a mounting bracket, so that, a front seatbelt (lap/sash) can be used on the jumpseat..its stronger than stock..and way more convenient.
I can try to post pics..but give me a little time to get it right.
thanks |
|
| Back to top |
|
|
JeffRobenolt
Samba Member
Joined: February 25, 2007
Posts: 1531
Location: Wisconsin
|
| Posted: Sun Jan 25, 2009 6:34 am Post subject: |
|
|
Pics please. I havn't figured out how to post them yet also.
Jeff
_________________
For OEM Subaru and SixStar parts and harness modications
AVsubaruconversions.com |
|
| Back to top |
|
|
hiram6
Samba Member
Joined: September 29, 2006
Posts: 1880
Location: Beautiful South
|
| Posted: Sun Jan 25, 2009 7:10 am Post subject: |
|
|
Here are a few words of advice on doing this mod, so you can learn from my mistakes.
First off, don't worry about factory measurements, get the seat in there and position it to your liking. Because I was using a captain's chair (my old driver's seat) I had to allow for the armrests, so it wound up slightly more towards the center of the van than I think the original spot would be. In the end it's not noticeable, and looks just fine.
Secondly, if you are doing a 2WD, you must remove the vapor tank in the wheel well in order to mount the upper bracket. You don't want to drill into it, and you need access back there to tighten the nuts on the bolts you will use to mount the bracket. As someone above said, use some substantial fender washers on the backside to distribute the load.
Now, let's talk a little more about that vapor tank. If you've never removed your vapor tank, here are some cautions. Both of these happened to me.
-The tank is held up by two things. First a bolt protrudes from the top of the fender well through an eye in the tank. PB blaster the crap out of this bolt, even if that means having to wire-brush undercoating out of the way. On my van, this bolt snapped off, and I had to drill it out and replace it. Big PITA. Also note the rear of the tank is held up by a depression in the rear of the wheel well. There's a bulge in the plastic tank that fits into a corresponding depression in your sheet metal. This comes into play later.
-Use extreme caution in removing the three vapor line connections from the tank, or you'll snap off the nipple on the tank. I did. Twice. In retrospect, what I should have done is cut the hose a few inches from the tank, and then just spliced the lines, rather than risk breaking the nipple of the NLA tank itself. I was able to find a used tank locally, you may not be so lucky.
Okay, last tip. remember how the rear of the tank has to fit into a depression? Guess what, this is the same place your bolts are going to be coming through from your upper bracket. In order for that rear tank support design to still work, you are going to need to cut off the bolts flush with the nuts. On mine that gave the tank just enough clearance to still catch in the depression. The tank isn't really heavy, so it may seem like you don't need that rear support, but you will see that you do. Without it, the tank will be all floppy in there, and eventually I think the front support would snap from the motion.
As you can tell from my notes, the tank is more of PITA to deal with than mounting the seat!!!! 
Click on my webpage below, some of the last pictures in my photo album are of this mod.
_________________
1985 Westy, 1.9L automatic (Daisy)
1996 Mazda Miata
1998 Jeep Grand Cherokee 5.9 Limited
You can't lie around on the beach and drink rum all day.................unless you start first thing in the morning. |
|
| Back to top |
|
|
JeffRobenolt
Samba Member
Joined: February 25, 2007
Posts: 1531
Location: Wisconsin
|
| Posted: Sun Jan 25, 2009 7:50 am Post subject: |
|
|
Thanks good info to know before I start.
Did you paint the covers on the bottom of the seat and side covers and frame? Where did you get the paint?
And where can I get a cool light like that?
Thanks Jeff
_________________
For OEM Subaru and SixStar parts and harness modications
AVsubaruconversions.com |
|
| Back to top |
|
|
hiram6
Samba Member
Joined: September 29, 2006
Posts: 1880
Location: Beautiful South
|
| Posted: Sun Jan 25, 2009 9:13 am Post subject: |
|
|
| jrobewesty wrote: |
Thanks good info to know before I start.
Did you paint the covers on the bottom of the seat and side covers and frame? Where did you get the paint?
And where can I get a cool light like that?
Thanks Jeff |
I had to disassemble the used jump seat I purchased, since I was switching my driver's seat to use as the jumpseat. When I had the seat apart, I used a textured brown rattle can from Home Depot (Rust-Oleam Autumn Brown # 223523) to paint the metal parts and the seat bottom. For the side panels, I had to do some repair, and then repaint them with a beige vinyl spray paint. No longer have the can, so I don't know the color/brand.
As for my light, I got it off ebay a while ago. I also have two shorter ones I'm going to mount somewhere else, not sure where yet.
_________________
1985 Westy, 1.9L automatic (Daisy)
1996 Mazda Miata
1998 Jeep Grand Cherokee 5.9 Limited
You can't lie around on the beach and drink rum all day.................unless you start first thing in the morning. |
|
| Back to top |
|
|
remraf
Samba Member
Joined: February 25, 2007
Posts: 291
|
| Posted: Sun Jan 25, 2009 2:47 pm Post subject: |
|
|
I am in the process of doing this right now. I just cut the factory mounts off the floor of the donor van and will be welding them in place tomorrow. My plan was to measure the placement of the existing factory holes on the wheel wells and drill holes to match.
I can't remember the name of the things I'm about to describe so maybe someone here can help. Basically, it is somewhat like a rivet except the shaft has threads at the end. There is a portion of the shaft that does not have threads so that when you tighten the bolt it flares and locks the fastener into place. I was thinking of going this route so I didn't have to mess with tack welding a bolt up in the fender well.
**I'm aware this needs to be a very solid mount so as not to kill anyone if it broke in the event of an accident** |
|
| Back to top |
|
|
meyervw
Samba Member

Joined: January 29, 2006
Posts: 470
Location: Chico, California
|
| Posted: Sun Jan 25, 2009 3:58 pm Post subject: |
|
|
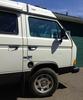
Here you go. The firs is the drivers side the second is passengers.
_________________
Spelling in my post may or may not be correct.
Gustav 1987 Wolfsburg Edition |
|
| Back to top |
|
|
stevey88
Samba Member
Joined: January 16, 2008
Posts: 1317
Location: Fremont, SF Bay Area
|
| Posted: Sun Jan 25, 2009 5:35 pm Post subject: |
|
|
remraf,
I also cut the bottom mounts off the van I got the seats from. The mounts are meant to sit in the channels of the floor. I think they weld the " ring " to the reinforcement plates after the the seat bracket are installed so it will fit right. As we cut the reinforcement off with the " ring " on , there are no guarantee that the reinforcement will sit in the floor channels. I have not mounted mine yet, but I plan to mount the floor plate first and then drill the seat brackets holes.
The rivet nuts are what you plan to use but I don't know how large they are available. I have only used 1/4 inch ones and you need a special tool to put them in.
_________________
Steve |
|
| Back to top |
|
|
kirsplat
Samba Member

Joined: April 30, 2008
Posts: 412
Location: Seattle
|
| Posted: Sun Jan 25, 2009 5:44 pm Post subject: |
|
|
One thing to keep in mind if you're welding in the jumpseat footers...
On the drivers side the brake booster vacuum hose and wiring run inboard of the frame rail and are right underneath the floor. When I welded mine in it melted the vacuum hose and I lost my power brakes. I ended up having to drop the gas tank to assess the damage and run another vacuum hose.
BTW, I offset my jumpseat a little towards the side of the van so the weld was right on top of it.
Be careful and mindful of the vacuum hose and wiring when welding the footers.

Chris
_________________
86 Syncro|EJ253|Carat |
|
| Back to top |
|
|
gator70
Samba Member
Joined: April 02, 2007
Posts: 63
Location: Santa Cruz
|
| Posted: Sun Jan 25, 2009 6:26 pm Post subject: |
|
|
| You can build jump seat footers by getting hardware at the hardware store. Just go to the elec department and the plumbing department. You will find a combination of parts that just tighten down to holes in the floor you must drill. It works great. |
|
| Back to top |
|
|
Mofus
Samba Member

Joined: February 21, 2008
Posts: 369
Location: San Diego
|
| Posted: Mon Jan 26, 2009 3:00 pm Post subject: |
|
|
Check out the link to this thread: http://www.thesamba.com/vw/forum/viewtopic.php?t=296357
1621, and I, have some pictures of the brackets that were made for the floor.
Check out my gallery, last two pages have pictures with measurements where to place the brackets:
I found the best way to find where to weld the floor brackets was to put the upper brackets in first, then put the seats in nice and level, and mark the floor with a Sharpie where to weld the brackets. In the picture you'll notice the right edge of the bracket pretty much lines up with the right edge of the seat tower (please excuse skanky fuzzy carpet).
I used the female side of 3" hinges for wrought iron gates (cut down of course). The ID is perfect like they were machined for the job. Cost about $1.99 each.
All lined up just before some grinding and welding
_________________
'87 Syncro passenger w/ 2.2L Subaru
'10 Passat Wagon (keeps Mrs. Mofus away from my van) |
|
| Back to top |
|
|
|


