| Author |
Message |
guanella74
Samba Member

Joined: March 13, 2009
Posts: 520
Location: Boulder, CO

|
 Posted: Sat Jul 17, 2010 12:42 pm Post subject: Ultimate How To MGL STRATOMASTER All-in-One Gauge Write Posted: Sat Jul 17, 2010 12:42 pm Post subject: Ultimate How To MGL STRATOMASTER All-in-One Gauge Write |
 |
|
Hey folks - I wanted to collect all the information I could on this and on my install and put it in one place to hopefully help those who might want to do the install in the future. Hope this helps someone out there!
Like others, I have cooked one motor and had various other problems that would have been easily avoided had I had the ability to monitor what is really going on in the engine at all times. Some folks like being gauge-less and letting karma take them wherever they go, which is fine; gauges can also make you psychotic about your engine if you let them, but I've found that after installing the insanely awesome MGL Avionics Stratomaster that I was only psychotic about watching them for the few couple weeks (hey, I was learning how my engine runs under different conditions!), but once the newness wears off it's really nice to just have a gauge with a bright red idiot light on it that flashes when a parameter is out of spec. It already saved my butt once when we were cruising through the desert and I noticed 2 CHT's skyrocket - the carb linkage had broken, and in 111degree heat, I likely could have done lots of damage in no time flat.
For the uninitiated, here is the run-down, and the link to get here is http://www.mglavionics.com/html/velocity_singles.html:
For our application on VW Buses (I personally have a Type4, btw, 2000cc, dual Weber IDF40 carbs, Extractor exhaust, but I believe this carries over to all aircooleds), I have mine set to monitor all four CHT's (Cylinder Head Temps), Oil pressure, Oil Temperature, RPM, Voltage, and of course 'flight time' and Hobbs cumulative driving time for long trips (hehe). The last two are just kind of fun - it automatically logs the continuous time you've been driving, and also the cumulative time. Oh, it also has a nice green backlight for night driving, and you can monitor other things such as exhaust gas temps (EGTs) if you wanted to, but I'm no Jake Raby so I left well enough alone there. The gauge is has a fairly high degree of configurability for the different parameters, too. You can set the points at which the idiot light goes off for each parameter, the max/min's on the scale, and things like whether you want the gauge to display the highest CHT reading or scan through them all at a given interval. The thing is amazing, and when a single CHT gauge like the Dakota Digital is $125+, it's a lot easier to rationalize the bang for the buck.
As a sidenote, having the gauge with the idiot light built into it means I don't have to sit and watch all the parameters if I don't want to (I obviously can if I want to, especially for tuning/whatever), which is great. I used to have an analog VDO gauge, and i about drove myself crazy watching that little needle all the time...
OK, without further adieu, here's the write up:
The materials:
Cost & Materials breakdown:
- MGL Avionics E1-EMS Velocity Single (the gauge): $295 shipped
- 20ft CHT Thermocouple wire 4-in-1 cable (shielded): $93 shipped (I think they accidentally sent me like 35 ft total, as I had waaaaaay too much. You'll likely need about 20ft). PN at omega.com is 4KX24SPP, link is http://www.omega.com/pptst/4KX_MULTIPAIR_CABLE.html and you have to scroll to the bottom and input the code into the drop-downs.
- Type K Thermocouple connectors (this is if you ever want to be able to pull your engine easily without it being attached to an umbilical cord going all the way to the front gauge. You have to use type K connectors or otherwise have a 'hot' junction with the wires directly touching each other. Cost for 4 connectors: $16. Also got them at Omega.com, PN is SMPW-K-MF and link is: http://www.omega.com/ppt/pptsc.asp?ref=SMPW_SMP_HMP_HMPW
- E-Z wire stripper (seriously, get one for this job because the number of wire ends you have to strip is ridiculous: $20
- Trailer cable (see photo) I went to my local hardware store, McGuckins, and got the 6-in-1 cable with 6 14ga wires in it, cocooned in a nice black rubber sheath. I got 21ft at a cost of $36.
- If you don't already have the oil temp sender, oil pressure sender, you'll need to buy these at a cost of ~$45 http://busdepot.com/search.jsp
- misc/smaller items: 1-Ring terminals (I had to get one size small for the plugs and dremel the ring out to fit each plug.) You also have the option of JB-Welding the (stripped and tied together) ends of each thermocouple pair to the head near the spark plug. 2-lots of spade-style (or whatever you prefer) electrical connectors. 3-A switch to turn the gauge on and off and either an inline 1 amp or 3amp fuse (MGL says 1 is fine, but I could only find 3). 4-the appropriate grinding stone bit for your dremel if you need to widen the ring terminal holes. 5-9/16 drill bit for the taco plate sending unit - $20
Total cost installed with gauge, senders, wires, and everything in between (yours may vary somewhat depending on shipping, etc): ~$574
I believe it ended up taking me about 12 hours total to install all this stuff senders, wiring, gauges, etc. It might take you less, but don't underestimate it, as it's tedious work running, stripping, connecting all those wires and senders, folks!
Here's a close-up of the CHT wire bundle:
More materials:
I also bought 4 extra ring terminals at the outset, because they're a bit soft and hard to drill/dremel out without deforming them badly. Plus after a few times of in and out when removing spark plugs from the engine, I'm bound to goof one up and need another.
Here's the inside of the trailer wire bundle: 6 wires, different colors. I only used 4 of these wires, but I like the option of using the other 2 wires in the future (ie for fuel pressure or something else neat) so they are there and already run back to the engine bay if I need them. They also had 4 wire bundles, which may be somewhat cheaper:
Here't the inside of the CHT Thermocouple Bundle; the orange wire in the middle may be ground - not sure, I chopped it off after stripping the sheath off and haven't had any ill effects:
The K-type connectors (interesting, I know). Matt at MGL said to not place these in the engine bay as it may throw off the readings - make the connections on the other side of the tin, preferably forward of the rear wheels. You'll have a bit longer umbilical running out the engine bay when you pull it next, but better than one going all the way to the gauges!
The gauge, ready for action:
I stripped off only a few inches of the trailer bundle sheath for the front connections to the gauge, and just enough to slide into the connectors (male going to female on the gauge) I was using. Note the use of one of the most amazing tools ever invented - the EZ wire stripper:
Bullet connectors crimped on:
CHT Bundle stripped out, gauge side. Each wire has a number printed on it every few inches (1,2,3 or 4) so you can pick out the pairs and not mix everything up:
I found two holes at the base of the nose cone to run each bundle through going from the gauge and down along the front sheet metal. I zip tied the bundles to the air duct at first, then ran all the way down, snaking them along the passenger side frame rail, zip tying all along the way. Since I was sent extra CHT wire, I left a few loops zip tied to one of the frame rails in case I need to chop and rewire the senders a few times in the next 30 years or whatever. This is a bit tedious pushing-pulling the wire bundles through all the holes and whatnot, not leaving lots of slack, etc, but no big deal:
For reference, this is how much was left after running the bundles under the bus and into the engine bay, using 21 ft of the black trailer bundle, and however much CHT they sent me:
Here's the back of the clock-delete plate where the gauge goes, and a shot of the connectors that come off the back of the gauge:
De-sheathed!:
Look, a CHT spark plug sender! Whether you do it like this (I stripped 5 inches or so, twisted it together and rolled it up and pinched it in the sender) or JBWELD it to the head between two fins near the plug, be sure and strip the wire pair and twist it all together first!
Here I had drained the oil, removed the taco plate, drilled a hole with a 9/16 bit I bought at the hardware store ($20, ouch!), and mounted it between 2 copper washers inside and out. It leaks  , so do it better if you can. Braze a bung on the inside or something. Its the same thread pitch as the lug nuts, btw, I think it was M14 but not totally sure.: , so do it better if you can. Braze a bung on the inside or something. Its the same thread pitch as the lug nuts, btw, I think it was M14 but not totally sure.:
I don't have a photo, but for the oil pressure sender I removed the std oil light sending unit and screwed in a male M10 to female 1/8NPT adapter into the hole in the case, which connects to a standard grease gun hose (male 1/8NPT on both ends), which connects to a female-female adapter that is 1/8 on both sides, that connects to the oil pressure sending unit. The sending unit is M10, and it connects to the 1/8, and after tightening it up I don't have any leaks after a few days. Hoping for the best there as it's really difficult sourcing this hose with M10x1.0 on both ends. The G on the sender corresponds to the gauge, and the WK goes to the idiot light.
One of the tricky parts about mounting the gauge - there are probably lots of better ways to firmly mount it, but I used....bailing wire. Yep! I bought a roll at the hardware store and used about a foot or so. I screwed in both screws most of the way, wrapped the wire around one screw, then went up and around to the top wire as shown below, then back down to the other screw and wrapped it around it and tightened both down. It was pretty simple, and has worked astonishingly well! Gauge is nice and firmly mounted, which is great because you twist and push the knob on it quite a bit:
Here is a terrible picture of it mounted in the dash. Somewhat of a self-portrait! hah.:
Heres another photo in-dash. I need to take a better one - disregard the numbers, as nothing was reading right yet at this point - took a bit of calibrating and sorting out a ground issue.
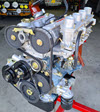
And, here's a shot of my happy engine!:
A few other thoughts on configuring the gauge:
- GROUND everything necessary to the engine block. I grounded to both the block and the body, using the black wire in the trailer wire bundle. It was already going from the gauge back so I just used it and grounded it under a tin bolt near cyl 1. If you don't do this, your gauge will just display stupid high numbers and jump all over the place constantly. Ensure that you ground your oil pressure sending unit as well if you use a relocation hose like I did.
- If you're using the VDO oil pressure gauge, set it at 5bar.
- If you choose to do the CHT senders at the spark plug, the numbers go up and down much faster than JBWelded to the head. FYI. Next time I have the engine out I'm going to ditch the spark plug senders and drill the tin for running the wire pairs through and JBwelding to head. This will also make it much less annoying to pull the spark plugs.
- Go into the settings for the different parameters on the gauge and set the alarms to make the idiot LED light go off on the gauge if they get too high or low. My engine runs hotter so I have my CHTs set to go off at 410, for example.
- Plot out your wiring for the trailer bundle and write it down so you don't get confused. In mine, I did Yellow-rpm, black-ground, oil pressure-green, oil temp-blue, voltage red. The gauge comes with instructions showing what's what coming off the gauge itself as far as wiring.
- you'll need to calibrate your tachometer on the gauge by true-ing it with a tachometer hooked up to the engine. Disregard the instructions that came with the gauge here, I talked to Matt at MGL and he said that if my ground is good on the engine block, keep turning up the pulse rate until it's correctly measuring. I ended up setting my pulse rate to something like 16.5 or 17.5 to get it right.
Enjoy the freedom the gauge gives you to not have to stare at the gauge (at least once you get over how cool it is to be able to monitor EVERYTHING!). The idiot light will flash if something is funky, so once you get it configured then go back to enjoying the drive. I just about drove both myself and my wife crazy the first two weeks with it because I was sooooo into looking at it and tweaking this and that constantly. Now, though, it's great to have, especially to avoid potential engine failures, but not worth staring at all the time.
IMO, the money spent is well worth making one's engine last that much longer, or even being able to tell that your engine is progressively getting worse via CHTs and other parameters, or simply avoiding that bad day when you forgot to connect something or you set something wrong and accidentally fry your motor.
Let me know if I can answer any questions, and hope this helps some of you!
For more information and other great posts pertaining to the MGL Avionics Stratomaster, search stratomaster, or just go to one of these:
http://www.thesamba.com/vw/forum/search.php?search_keywords=mgl+avionics&search_forum=5
--->another great writeup---> http://www.thesamba.com/vw/forum/viewtopic.php?t=301743&highlight=mgl+avionics
_________________
- Travis
1974 Westy CampMobile - the OG!
1979 Transporter
1979 Transporter
1977 Transporter
1974 Transporter
1973 Transporter
1971 Westy
Last edited by guanella74 on Sat Jul 17, 2010 9:17 pm; edited 1 time in total |
|
| Back to top |
|
 |
jopasm
Samba Member
Joined: June 17, 2010
Posts: 19
Location: Mississippi, USA
|
| Posted: Sat Jul 17, 2010 2:27 pm Post subject: |
|
|
Thanks for the nice write-up. I've been eyeing this gauge since I heard about it a couple of months ago.
Seepage from the sender at the taco plate seems to be an issue from reading through the forums. It seems that a combination of welding a nut to the plate and/or using jb weld to seal the nut along with a crush washer helps to eliminate the problem. |
|
| Back to top |
|
|
BUSBOSS
Samba Member

Joined: January 21, 2009
Posts: 2161
Location: Northern California
|
| Posted: Sat Jul 17, 2010 3:42 pm Post subject: |
|
|
Very nicely done and thank you for the detailed write-up!
I love when VWers  have the patience and attention to detail to do the job right and then take the time to share their experience with others. have the patience and attention to detail to do the job right and then take the time to share their experience with others.
Thanks again!
_________________
All the redemption I can offer, girl, is beneath this dirty hood
1976 Westfalia
1970 Karmann Ghia Convertible (sold - but not forgotten) |
|
| Back to top |
|
|
vttype2
Samba Member

Joined: February 23, 2007
Posts: 180
Location: Oxford, CT
|
| Posted: Sat Jul 17, 2010 3:49 pm Post subject: |
|
|
nice write up. i am about 2 minutes away from starting this install. i am sure i will have questions for you..... glad to see the 5 bars setting worked.
dave
_________________
1973 ASI Riviera
2.0L Dual Solex PDSIT Carbs
1982 Diesel Vanagon Camper |
|
| Back to top |
|
|
sneakyjack
Samba Member

Joined: January 14, 2010
Posts: 560
Location: SOuthern VT
|
| Posted: Sat Jul 17, 2010 4:06 pm Post subject: |
|
|
Nice documentation of photos tool and such!
let us know an update after extended use and If its saved you!
thanks
_________________
Nothin left to do....
www.idolmakerfilms.com |
|
| Back to top |
|
|
TomWesty
Samba Member
Joined: November 23, 2007
Posts: 3563
Location: Wyoming,USA
|
| Posted: Sat Jul 17, 2010 6:21 pm Post subject: |
|
|
That's just too cool! Thanks much! 
_________________
If you haven't bled on them, you haven't worked on them.
Visit: www.tomcoryell.com and check out my music! |
|
| Back to top |
|
|
guanella74
Samba Member
Joined: March 13, 2009
Posts: 520
Location: Boulder, CO
|
| Posted: Sat Jul 17, 2010 7:43 pm Post subject: |
|
|
Right on, thanks for the positive feedback guys - hope it will really be useful to some of you!
I've had it installed and running now for a three weeks and 4,300 miles (I know, right?!), and as I've driven across the country it's both taught me how to better drive the bus the right way (for example I didn't really know that I should shift into 3rd on even slight hills until I saw the temps increase so much from slight lugging in 4th), and it saved our butts in the desert and 100+ temps out when one of the carb linkages broke a piece off, and I immediately saw two CHTs skyrocket as those cylinders were doing double time to keep us going at speed. I wouldn't have known otherwise and would have tried to keep going for who knows how many miles...
It's also helped me time and tune the engine correctly - I've noticed that with the timing set too advanced, my CHT's are way higher than when I have it set correctly. This happened once on our latest road trip and I might have run with the engine CHTs super hot for who knows how long. Instead I just pulled right over and retarded the timing a degree or two and got back to happily tooting down the road.
Also, for those with carbs like mine that allow fine tuning for each cylinder's mixture, it helps with tuning appropriately. I also know my linkage is way out of sync between the two if cylinders1-2 are running a lot hotter or cooler than 3-4.
I'm a believer in the gauge for sure. And in its little idiot light that allows me the peace of mind to not hawk at the gauge all the time.
_________________
- Travis
1974 Westy CampMobile - the OG!
1979 Transporter
1979 Transporter
1977 Transporter
1974 Transporter
1973 Transporter
1971 Westy |
|
| Back to top |
|
|
SGKent 
Samba Member
Joined: October 30, 2007
Posts: 42938
Location: at the beach in Northern Wokistan
|
| Posted: Sat Jul 17, 2010 9:25 pm Post subject: |
|
|
some guy rearended the Acura this week while he was shaving, thank god it wasn't the bus. I hope you will focus on where you are going instead of playing with all the things that gauge will do 
_________________
 Canned Water - the new California approved parts cleaner (except in a drought in which case rub it with sand). Canned Water - the new California approved parts cleaner (except in a drought in which case rub it with sand).
George Carlin:
"Most people don't know what they're doing, and a lot of them are really good at it."
Skills@EuroCarsPlus:
"never time to do it right but always time to do it twice"
Last edited by SGKent on Sun Jul 18, 2010 9:55 am; edited 1 time in total |
|
| Back to top |
|
|
guanella74
Samba Member
Joined: March 13, 2009
Posts: 520
Location: Boulder, CO
|
| Posted: Sat Jul 17, 2010 10:03 pm Post subject: |
|
|
For sure, SG - wise words to all...the idiot light is the best part, IMO, so you don't have to keep tinkering with it all the time.
Were you driving the Acura? If so hope you're feeling alright - neck injuries are noooo fun, especially the latent kind that don't show up for a while...
_________________
- Travis
1974 Westy CampMobile - the OG!
1979 Transporter
1979 Transporter
1977 Transporter
1974 Transporter
1973 Transporter
1971 Westy |
|
| Back to top |
|
|
dwill49965
Samba Member

Joined: August 08, 2005
Posts: 1405
Location: Dartmouth, Nova Scotia
|
| Posted: Sun Jul 18, 2010 9:11 am Post subject: |
|
|
Great write up and documentation. For the taco plate oil temp sender leak, I would recommend using H3 Aviation gasket sealer (the goopy brown stuff, from Permatex) on both sides. It won't leak after that.
I have a Dakota digital CHT gauge, and you're right - for about 3 times the money, you can get about 10 times the functionality.
_________________
Darryl
--------------
'78 Westy, Boston Bob built 2.0 L, FI, MSD 6A |
|
| Back to top |
|
|
vttype2
Samba Member
Joined: February 23, 2007
Posts: 180
Location: Oxford, CT
|
| Posted: Sun Jul 18, 2010 10:06 am Post subject: |
|
|
RPM wire to negative on coil?
Dave
_________________
1973 ASI Riviera
2.0L Dual Solex PDSIT Carbs
1982 Diesel Vanagon Camper |
|
| Back to top |
|
|
guanella74
Samba Member
Joined: March 13, 2009
Posts: 520
Location: Boulder, CO
|
| Posted: Sun Jul 18, 2010 9:36 pm Post subject: |
|
|
dwill et al - thanks for the tips on sealing the taco plate.
vttype2, yep - if you follow the wire coming off the distributor (the condenser, mine is green) you connect rpm wire to that same side of the coil.
Rock it out! Let me know how your install goes....
_________________
- Travis
1974 Westy CampMobile - the OG!
1979 Transporter
1979 Transporter
1977 Transporter
1974 Transporter
1973 Transporter
1971 Westy |
|
| Back to top |
|
|
vttype2
Samba Member
Joined: February 23, 2007
Posts: 180
Location: Oxford, CT
|
| Posted: Mon Jul 19, 2010 4:04 am Post subject: |
|
|
install was really easy..... two afternoons, maybe a total of 4 hours. but i had all of the sensors previously installed with other gauges. anyways, everything works really well. Chts on a quick 30 min drive last night were about 330....... the only thing that needs tweeking is the RPM readings. did you have to adjust the rpm screw on the back of the gague at all? the pulse rate doesnt seem to dial it quite in, either the high end is right or the low end of the scale is right. other than that, it was quick and easy, and thanks for the tip on the bailing wire to hold that thing in. that worked great.
dave
_________________
1973 ASI Riviera
2.0L Dual Solex PDSIT Carbs
1982 Diesel Vanagon Camper |
|
| Back to top |
|
|
guanella74
Samba Member
Joined: March 13, 2009
Posts: 520
Location: Boulder, CO
|
| Posted: Mon Jul 19, 2010 9:50 am Post subject: |
|
|
Dave,
I'm interested that you brought up the RPM issue - I've been suspecting that my high end is somewhat off, however I don't have a tachometer to true it. To set mine I stopped my Verner's VW in Boulder and asked if he could just hook it up to his tach while I was idling there in the drive, and I true'd the gauge to idle speed idle, not thinking I'd need to also true it at other engine speeds or mess with the screw in the back. I'm thinking maybe I do.
How much is yours off by at either end of the spectrum? And what pulse rate are you using?
I felt a little janky about using bailing wire, but it really works nicely!
_________________
- Travis
1974 Westy CampMobile - the OG!
1979 Transporter
1979 Transporter
1977 Transporter
1974 Transporter
1973 Transporter
1971 Westy |
|
| Back to top |
|
|
WhirledTraveller
Samba Member

Joined: January 09, 2008
Posts: 1414
Location: Cambridge, MA
|
| Posted: Mon Jul 19, 2010 12:47 pm Post subject: |
|
|
For the RPM's on my stratomaster I left all the pulse settings on default and just used the screw in the back. I also installed a small capacitor to add some filtering (not sure if it was necessary). It took a little trial and error with the screw until I got solid readings at both low and high RPM.
_________________
1977 Westy, Automatic. Big Valve heads, CS Cam. |
|
| Back to top |
|
|
guanella74
Samba Member
Joined: March 13, 2009
Posts: 520
Location: Boulder, CO
|
| Posted: Mon Jul 19, 2010 3:22 pm Post subject: |
|
|
Whirled - thanks for the tip; I think I'll get a tach and give it a go sometime soon with the screw on the back to see if I can't dial it in.
Woot!
_________________
- Travis
1974 Westy CampMobile - the OG!
1979 Transporter
1979 Transporter
1977 Transporter
1974 Transporter
1973 Transporter
1971 Westy |
|
| Back to top |
|
|
vttype2
Samba Member
Joined: February 23, 2007
Posts: 180
Location: Oxford, CT
|
| Posted: Mon Jul 19, 2010 6:02 pm Post subject: |
|
|
yeah. exactly. i put it at 2 pulses. and then turned the screw on the back. seems to be pretty close.... good luck.
dave
_________________
1973 ASI Riviera
2.0L Dual Solex PDSIT Carbs
1982 Diesel Vanagon Camper |
|
| Back to top |
|
|
RatCamper
Samba Member

Joined: November 13, 2008
Posts: 3305
Location: Australia
|
| Posted: Mon Jul 19, 2010 7:26 pm Post subject: |
|
|
That's pretty awesome!
Does anyone have a good way of calibrating a tach? both of mine are totally different at high rpms.
Originally I calibrated the digital one by calculating how many rpms mains power would simulate and used the 9v AC feed on a Commodore 64 power supply to simulate the ignition pulse, and 12V DC to power the tach, then I dialled it in to the revs I should be seeing.
Are the CHTs temperature compensated or whatever they call it?
A good wire stripper is invaluable for working on a VW.
Mine came from a $10 tool bin. It's a bit different from the OPs. Mine more simulates biting the insulation off, only without the cracked teeth (where were you years ago ) so it doesn't have the wire size holes. I just put the wire in the jaws to the depth I want and squeeze the handle.
This gauge may be a worthy future investment. I'd probably end up sticking a post-it over the gauge to stop myself from looking at it
The idiot light is the most useful part for day to day driving IMHO. |
|
| Back to top |
|
|
vttype2
Samba Member
Joined: February 23, 2007
Posts: 180
Location: Oxford, CT
|
| Posted: Thu Jul 22, 2010 5:32 am Post subject: |
|
|
I have everything installed for this gauge and have been driving around with it for the past few days....... and am wondering what kind of numbers you guys are seeing with this gauge. today i took the bus on the interstate for the first time and was cruising at about 65. I have also wired in a O2 sensor and a gauge to monitor my A/F ratio in an ongoing effort to try and jet my dual solexes properly.....but that's beside the point....or maybe its not....
anyways, my question is my head temps under cylinder plugs # 1 and 3 #are pretty close to the same temps -within 10 to 15 degrees which i feel is prob normal around town and at 55 to 60 mph, but...when i was in the interstate this morning going between 65-70 mph climbing the mountains in Vermont my #3 was giving me a reading of 40 degrees higher than my #1! so my #3 was approx 380 and climbing while #1 was about 340 and staying relatively stable.
Normal? vac leak? jetting for that carb screwed up? any thoughts? i've searched the archives and haven't really found anything relating to a temp difference of this much......
dave
_________________
1973 ASI Riviera
2.0L Dual Solex PDSIT Carbs
1982 Diesel Vanagon Camper |
|
| Back to top |
|
|
Jody '71
Samba Member

Joined: July 16, 2005
Posts: 2842
Location: Manassas VA
|
| Posted: Thu Jul 22, 2010 6:25 am Post subject: |
|
|
Those readings sound just about right for your CHT. I'd start considering cooling issues if you get close to 400+. 425 is 
_________________
'66 Beetle
2011 Hyundai Elantra Touring |
|
| Back to top |
|
|
|


