| Author |
Message |
shepherdsond
Samba Member
Joined: April 25, 2005
Posts: 452
Location: Bellingham, WA

|
 Posted: Sat Nov 10, 2012 1:27 pm Post subject: Another Syncro Tintop to Hightop Camper Converson - Long Posted: Sat Nov 10, 2012 1:27 pm Post subject: Another Syncro Tintop to Hightop Camper Converson - Long |
 |
|
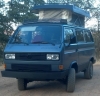
Documenting another tin top to hightop conversion.
This project starts with the demise of my last Syncro Westy in 2009 http://www.thesamba.com/vw/forum/viewtopic.php?t=382455&highlight=shepherdsond
I got a pretty good insurance payback with some help from GoWesty and others. After briefly considering cashing out of syncros and buying a small boat or something else we decided we were not yet ready to give up the camp at any moment in the PNW wilderness convenience of a Syncro.
So, in March 2010 I purchased a 1987 Syncro tintop with front and rear lockers from Justin (Streamline Audio , Vancouver WA). He had converted the engine very nicely to a 1999 2.2 phase II Subaru engine and made some other nice modifications including:
• 16” Mercedes wheels
• BFG AT Tires
• Decoupler
• Larger gear ratios
• Side rock rails
• Custom angle iron front and rear bumper (with hitch)
• Swiveling passenger seat
• Recaro front seats
My goal was to create a capable custom back country camper for not more than the price of a nice Syncro Westy. The project is ongoing and although the major parts are now done the project is far from completed. I plan to update this post as I go. Comments, questions and suggestions most welcome.
Camper Interior
I considered making custom cabinets but I have always liked the Westfalia cabinets and I was lucky to find a brown set (+ 3-way Dometic fridge) for a reasonable price in Whistler, BC. TheSamba member Edgood1 linked me to some of his conversion photographs which were very useful for locating the camper interior attachment points and holes since I did not have a donor vehicle to work from.
Since I did not have the original floor mounting attachments or a welder to attach them I made studs to mount the cabinets using bolts through the floor with thick washers, sealant on both sides and a locking nut.
While I was installing this I also installed a cork tile floor.
I like the look of it but I have not found it to be practical, things slide on it too easily and it is uncomfortable to kneel on compared to a carpet. Currently it is covered with Home Depot brown carpeting.
I decided not to cut Utility holes at this point since they can result in leaking and rust. I never use hook ups for electricity or water and if I need electricity (e.g .to charge batteries) the cable can go through the door jamb – for now anyway. The water tank can be filled from inside (although this is not convenient and risks spilling water into the interior so I might revisit this later).
Propane Tank
The problem with the standard Westy setup is loss of ground clearance, small size, lack of any way to tell how much gas is left and difficulty filling. I toyed with the idea of designing a custom external propane tank setup. Like this (using a light weight composite tank) but plumbed into the van propane system.
In the end I discarded this idea since it would involve purchase of a rack, I probably do not have the skills to make it look good and safe and the Westy propane tank is the most discrete option for all its failings and probably the cheapest and safest. It also detracts very little from ground clearance. The problem with not being able to tell how much is left in the tank though is a serious one and I will at some point have to install a second tank or at least a method for using the small bottles if the main tank runs dry. I purchased a tank on TheSamba and new fittings and installed in the usual place using some fittings that were in place and others that I had to drill and provide mounting studs.
HighTop
With the camper interior installed the next step is to prepare for and install a top. I have nothing against the Westy poptop but I was intrigued by the new Hightop option that John Charlton is importing from the UK (http://canadianhightops.ca/). The Hightop seemed to offer more comfort in the cool wet PNW environment, more storage and more convenience (TheSamba High top thread -http://www.thesamba.com/vw/forum/viewtopic.php?t=476579&highlight=conversion). The Westy pop top would certainly have been cheaper and less work (at least if using the simple cut a hole in the roof technique rather than replacing the whole roof) but I went with the N. American Hightop from John. John delivered them to Justin’s shop and John and Justin helped four of us install the tops over a weekend in Jan 2011.
Cutting stringers to form the bed frame, the bed itself is ¾” ply.
The top is held on entirely by 2-part glue backed up with Sikaflex adhesive sealant, it seems pretty solid.
After installation of the top the inside needs finishing which involves installing racks, windows, power fan, electrical wiring, insulation, liner material, and lights (inside and out) in roughly that order. Also finishing off the platform and frame. Seems like an easy job but it took much more time and money than expected. I spent more time planning and thinking than actually working on the project.
Windows
The sliding side windows came from John with the top and require a ½” ply wood surround to give enough depth of material to sandwich in the window frame. I varnished the frames in case water got in and rotted them. I first tried installing with Butyl RV window sealer but they leaked in months so I reinstalled with Sikaflex which seems much better but will probably be hard to deal with if and when they are ever removed (the wooden dowels have now been replaced with steel rack system).
I also decided to add a rear sliding window for more light and ventilation. I purchased it from ebay and installed it with a plywood surround and Sikaflex as for the side windows. It is nice to have the light but in retrospect I don’t think it needs to be an opening window as the side windows provide plenty of ventilation and the rear window is difficult to reach. Aesthetically I am undecided..
A two part epoxy was used for all wood to fiberglass connections
Racking systems
I also installed a side racking system in case I ever wanted to carry kyaks, skis or whatever on the outside. I used an aluminum truck bed tie down system sold by Macs http://www.macscustomtiedowns.com/category/VersaTieTrackKits
Different attachments open up the possibility for a wide range of custom racking options
Early prototype rack in use
The tracks were bolted to the high top and backed by T-nuts in plywood and 1/8” steel to spread the load and prevent flexing. Eye nuts on the inside will be used to secure a nylon net to stop cargo falling down.
I placed 2 racks vertically on each side as a basis for a carrying system and another in the cargo carrying area on the top at the rear. I also glued in supports for a 3rd rack on each side if needed in the future. At some point in the future I might install a roof rack system for carrying canoes but for now I will use a trailer.
Surrounding the rear cargo area I attached aluminum angle side pieces with round cut outs to keep items in and provide tie down points.
Under the whole of the rear cargo area of the hightop I glued and bolted (with T-nuts) a piece of ½” ply to add strength (I may want to carry, gas, water, firewood or a solar shower up there).
All the exterior metal was powder coated before installation.
Fan
The fan is a nice Fiamma powered unit provided by John. The US version only comes with an opaque white cover but I wanted transparent so I purchased one directly from Fiamma via my parents in the UK http://www.fiamma.com/EN/products/quality_motorhome_products/vent/vent/. Installation is fairly straightforward and similar to installing windows. Measure at least 3 times and cut once!
The power for the fan will go through a PWM dimmer switch for variable speed control.
Interior light
I purchased two warm white LED strip lights from SuperBright to install in the hightop to provide room lighting.
(http://www.superbrightleds.com/moreinfo/rigid-ligh...tures/622/)
Power will in future go through a PWM dimmer like the fan. One LED is screwed into a fir mounting plate screwed into the plywood backer and the other is secured by Velcro so that it can be used outside also. At 615 lumens each these provide a lot of light.
Exterior lighting
I wanted three kinds of exterior light. A reversing light, lights on each side of the van for a 360 degree view and a 3rd stoplight. The (55W incandescent) reversing light is switchable from the dash board so that it can be always on, always off or switched on by a relay spliced into the RH stock reversing light,
Switches for the reversing light and radio (always on, ignition on), and a spare (driving lights?).
The two side lights are LED 10W floodlights from Xglow http://www.xkglow.com/Modular_10_watt_high_power_flood_led_work_light_p/xk061010-f-1.htm
These are each operated separately by a switch on the B column. They provide a great all around view when trying to find a camp spot and have a low enough current draw that they can be left on to provide area lighting when setting up camp. The 3rd stoplight is mounted below the rear window on the top and activated by a direct splice to the stop light circuit in the RH rear light assembly.
12V Outlets
I added a marine 12V outlet on both sides of the top to provide power for things like lights, air pumps etc.
Aux Battery
I started with the well documented stack of 4 UB12220 batteries. After a year however they seemed to be losing some oomph and I recently replaced them with two 75 amp/hour Diehard group 65 P2 batteries. Since my starting battery is located behind the rear right light cluster both Aux batteries fit in the stock locations inside. A yandina 100 controls the connection between aux and starting batteries and a NOCO Genius 10 amp on board charger in the kitchen cabinet to top up the batteries when needed.
http://www.amazon.com/NOCO-GEN1-On-Board-Battery-C...ius+10+amp
Sound
BASS 600 subwoofer under drivers seat.
http://www.amazon.com/BASS600-8-Inch-Profile-Ampli...0Subwoofer
The sub works off of the sub output from the radio. A Clarion 4 channel amp under passenger seat powers the front door speakers and will power rears when I install them.
Furnace
I installed a Propex HS2000 furnace (from Karl) in the usual location under the rear bench seat. This has been a great addition. If I did it again however I would consider the more powerful HS2800 option.
Wiring
The Aux battery is connected to the camper circuits via a Blueseas fuse box in the kitchen cabinet.
Wiring for the Hightop goes up the B pillar to a distribution buss under a hatch in the bed.
Wires exiting the B pillar
A switch box fashioned from an external electrical box attached to the B pillar with lighted rocker switches for the two flood lights, the interior lights and the fan.
PWM Dimmer switch for the fan. This still draws current when I the off position so unfortunately I need an on/off switch as well.
I also ran a coax cable to the luggage rack for a future camera and several spare wires for future projects.
Insulation
I knew I had to have insulation to keep it cool and warm in the appropriate seasons but just as importantly to control condensation in winter. Camping with the bare shell in winter and cooking inside produced streams of water in the gutter where the roof meets the van roof – a huge potential mould/smell issue. For this reason the insulation also needs to be closed cell foam. I decided to line the top with ½” polyethylene minicell foam (http://www.foamforyou.com/minicell_foam.htm) which can be purchased relatively cheaply online in 4’x4’ sheets. I think it cost about $200 for the whole top. I glued it with 3M Hi Temp adhesive 90 spray. I should have researched some cheaper alternatives as I ended up using 10 cans or more and it is not cheap (lots of volatiles too). Before attaching the foam I pre placed a number of wood pieces so that I could later screw things like lights and curtains into them.
Finishing
The insulation was then finished with a layer of marine hull liner (http://www.perfectfit.com/15593/154092/Marine-Carpet-and-Hulliner/Hulliner-and-Headliner-72.html. The liner was glued with the 3M spray to the insulation and joins made by pushing the edge of the liner into the join between pieces of foam.
The frame around the opening was finished in hemlock fir with acrylic varnish and brass screws. The narrow strips down each side below the windows became small storage cupboards.
The bed and cupboard tops were finished with a layer of Home Depot brown outdoor carpeting. The bed both front and rear were cut in half down the middle and can be bolted together using SS screws into T nuts embedded in the bed. This makes it easy to remove any of the bed pieces.
The extension bed piece is sized so that it spans the gap from side to side for two people to sleep up top or end to end for one person giving them much more space and an easier exit.
Bed for one
Bed for two
A lip on the end of the bed extension helps to stop pillows falling off
Items stored in the rear are prevented from falling by a removable board (this will also have cargo netting attached to the eye nuts in the future).
I am toying with the idea of a front bulkhead with door as a way to keep stored items out of sight and in place however it works fine the way it is so I may not get round to it for a while.
Jobs still to be completed include:
• Window curtains
• Cutain to hide the rear of the top to reduce heat loss in winter
• Reversing camera (either bumper or Hightop mounted – or both)
• Dimmer for interior light
• Shower arrangement in rear (like the Eurovan)
• Second propane tank or extendastay
• Complete side ski racking attachments
• AC
Ultimately I hope to repaint the whole van so the top matches the van.
Thoughts to date
I have lived with the Hightop now for a couple of years. I am sure gas consumption is increased but probably not more than 10% or so, not really noticeable. The convenience of not having to pop the top for headroom is significant as is the extra storage space. The Hightop is much quieter and warmer as you would expect, great for snow camping. The upper bed has mixed reviews, for one person it is great but for two it is very crowded due to the very low headroom. We tried it once but I think we will probably continue to sleep below and use the top for storage, not a problem as this is our preference anyway. The Hightop conversions based on a Westy body have considerably more headroom due to the configuration of the Westy roof so this may not be a problem. Other drawbacks include clearance issues on jeep tracks with low hanging trees, this does not happen often, so far I have only once used the saw that I carry for this eventuality. We are very happy with the conversion.
Some recent trips
_________________
87 Syncro Hightop Camper
3 knobs + solid shaft
2.2 Phase II Subaru
Hi-Top build thread:
http://www.thesamba.com/vw/forum/viewtopic.php?t=534517
Last edited by shepherdsond on Mon Nov 12, 2012 1:27 pm; edited 12 times in total |
|
| Back to top |
|
 |
TommyBoyGomes
Samba Member
Joined: May 28, 2005
Posts: 1535
Location: L.A./Dublin, Irl
|
| Posted: Sat Nov 10, 2012 1:46 pm Post subject: |
|
|
Very cool, great work!
_________________
1969 Squareback, 1776cc
1990 Vanagon Multivan |
|
| Back to top |
|
|
JeffRobenolt 
Samba Member

Joined: February 25, 2007
Posts: 1531
Location: Wisconsin
|
| Posted: Sat Nov 10, 2012 2:31 pm Post subject: |
|
|
Very nice 
_________________
For OEM Subaru and SixStar parts and harness modications
AVsubaruconversions.com |
|
| Back to top |
|
|
dipple
Samba Member
Joined: April 09, 2005
Posts: 135
Location: Whistler BC
|
| Posted: Sat Nov 10, 2012 2:51 pm Post subject: |
|
|
Nice build. Glad the interior worked out for you.
_________________
1987 Syncro
1998 Syncro TDI Passat |
|
| Back to top |
|
|
tschroeder0
Samba Member
Joined: April 14, 2008
Posts: 2098
Location: Boulder CO
|
| Posted: Sat Nov 10, 2012 2:59 pm Post subject: |
|
|
That is my favorite high top build so far, great work and it looks really tough!
Todd |
|
| Back to top |
|
|
shepherdsond
Samba Member
Joined: April 25, 2005
Posts: 452
Location: Bellingham, WA
|
|
| Back to top |
|
|
insyncro
Banned

Joined: March 07, 2002
Posts: 15086
Location: New York
|
| Posted: Sat Nov 10, 2012 4:42 pm Post subject: |
|
|
Nice interior finishing  |
|
| Back to top |
|
|
purplepeopleeater
Samba Member

Joined: July 23, 2005
Posts: 3117
Location: E. Washington
|
| Posted: Sat Nov 10, 2012 7:33 pm Post subject: |
|
|
| top looks great, is that the hull liner you used? |
|
| Back to top |
|
|
jsmitch11
Samba Member
Joined: July 02, 2011
Posts: 337
Location: Seattle, WA
|
| Posted: Sat Nov 10, 2012 8:02 pm Post subject: |
|
|
Wow you did an awesome job!! I have the same high top and will be stealing a couple of ideas from you like the exterior rack on the side of it.
_________________
1984 Vanagon Westfalia Syncro Hightop
1986 Vanagon Syncro(RIP)
1989 Vanagon Wolfsburg Whitestar Edition(RIP)
My Van syncro conversion/restoration
http://www.thesamba.com/vw/forum/viewtopic.php?t=535730&highlight=black+diamond |
|
| Back to top |
|
|
carterzest
Samba Member

Joined: January 22, 2008
Posts: 3841
Location: Eagle, ID/Sun Valley, ID
|
| Posted: Sat Nov 10, 2012 8:34 pm Post subject: |
|
|
Awesome write up. A real Phoenix Rising story of a family's dedication to the Syncro Vanagon. Great finish work. I can't wait to drool over it in person. Come to the Christmas meet please (thread in my sig line).
Love the foam and hull liner. It amazes me that those tops and all he ancillary weight are simply held on by adhesives. That kinda freaks me out, but, I've followed all of the threads and it seems really permanent. I'd almost want to secure it to the van someway.
Awesome job!
_________________
Happiness=Portland, Oregon in the rearview mirror! |
|
| Back to top |
|
|
shepherdsond
Samba Member
Joined: April 25, 2005
Posts: 452
Location: Bellingham, WA
|
| Posted: Sat Nov 10, 2012 10:46 pm Post subject: |
|
|
purpleeater, yes that's the one:
http://www.perfectfit.com/15593/154092/Marine-Carpet-and-Hulliner/Hulliner-and-Headliner-72.html
I used the oyster color in geometric pattern which is currently unavailable. I would definitely suggest looking at any hull liner first hand before purchasing to make sure it is what you want. This stuff is thick and stretchy which is good and easy to apply but it is also very "furry" so I am bit concerned about how easy it will be to clean road dust out of it. Hopefully it will clean ok with a dry vac or a wet and dry vac but I have not tried yet. An option worth considering would be a traditional vinyl car headliner with foam backing which would be easy to clean with a washrag. Allot depends on how easy it is to get a reasonably professional finish on the joins.
carterzest, I definitely plan to attend one of these meetings, looking forward to it. You could certainly use SS screws to attach the top but I really don’t think it would add anything positive. John always points out that airplanes are glued together these days.
_________________
87 Syncro Hightop Camper
3 knobs + solid shaft
2.2 Phase II Subaru
Hi-Top build thread:
http://www.thesamba.com/vw/forum/viewtopic.php?t=534517 |
|
| Back to top |
|
|
syncrogreg
Samba Member

Joined: November 08, 2009
Posts: 743
Location: USA (Nashville TN)
|
|
| Back to top |
|
|
kbeefy
Samba Member
Joined: March 10, 2006
Posts: 600
Location: Central Oregon
|
| Posted: Sun Nov 11, 2012 12:10 am Post subject: |
|
|
spectacular! Thank You.
_________________
86 syncro CHC, NorthWesty subbie 2.5, decoupler, locker, custom interior, 225/75r16 Duratrack's on CLK's, Toyo cabin heater, ARB fridge, 300w Zamp Solar, Gowesty bumpers/skid/rails, Fiama awning
'86 Syncro Westy. Stock for now.
2000 F350 7.3 CC LB 11' Northland Cabover
2006 Subbie OBXT
2002 Tacoma DoubleCab 4x4
1969 Mustang Basket Case 351c/FMX/9
http://kbeefy.blogspot.com/ |
|
| Back to top |
|
|
outwesty
Samba Member

Joined: June 06, 2006
Posts: 1078
Location: Northern Sierras
|
| Posted: Sun Nov 11, 2012 12:20 am Post subject: |
|
|
| Thanks for sharing. Every day I like the high tops more and more. |
|
| Back to top |
|
|
Jedi
Samba Member
Joined: October 23, 2007
Posts: 734
Location: Cool California
|
| Posted: Sun Nov 11, 2012 8:36 am Post subject: |
|
|
| outwesty wrote: |
| Thanks for sharing. Every day I like the high tops more and more. |
_________________
1961 Westfalia SO23 Mango Green/Seagull grey
1961 Westfalia SO34 T/BW
1961 Westfalia SO34 SWR
1964 Westfalia SO33 pearl white
1965 Westfalia SO42 Velvet green
1986 Syncro Wolfram grey with black int GL
1986 Syncro Doka
1987 Syncro Sevana beige Adventurewagen
1987 syncro Sevana beige GL
1973 Pumpkin orange Thing
2 1963 Rag top bug's
1965 Manx
1970 Single cab
1971 combi
1990 Vanagon GL
2007 Audi A4 3.2L quattro |
|
| Back to top |
|
|
Jedi
Samba Member
Joined: October 23, 2007
Posts: 734
Location: Cool California
|
| Posted: Sun Nov 11, 2012 8:42 am Post subject: |
|
|
Great build.I have shared your thread on the High roof thread so others following that topic can see your great custom camper work 
http://www.thesamba.com/vw/forum/viewtopic.php?t=4...highlight=
_________________
1961 Westfalia SO23 Mango Green/Seagull grey
1961 Westfalia SO34 T/BW
1961 Westfalia SO34 SWR
1964 Westfalia SO33 pearl white
1965 Westfalia SO42 Velvet green
1986 Syncro Wolfram grey with black int GL
1986 Syncro Doka
1987 Syncro Sevana beige Adventurewagen
1987 syncro Sevana beige GL
1973 Pumpkin orange Thing
2 1963 Rag top bug's
1965 Manx
1970 Single cab
1971 combi
1990 Vanagon GL
2007 Audi A4 3.2L quattro |
|
| Back to top |
|
|
shepherdsond
Samba Member
Joined: April 25, 2005
Posts: 452
Location: Bellingham, WA
|
| Posted: Sun Nov 11, 2012 10:16 am Post subject: |
|
|
Thanks for the kind words, I could not and would not have done it without the help and information I got from TheSamba.
_________________
87 Syncro Hightop Camper
3 knobs + solid shaft
2.2 Phase II Subaru
Hi-Top build thread:
http://www.thesamba.com/vw/forum/viewtopic.php?t=534517 |
|
| Back to top |
|
|
climberjohn
Samba Member

Joined: January 11, 2005
Posts: 1840
Location: Portland Orygun
|
| Posted: Thu Jan 17, 2013 11:57 am Post subject: |
|
|
David,
Your Van looks terrific, and I appreciate all your photos. Even though I do not ever plan to have a high top, I got some good ideas of some other interior modifications. Thanks for your nice write up, and I hope to see you around Portland sometime.
CJ
_________________
'86 Westy, 2.5 Subaru power
Know your limits. Exceed them often. |
|
| Back to top |
|
|
shepherdsond
Samba Member
Joined: April 25, 2005
Posts: 452
Location: Bellingham, WA
|
| Posted: Mon Feb 18, 2013 9:35 am Post subject: |
|
|
My van did not have power windows when purchased but I was given the whole setup by someone replacing his with manual regulators so I installed them. Instead of placing the switches in the doors I put them in the dash thinking it would be simper and involve less wiring (which it is but I wouldn't neccesarily do it this way again).
This last week I added one touch up and down function to the driver window by wiring in an Autolok WC1000 module.
http://www.amazon.com/AUTOLOC-POWER-ACCESSORIES-10...ow+up+down
The unit senses the motor current to "know" when to turn the motor off at the end of its travel. The sensitivity can be adjusted by cutting a wire (per instructions) that puts another resistor in parallel with the currrent sensing circuit. I had to cut this wire as my regulator binds a bit when going up and it was triggering too soon. The unit also has an input for a keyless entry system input that roles the windows up when locking which I also plan to hook up to my (crimestopper) keyless entry module.
Now that I know it works I will install another one on the passenger side. If I did this again I would use the Install Essentials 530T unit as it has much better instructions and appears to be a much more refined unit and is cheaper than the WC1000 for two windows
http://www.amazon.com/Install-Essentials-530T-Wind...ow+up+down
_________________
87 Syncro Hightop Camper
3 knobs + solid shaft
2.2 Phase II Subaru
Hi-Top build thread:
http://www.thesamba.com/vw/forum/viewtopic.php?t=534517 |
|
| Back to top |
|
|
shepherdsond
Samba Member
Joined: April 25, 2005
Posts: 452
Location: Bellingham, WA
|
| Posted: Fri Jun 14, 2013 5:53 pm Post subject: |
|
|
I Just installed the Thule Hightop rack that I purchased when I was in the UK last Christmas:
I think the rack that John has subsequently designed for Hightops is a better option but a bit more spendy. An advantage of this system is that it is very easy to remove and all the Thule and most Yakima fittings will work with it. It is rated to 75Kg and seems quite strong, it's way up there though!
I will experiment with this for a while, there are a number of options. The uprights can be moved further apart by using a longer horizontal bar (its the same type of bar as the roof bar). Since I have also installed simple mounts on my hightop I could also attach it to these and get rid of the horizontal, or I could make it into a side rack using these mounts. My goal is to end up with something that will safely carry a tandem seakayak.
_________________
87 Syncro Hightop Camper
3 knobs + solid shaft
2.2 Phase II Subaru
Hi-Top build thread:
http://www.thesamba.com/vw/forum/viewtopic.php?t=534517 |
|
| Back to top |
|
|
|


