| Author |
Message |
Bern
Samba Member
Joined: March 08, 2004
Posts: 152
Location: Issaquah, WA

|
 Posted: Mon May 14, 2007 11:42 pm Post subject: Vanagon VR6 swap .... it has begun.... weeeeee! Posted: Mon May 14, 2007 11:42 pm Post subject: Vanagon VR6 swap .... it has begun.... weeeeee! |
 |
|
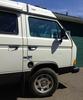
Ok, so I know a few of you are following this, so I decided to make a thread about it... As I write this, its still not done, but I'll update as I have time and make progress (albeit that may be slow cause I'm so damn busy at work right now)
Ok, firstly, let me say that I'm not spending hours upon hours detailing and polishing every little thing cause this thing is going to be going camping and getting muddy and all that jazz, so don't hate me for not taking the entire underbody apart and cleaning it...it will get cleaned up a bit when i'm done, but in the meantime, i see no point is cleaning things only to get them dirty again...
This is where we begin....FU bastard waterboxer!
Caution: Pirate at work.
The workspace. (make note of the nice new engine hoist  ) (and yes, that is leapord print covering my subwoofer box, it matches the interior of the van, and I was bored at work and got a good deal on those subs, thats why I decided to put 4 12s in a van ) (and yes, that is leapord print covering my subwoofer box, it matches the interior of the van, and I was bored at work and got a good deal on those subs, thats why I decided to put 4 12s in a van  ) )
Getting down to business. Out with the old.....
Hmmmmm....which would you want?
Getting better....
Making some room for the VR. (opening does not have to be this big, but it makes it WAY easier for getting access to dizzy cap and all the ish on that side of the motor)
New high torque starter....
Adapter plate and custom flywheel mounted to the VR. When I first had all the hardware for the whole adapter/clutch/flywheel sitting on the bench and no instructions, it looked confusing, but after studying things for a minute or two it made sense... BTW, I went with a stage 2 pressure plate and factory clutch disc, all vanagon style. Adapter plate, flywheel, clutch and starter are all from Kennedy.
Needed to trim a 1/4" off the tip of the input shaft, I went slow so as not to heat the shaft up too much. Cut a little, took a break, cut more, break, etc etc...
I realize I skipped some steps, but BAM, the motor is in. I didn't get any pics of the whole mounting process, but I basically dropped the motor in from the TOP, unbolted the front mount from the tranny so it could slide forward and give enough room for the mating process (the adapter plate used studs). After getting them together i put the tranny mount back in and used the hoist to position them where i wanted them, and the correct angle for the motor as well (easiest to determine this by looking at the tranny front mount and making it level).
Ground clearance loss: not that much if at all. I completely forgot to take that measurement before I got started, so I'll never know, but it doesn't really look that much lower, I do plan on fabbing up a skidplate though.
And, this is the result so far....WINNER!!!
To get to this point took me about 2 half days of working. All told it could be done in a day if I had the time and could work straight through, but I'll be modest and say it took me a day and a half.
Next up: wiring, coolant, and exhaust....
I'll get more pics when I can find more time to work on it, I've only been able to walk past it everyday on my way out the door, and I'm really ready to drive it already!
Special thanks to Darren L (fastwagens) for all the tips from his swap. Chris at Fine Tuning for help with parts and some tech help. And my old man for giving me an extra hand when needed. |
|
| Back to top |
|
 |
H2O-Box
Samba Member
Joined: November 28, 2006
Posts: 28
Location: Amesbury, Ma
|
| Posted: Tue May 15, 2007 7:20 am Post subject: |
|
|
That is going to have more power.
However the loss of sleeping area would be tomuch for me to take..
B- |
|
| Back to top |
|
|
aviatorjames
Samba Member

Joined: March 01, 2005
Posts: 232
Location: Half Moon Bay, California
|
| Posted: Tue May 15, 2007 7:41 am Post subject: |
|
|
Another Vanagon bites the dust
(..my opinion only..)
_________________
...some days it's not even worth chewing through the restraints... |
|
| Back to top |
|
|
shenan-agon
Samba Member

Joined: May 11, 2005
Posts: 429
Location: Portland, OR
|
| Posted: Tue May 15, 2007 9:10 am Post subject: |
|
|
| Looking good! How much higher are you going to need to make the engine cover to get over that? |
|
| Back to top |
|
|
psych-illogical
Samba Member

Joined: October 14, 2004
Posts: 1181
Location: AZ
|
| Posted: Tue May 15, 2007 11:09 am Post subject: |
|
|
So...how do you REALLY feel about waterboxers? 
_________________
83 1/2 Westy waterboxer
'57 Beetle-sold 
Coupla '81 BMW motorcycles (R80G/S; R100RS)
'96 BMW R1100GS |
|
| Back to top |
|
|
1621
Samba Member
Joined: May 15, 2006
Posts: 2174
|
| Posted: Tue May 15, 2007 12:23 pm Post subject: |
|
|
Looks great! Keep taking those pictures and posting them.
Waterboxers make great boat anchors.
Lundy
_________________
'85 Westy |
|
| Back to top |
|
|
fastwagens
Samba Member

Joined: March 01, 2004
Posts: 1028
Location: Michigan (The other west coast)
|
| Posted: Tue May 15, 2007 12:35 pm Post subject: |
|
|
This van will be more reliable not to mention faster. the performance gains will by far out weigh the loss of sleeping area. Another thing when I installed mine I made the raised lid high enough that now it is even with the rear seat when it is folded fwd. My 7 and 10 yo both have slept back there. Bern If I lived in the PNW I would come piss all over that weak unreliable boxer for you.
props baby
BTW you'll love that starter. |
|
| Back to top |
|
|
Mad-Max
Samba Member

Joined: January 13, 2006
Posts: 384
Location: Puerto Rico
|
|
| Back to top |
|
|
Bern
Samba Member
Joined: March 08, 2004
Posts: 152
Location: Issaquah, WA
|
| Posted: Tue May 15, 2007 11:45 pm Post subject: |
|
|
i don't plan on losing my sleeping area... the decklid will be raised a minimum of 4.5" or so, but i think i may end up putting it closer to 6".... really not that bad considering that when i sleep i'm generally laying down and even on my side will still have more than 2.5-3 feet of clearance to the roof....i plan on building a platform around the engine lid with either compartments or something along those lines so its not a waste of space... and i've seen the hinges that can raise the rears seats, which may be an option.... although, turns out I can make a custom interior too...we'll see what happens...  |
|
| Back to top |
|
|
tikibus
Samba Member

Joined: July 07, 2006
Posts: 834
Location: Rochester, NY
|
| Posted: Wed May 16, 2007 2:12 pm Post subject: |
|
|
Nice work. Well illustrated.
I see wire harness in the near future to test your patience.
Keep up the good work 
Question: Does the rear suspension need to be beefed up to take the extra weight and or torque of the new speed ball being put in?
_________________
Happy Trails!
Mark
______________
Founding member of the Empire State VW Camping Club.
http://www.empirevwcamping.org/
1984 Westy - Tiki
1997 Honda Civic -The Green Hornet
1971 Volvo P-1800E- needs TLC |
|
| Back to top |
|
|
Hendrick
Samba Member
Joined: March 19, 2006
Posts: 5
Location: Ballinafad ON
|
| Posted: Wed May 16, 2007 8:54 pm Post subject: |
|
|
| How do you plan to support the engine?From what i can see you have no mounts left and right. |
|
| Back to top |
|
|
Bern
Samba Member
Joined: March 08, 2004
Posts: 152
Location: Issaquah, WA
|
| Posted: Wed May 16, 2007 9:21 pm Post subject: |
|
|
A couple days before I started the motor swap I went to syncro springs to replace my H&R lowering springs to get it in the air for backwoods camping this summer... I really doubt i'll need to go much further with the suspension unless its for adding more height to the car, but there's a couple things i can do if this poses an issue...won't really know till i get some good wheel time behind the swap and see how things go...
the engine is already supported in there, hence the chain that the hoist was hooked up to just laying on the top of the motor...i have one mount on both side right now, and plan on doing a third, although its quite sturdy in there right now, not much movement, nice and solid...
the mount on the drivers side extends out to the crossbar towards the top of the bend at an angle to support the engines torqueing side to side under acceleration and deceleration.... and the mount on the passenger side will also help support the torqueing but also carries the weight (albeit not all off it, both mounts share the weight about the same).... |
|
| Back to top |
|
|
Hendrick
Samba Member
Joined: March 19, 2006
Posts: 5
Location: Ballinafad ON
|
| Posted: Thu May 17, 2007 8:29 am Post subject: |
|
|
Did you fabricate these mounts yourself? If so that's pretty impressive for a couple of days work!I have recently completed a similar project (1987 Transporter/1998 GTI VR6)
It took me a few days just to fab. the mounts and narrow the front bracket to meet up with adapter and and block.
Are you runnung the Power steering? i have removed my pump and replaced it with a TDI timing belt tensioner and fabricated bracket, my van had manual steering. |
|
| Back to top |
|
|
Bern
Samba Member
Joined: March 08, 2004
Posts: 152
Location: Issaquah, WA
|
| Posted: Tue May 22, 2007 11:05 pm Post subject: |
|
|
yep, fabricated the mounts from scratch...and i'm not running power steering ( i had it disconnected before cause it was all sorts of leaky and i didn't want to deal with it straight away, plus i wanted to get my arms nice and buff for summer time)....eventually i'll look into hooking the power steering back up...
SWAP UPDATE: i got the engine running today!!! woooo! its been sitting for quite awhile as i initially started gathering parts for this swap almost a year ago... anyway, i finished the wiring today, made a relay pack for the fuel pump relay and the ECM power relay, hooked up all the guages, everything else etc etc....went to turn the key, it cranked over for about 5-10seconds then fired right up! it was loud as hell with only the downpipe on and now exhaust sytem, but it growled and sounded great! after that initial start, it will fire right up in less than a second....i'm super stoked.... i'm fairly good with wiring since its kinda what i do for a living, but when you've got a massive amount of wires like with this swap its a little unnerving making sure you have the right wire and are reading the wiring diagrams for both vehicles properly since bently changed the styling of their diagrams .... and then factoring in that i'm adding my own custom wiring/relays to do everything that the factory van wiring couldn't do...but when it fired and nothing was wrong at all i cracked a huge grin...
anyway, all i've got left is the exhaust and throttle cable, which i'll do tomorrow...
sweet!!! |
|
| Back to top |
|
|
lovedavdubs
Samba Member

Joined: April 30, 2004
Posts: 1597
Location: New York, NY.
|
| Posted: Wed May 23, 2007 2:58 am Post subject: |
|
|
Congrats man
I wish it were as simple as you make it look.  How are those mounts holding up? Does the engine flex at all when you rev it? You should take a quick video and post it on Youtube. How are those mounts holding up? Does the engine flex at all when you rev it? You should take a quick video and post it on Youtube.
My 82 is far too precious for me to cut up. But If I came across a cheep water pumper I'd love to try and follow in your foot steps. Not to say your Van is cheep and or not precious.
_________________
82 Air-cooled Westy (Lola)...My other vehicle is a subway. |
|
| Back to top |
|
|
CF
Samba Member
Joined: February 17, 2005
Posts: 802
|
| Posted: Wed May 23, 2007 3:44 am Post subject: |
|
|
| lovedavdubs wrote: |
Congrats man
I wish it were as simple as you make it look. How are those mounts holding up? Does the engine flex at all when you rev it? You should take a quick video and post it on Youtube.
My 82 is far too precious for me to cut up. But If I came across a cheep water pumper I'd love to try and follow in your foot steps. Not to say your Van is cheep and or not precious. |
Jay
i have a "cheap water pumper"
|
|
| Back to top |
|
|
lovedavdubs
Samba Member
Joined: April 30, 2004
Posts: 1597
Location: New York, NY.
|
| Posted: Wed May 23, 2007 3:49 am Post subject: |
|
|
Um...  ...not that cheep ...not that cheep
That van sill kickin?
_________________
82 Air-cooled Westy (Lola)...My other vehicle is a subway. |
|
| Back to top |
|
|
Christopher Schimke
Samba Member

Joined: August 03, 2005
Posts: 5548
Location: PNW
|
| Posted: Wed May 23, 2007 7:44 am Post subject: |
|
|
Cool beans Bern! Where are all the pictures you promised?
_________________
"Sometimes you have to build a box to think outside of." - Bruce (not Springsteen)
*Custom wheel hardware for Audi/VW, Porsche and Mercedes wheels - Urethane Suspension Bushings*
T3Technique.com or contact me at [email protected] |
|
| Back to top |
|
|
Bern
Samba Member
Joined: March 08, 2004
Posts: 152
Location: Issaquah, WA
|
| Posted: Wed May 23, 2007 3:08 pm Post subject: |
|
|
ok, have a few more pictures...but first, how about a video?
the exhaust is done now, almost everything is hooked up, i do need to clean some more things up, and figure out my throttle linkage...that should be fun...
an issue i just realize i had is that with the stage 2 pressure plate i'm using its bending the clutch slave cylinder mounting plate... hmm...gonna have to add some bracing or something to that....we'll see whats what...
anyways, took this vid a few minutes ago...breaking for lunch right now...
http://www.youtube.com/watch?v=z0o_UyeQm8s |
|
| Back to top |
|
|
lovedavdubs
Samba Member
Joined: April 30, 2004
Posts: 1597
Location: New York, NY.
|
| Posted: Wed May 23, 2007 4:23 pm Post subject: |
|
|
 Holy crap! That sounds bad ass! Holy crap! That sounds bad ass!
_________________
82 Air-cooled Westy (Lola)...My other vehicle is a subway. |
|
| Back to top |
|
|
|


