| Author |
Message |
Undis
Samba Member
Joined: October 24, 2006
Posts: 1448
Location: Riga, Latvia & Sydney, Australia

|
 Posted: Thu Nov 13, 2025 1:24 am Post subject: Re: VW model build topic Posted: Thu Nov 13, 2025 1:24 am Post subject: Re: VW model build topic |
 |
|
| finster wrote: |
I think Herbert would approve of your models
|
I wish he could see it!
_________________
Check out my Facebook page: Volkswagen Prototypes. |
|
| Back to top |
|
 |
jack1448
Samba Member

Joined: October 27, 2012
Posts: 324
Location: Northern NJ
|
| Posted: Sun Dec 21, 2025 1:07 pm Post subject: Re: VW model build topic |
|
|
Happy Holidays to everyone!
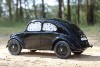
I decided to take a break from my vintage builds to do this Hasegawa 1967 VW Pickup. This was an opened box kit that I purchased a while back for a very reasonable (i.e. cheap) price. There was some minor damage to the roof but that was easily repaired.
I hadn’t looked at the kit in years and my first thought was why weren’t there opening doors? I had to go back through this forum to Volkaholic’s build to see that he added the open door and treasure chest in his build. Wow, that took some guts and skill – there is not a lot of meat around the window frame to cut!
Otherwise, it is a nice kit with the realism, fit and ease of construction that only computer aided designs can provide. There are a few items that I could quibble with, one which was the slotted wheels that came with the kit. In the picture below, I have the Hasegawa wheels next to the 1958 (in red) and 1965 (white) Revell Micro Bus/Station Wagon kits:
I still had an (almost) complete set of smoothies from the 1965 Revell kit in my part stash which I was planning to use during the recent refresh of my Station Wagon build – see page 67 of this thread - and was able to salvage one outer rim from the previously used wheels to complete the set. This required some modifications to the Hasegawa hubs to accept the Revell wheels. I also had to narrow the front and rear axles to get a wheelbase that looked right. I did keep the larger hubcaps from this kit as the Revell ones are a bit small. Here it is with hubs modified ready to accept the Revell wheels:
As Volkaholic noted, the kit does not come with pedals even though the floor has holes for them. I made a set of pedals and used the existing mounting holes even though they aren’t easily visible after fully assembled.
It all went together well until I got to the front bumper. The left inside edge of the bumper was about 3/16-inch away from the driver’s side dogleg, whereas the right side was a good, close fit. Whether this was molded this way or there was some relaxation that occurred over time, it’s hard to tell. I figured no problem – a little heat and some gentle persuasion would fix it. Well, first try and the bumper snapped in two. So, I glued the bumper and tried a little more heat and it broke again! Third time, more heat and the same result! This time I repaired the bumper and added a round styrene rod behind the center section of the bumper for reinforcement. Once again, I submerged the part, this time in very hot water (just shy of boiling), and I could feel the bumper give a little before it broke again. Here is what I was left with:
So now what to do? I searched through my extra parts and found a front bumper from the 1965 Revell Station Wagon kit. This seemed a little big and would need a lot of work to make it look right. I thought about making a front bumper but decided that would also be a lot of work. I searched deeper into my extra parts and found a ribbed front bumper from the 1958 Revell Micro Bus kit that was almost an exact fit (surprising because the front section of the 1958 and 1965 Revell kits are the same except for turn signals).
To make it more like the Hasegawa slash-style bumpers, I glued a 1/16-inch round styrene rod down the middle of the bumper and then filled in the bottom and top with putty. I left the upturned-ends in place as a hint to its origin. In fact, if I hadn't mentioned it, probably no one would notice this isn't what came with the kit.
So onto the pictures! I included a couple of the Hasegawa next to the 2 Revell kits for comparison.
|
|
| Back to top |
|
|
finster
Samba Member
Joined: May 26, 2012
Posts: 10600
Location: not far from the madding crowd
|
| Posted: Mon Dec 22, 2025 6:52 am Post subject: Re: VW model build topic |
|
|
 nice job! nice job!
_________________
"we're here on Earth to fart around" kurt vonnegut
nothing lasts, nothing is finished, and nothing is perfect... |
|
| Back to top |
|
|
Blue Baron
VW Aficionado

Joined: June 16, 2006
Posts: 28329
Location: Free State of Florida
|
| Posted: Tue Dec 23, 2025 8:02 pm Post subject: Re: VW model build topic |
|
|
Wow, that wheel swap did the trick!
Nice effort!
_________________
We are striving for perfection, to make our cars run forever, if possible.
Heinz Nordhoff |
|
| Back to top |
|
|
volkaholic1
Samba Member

Joined: October 31, 2004
Posts: 898
Location: ohio
|
| Posted: Sat Dec 27, 2025 3:54 pm Post subject: Re: VW model build topic |
|
|
i spent 3.5 years on a WWI tank build, so time to get back to bugs!
this is the 68 revell beetle, the details in this kit are pretty amazing, lots of little stuff most models leave off,
i always start with the engine, and since this is so nice, i decided to resin cast the parts so i can build more later, i decided to build 3 at this time
making slow progress on my 68beetle model build, got 3 engines started, 1 stock black, 1 dark blue metallic, 1 dark red metallic
i dig the little details, if you look at the upper left on the engines, you can see a little round part, baby blue, this is the "bosche blue coil" that we run for more spark power
in the middle you can see a little brown shape, that is the phenolic spacer block that helps keep the fuel pump cool.
why 3 engines? not sure what color this car will be, so got to plan for options!
a couple of interesting errors i have found, 1, this is supposed to be a stock 68, yet is has the 71up doghouse oil cooler
also, the fuel pump actually has a hose that runs up to the carb, nice detail, except it is coming out the wrong place, it is coming out the top when it should be coming out the bottom, i had to check my moms bug too confirm.
_________________
Volkaholic |
|
| Back to top |
|
|
jack1448
Samba Member
Joined: October 27, 2012
Posts: 324
Location: Northern NJ
|
| Posted: Sat Jan 03, 2026 7:17 am Post subject: Re: VW model build topic |
|
|
| Glad to see you back! This kit appears to be one of the last variations of Revel's 68 beetle kits, interesting to see the new engine parts. Keep posting updates on your build. |
|
| Back to top |
|
|
|


