| Author |
Message |
Loren 
Samba Member

Joined: January 10, 2004
Posts: 1897

|
 Posted: Sun Nov 30, 2025 5:26 pm Post subject: Re: December 58 Ghia cabriolet lifetime restoration project Posted: Sun Nov 30, 2025 5:26 pm Post subject: Re: December 58 Ghia cabriolet lifetime restoration project |
 |
|
While I'm waiting for the painter to pick up the Ghia, I figured I would try to get something done that wouldn't need to come off again, so I installed the rear shocks. I went with Koni adjustable shocks and set them at the softest setting. I did a lot of research here on the Samba and these seem to have the best reviews for my application. We will see how they feel once the Ghia is back on the road.
The clean new shocks really contrast the dirty under carriage  Looks like I will have a lot of cleaning to do once I get the car back from the painter. Looks like I will have a lot of cleaning to do once I get the car back from the painter.
I also ordered white wall tires from CIP1. They were very affordable and so far I have been really happy with the quality of parts from them. I'm hoping to get them mounted to the painted rims this week. Once they are mounted I will see if one fits in the spare tire area. I only ordered four tires because I was afraid one wouldn't fit. I have a few NOS tires from the 90's that are a little thiner and one of those should make a good spare if a new one doesn't fit. Of course I will have to look them over and make sure they are still in good condition. They have been stored away out of the sun, so we'll see.
|
|
| Back to top |
|
 |
Loren
Samba Member
Joined: January 10, 2004
Posts: 1897
|
| Posted: Thu Nov 20, 2025 5:15 pm Post subject: Re: December 58 Ghia cabriolet lifetime restoration project |
|
|
| Thanks for the kind words. Fingers crossed that the Ghia will be back before Christmas. In the mean time I'm hoping the bits I dropped off at the chrome shop will be done and that the seats will be finished too. I also picked up some new white wall tires, so I need to get those mounted to the painted rims. At least I have a few things I can do while the Ghia is away. |
|
| Back to top |
|
|
DaveB9
Samba Member
Joined: October 20, 2021
Posts: 386
Location: UK
|
| Posted: Thu Nov 20, 2025 3:40 pm Post subject: Re: December 58 Ghia cabriolet lifetime restoration project |
|
|
Ah Loren, what a pain! I would be so annoyed having to take things out again, but when you have come this far it would be silly to cut corners.
Hopefully the painter can sort it out and you'll never be able to tell. Keep the updates coming. |
|
| Back to top |
|
|
Tall Bloke
Samba Member

Joined: October 07, 2005
Posts: 253
Location: UK>Ohio>UK
|
| Posted: Wed Nov 19, 2025 3:58 am Post subject: Re: December 58 Ghia cabriolet lifetime restoration project |
|
|
Two steps forward , one back - better to have found missing paint now rather than fully assembled.
Check other areas for rework so its the only time it goes back in the shop for paint.
Keep up with the detailed assembly Loren - this is becoming addictive viewing and as a reference directory for future restorations.
_________________
-------------------
All of 30 horses ! |
|
| Back to top |
|
|
Loren
Samba Member
Joined: January 10, 2004
Posts: 1897
|
| Posted: Mon Nov 17, 2025 5:35 pm Post subject: Re: December 58 Ghia cabriolet lifetime restoration project |
|
|
So much for a post update every week  I was working under the dash and noticed a big spot the painter forgot to fix. I think he sanded down a drip and didn't get around to painting it. You can only see it if you are under the dash looking up. I saw an edge of the spot, but I thought it was buffing compound and would buff out, unfortunately that wasn't the case. I contacted the painter and he will pick up the Ghia and fix it once the weather is nice enough to trailer it to his shop. Hopefully, he can get it in the next week or two. In the mean time I have been removing most of the parts I've installed. I know he will be very careful, but I can't take the chance that something would get overspray or damaged, so it's all coming out. I'm even removing the tail lights and nose badge, you can't be too careful with these rare parts. I was working under the dash and noticed a big spot the painter forgot to fix. I think he sanded down a drip and didn't get around to painting it. You can only see it if you are under the dash looking up. I saw an edge of the spot, but I thought it was buffing compound and would buff out, unfortunately that wasn't the case. I contacted the painter and he will pick up the Ghia and fix it once the weather is nice enough to trailer it to his shop. Hopefully, he can get it in the next week or two. In the mean time I have been removing most of the parts I've installed. I know he will be very careful, but I can't take the chance that something would get overspray or damaged, so it's all coming out. I'm even removing the tail lights and nose badge, you can't be too careful with these rare parts.
|
|
| Back to top |
|
|
WrennMetallWerks
Samba Member
Joined: December 06, 2007
Posts: 3471
Location: Rescue ca
|
| Posted: Sat Nov 01, 2025 8:42 am Post subject: Re: December 58 Ghia cabriolet lifetime restoration project |
|
|
Very krafty Mr Loren.

_________________
⚒ Believe In The Power Of Positive Thinking ⚒
Purpose Over Pleasure 🕊
“Hard Werk ⚒ God First “ |
|
| Back to top |
|
|
Loren
Samba Member
Joined: January 10, 2004
Posts: 1897
|
| Posted: Mon Oct 20, 2025 10:28 pm Post subject: Re: December 58 Ghia cabriolet lifetime restoration project |
|
|
I've decided that I don't want to have a radio in the Ghia, so this meant figuring out a speaker delete plate and installing a radio delete plate. Originally, the speaker delete was a piece of hardboard that was attached under the dash in place of the speaker. I wanted something a little more refined, so I decided to make one out of sheet steel. The first thing I did was to make a hammer form from two pieces of oak. If I were making more of these I would have made the form from steel instead of wood. Even though oak is a hardwood it is still too soft for more than a few uses.
Here is the hammer form and the oversize piece of steel. I bolted the two halves of the form together through the attaching holes for the plate. These were perfect for locating the plate and kept everything secure while hammering down the edges.
Here the edges are all hammered down. Since the oak was soft the edges sunk into the form a little and I had a hard time extracting the bottom part of the form. This is where a steel form would have been better.
Here it is out of the form. The edges need to be smoothed out, but other than that it looks really good.
Here is the finished plate:
I had some sheet gasket material, so I cut out a gasket to go between the dash and the plate. I purchased the speaker grill from Karmann Ghia Parts and Restoration a few years ago and I had it painted to match the car. I am really happy with their reproduction. The fit and finish is excellent.
It turned out really nice and clean and it really looks good from the top side.
With the speaker delete plate finished it was time to move on to the radio delete plate. The radio plate was all painted and ready to go, but I wanted some sort of gasket to help seal it from the trunk. Originally, the factory glued a scrap piece of vinyl to the back of the dash to cover the radio hole. I like to keep things original, but I'm not a fan of the scrap of vinyl look. I ended up gluing two pieces of black mat board together and glued a piece of my seat vinyl to one side. I made it a hair deeper than the back of the delete plate so it would stand proud a bit and keep the plate from rubbing against the dash. I curved the inside edges to match the curves of the plate and I put a coat of water proof sealer on the back to protect it from moisture.
I attached the plate with 1/4" plated brass Dura-Collars. I put a little anti seize on the threads of the set screws and covered the collars with rubber dust caps.
|
|
| Back to top |
|
|
Karmann Gheezer
Samba Member
Joined: April 12, 2006
Posts: 450
|
| Posted: Sat Oct 18, 2025 10:41 am Post subject: Re: December 58 Ghia cabriolet lifetime restoration project |
|
|
Loren, I really enjoy you finding solutions for what's not available and coming up with a "MacGyver" idea to get it done. Brilliant!
_________________
 |
|
| Back to top |
|
|
Loren
Samba Member
Joined: January 10, 2004
Posts: 1897
|
| Posted: Fri Oct 17, 2025 11:02 pm Post subject: Re: December 58 Ghia cabriolet lifetime restoration project |
|
|
This week's goal was to install the glove box. The first order of the day was to figure out how to replicate the bumpers for the glove box door hinges. These are actually "springs" that compress when the glove box door is closed and help push the door open when the latch is released. My original ones were badly deformed and brittle. After some thought I decided I could make a close reproduction that would do the trick.
Here is an original one from my Ghia
Here is the bracket it fits into. There is one under each hinge. For the 60 model year Ghia, VW eliminated this bumper and put a spring on the driver side hinge to help pop open the glove box door.
Here are dimensions, in case anyone else wants to make some:
The bumpers are 5/8" deep, so I wen't on E-bay and bought a 6" square by 5/8" thick rubber pad. This would be enough material for 36 bumpers. With the pad in hand, I used a 7/16" hole punch that I could chuck in the drill press. I set the drill press to the lowest RPMs so I wouldn't burn the rubber. The 7/16" hole punch was a little smaller than the original hole, but it was the closest I could find. I used a little Glide Lube to cool and lubricate the punch when drilling the holes.
After I had a few holes drilled I cut the rubber into squares. I was able to find a 7/16" diameter by 5/8" long plastic bushing at the hardware store, along with two washers, a bolt and nut. I secured the washers to the bolt and chucked it in my cordless drill so I could run the drill and grind the washers down to match the diameter of the original rubber bumper.
With all the parts in hand, I put the plastic bushing in the hole in the rubber pad and bolted the washers to the outsides. This would give me a guide to cut the rubber to.
Next I used a sharp knife to cut away as much excess rubber as I could and I sanded it down until it matched the profile of the original bumper. I was lucky to have access to a picture framing shop that has a hand operated disc sander. This was the prefect tool to sand the rubber down. I had complete control and was able to avoid burning the rubber or sanding down the washers.
Here is my reproduction on the left and the original on the right. Not a perfect reproduction, but very close and it fits and works great. I don't know how good the rubber is, but I'm hoping it will last and keep the glove box door opening like it was designed to for many years to come.
With that project behind me it was time to tackle the glove box. Over the years I was lucky enough to find a really nice one, but the outside was stained a little where the securing strap sat and the inside was stained and dirty. The first thing I did was spray the exterior with a mat clear coat to help water proof it. This made the stains stand out more, so I hit it with a coat of flat black spray paint to even out the finish.
With the outside done it was time to finish the interior. The first step was to lightly sand it to remove some of the old flocking. Then I blew it out with compressed air to remove the dust. Next, I painted it with a coat of off-white latex paint to block the stains and provide a good base for the flocking adhesive. After the paint was dry I applied a coat of white flocking adhesive and while it was still wet I used a hand held colander to dust it. The next day it was dry and I was able to tip the box over and knock all the loose flocking out.
The last step was to carefully fit the glove box behind the dash the tighten the strap with a 25mm long Rashche bolt. Getting the bolt started was a pain, and it took me a fair bit of fiddling to finally get it to catch.
I'm happy to check another tough project off the list! |
|
| Back to top |
|
|
WrennMetallWerks
Samba Member
Joined: December 06, 2007
Posts: 3471
Location: Rescue ca
|
| Posted: Wed Oct 15, 2025 8:22 pm Post subject: Re: December 58 Ghia cabriolet lifetime restoration project |
|
|
Excellent work. Keep it up my friend.
_________________
⚒ Believe In The Power Of Positive Thinking ⚒
Purpose Over Pleasure 🕊
“Hard Werk ⚒ God First “ |
|
| Back to top |
|
|
Loren
Samba Member
Joined: January 10, 2004
Posts: 1897
|
| Posted: Sun Oct 12, 2025 4:33 pm Post subject: Re: December 58 Ghia cabriolet lifetime restoration project |
|
|
This week I was able to restore the vent system and get it installed. first on the list was to get the vent controls painted and assembled.
Here is the special lock tab washer. One end gets bent up to keep the securing nut from unscrewing.
Once the knobs were assembled it was time to install the actuating cables.
Once the cables were secured to the vent knobs, the side covers were bolted on. Next the cables were greased and the cable sleeves were pushed over the cables and secured by the control box clamps.
Then I cut a new gasket for the housing and glued the two wide sides to the housing.
Here are the vent pipes all cleaned and painted. I even painted the cable sleeves black. Originally they were copper plated, but most of the copper had worn off and I liked the look of the black sleeves. It's funny that one of the vent pipes has a ton of spot welds. I wonder what the guy was thinking when he assembled and spot welded it.
With all the parts cleaned and painted it was time install them. This is one of the most frustrating jobs to overcome. The vent pipes don't fit very well and there isn't any room for your hands to get the rubber sleeves in place. After a lot of trial and error I finally found a formula that worked to get them in.
The first thing I did was dry fit the pipes so I knew how they need to be pushed and pried into place. They don't line up perfectly so you have to find the sweet spot and dry fitting them made it much easier for the next step. After the dry fit I removed them and slipped the rubber sleeves over the back and bottom tube openings. I pushed them on about half way then doubled them over on themselves, making sure they didn't hang over the tube opening, otherwise the seals might get pinched during installation. I used some glide lube on the bottom seal so that it would unfold easier. I put the front rubber sleeve on the pipe coming out of the inner fender and not on the vent pipe itself. I doubled this seal over too.
Once the seals were installed I forced the pipe into place the best I could. Then I unfolded the bottom seal. The glide lube enabled the seal to unfold easily around all sides, even on the back side where you can't fit your hand. Then I unfolded the other two seals and was able to pull and pry them here and there to get them fully seated. I didn't used glide lube on these because they would be too slippery and I couldn't get a good grip on them to fully seat the seals. Needless to say the first one took about an hour and the second one only took 10 minutes.
I installed the passenger side vent pipe first, then the vent controls. I put masking tape over the long sleeve to keep the paint from scratching off. I installed them from the driver side, slipping the long sleeve in behind the dash and was able to push it far enough into the passenger side fender to get the vent control box past the hood hinge. Once the control box was past the hood hinge I was able to push it into place. Next up I connected the long cable to the vent pipe lever and secured the cable housing under the dash. Once this was done I was able to install the driver side vent pipe and hook up the control cable. With that done, I set the control box in place and screwed it down, making sure the control knobs were centered in their slots by rotating the box left or right to center them.
Her you can see how I set the rubber sleeves and doubled them back on themselves.
|
|
| Back to top |
|
|
Loren
Samba Member
Joined: January 10, 2004
Posts: 1897
|
| Posted: Tue Sep 30, 2025 4:18 pm Post subject: Re: December 58 Ghia cabriolet lifetime restoration project |
|
|
This week's update is coming in a little early. Next week I am taking the rear and front seats to the upholstery shop. I have original covers for the front seats for them to duplicate and an original upholstery 63 Ghia rear seat that they can use as a reference. The goal here is to get them looking as close to original as possible.
A little over 20 years ago I had more time than money and was able to make a new rear seat for my Ghia from scratch. Mine was long gone, but as luck would have it a friend had a dry rotted 58 Ghia cabriolet rear seat that worked great for measurements, so I was able to make seats for both of our cars. I tried to make them as close to original as possible, duplicating all the joinery and routing in all the details. For a simple looking seat they are actually quite complicated to reproduce.
Here is the original upholstery 63 Ghia cabriolet rear seat that will be used as a reference to get the job done right.
Unfortunately, the seat hinges were bent back to make them easier to ship.
Here is what it looks like with the hinge removed. |
|
| Back to top |
|
|
Loren
Samba Member
Joined: January 10, 2004
Posts: 1897
|
| Posted: Sun Sep 28, 2025 7:59 pm Post subject: Re: December 58 Ghia cabriolet lifetime restoration project |
|
|
This week I was able to clean the dome light door switches and get them wired and installed. I painted the faces of the switches black to protect them. I seem to remember they were black before I cleaned them, but I cleaned them so long ago I can't remember for sure.
It took a little research to find out how the switches are wired, but thanks to my 59 coupe I was able to figure it out. The right side of the car only has one brown wire. It runs under the glove box and goes down through a small hole with a rubber grommet next to the defrost tube. This wire runs inside the car and goes back through an oval hole where it's wired to the switch.
The left side has two brown wires that go through a hole in the inner fender. This hole does not have a grommet. The wires then go down the A pillar and connect to the switch. I found it easiest to snake a spare piece of wire down through the hole and out the oval hole in the A pillar. I taped the two brown wires to the snake wire and pulled them through. The two brown wires in my new loom were soldered separately on the ends, where as they should have been soldered together. It would have been easier if I had soldered them together as tight as possible out of the car, since they both have to fit in the same hole in the switch. I had to file the extra solder off the ends in order to get them to fit.
Not the best picture, but this is the hole the two brown wires go through.
The red wire is my snake wire and I used blue tape to secure it to the brown wires and pulled them through. Once I got them through the oval hole I could untape them and feed the brown wires through the round hole for the switch.
|
|
| Back to top |
|
|
John Moxon
Samba Moderator

Joined: March 07, 2004
Posts: 14259
Location: Southampton U.K.
|
| Posted: Fri Sep 26, 2025 1:00 pm Post subject: Re: December 58 Ghia cabriolet lifetime restoration project |
|
|
| Loren wrote: |
| A note of caution. These collars have not been time tested, so I don't know how well they will work over time. My biggest concern is that the steel set screw would get stuck to the brass collar over time, due to galvanic corrosion, especially in wetter climates. That's why I suggest using anti-seize on the set screw. I don't know if the rubber boot covers that I put on them will help protect them, but I figured it couldn't hurt, especially for the one on the side badge that is exposed to the elements and road debris. |
My Ghia doesn't live in a wet climate. Well, it doesn't come out when the climate is wet. 
_________________
John.
Judson Supercharger Information on The Samba
My 1958 Shorrock Supercharged Karmann Ghia
Stop dead photo links! Post your photos to The Samba Gallery! |
|
| Back to top |
|
|
Loren
Samba Member
Joined: January 10, 2004
Posts: 1897
|
| Posted: Fri Sep 26, 2025 11:59 am Post subject: Re: December 58 Ghia cabriolet lifetime restoration project |
|
|
| A note of caution. These collars have not been time tested, so I don't know how well they will work over time. My biggest concern is that the steel set screw would get stuck to the brass collar over time, due to galvanic corrosion, especially in wetter climates. That's why I suggest using anti-seize on the set screw. I don't know if the rubber boot covers that I put on them will help protect them, but I figured it couldn't hurt, especially for the one on the side badge that is exposed to the elements and road debris. |
|
| Back to top |
|
|
John Moxon
Samba Moderator
Joined: March 07, 2004
Posts: 14259
Location: Southampton U.K.
|
|
| Back to top |
|
|
DaveB9
Samba Member
Joined: October 20, 2021
Posts: 386
Location: UK
|
| Posted: Fri Sep 26, 2025 9:16 am Post subject: Re: December 58 Ghia cabriolet lifetime restoration project |
|
|
Those dura collars are a neat idea. I just used the circular rubber covered clips used for engine lid badges, but I like the look of those.
Good luck with the vent controls! That wasn't my favourite bit of re-assembly, though at least with the colour of your car it will be easier to see into the corners behind the dash. |
|
| Back to top |
|
|
Loren
Samba Member
Joined: January 10, 2004
Posts: 1897
|
| Posted: Fri Sep 19, 2025 3:49 pm Post subject: Re: December 58 Ghia cabriolet lifetime restoration project |
|
|
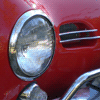
Next up was installing the side badge and nose badge. I used 1/8" brass chrome plated dura collars to keep them in place. I bought these from an R/C hobby store. The nice thing with these is that I can easily remove them if I need to. I used some anti-seize on the set screws for added insurance and I cut down rubber end caps to slip over the collars to keep water out. I think this is especially necessary for the exposed one holding the fender badge on.
The side badge is a reproduction from Jerry Heldt in Australia. It's a really nice repoduction.
Here you can see the dura collar in action and the small allen head set screw
I used a cut down 6mm rubber end cap to cover the collar
With the side badge on it was time to install my NOS nose badge.
I used a nose seal from Cip1 and it fit perfectly. I had another seal that I bought many years ago and it was too small. I can't remember where I bought it from.
Now that these are done it's time to tackle the fresh air vent controls and restore and install the glove box. |
|
| Back to top |
|
|
Loren
Samba Member
Joined: January 10, 2004
Posts: 1897
|
| Posted: Fri Sep 19, 2025 3:31 pm Post subject: Re: December 58 Ghia cabriolet lifetime restoration project |
|
|
I was able to get a few things done on the Ghia this week.
First on the list was to wrap the vinyl on the dash grab handle and install it. I used contact cement to glue the vinyl in place. I have an original grab handle from a 60 Ghia and it has a piece of rolled up vinyl in the groove on the under side of the handle, so I duplicated that on mine. It locks in the ends of vinyl wrap and keeps them from delaminating. I rolled up a piece of vinyl that was as wide at the vinyl cover and 1.75" wide. I used contact cement to keep it rolled up, taking care not to get glue on the outside of the roll. When it was ready to install I put glue in the groove on the underside of the handle, stuffed the roll in the groove and clamped a curved piece of wood over it until it was dry. Once it was all done the handle was bolted to the dash.
The ends of the vinyl cover are folded over for a clean edge. I cut the corners out so there wasn't a double layer of vinyl on the back side.
Here is the piece of rolled vinyl for the groove. I put it in with the seam side down into the groove. Notice there is no glue on the outside of the roll.
I cut a 1/4" wide piece of maple and curved one side to match the curve of the handle. It was thin enough to fit in the groove and really push the vinyl roll into place. I let it dry over night before I removed the clamps. Even with rubber ends on the clamps they made a depression in the vinyl cover. I was worried at first, but after some time the vinyl relaxed back into place and the dents disappeared.
Here is the handle with the two rubber seals for the ends. I bought these a few years ago from Dwayne. He made a small batch of these because he needed a set for his restoration. I don't know if anyone is making these rubber seals now or not. There is a seller here on the Samba who makes them out of resin, but I don't know how pliable they are or how well they fit.
|
|
| Back to top |
|
|
stale air
Samba Member

Joined: August 23, 2007
Posts: 5732
Location: Senoia Ga, formerly NorCal
|
| Posted: Tue Sep 16, 2025 11:36 am Post subject: Re: December 58 Ghia cabriolet lifetime restoration project |
|
|
That door pull turned out awesome, great work, and like was said above, attention to detail.
_________________
WANTED: Henry Veale Santa Rosa plate frames
WANTED: Brittsan Motors Fresno plate frames
WANTED: Any Georgia plate frames
|
|
| Back to top |
|
|
|


