| Author |
Message |
Spinal Tap
Samba Member
Joined: August 01, 2008
Posts: 413
Location: Chicago IL

|
 Posted: Fri Nov 18, 2011 10:11 am Post subject: Posted: Fri Nov 18, 2011 10:11 am Post subject: |
 |
|
Like all good things, it looks like this story and thread have come to an end. 
Thanks for taking us along for the ride. Happy trails! 
_________________
'85 Westy
'74 MG-B
| RCB wrote: |
| Its called tact...and tact is the ability to tell someone to go to hell in such a manner that they anticipate the trip. |
|
|
| Back to top |
|
 |
whafalia
Samba Member
Joined: January 28, 2009
Posts: 685
Location: San Francisco
|
| Posted: Fri Nov 18, 2011 9:23 am Post subject: |
|
|
Thank you Mr. Pate, your thoroughness and attention to detail is inspirational and it sounds like you got the commensurate results. Your archetype is now the shop teacher in the back of my mind chiding me when I take a short cut or perhaps nodding approvingly if I happen to do something right. The high point for me was when you nickel-plated some fasteners 'cause you didn't want to wait for paint to dry.
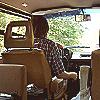
And, is that a leather covered dash? |
|
| Back to top |
|
|
James 93SLC
Samba Member
Joined: January 21, 2009
Posts: 937
Location: NE Ohio
|
| Posted: Fri Nov 18, 2011 8:24 am Post subject: |
|
|
| presslab wrote: |
| James 93SLC wrote: |
Confused  |
JWPATE has an '84 Vanagon. This tachometer is different than the later models. |
OK, that makes sense.
_________________
-------------------------
91 Vanagon Carat
93 Corrado SLC
-------------------------
Photos: http://picasaweb.google.com/slc.corrado
--------------------------------------------------------
tencentlife "Sometimes a pooka is a problem and sometimes it's just a pooka" |
|
| Back to top |
|
|
bac914
Samba Member
Joined: August 11, 2008
Posts: 112
Location: Denver
|
| Posted: Fri Nov 18, 2011 12:51 am Post subject: |
|
|
James, Congratulations on a job well done. A big thanks for taking the time to post your findings and techniques and share your knowledge. I just finished replacing head gaskets on my EG33. Your photos and discussion let me see what was ahead of me before even turning a wrench.
Great Stuff. |
|
| Back to top |
|
|
presslab
Samba Member
Joined: September 29, 2008
Posts: 1730
Location: Sonoma County
|
| Posted: Thu Nov 17, 2011 11:15 pm Post subject: |
|
|
| James 93SLC wrote: |
| Confused |
JWPATE has an '84 Vanagon. This tachometer is different than the later models.
_________________
1986 Vanagon Westfalia EJ25
1988 Subaru GL-10 EJ20G --- 2000 Honda XR650L
2010 Titus El Guapo --- 2011 On-One 456 Ti |
|
| Back to top |
|
|
James 93SLC
Samba Member
Joined: January 21, 2009
Posts: 937
Location: NE Ohio
|
| Posted: Thu Nov 17, 2011 9:20 pm Post subject: |
|
|
| Zeitgeist 13 wrote: |
Congrats on a job done masterfully, James!
I'm intrigued by your Dakota Digital box. I have the SGI-5 box that I'm planning to use to convert another project car's speedometer from mechanical to electronic. So, it's good to see that they have other items for the tach signals, which I may need to use in the future. |
For the SGI-8 model, Dakota Digital claims "Product not compatible with '86-91 VW Vanagon's and other similar models".
I was looking at this for my VR6 conversion and dismissed it due to this statement.
Confused
_________________
-------------------------
91 Vanagon Carat
93 Corrado SLC
-------------------------
Photos: http://picasaweb.google.com/slc.corrado
--------------------------------------------------------
tencentlife "Sometimes a pooka is a problem and sometimes it's just a pooka" |
|
| Back to top |
|
|
thummmper
Samba Member
Joined: November 25, 2009
Posts: 2015
Location: Meadow Valley, California Republic
|
| Posted: Thu Nov 17, 2011 8:04 pm Post subject: |
|
|
| Bravo James!! Bravo!! |
|
| Back to top |
|
|
Destructo
Samba Member
Joined: July 31, 2006
Posts: 407
Location: Westhampton, MA
|
| Posted: Thu Nov 17, 2011 3:14 pm Post subject: |
|
|
James, this thread and others like it are the reason we check this forum incessantly. Your attention to detail and pictures provided give us all the urge to get under our vans and DO SOMETHING!! 
I absolutely loved this thread and want to at least hear updates now and then. I hope that when I finally dig into my own SVX project, I can bounce questions your way for sage advice.
On behalf of the rest of the Samba members, thank you so much for participating on this forum! (clapping emoticon, you get the idea)
_________________
1985 Wolfsburg Edition Westfalia Camper Bostig conversion
Dude, where's your van? |
|
| Back to top |
|
|
Zeitgeist 13
Samba Member

Joined: March 05, 2009
Posts: 12175
Location: Port Manteau
|
| Posted: Thu Nov 17, 2011 3:02 pm Post subject: |
|
|
Congrats on a job done masterfully, James!
I'm intrigued by your Dakota Digital box. I have the SGI-5 box that I'm planning to use to convert another project car's speedometer from mechanical to electronic. So, it's good to see that they have other items for the tach signals, which I may need to use in the future.
_________________
Casey--
'89 Bluestar ALH
'01 Weekender --> full camper
NEAT, no ICE. |
|
| Back to top |
|
|
JWPATE
Samba Member
Joined: January 26, 2006
Posts: 541
|
| Posted: Thu Nov 17, 2011 2:46 pm Post subject: |
|
|
This device arrived yesterday, and so I got it in today. A product of DAKOTA DIGITAL, this model SGI-8 has the single purpose of recalibrating an ignition system tachometer signal, thus allowing OEM tachometers to read correctly with engines having more or less cylinders that original.
We have to locate the correct wire first of all, and with the '84 models it will require a search. Only the later vans of that year had the tach, and it isn't included in the Bentley wiring section. The '85 model used a green wire through pin 9 of the instrument cluster plug. It turns out that '84's also used pin 9, but the color is red with black stripe.
Wire it up according to the instructions and set the switches for a six cylinder engine and four cylinder gauge. I decided to just leave it inside the instrument cluster cavity, after securing the wires with a tie.
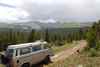
And it works perfectly! With the tach now indicating correctly, I decided to take that first road test. I went about ten miles this first time out and stopped half way through it to fill up with gas and check for any sign of leaks.
I LOVE THIS THING! The van is a new experience with the SVX engine. It is so quiet at idle that except for the tach you might think it had stopped running. It pulls without effort from 1000 RPM in forth gear (level surface), and is smooth and quiet at all speeds. Oil pressure is 45 at 3000 rpm and 10 at idle. Idle speed warm is between 600 and 700. Throttle response is so quick one has to adjust to the power available. Oil temp. stabilized at 190 and held there, so no problem for now. By Summer I will have the external oil cooler plumbed in. Coolant temp. came up nicely to about 8:30 on the gauge and held there.
This was a great afternoon for old James.
I suppose the intent of this thread has now reached its conclusion. I do already have thoughts of different gearing, but that is another subject. Let me thank you all again for following the progress, and for jumping in when you recognized the errors and mistakes. It has certainly been worth the effort for myself, and your assistance is still greatly appreciated. |
|
| Back to top |
|
|
JWPATE
Samba Member
Joined: January 26, 2006
Posts: 541
|
| Posted: Thu Nov 10, 2011 2:38 pm Post subject: |
|
|
OK, the alternator light problem was just what several members suggested. The Vanagon left the factory with already one pigtail taking off the alt light circuit and running to the O2 light milage switch. There it connected with a diode in the connecting receptacle, so that if the milage switch is closed, the alt. light also will find a ground and light up.
I had already eliminated that device, to that wire is just ended in heat shrink.
Then at the Hannover operation with Westfalia, another couple of plug connectors were added, in order to run a second pigtail back to provide switched power to the fridge relay. This is the one that gives us problems on the Subaru conversions. Worked OK with the simple VW harness, but now this draw adds up to enough to keep the Alt light on after the ground back in the alternator has been removed (by the engine running and voltage replacing the ground path).
The link provided above by Franklinstower is the way to go for '86 and later Westy's, but it will not help us here. I had to take off the instrument cluster to be certain I was tracing the correct wire. It is the blue wire on pin 11 (and not 13 as shown in the Bentley). Anyway, it is the only blue wire so trace it down.
With this rats-nest of wires and plugs it will not be completed in five minutes. Having been here before over the years, I didn't look forward to sorting this out. But go slow and you will first find the pigtail taking off for the O2 switch, and next will be the wire we are looking for. Cut it, add enough length as seen here to reach a switched power source, then heat shrink on the cut off stub and the splice. Attach a female spade plug and decide where to power it - I added it to the rear window heat, which I have never used anyway.
And at last, all the indicator light issues are resolved.
I did have it under its own power today, in the process of switching it around for easier access to that fuse panel side. Boy is that a nice clutch. Thanks to Dylan for suggesting it.
Last edited by JWPATE on Fri Nov 18, 2011 8:15 pm; edited 1 time in total |
|
| Back to top |
|
|
JWPATE
Samba Member
Joined: January 26, 2006
Posts: 541
|
| Posted: Wed Nov 09, 2011 8:16 pm Post subject: |
|
|
THANKS
And I will take a look at that tomorrow. The panel in your link is for the '86 and newer Vanagons. I will have to see how they did it on the '84 model. It may still be able to isolate the alt warning circuit. |
|
| Back to top |
|
|
Franklinstower
Samba Member

Joined: September 21, 2006
Posts: 2010
Location: PNW
|
| Posted: Wed Nov 09, 2011 7:48 pm Post subject: |
|
|
i will try again, for some reason my post above doesn't appear, but it does when I preview it?
here it is again:
If you do a search, I have posted the alt light fix. It involves a cut and splice behind the fuse panel. Takes 5 minutes. Try this:
http://www.weidefamily.net/vanagon/Pending_Content...ghtFix.pdf
Paul
_________________
'89 Westy - EJ25/22 Frank 4.44 5mt
'75 Miami Blue Sunroof FI Standard Bug
YITB |
|
| Back to top |
|
|
JWPATE
Samba Member
Joined: January 26, 2006
Posts: 541
|
| Posted: Wed Nov 09, 2011 3:46 pm Post subject: |
|
|
Dunno what happened with the above posting. There is no message?
Good progress today, and getting close now.
I took off all of the intake system in order to have better access to the black box again. The two problem plugs on the wiring harness were T2G and T2E. They contained the right wires, but had the female connector where the male should have been - and vice versa on the other set. I cut them both off, did continuity checks on the four wires to be certain, and spliced the correct plugs on.
Now all the lights are wired and working as they should.
For whatever reason, when I started it up after the above work, it idles right where it should??? First it comes on fast for just a few seconds, than settles right back to 1200 on my unmodified RPM gauge. After a few minutes (Aux air valve closing) it goes to 1000 RPM on the gauge and oh is it smooth. So much so, that I let it idle today for a while, as I watched the coolant temp. in the various pipes with one of those hand-held temp. guns. It all seems to work just as expected. After the temp gauge on the Vanagon reaches normal range, I could detect the thermostat open and the return pipe begin to warm up.
Getting antsy now for a road test, but the one remaining issue is the Alt. light. It never goes out after start, and I will look into that tomorrow. |
|
| Back to top |
|
|
Franklinstower
Samba Member
Joined: September 21, 2006
Posts: 2010
Location: PNW
|
| Posted: Tue Nov 08, 2011 8:06 pm Post subject: |
|
|
deleted
_________________
'89 Westy - EJ25/22 Frank 4.44 5mt
'75 Miami Blue Sunroof FI Standard Bug
YITB
Last edited by Franklinstower on Fri Nov 18, 2011 9:24 am; edited 1 time in total |
|
| Back to top |
|
|
JWPATE
Samba Member
Joined: January 26, 2006
Posts: 541
|
| Posted: Tue Nov 08, 2011 7:53 pm Post subject: |
|
|
Good call on the alt. output wires. Tom Shield replaced a section of that wire already (with double wires) when doing the harness conversion. And, as you have observed, he reported that the original wire was burnt.
That is an excellent suggestion about the fridge relay pulling enough to keep the alt light on. This one is not only a Westy, but it also has a second battery for the camper equipment (fridge, lights, water pump). That battery has a relay to provide that it is not connected with the main circuit unless the alt. is putting out. That relay just may be involved. I hadn't thought of that, and so very much appreciate the suggestion. |
|
| Back to top |
|
|
wcdennis
Samba Member

Joined: July 20, 2004
Posts: 955
Location: Winston-Salem NC
|
| Posted: Tue Nov 08, 2011 7:21 pm Post subject: |
|
|
| As to your Alternator light staying on: If your van is a Westfalia, the refrigerator relay under the driver's seat is mot likely the problem. It pulls just enough current off the Subaru signal wire to keep the light on. If you pull the blue wire off the relay that should fix it. Of course your fridge will not run on 12v while you drive--that requires yet another fix. |
|
| Back to top |
|
|
hisport
Samba Member
Joined: June 07, 2008
Posts: 24
Location: Pilot Mt, NC
|
| Posted: Tue Nov 08, 2011 4:03 pm Post subject: Good sleuthing JP! |
|
|
While you're checking the alt wiring, take a quick look at the alt output lead. OE lead is white, and really too small. If it is hardened and blackened at the ring terminal, you may want to double up lead or replace with heavier gauge. This is a common alt failure culprit in the SVX coupe. Both the SVX engines I bought had rebuilt/new alternators and fried wiring in the harness.
BTW, the one I bought in a wrecked car (72K miles) also turned out to have a broken LH exhaust cam (from the wreck); hence the second parts engine. So, don't feel bad about having to go through yours. At least you didn't have to tow it wrapped up in a wrecked SVX all the way from the Bushytail, West Virginia mountains during the dead of winter (in a 5 cylinder Eurovan). Sigh...
Dead cold 1500 rpm is kinda normal (maybe that why the SVX auto trans generally failed by 80K miles ?); should come down to 650 or so within 5 minutes or less. Has an old school Bosch L jetronic type heated idle air bypass valve plus an ECU controlled IAC. For some reason. |
|
| Back to top |
|
|
JWPATE
Samba Member
Joined: January 26, 2006
Posts: 541
|
| Posted: Tue Nov 08, 2011 3:24 pm Post subject: |
|
|
Good to know hisport, that others have also had the high idle issue to deal with. I did quickly clamp off the idle air bypass hose today and the rpm fell right down to 1500 on my high-reading tach, so right in the 1000 range in real revolutions. I will get back to that issue in good time.
Today I sorted out the check engine light issue. The fact that I could see flashing brighter, but always on, led me to wonder if there wasn't a secondary ground source at play, and I found it in the old VW O2 milage counter. I had just set that unit at the light-on setting, and extended the ground wire back to the black box. Today I eliminated the counter completely and the issue is cleared.
The check engine light responds now just as it should. There are no fault codes in there, and it is light-on with just ignition on and light-out after start.
Two more lights were not acting as they should. The oil pressure light did not go out after start, even though there was strong oil pressure on the gauge. The alt. light also does not go out after start. In addition, after start, that coolant light starts to flash as if the coolant reservoir were low (and it was full).
So I started with the oil light as that was most bothersome. The pressure switch checked good, so I started looking for a ground somewhere in the wiring. The answer came when I did a continuity check on the harness oil pressure wire. I found that the pair of two wire plugs in the black box were hooked up wrong. The plugs are reversed male to female so that only will hook up one way. The rebuilt harness had the plugs opposite of what they should be. All is solved on that issue, and I just have to cut off the plugs and put them on correctly. That solves the oil light and the coolant level light as they are the wires involved in the pair of 2-wire plugs.
The alt. light is still to go before I can get on with the RPM and tach modification/calibration. |
|
| Back to top |
|
|
hisport
Samba Member
Joined: June 07, 2008
Posts: 24
Location: Pilot Mt, NC
|
| Posted: Tue Nov 08, 2011 6:12 am Post subject: EG33 High Idle |
|
|
What a beautiful job you are doing!
I have a '92 EG33 in an '85 westy. Completed the conversion a couple of years ago, and just now finishing up the post repaint/interior reassembly. A sailboat project interrupted things.
Please know that I have struggled with the high idle issue as well. Most common causes are reportedly dirty sticking IAC or leaking Idle Air Bypass. IAB can be quickly checked by pinching the supply air hose on the RHS of the intake plenum.
Neither of these are at fault with mine, but still high idle. I finally backed off the throttle body set screw to get it down to a reasonable level, but it ain't right. While I replaced all the under manifold vac lines (as you apparently did at the beginning of this thread) while the engine was out, I'm about to pull the manifold again and have a look.
Easy tach solution is a diode driver circuit. Pmail me for diagram, or look on the subaruvanaagon yahoo site. This circuit corrects for the 6/4 pulse issue, and may be a little more trustworthy than trying to trim out a 50% error.
The diode tach driver seems to work well, though I have now messed up the flex circuit on the back of the tach/speedo (while taking the dash repeatedly out to install front AC). Anyone have a spare flex circuit?
Fault code signalling needs to have engine run a a good clip for a few minutes. Study the jinglish SVX manual section; its all there, though a little confusing.
Caveat: please make sure to bleed the cooling system really, really thoroughly, at > 2000 rpm, with the thermo open and heater on. More than one initial test drive has ended in tears with a cooked motor. |
|
| Back to top |
|
|
|


