| Author |
Message |
David Marquis
Samba Member
Joined: July 24, 2010
Posts: 97
Location: Bay Area, California

|
 Posted: Wed Jul 29, 2015 3:11 pm Post subject: Posted: Wed Jul 29, 2015 3:11 pm Post subject: |
 |
|
I went to the hardware store and bought some simple, stainless steel, sheet metal, Phillips head screws.
_________________
1989 Westfalia Vanogan GL, 2.1 |
|
| Back to top |
|
 |
SCM
Samba Member

Joined: January 26, 2011
Posts: 3474
Location: Bozeman MT
|
| Posted: Wed Jul 29, 2015 2:10 pm Post subject: Re: screw size for filler tube |
|
|
| jfrog wrote: |
| do any of y'all know the screw size for the 3 screws that attach the filler neck (tube) to the exterior of the nozzle placement ring? |
I don't know the actual size but I don't think they are anything special. Just stubby little self tapping screws. If you're missing them I would just figure out how large the screw holes are and find something at a hardware store that is just a bit larger in diameter and about 1/2 inch long.
_________________
'91 Westfalia GL Automatic (GTA "Turbo" Rebuild w/Peloquin) and 2.3L GoWesty Engine |
|
| Back to top |
|
|
jfrog
Samba Member
Joined: October 21, 2012
Posts: 27
Location: Seattle
|
| Posted: Wed Jul 29, 2015 1:51 pm Post subject: screw size for filler tube |
|
|
| do any of y'all know the screw size for the 3 screws that attach the filler neck (tube) to the exterior of the nozzle placement ring? |
|
| Back to top |
|
|
David Marquis
Samba Member
Joined: July 24, 2010
Posts: 97
Location: Bay Area, California
|
|
| Back to top |
|
|
fraggle00
Samba Member

Joined: October 19, 2011
Posts: 356
Location: Bristow, VA
|
| Posted: Wed Apr 23, 2014 8:21 am Post subject: |
|
|
If the hose is fuel rated, it won't matter that much if its that stiff or not. Just make sure it isn't pinched or rubbing anywhere and any FLAPs hose that fits should be just fine. I doubt the system will pull enough vaccuum to collapse the hose, the main concern when looking at stiff vs flexible, though that's a really easy test with a mighty vac, might be a good thing to try, just to have the info.
I, too, broke a hose and one of the rollover valves. I used a short length of what was in the VanCafe kit and a new valve to fix it.
_________________
'91 Vanagon Carat
'87 Porsche 928S4 DOWN
'12 Fiat 500 Abarth |
|
| Back to top |
|
|
David Marquis
Samba Member
Joined: July 24, 2010
Posts: 97
Location: Bay Area, California
|
| Posted: Tue Apr 22, 2014 10:01 pm Post subject: |
|
|
Anyone???
_________________
1989 Westfalia Vanogan GL, 2.1 |
|
| Back to top |
|
|
David Marquis
Samba Member
Joined: July 24, 2010
Posts: 97
Location: Bay Area, California
|
| Posted: Mon Apr 21, 2014 7:58 pm Post subject: Fuel tank reseal, hard plastic lines |
|
|
Ok, Im in the middle of doing my tank reseal and I discovered that my hard plastic lines are brittle, one of my hard plastic lines that go into my roll over float valve just snapped as I was unhooking my expansion tank. THen as I inspected it it broke again. I am referring to #19 as seen in the following diagram:
http://www.jimellisvwparts.com/images/parts/VW/fullsize/004032000.jpg
I called GoWesty and Van Cafe and both places say that they do not sell this hard plastic hose. They both suggested using old/used line from a salvaged bus. To me that is not an option.
I thought about using some of this,
http://www.gowesty.com/ec_view_details.php?id=23642&category_id=&category_parent_id=
I have some in front of me, left over from my fuel line replacement kit that I used awhile back and it looks to be the same size. When I called GoWesty to ask them about using this they said that it is not advised.
I looked through threads on tank resealing and I read that some simply used fuel line and skipped using the hard plastic line all together, whereas some had replaced the hard plastic line with another.
I found this: http://www.thesamba.com/vw/forum/viewtopic.php?t=540629&start=0
....and....
indytriple, in this thread stated: "I used standard fuel line from the FLAPS to replace ALL of the black plastic hose. It's a bunch. If I recall it's something like 10-12 feet of hose. It has been working great. The expansion tanks are snug, and there doesn't seem to be undue pressure on the roll-over valve from the increased diameter tubing on top. There's no room to spare, though."
And...
Vanagon Nut wrote:
I recall now what I did. I just slipped a piece of fuel hose over the nylon hose and valve nipple. It was a tight fit. The logic being that there shouldn't be much, if any, pressure in the EVAP system (if it's working right) and the original nylon hose was a slip fit. Finding a sweet spot for that transition to fit in the stock position, and allow expansion tank to seat was not easy but AFAIK, it fit with little to no pressure on valve.
In another thread, seen here: http://www.thesamba.com/vw/forum/viewtopic.php?t=591853&highlight=fuel+expansion+tank
wasserbox had stated: I got some bulk FI hose from Autozone and replaced every bit of fuel line.
Ok, so I have several questions...............
It is strange to me that these kits do not address this, nor do any of the vendors seem to carry replacement line for these sections. Why replace the age old rubber hoses and leave the black plastic ones as they are?
1)
I found this when looking around online:, http://www.ratwell.com/technical/FuelHoses.html#hose
Under Locating Hose: it lists Fuel hose (FI), Breather lines, Would this be the stuff I need?
2)
What is the consensus here? What is the opinion of those who have done this as to the best method in replacing all of these black lines?
3)
And... Does anyone have any links to replacement lines, or part numbers, etc?
_________________
1989 Westfalia Vanogan GL, 2.1 |
|
| Back to top |
|
|
Milfordite
Samba Member
Joined: August 18, 2011
Posts: 43
Location: United States
|
| Posted: Sat Jul 14, 2012 2:52 am Post subject: |
|
|
When you do the tank reseal, don't neglect to replace the rubber bushings in the top of the expansion tanks. Water can get thrown up from the wheel, get into the tank, and from there to your gas tank. Trust me on this, no fun! Mine were toast, but when I put in a new tank and lines, I didn't pull the expansion tanks off....bad move!
_________________
1990 VW Vanagon westy |
|
| Back to top |
|
|
torchmonkey
Samba Member
Joined: June 16, 2012
Posts: 248
Location: Philly
|
| Posted: Fri Jul 13, 2012 2:46 pm Post subject: |
|
|
| OK good. thanks. moving right along then... |
|
| Back to top |
|
|
Altoona
Samba Member
Joined: November 14, 2011
Posts: 597
|
| Posted: Fri Jul 13, 2012 2:44 pm Post subject: |
|
|
| torchmonkey wrote: |
Putting in a tank and all new seals etc... one question I haven't seen addressed is: there is a hook/ clamp screwed into the body of the van that looks like it may be to hold the crossover tube in place. You can see it in the center. Is this what it is actually used for???
|
Yes. |
|
| Back to top |
|
|
torchmonkey
Samba Member
Joined: June 16, 2012
Posts: 248
Location: Philly
|
| Posted: Fri Jul 13, 2012 1:24 pm Post subject: |
|
|
Putting in a tank and all new seals etc... one question I haven't seen addressed is: there is a hook/ clamp screwed into the body of the van that looks like it may be to hold the crossover tube in place. You can see it in the center. Is this what it is actually used for???
|
|
| Back to top |
|
|
SCM
Samba Member
Joined: January 26, 2011
Posts: 3474
Location: Bozeman MT
|
| Posted: Thu May 31, 2012 8:27 am Post subject: |
|
|
| joetiger wrote: |
| So, remember to change those two hoses! And ... |
And for anyone else about to put in a NEW tank, check out this thread regarding the hassles they may cause when seating the fuel gage sending unit. I'll be redoing my install in a couple weeks because of this issue.
http://www.thesamba.com/vw/forum/viewtopic.php?t=513681&highlight=fuel+tank+reseal
On the plus side, I get to use my step-dad's GIANT garage, ramps, jack, etc. The job only took me 4 1/2 hours the first time and I bet I can shave an hour off of that on round two.
_________________
'91 Westfalia GL Automatic (GTA "Turbo" Rebuild w/Peloquin) and 2.3L GoWesty Engine |
|
| Back to top |
|
|
joetiger 
Samba Member

Joined: January 27, 2005
Posts: 5274
Location: denver
|
| Posted: Thu May 31, 2012 6:34 am Post subject: |
|
|
Regarding the feed and return lines...
I've done the tank reseal and new lines to the motor, but like an idiot I never replaced the feed and return lines from and to the tank.
For a couple of years I've had the common buzzing fuel pump issue and an odd hesitation issue, like the motor is clearing its throat on heavy acceleration and also hesitates ever-so-slightly on acceleration, just enough to be noticeable. I couldn't figure it out.
A few weeks ago after a fill-up, I noticed an unusually strong fuel smell. On a whim I got under there and just touched the feed line. The whole thing went wet. It didn't drip, but gas was seeping out around the connection to the tank.
Dumbass...I never changed those two hoses. Upon further inspection, they were both dry-rotted, cracked, and leaking at the clamps.
I replaced them a few days later, and no more pump whine, no more hesitation. I can't believe the hesitation issue was as simple as that, but I'm assuming that the feed line was allowing air into the system before the pump and causing cavitation and slight fuel starvation. In any case, problem solved!
So, remember to change those two hoses! And give yourself a swift kick in the ass if you overlooked it like I did.
_________________
Joe T.
'86 NAHT Vanagon GL Syncro/ supercharged ABA 2.0 "Pigpen"
'91 Wolfsburg Carat "Barchetta"
'02 Baja-ish Beetle "Bubbles"
"get metaphysical with it. if it's simply a means to get to and from places, it will let you down. if it becomes your zen, it can't fail you." -dabaron
"Still, it's good to be afield."--VWagabond
Justice for Megan: https://linktr.ee/justiceformegantrussell |
|
| Back to top |
|
|
fortyyearoldnoob
Samba Member
Joined: October 20, 2011
Posts: 11
Location: Los Angeles
|
| Posted: Thu Nov 17, 2011 3:55 pm Post subject: Clean inside tank before installing? |
|
|
Hi folks,
Just bought a used tank to swap out for my dented/leaky one, and drained all the gas inside. Though I plugged up the holes while cleaning it, a few bits of debris/gunk hovering about the openings fell in during the process. I also noticed the entire inside is covered in brown spots. So my question is: do I need to clean the inside before installation? If so, how? Can I just rinse it out with a bit of gas, or is that too dangerous? And what are those brown spots, rust?
-J
_________________
'85 Full Westy, '93 EJ-22 (non-turbo, MFPI, SOHC) |
|
| Back to top |
|
|
Vanagon Nut
Samba Member

Joined: February 08, 2008
Posts: 10506
Location: Sunshine Coast B.C.
|
| Posted: Fri May 06, 2011 11:08 am Post subject: |
|
|
| MootPoint wrote: |
.... I clipped some of the other nylon hose - where it headed toward the T - and will install it on the evap tank valve nipple and then use a piece of gas line to get it down and over to the original line. |
Pretty sure I didn't do it that way but IMO makes more sense than attaching fuel hose to valve then nylon from there.
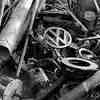
I think I posted this pic already elsewhere, but for anyone doing this, make sure you don't pinch the black nylon hose between frame and tank. IIRC, this happened b/c I was tugging on hose working on the transition from rollover valve. (edit: on my first tank reseal effort)
Neil.
(p-side of 1981 model. Not sure if body work detail same for all MY)
_________________
1981 Westy DIY 15º ABA
(VW Gas I4)
1988 Westy DIY 50º ABA
VE7TBN |
|
| Back to top |
|
|
randywebb
Samba Member

Joined: February 15, 2005
Posts: 3815
Location: Greater Metropolitan Nimrod, Orygun
|
| Posted: Fri May 06, 2011 10:42 am Post subject: |
|
|
small amounts of clean old fuel can be mixed with new fuel & burned - esp. good if you do it in a vehicle you don't care about
_________________
1986 2.1L Westy 2wd Auto Trans. |
|
| Back to top |
|
|
akyrie
Samba Member
Joined: March 24, 2010
Posts: 519
Location: Driftless, Wisco
|
| Posted: Fri May 06, 2011 5:54 am Post subject: |
|
|
Make sure to route the breather tube correctly, this seems to be a big problem. I just did my seals too, and I didn't do it correctly the first time, had to go back in and route the breather tube the right way. I hope that it works out this time.
Using ramps for this project rocks, although on my second go round I didn't have access to them and I figured it out. If you didn't route the breather tubes right the first time, you dont have to empty your tank. What I did was remove the straps with a jack underneath the tank, and lowered the tank until i could reach my hand up and re-route the breather tube. This was done through two access parts, behind the passenger wheel, and from the behind the tank.
yeah pain of a project, what do I do with my crap fuel that I cleaned out of the tank? I am in a city now, but I am used to just using it a bon fire starter fluid where I am from. Tank wasn't dirty but I forgot to clean the drain bucket, duh! at 4 bucks a gallon.
_________________
Although I got a funny message from the Porsche guys, it read, "what a mighty ship that you must sail"
....has anyone else received that?
82 AHU DK, 1950's Puch-black |
|
| Back to top |
|
|
indytriple
Samba Member

Joined: April 27, 2009
Posts: 710
Location: Brownsburg, Indiana
|
| Posted: Thu May 05, 2011 8:32 pm Post subject: |
|
|
I just replaced my fuel tank, crossover tube and the expansion tank and charcoal canister hoses on my Westy. I used standard fuel line from the FLAPS to replace ALL of the black plastic hose. It's a bunch. If I recall it's something like 10-12 feet of hose. It has been working great. The expansion tanks are snug, and there doesn't seem to be undue pressure on the roll-over valve from the increased diameter tubing on top. There's no room to spare, though.
| mootpoint wrote: |
| I found it really handy to have a floor jack available to help lift the tank back in place. A short 4x4 under the tank helped spread the force. |
X2. Definitely do this. SUPER easy this way.
Also, I mounted the crossover tube in the hook that is bolted onto my underbody. I ran it over the e-brake, coolant pipes, etc. I left the plastic nipples of the crossover tube out of the tank until it was lifted and mounted into position. I then reached into each wheel well and pushed the plastic nipples into the grommets on the tank.
I used a gasoline-resistant sealant on each grommet on the tank where the rubber touches the tank, and on the fuel sending unit rubber seal as well. I used it VERY sparingly, and I made sure that no excess was squeezed anywhere into the inside of the tank when the grommets were put in place.
_________________
"See The Glass As Already Broken."
87 Vanagon Westy Auto Bostig
www.bluegrassbicyclecompany.com |
|
| Back to top |
|
|
MootPoint
Samba Member

Joined: September 16, 2006
Posts: 862
Location: ABQ, NM
|
| Posted: Mon May 02, 2011 3:34 pm Post subject: |
|
|
| Vanagon Nut wrote: |
I recall now what I did. I just slipped a piece of fuel hose over the nylon hose and valve nipple. It was a tight fit. The logic being that there shouldn't be much, if any, pressure in the EVAP system (if it's working right) and the original nylon hose was a slip fit. Finding a sweet spot for that transition to fit in the stock position, and allow expansion tank to seat was not easy but AFAIK, it fit with little to no pressure on valve. |
That's exactly what I am planning to do tomorrow once it warms up again. I clipped some of the other nylon hose - where it headed toward the T - and will install it on the evap tank valve nipple and then use a piece of gas line to get it down and over to the original line. Since it will be coming off the front of the tank and in harm's way from tire debris (and not out the back were it gets some protection) I think a heavier hose is a good idea there anyway.
Thanks for the help.
_________________
1984 Westy with tencentlife power! |
|
| Back to top |
|
|
Vanagon Nut
Samba Member
Joined: February 08, 2008
Posts: 10506
Location: Sunshine Coast B.C.
|
| Posted: Mon May 02, 2011 1:30 pm Post subject: |
|
|
| MootPoint wrote: |
| Vanagon Nut wrote: |
The black nylon hose is used elsewhere on a Vanagon. If one has spare hose, I bet installing a new piece(s) at "T" easy with tank out. This would offer a chance to inspect this "T" (it's old so handle it carefully. Maybe a FLAPS has one?). |
I didn't know what to do with the evap hose, as I wasn't sure about the material. Is that a standard FLAPS item? I don't see it on the VC or GW sites.
The hose does appear to contract upon cooling off from the heat gun.
I didn't consider replacing the roll over valve. Do they wear out? How do you know? By being handed the FAIL notice from the smog guy? |
Meant: "if one has spare hose from another Vanagon" Was suggesting that if "T" broke, a FLAPS may have that size "T". I have read elsewhere of that part failing due to age edit: and handling (cutting off nylon hose)
No. "FAIL" notice not handed to me by smog guy.  Bentley describes test for roll over valve P. 20.27 Bentley describes test for roll over valve P. 20.27
Offered source of new valve in case one broke nipple off while trying to remove from expansion tank. As you wrote, one could cut the black nylon hose.
I recall now what I did. I just slipped a piece of fuel hose over the nylon hose and valve nipple. It was a tight fit. The logic being that there shouldn't be much, if any, pressure in the EVAP system (if it's working right) and the original nylon hose was a slip fit. Finding a sweet spot for that transition to fit in the stock position, and allow expansion tank to seat was not easy but AFAIK, it fit with little to no pressure on valve.
_________________
1981 Westy DIY 15º ABA
(VW Gas I4)
1988 Westy DIY 50º ABA
VE7TBN |
|
| Back to top |
|
|
|


