| Author |
Message |
Mr Margaret Scratcher
Samba Member
Joined: February 10, 2013
Posts: 302
Location: Cambridge UK

|
 Posted: Mon Aug 14, 2023 11:40 am Post subject: Re: 1966 Deluxe 21 Window Shamba Posted: Mon Aug 14, 2023 11:40 am Post subject: Re: 1966 Deluxe 21 Window Shamba |
 |
|
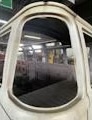
Cleaned up pretty well:
Screwed this outer panel in place to get it nice and tight:
Really struggled with the plug welds here, seemed like the wire was just burning back to the torch every time on some of the holes - could be that the remnants of paint were preventing good conductivity maybe:
Sod's law of course, these last two just flowed out perfectly:
Didn't really need to grind any of this back as it will all be hidden, but thought it was a good idea to check there were any missed spots, and also always good to have a practise
Eh... Well, it's done, I guess, even if it does look like it was repaired with chewing gum. To be honest I think I rushed, and it shows. Oh well, all lessons learned. |
|
| Back to top |
|
 |
Mr Margaret Scratcher
Samba Member
Joined: February 10, 2013
Posts: 302
Location: Cambridge UK
|
| Posted: Sun Aug 20, 2023 12:35 pm Post subject: Re: 1966 Deluxe 21 Window Shamba |
|
|
Over on to the other side:
Trimmed off the rot but left the outer metal lip attached to the main lip:
Repair patched in:
Outer patch made:
Prepped and ready for welding next time:
|
|
| Back to top |
|
|
Mr Margaret Scratcher
Samba Member
Joined: February 10, 2013
Posts: 302
Location: Cambridge UK
|
| Posted: Mon Aug 21, 2023 2:34 am Post subject: Re: 1966 Deluxe 21 Window Shamba |
|
|
Also had a further tinker with the long side panel.
This lip needed trimming down somewhat in order to fit into the indent on the B pillar:
But I found that with the panel clamped with the lover edge flush with the inner rocker panel edge, the leading edge was a bit forward:
And the rear edge looked similar:
I could get the rear to line up:
But only with the rear lower lip misaligned, so the panel was slanting downwards towards the rear:
I did get it a bit closer with a bit of work on the B pillar, but I don't want to push that too far back, as that will affect the dogleg fitment. |
|
| Back to top |
|
|
Mr Margaret Scratcher
Samba Member
Joined: February 10, 2013
Posts: 302
Location: Cambridge UK
|
| Posted: Tue Aug 22, 2023 1:19 pm Post subject: Re: 1966 Deluxe 21 Window Shamba |
|
|
Got this repair patch in on the inner valance:
I'm going to grind it back a bit more but it was getting late. |
|
| Back to top |
|
|
Mr Margaret Scratcher
Samba Member
Joined: February 10, 2013
Posts: 302
Location: Cambridge UK
|
| Posted: Sun Sep 10, 2023 3:16 am Post subject: Re: 1966 Deluxe 21 Window Shamba |
|
|
Did a bit more tinkering with getting the long side panel to fit:
(Thanks to everyone that gave me advice in this thread: https://www.thesamba.com/vw/forum/viewtopic.php?t=784458)
But before that goes on I need to replace the support posts, got the old ones cut out and trimmed back, mocked up with the replacement posts:
More mocking up:
(Feels good, going to feel even better when they're actually welded in!
But before that, I need to do some repairs on the inner rocker:
Or at least i thought so - a quick run along with the wire wheel revealed a few more holes:
So I'm now weighing up whether completely replacing with a new rocker is going to be more economical than repairing the holes, both in terms of time and money (£20) |
|
| Back to top |
|
|
ted698
Samba Member
Joined: June 17, 2016
Posts: 142
Location: Shropshire, UK
|
| Posted: Mon Sep 11, 2023 8:24 am Post subject: Re: 1966 Deluxe 21 Window Shamba |
|
|
| If thats all there is I'd back it with copper (flatten an old copper pipe) to stop blow through, and weld it up - would literally take minutes... |
|
| Back to top |
|
|
Mr Margaret Scratcher
Samba Member
Joined: February 10, 2013
Posts: 302
Location: Cambridge UK
|
| Posted: Mon Sep 11, 2023 11:13 am Post subject: Re: 1966 Deluxe 21 Window Shamba |
|
|
| ted698 wrote: |
| If thats all there is I'd back it with copper (flatten an old copper pipe) to stop blow through, and weld it up - would literally take minutes... |
I've ordered a replacement, but yeah, you're probably right, and I already have some copper.
It's the little dimples that are *about* to be holes that make me think i should just replace the whole thing, to be honest |
|
| Back to top |
|
|
Mr Margaret Scratcher
Samba Member
Joined: February 10, 2013
Posts: 302
Location: Cambridge UK
|
| Posted: Sat Sep 23, 2023 12:15 pm Post subject: Re: 1966 Deluxe 21 Window Shamba |
|
|
Got out and had a little tinker today:
So the B post sandwiches in between the bulkhead and whatever the panel is called that the dogleg joins on to:
So that panel needs to come off first:
TADA!
Since last time I've also welded up all the little holes in the inner rocker, uncovered some more today when the B pillar came out but I think patching it is the way to go. Plus it's all practice.
I am wondering whether to weld the B post and vertical supports before the long panel long panel
Pros:
This would have been how it would have been done originally
Can weld from outside (I really need to empty the engines etc out of the bus, and cut out the floor)
Cons: hard to align lips on the posts to the long panel skin
Orrrrrrr weld the long panel on first then repair the posts
Pros:
Snug fitting against the long side panel
Cons:
Can't access the insides of the pillars to rustproof
Potentually more heat/warpage going into the long panel when welding the posts |
|
| Back to top |
|
|
Mr Margaret Scratcher
Samba Member
Joined: February 10, 2013
Posts: 302
Location: Cambridge UK
|
| Posted: Sun Oct 08, 2023 1:37 pm Post subject: Re: 1966 Deluxe 21 Window Shamba |
|
|
Got out for a little while today, tackled this bit of the inner rocker:
(I've already filled up the smaller holes)
Recycling the old outer panel:
|
|
| Back to top |
|
|
Mr Margaret Scratcher
Samba Member
Joined: February 10, 2013
Posts: 302
Location: Cambridge UK
|
| Posted: Sun Apr 21, 2024 2:06 pm Post subject: Re: 1966 Deluxe 21 Window Shamba |
|
|
Sun's out again in the UK, so I got out for my first proper weekend of tinkering today:
Needed to patch this hole in the inner rocker:
Patch made (Again, using old offcut from the old side panel):
Then after filling in another couple of pinholes on the inner rocker, I welded on the long panel support posts:
Got the B post welded on here:
There seems to be remnants of seam sealer here - is sealer used between this panel and the closing panel, or has it just squished under the closing panel afterwards?
But the issue was that if I made the corner of the panel line up, the curved lip was sitting too far in:
I might have to cut a slit in this to move the lip out to where the side panel will sit |
|
| Back to top |
|
|
Mr Margaret Scratcher
Samba Member
Joined: February 10, 2013
Posts: 302
Location: Cambridge UK
|
| Posted: Sat May 03, 2025 3:29 pm Post subject: Re: 1966 Deluxe 21 Window Shamba |
|
|
The weather in the UK is nice again, so I got outside and made a bit of progress:
Before:
After:
Happy to have that done, although I still need to tackle the tricky under toolshest and bulkhead area, and then the long side panel... |
|
| Back to top |
|
|
pondoras box
Samba Member
Joined: March 22, 2004
Posts: 1596
Location: Eerie PA
|
| Posted: Sat May 03, 2025 6:17 pm Post subject: Re: 1966 Deluxe 21 Window Shamba |
|
|
Good job on this one. The neat thing about buses this rusty is that you know exactly how they go together when you’re done with them. Keep plugging away at it and it will be solid before you know it.
_________________
Looking for anything from Hal Casey Motors out of Hamburg New York, from license plate surrounds to matchbooks.
1961 23 Window (Bobo)
1965 11 Window (Zelda). https://www.thesamba.com/vw/forum/viewtopic.php?t=563183
1965 13 Window (Lucas)
1957 Oval ragtop
1960 hardtop
1964 hardtop
1965 hardtop
1973 standard bug
https://www.thesamba.com/vw/forum/viewtopic.php?t=804912
1988 Cabriolet VR6 conversion
Plus a lot of other rusty junk |
|
| Back to top |
|
|
Mr Margaret Scratcher
Samba Member
Joined: February 10, 2013
Posts: 302
Location: Cambridge UK
|
| Posted: Tue Jul 01, 2025 2:40 pm Post subject: Re: 1966 Deluxe 21 Window Shamba |
|
|
| pondoras box wrote: |
| Good job on this one. The neat thing about buses this rusty is that you know exactly how they go together when you’re done with them. Keep plugging away at it and it will be solid before you know it. |
Cheers, gradually chipping away!
Speaking of - finally removed the last remnants of the old front top hat around the gear shift tube
|
|
| Back to top |
|
|
|


