| Author |
Message |
72Ghia
Samba Member

Joined: November 11, 2007
Posts: 1253
Location: Baltimore Maryland

|
 Posted: Sun Jun 22, 2008 8:26 pm Post subject: 72 Ghia Vert Restoration Update Posted: Sun Jun 22, 2008 8:26 pm Post subject: 72 Ghia Vert Restoration Update |
 |
|
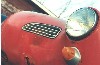
Here we have a 72 Ghia Vert shown as it arrives to it's new home.
Purchased from a friend who was moving & was forced to unload it.
The previous owner had problems getting it running therefore it
sat in a large shed for about 9 years.
This is how it looked as it arrived to it's new home.
Some mouse nesting activities detected
the culprit. Still not sure how one made his way onto the washer fluid container but that could be why the sprayer was Kaput.
"Signs" of shotty repairs. Some fine workmanship there.
Little time passed before dismantling begins.
Along the way lots of photos were taken. A digital camera can be a great tool for drawn out restorations. Espeically for those with poor memory 
Small parts were cleaned up, inspected, bagged, tagged, labeled & boxed.
A Blasting booth like shown here http://www.harborfreight.com/cpi/ctaf/displayitem.taf?Itemnumber=42202 is great for these smaller parts.
If you choose to use this booth you will probably want a shop vac with microfilter bag inside attached to the booth. This will prevent clouding up by pulling dust partcles away. Other considerations are a respirator & sealed flourescent light to install in the booth. I used someting like this:
http://www.harborfreight.com/cpi/ctaf/displayitem.taf?Itemnumber=46114
Two catagories were created for the parts:
1. Restored
2. Unrestored
Within those catagores parts were sorted furthermore as they pertained to the car such as : Exterior , Interior , Engine & so on.
File cards were placed on each box listing & detailing what was inside.
Any missing pieces were also noted on the file cards. Even down to missing bolts & screws. From those labels a sheet was made in order to search for parts. The file cards on the boxes are updated as parts are added , transferred , etc. This has made things a little easier during mock ups too.
The shell goes off to be soda blasted
& brought back a few days later.
Removing previous repair materials found in the panels.
In this case some galvanized screen & lots of filler.
Once paint, bondo & dirt were blasted off rust damage was better determined & repair sections were ordered. I decided to use the entire repair section therefore having better access to clean up what was behind it.
Many of them were obtained as restoration left overs from the Samba classifieds.
After some wire wheeling & POR15
New panel clamped in place with weld clamps obtained from Harbor Freight.
After mig welding, a thin layer of Bondo was applied on the outside & 3M Seam Sealer to the inner side.
cutting out the old headlight section.
ready to install the new
fitting weld clamps. Afterwards I went around and tacked this section on
between the clamps, removed them and continued adding tack welds until the cut was completely filled in.
I thought this would make a good practice piece for mig welding since it was a small panel.
Need some more practice with the mig
soda blasting reveals previous nose repair tacked on a lap welded donor fender
finding bondo , bondo & more bondo
peeling off the overlapping sheetmetal, exposing the rusted underlying original
cutting along the previous repair weld
doing away with the lap welds & will reattach later when repair parts become available.
So this is how the front remains until an inner fender is available and fresh air box is ordered. I will try and get some more practice in before
re-attaching this portion
It appears the front end rec'd a good "whack" back in it's day.
With the inner and outer front fender removed it will be a good time to straighten or switch out these wrinkled panels. Lesson learned here is :
When inspecting a Ghia for purchase. 1. Dont do it in the dark, 2. Dont inspect it with a bunch of boxes piled on the front hood. 3. Remove the spare tire and mouse nesting materials from the well first. 
After neutralizing the baking soda used to blast the paint off, remaining rust was sanded the clean metal was lightly prepped & primed
Decided to put some primer on the car just as self reasurrance that progress was being made.
For anyone looking to soda blast a car, you need to neutralize the baking soda which will remain on the steel afterwards. I was instructed to wash it down with 10 percent vinegar & water, then rinse with water.
More pics to follow... keep checking the thread & thanks again to all for the influence of the project & inspiration !
_________________
Bill
WTB- Billet center caps with Wolfsburg logo
72 Ghia Vert project
Bodywork http://www.thesamba.com/vw/forum/viewtopic.php?t=303542&highlight=
Re-assembly: http://www.thesamba.com/vw/forum/viewtopic.php?p=4762737#4762737
72 Beetle Weekend Driver, restored in the 90's
http://www.thesamba.com/vw/forum/viewtopic.php?t=353424
www.airsuckers.com
Last edited by 72Ghia on Fri May 29, 2009 1:31 pm; edited 49 times in total |
|
| Back to top |
|
 |
NOVA Airhead
Samba Member

Joined: July 20, 2005
Posts: 5225
Location: Richmond, VA
|
| Posted: Mon Jun 23, 2008 6:16 am Post subject: |
|
|
Nice work! You have made great progress.
Are you saying that new metal was laid right over the old?!
It never ceases to amaze me some of the repairs that happen to these cars.
_________________
Ghia Owner Emeritus |
|
| Back to top |
|
|
Bad Karma
Samba Member
Joined: April 17, 2008
Posts: 90
Location: Maryville, IL
|
| Posted: Mon Jun 23, 2008 7:36 am Post subject: |
|
|
What are the weld clips you are using, I have never seen those before?
_________________
'69 Ghia Coupe |
|
| Back to top |
|
|
72Ghia
Samba Member
Joined: November 11, 2007
Posts: 1253
Location: Baltimore Maryland
|
|
| Back to top |
|
|
NOVA Airhead
Samba Member
Joined: July 20, 2005
Posts: 5225
Location: Richmond, VA
|
| Posted: Mon Jun 23, 2008 9:16 am Post subject: |
|
|
Given the level of work you are doing, I have a question. Are you planning to keep the large '72 style bumpers, earlier bumpers or something else? Also on the turn signals. Any thought on using the older bullet style.
It looks like you are planning to use the '72 bumpers in the rear based on the indentations.
_________________
Ghia Owner Emeritus |
|
| Back to top |
|
|
denizen224
Samba Member

Joined: June 10, 2007
Posts: 253
Location: Bill's Bug 'n Bike Barn, Merry Land
|
| Posted: Mon Jun 23, 2008 9:40 am Post subject: |
|
|
It looks to me like he's staying fatchick the whole way. In particular, the new rear quarter clip patch panel used is the one with the depression for the Europa bumpers.
_________________
Mr. Bill |
|
| Back to top |
|
|
72Ghia
Samba Member
Joined: November 11, 2007
Posts: 1253
Location: Baltimore Maryland
|
|
| Back to top |
|
|
NOVA Airhead
Samba Member
Joined: July 20, 2005
Posts: 5225
Location: Richmond, VA
|
| Posted: Mon Jun 23, 2008 9:59 am Post subject: |
|
|
72Ghia wrote:
| Quote: |
| I know a lot of people do not care for the "fattie style" so any ideas on what direction to go here? |
It depends on your budget and what you prefer. There are plusses and minuses to fitting the early style bumpers:
Plus: You have the earlier style bumpers that seem to be favord by a lot of people.
Minus: You have a car that really isn't anything as its a hybrid that is not reasily reversed. Even if you put the bumpers on, You still have the larger taillights that people do not seem to favor.
Given the number of changes involved and the fact that you already have some nice parts, I would keep it stock.
IMO if you want the earlier look, buy another car.
_________________
Ghia Owner Emeritus |
|
| Back to top |
|
|
waxhead
Samba Member

Joined: January 19, 2004
Posts: 950
Location: Philly 'burbs
|
| Posted: Mon Jun 23, 2008 10:17 am Post subject: |
|
|
You've got your work cut out for you! Lookin' good though. My vote is to keep it stock - keep the original bumpers. I think they look fine on the later models. Probably add to the future value of the car too.
_________________
Mike B. |
|
| Back to top |
|
|
72Ghia
Samba Member
Joined: November 11, 2007
Posts: 1253
Location: Baltimore Maryland
|
|
| Back to top |
|
|
72Ghia
Samba Member
Joined: November 11, 2007
Posts: 1253
Location: Baltimore Maryland
|
|
| Back to top |
|
|
72Ghia
Samba Member
Joined: November 11, 2007
Posts: 1253
Location: Baltimore Maryland
|
|
| Back to top |
|
|
dubulup
Samba Member

Joined: November 13, 2008
Posts: 387
Location: Earth People
|
| Posted: Thu Dec 18, 2008 8:33 am Post subject: |
|
|
I just spent a lot to get the fattie turnlamps resurrected...I love the look of the ghia above.
can't wait until I find some bumpers |
|
| Back to top |
|
|
72Ghia
Samba Member
Joined: November 11, 2007
Posts: 1253
Location: Baltimore Maryland
|
|
| Back to top |
|
|
70 140
Samba Member
Joined: September 22, 2002
Posts: 8471
Location: Ontario Canada
|
| Posted: Thu Dec 18, 2008 1:29 pm Post subject: |
|
|
I don't know why people are so fixated on switching to early bumpers on later cars. I like the look of the later bumper on the late car. Plus they are more of a bumper, the old style is pretty thin. It doesn't take much to dent it.
The bumpers on Bones vert look clean!! |
|
| Back to top |
|
|
72Ghia
Samba Member
Joined: November 11, 2007
Posts: 1253
Location: Baltimore Maryland
|
|
| Back to top |
|
|
72Ghia
Samba Member
Joined: November 11, 2007
Posts: 1253
Location: Baltimore Maryland
|
|
| Back to top |
|
|
Geardo
Samba Member
Joined: October 08, 2008
Posts: 116
Location: Lafayette,LA
|
| Posted: Thu Dec 18, 2008 4:19 pm Post subject: |
|
|
Great work there 72Ghia, love the pictures of your progress
_________________
71 KG Coupe
65 Corvair Corsa Convertible
2000 Suzuki Bandit 1200 |
|
| Back to top |
|
|
72Ghia
Samba Member
Joined: November 11, 2007
Posts: 1253
Location: Baltimore Maryland
|
|
| Back to top |
|
|
hovercraft
Samba Member
Joined: October 23, 2008
Posts: 3
Location: El Paso Texas
|
| Posted: Wed Mar 25, 2009 8:56 pm Post subject: |
|
|
| Wow! Great thread, you've inspired me. |
|
| Back to top |
|
|
|


