| Author |
Message |
hemifalcon
Samba Member

Joined: June 15, 2005
Posts: 1483
Location: Union Grove, WI

|
 Posted: Thu Jun 17, 2010 10:17 pm Post subject: 1962 Original Style Multi-Piece Mohair Headliner install :-) Posted: Thu Jun 17, 2010 10:17 pm Post subject: 1962 Original Style Multi-Piece Mohair Headliner install :-) |
 |
|
Okay, so here it goes.. I finally jumped full bore into the installation of this WWest Mohair multi-piece (original) style headliner installation. I took pictures along the way to show anyone here who needed them. I looked periodically and found very few details but luckily some decent pictures in the gallery of other installed headliners for reference. Hopefully these pictures will serve to help some of you out there struggling with the idea of doig it yourself, not at all, or paying the $$$ to have a 'professional' do it. As with all things--patience is the real key to doing this job. That is also the primary key to doing one of the 'one-piece' headliners. If anyone has any questions, please feel free to ask.. Here is a partial list of things you need to do this. (I made a note to clean my hands between every break, and when I moved onto a new section of the headliner--) And yes, at looking at this material, i think I shoulda used a different color to match my interior better.. :-/
1. Patience.
2. Adhesive (3m Super 77, or Super 90(dries faster than the 77), and some brush on Dap Weldwood Adhesive)
3. Solvent for cleanup of glue.
4. Clean hands (let me repeat--keep your hands clean with working with this material. It gets dirty easily, and if you get glue on it--forget it, it's ruined.)
5. Small flexible putty knife (plastic or flexible metal 1-1.5")
6. Lots of Binder Clips
7. Hammer, and drift for closing toothed clamps
8. heatgun (not absolutely necessary)
9. Razor blades and sharp scissors (many relief cuts)
10. Padding for roof, personal preference here-
11. Good lighting
12. Patience, soothing music, and no distractions.. That should top it off.
One thing to note here-- I found the Mohair headliner to be especially nice to work with. I actually prefer it over the vinyl now that I've worked with it. Okay, that's it for now. Here's the pics so far.. Will finish tomorrow.
Here is the rear windows with the padding installed, I jused a combination of foam backed with felt and quilt batting to smooth the transitions..
Here is the rear window area as I started.. I didn't go about this perfectly, as the single piece of fabric should be able to encircle the entire window. I believe that if you glue the bottom first, vice the top-this will work. You will see how I remedied this
Cutting out a small hole in the middle, then working outwards with relief cuts towards the window opening edges--you slowly are able to gather the fabric where it belongs. Don't pull it too tight here. YOU AREN'T USING GLUE AT THIS POINT, UNLESS YOU HAVE SECURED THE BOTTOM-
At this point, i've got a bit of Dap on the top edge of the window opening, and at the bottom to help secure the material for easier handling. I have started using my clips along the circumference of the opening as well. Dont' worry about the gap where you see the padding at the bottom.. It'll get covered.
Here is the partially finished rear window. You see that there are no wrinkles, and it's basically in it's finished location. It's not SUPER tight either. Just taught. It doesn't need to be springboard tight
Here is how I finished off the bottom. I had enough excess material at the top when I was done with the initial fitting, that I was able to cut it off and it fit across the bottom. I made some rough angles at the bottom, folded them in a seam, made them uniform, and then glued it into position. Same as everything else, clamps, check fit, then glue into place and re-clamp.

Door posts are next. These are relatively straight forward. You'll have to make sure that all the grippers are opened far enough at the door jamb to capture the windlace. Once this is in place, go ahead and push the windlace into position. Once it's in position, and equally centered, hammer down the grippers carefully making sure that the windlace stays in place. Once they are all hammered down, with NO glue, start checking how the material will lay on the metal/padding. There will be some generous stretching and manipulation of the material here to get it over the bumps and curves. Don't cut anything until after the glue has set--or all the job is done.. There's no point to trim anything until you are done! Make sure for ease of locating later, to find the holes for the assist strap screws--once all the material is in place, these can be hard to re-locate.


After the back window (the hardest part) is completed, and you have the door pillars done, you get to the quarter roof sections. These aren't necessarily easy either, but once you get them in place--you are good to start. With the WWest headliner, and i'm guessing others- there is a nylon strip that allows for the rear quarter grippers to lock onto this piece. I had to trim mine significantly to get it to fit, but it was likely just due to the extra fabric i had stuffed into the seam from the rear window material. So, just check yours. Ensure that when you are placing this into position, you have the strip centered for the most part from top to bottom. Starting anywhere with the grippers, start hammering them down capturing the nylon strip and cloth/vinyl. Ensure that your rear window cloth stays pinched in there as well and that once all are hammered down, you have a nice even seam from the top to the bottom where they merge. Take your time here--this is another quick spot to view many botched headliners. The first thing I did after tucking the seam and hammering the grippers, was run an artists paint brush with Dap Weldwood glue over the top of the roof rail to secure the cloth going to the front of the car. You will have to let this set (I gave it an hour drying time per side).


Here is the initial dry fit after the top rail was allowed to dry. Same as with the rear window, take your time, making sure the material is smooth, and wrinkle free. (I still don't know how those crazy Germans did this in a factory assembly line!)


Notice the liberal use of the binder clips.. Make sure you have a lot of them! Relief cuts around the window opening once again, and also at the door opening. For the cut just forward of the door jamb/pillar, just make it straight, no special angle cuts or anything. Then, take the excess material and make it into an approximate 45degree angled fold. If you do this right, you won't have to worry really about gluing the folded portion--this is a pain and glue usually shows at the fold. Put the binder clips along the door pening on the flat grippers and don't pull too tight, you shouldn't have to. Remember, right now there is only a small bit of glue along the very top/inner edge of the roof rail. AS you get towards the front of the door opening, you'll need to again create an angled fold. See picture for detail. You will have to spend some time stretching the material around the point where the rear seat bump stops fasten. Take your time, get it to fit nicely here- don't cut any of the excess. Just glue it to the wheel well when you are ready for glue. Once you have everything fitting nicely, remove your clamps, get your choice of spray adhesive, and go to town, but don't get anything soaked.


Mistakes happen when you are doing this all day, and you are tired. I dropped my quart of Weldwood just inches from my doorsill.. didn't spill too much, but if it was in the car, what a mess. Some solvent, and some rags-and it was gone..
So, continuing on.. I finish up this post now..
Here you can see hwo I finish up the roof/sides after the glue was allowed to set over night. I put a little of the Weldwood contact cement on the gripper bottoms for the material to cling to a little better. Just a little, you dont' want it to bleed through the fabric. Then, after it dried, i didn't cut any excess material off except at the front edge where the angle fold was secured. I rolled up the material and tucked int deeply into the gripper slot, and worked from the front to the back. Check to make sure there are no wrinkles, or lumps in the fabric after doing this. If everything looks good..

Use a light hammer, and use something like the plastic as I used below, or some other clean fabric (leftovers cut off from the headliner material) to soften the blow to the grippers.. Don't hit this too hard, or the grippers can actually slice through the headliner edge leaving you F****D. Take your time, and gently knock them all tight up against the roof--the will not be perfectly flush with the roof, and don't worry, they don't have to be. The material will be squished in there so well that it won't pull out.. Trust me. Also, ask how I know that the gripper will chop through the material.. :-/


Here it is initially fitted.. You have to be careful with the Mohair here I believe, as it stretches out pretty easily, and it doesn't shrink easily. I'll try in a day or so to use some water in a spray bottle and my heat gun to see if I can shrink it. I'm kinda worried about discoloration though.. I'll have to try it out.. The top portion from WWest was marked 'front' on the backside of the fabric, so pay attention to this. I'm not sure if it narrows or not, but I'm assuming that it may. I'm not particularly thrilled at how loose the fabric is from side to side in the front of the car, but again i'm hoping it'll tighten up with some heat over time.. AS far as positioning the top portion, use a very blunt tipped bent piece of plastic, tin, or a bent epoxy coated hanger-which is what I came up with. You have to get the nylon stips to lock into the top of the roof, not that hard. This is pretty much the easiest part of the job other than the quarter window bottoms--you're in the home stretch.

Note the wrinkles near the headliner bows. These can be gotten out mostly by slight adjustment of the rods. I think part of my problem is that the headliner bows are not completely straightened out as the roof insulation is too thick.
my epoxy coated hanger tool--awesome fab work, i know!
Here are the quarter window bottoms installed. Pretty straight forward here. Don't get sloppy now, you are almost done. Make sure you get some glue near the folds so that they don't come undone in time. Just put a little on the new piece, and a little on the fabric you are bonding it to and hold it for a minute or so to ensure they bond together. Not too much, no bleed through needed at this point.
And, here's the finished product. I'm pretty happy with the way this turned out.. And honestly, i wouldn't do another type of headliner. The multi-piece was actually very easy, and other than the time involved--straight forward. I hope this can help someone else in their efforts to get their interior done and looking good.. Good luck to you!
The only thing left is to install the windows. Popouts would be nice, but i'll be using fixed glass.. I'll have my mom help me this time--although it can be done by one person.
Okay, so here the windows are--installed. You can start with the rear or quarter windows. It only really matters if you are working solo, then starting with the rear glass is easiest as it limits the number of times you will have to get in and out of the car. I had my mom, you can use anyone's help, assist with support the glass firmly on the outside as I pulled the wire around the inside. I used a 14ga copper stranded wire to slowly pull the seal inward. Pull slowly--as here is a major sticking point once again. It is very easy for the rubber to lift the headlining material and pull it in when you are installing the glass. You need to work slowly ensuring that the material does not get yanked in--or if it starts--use a small plastic blade to push it back under the seal before the wire is past that point. This is the final push for the install here-- take your time and do it right--Don't let frustration ruin your hard work now..
All that is left now, is the coat hooks, assist straps, and dome light along with rear seat stops--and then putting the rear quarter panels back in.. So close..
_________________
'62 VW Bug Sedan (Ruby Red)
Resto pics> http://smg.photobucket.com/albums/v697/hemifalcon/Bug%20resto/?start=all&paginator=top
Last edited by hemifalcon on Sun Jun 20, 2010 6:41 pm; edited 3 times in total |
|
| Back to top |
|
 |
fluxcap
Samba Member
Joined: February 07, 2006
Posts: 1969
Location: Newnan GA
|
| Posted: Fri Jun 18, 2010 1:52 am Post subject: |
|
|
Nice man. I had to do my rear window piece the exact same way. I envy those who can get that one piece in their wrinkle free.
_________________
Eric - 1966 camper bus
"It's like, how much more black could this be, and the answer is none.......none more black." |
|
| Back to top |
|
|
Harris
Samba Member

Joined: June 11, 2004
Posts: 1317
Location: Texas
|
| Posted: Fri Jun 18, 2010 6:48 am Post subject: '62 Original Style Headliner |
|
|
| Congratulations on doing it yourself. It's nice to see your taking care of to smooth out any wrinkles. Good job. Keep us posted. |
|
| Back to top |
|
|
glutamodo 
The Android

Joined: July 13, 2004
Posts: 26538
Location: Douglas, WY
|
| Posted: Fri Jun 18, 2010 7:00 am Post subject: |
|
|
Yeah nice!
I've done a couple of headliners before, but although I got many cameras and like to take photos, when I'm in the middle of jobs like that I don't like to stop and take those kind of photos. Even when I have the camera sitting right there I just kind of forget about it.
I think 3Ms adhesives have gotten better over the years. In like 1989 or 1990 I put a new (perforated vinyl) headliner in my 62, not being able to find a cloth one at that time. I used one of 3Ms spray adhesives - I can't remember which number adhesive it was, but after a few hot days in the sun the glue stared to get gooey and the headliner didn't stay put. And then later on I saw can of that same product in some store where they'd revised the text "not recommended for automobile headliners" or something like that.  Now they tell me! Now they tell me!
One thing I DO NOT like about those replacement mohair headliners is that they supply the door opening piece in cloth, and not Silver Beige vinyl like it was originally. Same goes for the piece under the the side windows. That's why I retained the vinyl piece there in my 62 when I redid that headliner in mohair, even though it's too white I liked it better than having cloth there. And when I did the headliner in my Baja I left the original pieces in place for both the door opening piece and the pieces under the side windows.
After that happened, another mechanic I knew years ago recommended to use a hot glue gun to do the pinchwelt areas, and that's how I did it after that. Well, that plus some Shelby 290 in some areas, which I bought online (cannot remember where now though) Actually though I think I should have done the glue gun in a few other areas as well. After like 4 or 5 years I've noticed that those vinyl pieces on my Baja could use regluing.
-Andy |
|
| Back to top |
|
|
Harris
Samba Member
Joined: June 11, 2004
Posts: 1317
Location: Texas
|
| Posted: Fri Jun 18, 2010 7:21 am Post subject: '62 Original Style Headliner |
|
|
Andy Wrote:
| Quote: |
| One thing I DO NOT like about those replacement mohair headliners is that they supply the door opening piece in cloth, and not Silver Beige vinyl like it was originally |
Stands to reason the vinyl is better here. How many times have you reached in and touched the windlace without thinking. I have to be careful to keep my hands off. The cloth or mohair can get dirty quickly.
Lou |
|
| Back to top |
|
|
hemifalcon
Samba Member
Joined: June 15, 2005
Posts: 1483
Location: Union Grove, WI
|
| Posted: Fri Jun 18, 2010 9:37 am Post subject: |
|
|
Believe me.. I thought about that too--and now know why they have a +$$option for the vinyl door pieces. Just look at the plastic or vinyl around the drivers door of your daily driver--it's either dirty, or worn smooth from sliding past it for years. It stand to reason that should I do this again--and I probably will- I'll get vinyl for the doorposts..
And, as far as the picture taking thing goes--I have the camera sitting there, and other than almost sitting, stepping on it or dropping it a few times--it allows me to reflect on the situation at hand.. And then look at the picture to see where I need to pull or tighten up the material if needed. Also, i have to actually stop for a second to do the pictures-.. Part of that patience thing I think!  Gonna go finish up the headliner now.. Pics will be posted in the first posting as edited. Thanks for the compliments guys.. Gonna go finish up the headliner now.. Pics will be posted in the first posting as edited. Thanks for the compliments guys..
And lastly.. isn't 'silver beige' kinda an awkward and confusing name for things?? I mean, is it silver, or beige?? In thinkining, really feel that I should have gotten the 'grey' headliner.. 
_________________
'62 VW Bug Sedan (Ruby Red)
Resto pics> http://smg.photobucket.com/albums/v697/hemifalcon/Bug%20resto/?start=all&paginator=top |
|
| Back to top |
|
|
glutamodo
The Android
Joined: July 13, 2004
Posts: 26538
Location: Douglas, WY
|
| Posted: Fri Jun 18, 2010 10:30 am Post subject: |
|
|
Who know why they come up with some of those names for colors, and don't forget we're dealing with translations, could be that some of those color names have a different feel to them when spoken in thier original German.
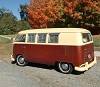
That material that Acme is selling for their headliners, I've noticed it changes as it ages. I bought a mohair thinking to put it in my 62 several years ago, and can't remember what color I ordered but it looked way too tan for me. So that one went in my Baja instead. Over the years it's faded to look correct. I put this in in October 2005, and then I took a similar photo today, look at the color difference:
|
|
| Back to top |
|
|
hemifalcon
Samba Member
Joined: June 15, 2005
Posts: 1483
Location: Union Grove, WI
|
| Posted: Fri Jun 18, 2010 11:35 am Post subject: |
|
|
| glutamodo wrote: |
Who know why they come up with some of those names for colors, and don't forget we're dealing with translations, could be that some of those color names have a different feel to them when spoken in thier original German.
That material that Acme is selling for their headliners, I've noticed it changes as it ages. I bought a mohair thinking to put it in my 62 several years ago, and can't remember what color I ordered but it looked way too tan for me. So that one went in my Baja instead. Over the years it's faded to look correct. I put this in in October 2005, and then I took a similar photo today, look at the color difference:
|
Wow, that is a pretty noticeable difference. So, in looking at my assist straps (original), they are more of a beige, vice grey. So, hopefully mine will age with the sun or whatever bleaches out the rich color.. We'll see in time..
_________________
'62 VW Bug Sedan (Ruby Red)
Resto pics> http://smg.photobucket.com/albums/v697/hemifalcon/Bug%20resto/?start=all&paginator=top |
|
| Back to top |
|
|
ACSwede
Samba Member

Joined: July 15, 2002
Posts: 285
Location: SWEDEN
|
| Posted: Fri Jun 18, 2010 2:11 pm Post subject: |
|
|
Nice job!...and great sharing step-by-step details with accompanying pictures.
Based on experience I can recommend 3M Spray adhesive 08080.
Far superior anything else I have tried:
- Will NOT stick instantly...hence, will give you time to "work" the fabric in place.
- Binder clips NOT needed.
- No discoloration.
_________________
ACSwede's garage |
|
| Back to top |
|
|
hemifalcon
Samba Member
Joined: June 15, 2005
Posts: 1483
Location: Union Grove, WI
|
| Posted: Fri Jun 18, 2010 2:15 pm Post subject: |
|
|
| ACSwede wrote: |
Nice job!...and great sharing step-by-step details with accompanying pictures.
Based on experience I can recommend 3M Spray adhesive 08080.
Far superior anything else I have tried:
- Will NOT stick instantly...hence, will give you time to "work" the fabric in place.
- Binder clips NOT needed.
- No discoloration. |
Good info. I found that the 3M 90 isn't nearly as tacky as the 77.. Also, this may be a tip for anyone out there-once the glue becomes tacky-it'll be less likely to bleed through your fabric. Spray it on to whatever you are going to stick the fabric/vinyl whatever--let it get tacky, then put it on there.. As fas as I know, none of this stuff dries solid like super glue--so it's always able to be worked with some heat applied from my short bit of experience. I like using the binder clips, as this way some positive force is left on the glued location- and I can walk away knowing that it'll be secured.
_________________
'62 VW Bug Sedan (Ruby Red)
Resto pics> http://smg.photobucket.com/albums/v697/hemifalcon/Bug%20resto/?start=all&paginator=top |
|
| Back to top |
|
|
ACSwede
Samba Member
Joined: July 15, 2002
Posts: 285
Location: SWEDEN
|
| Posted: Fri Jun 18, 2010 2:25 pm Post subject: |
|
|
BTW; Quickly browsed your Resto pics - Congratulations on a clean ride with the right stance - Nose down, ass up! 
_________________
ACSwede's garage |
|
| Back to top |
|
|
hemifalcon
Samba Member
Joined: June 15, 2005
Posts: 1483
Location: Union Grove, WI
|
| Posted: Fri Jun 18, 2010 2:41 pm Post subject: |
|
|
| ACSwede wrote: |
| BTW; Quickly browsed your Resto pics - Congratulations on a clean ride with the right stance - Nose down, ass up! |
Thanks.. The nose will be going back down just a hair. I lowered the rear one notch over the past 6 months.. Just waiting on a different set of rear wheels from Centerline, and my new Sewfine carpet kit. Waiting..Waiting..Waiting..
_________________
'62 VW Bug Sedan (Ruby Red)
Resto pics> http://smg.photobucket.com/albums/v697/hemifalcon/Bug%20resto/?start=all&paginator=top |
|
| Back to top |
|
|
pantone149
Samba Member
Joined: August 19, 2004
Posts: 1031
Location: Mt. Shasta
|
| Posted: Fri Jun 18, 2010 2:57 pm Post subject: |
|
|
| Incredible work. Now I know why there is a worldwide shortage of binder clips and their prices have shot up. |
|
| Back to top |
|
|
hemifalcon
Samba Member
Joined: June 15, 2005
Posts: 1483
Location: Union Grove, WI
|
| Posted: Fri Jun 18, 2010 3:00 pm Post subject: |
|
|
| pantone149 wrote: |
| Incredible work. Now I know why there is a worldwide shortage of binder clips and their prices have shot up. |
Hah.. I actually had most of them from 2007 when I did this the first time. The binder clip speculators shoulda been on their game like they were on the oil purchases!!! Heckl, at $.88/for 20 from Wal-Mart, can't go wrong--
_________________
'62 VW Bug Sedan (Ruby Red)
Resto pics> http://smg.photobucket.com/albums/v697/hemifalcon/Bug%20resto/?start=all&paginator=top |
|
| Back to top |
|
|
pantone149
Samba Member
Joined: August 19, 2004
Posts: 1031
Location: Mt. Shasta
|
| Posted: Fri Jun 18, 2010 3:09 pm Post subject: |
|
|
| So where exactly is NE Illinois? Sounds llike a lot of water to me. |
|
| Back to top |
|
|
hemifalcon
Samba Member
Joined: June 15, 2005
Posts: 1483
Location: Union Grove, WI
|
|
| Back to top |
|
|
pantone149
Samba Member
Joined: August 19, 2004
Posts: 1031
Location: Mt. Shasta
|
| Posted: Fri Jun 18, 2010 3:49 pm Post subject: |
|
|
| Born near Wrigley Field. That's all. |
|
| Back to top |
|
|
WD0AFQ
Samba Member

Joined: August 14, 2008
Posts: 595
Location: Dexter, Mo.
|
| Posted: Fri Jun 18, 2010 8:19 pm Post subject: |
|
|
Dude, thanks so much for taking the time to shoot those pics. I will use them when I do this chore. Just came in from working in the evening coolness on my interior. Can not work on it during the day, too darn hot inside it.
Again, thank you so much, it looks really great.
Dan
_________________
66 baja
http://www.danandteri.blogspot.com |
|
| Back to top |
|
|
Azsilverbug
Samba Member

Joined: August 08, 2007
Posts: 301
Location: Tucson, AZ
|
| Posted: Fri Jun 18, 2010 11:23 pm Post subject: |
|
|
How many hours did it take you?
_________________
65 Drag Bug
62 Bug
68 Bug
65 Dune Buggy
You can tune a piano but you can't tune a fish |
|
| Back to top |
|
|
hemifalcon
Samba Member
Joined: June 15, 2005
Posts: 1483
Location: Union Grove, WI
|
| Posted: Sat Jun 19, 2010 6:41 am Post subject: |
|
|
It was no problem to post the pictures up here for you guys.. Anyone who along the way finds themselves in a bind, hopefully this is helpful to them.
I am gonna say that actual hours working on the headliner was somewhere around 6-8??? It's hard to say as much of the time is spent watching glue dry-- So, that doesn't really count.Overall, it didn't take too long, and I figure about 30-40 mins to set the windows back in, and that's basically the job completed. When it comes down to it, that's nothing compared to other jobs on our VW's that take much longer and can cause even larger headaches..
_________________
'62 VW Bug Sedan (Ruby Red)
Resto pics> http://smg.photobucket.com/albums/v697/hemifalcon/Bug%20resto/?start=all&paginator=top |
|
| Back to top |
|
|
|


