| Author |
Message |
Hondaslayer
Samba Member

Joined: April 07, 2012
Posts: 206
Location: Auburn, WA

|
 Posted: Sun Sep 30, 2012 7:21 pm Post subject: Fuel gauge stuck on full, 75 Westfalia Posted: Sun Sep 30, 2012 7:21 pm Post subject: Fuel gauge stuck on full, 75 Westfalia |
 |
|
As the title says, stuck on full when vehicle is on.
When key is off the gauge is all the way below "E"
When key is turned to the on position the needle comes up past "E" jumps erratically for 2 -3 seconds before it finishes the sweep to full. The fuel sending unit is newer, though it appears to be a cheaper quality unit. That said it ohms out fine and the readings change as the arm completes its sweep. When I ground out the brown wire the gauge reads Full which should indicate a good gauge IIRC (correct me if I'm wrong).
Due to the erratic initial reaction of the gauge I suspect a bad ground, however I have cleaned the ground connection and even grounded to a new location with no change. Is there something I am missing?
Tank is currently full, gauge continues to read full even when fully empty (ran out of gas 2x now) and aside from the erratic needle movement when key is turned on the gauge sweeps fine.
_________________
Failure is always an option. |
|
| Back to top |
|
 |
busdaddy
Samba Member

Joined: February 12, 2004
Posts: 53214
Location: Surrey B.C. Canada, but thinking of Ukraine
|
| Posted: Sun Sep 30, 2012 7:51 pm Post subject: |
|
|
It's not common but the voltage stabilzer (vibrator) can stick or short out internally, that would give the gauge full battery power (not good), either that or the sender is shorting inside (but you say it OHM's OK) or the wire between the tank and gauge is pinched somewhere.
_________________
Rust NEVER sleeps and stock never goes out of style.
Please don't PM technical questions, ask your problem in public so everyone can play along. If you think it's too stupid post it here
Stop dead photo links! Post your photos to The Samba Gallery!
Слава Україні! |
|
| Back to top |
|
|
nodrenim
Samba Member
Joined: October 06, 2006
Posts: 843
Location: Dobson, North Carolina
|
| Posted: Mon Oct 01, 2012 4:16 am Post subject: |
|
|
| This may sound sort of nutty, but try bouncing the rear wheels off a curb a couple of times. Your float may be stuck, the bounce may or may not help, but at least it's a free try. Good Luck. |
|
| Back to top |
|
|
Hondaslayer
Samba Member
Joined: April 07, 2012
Posts: 206
Location: Auburn, WA
|
| Posted: Mon Oct 01, 2012 9:17 am Post subject: |
|
|
The floats moves fine, p.o put an access hole in with what appears to be an old school can opener (have several new scars as a result of fishing the sending unit out).
I'll check out the vibrator, if it's bad can I use just any old vibrator from Lovers Lane?

_________________
Failure is always an option. |
|
| Back to top |
|
|
Hondaslayer
Samba Member
Joined: April 07, 2012
Posts: 206
Location: Auburn, WA
|
| Posted: Mon Oct 01, 2012 3:18 pm Post subject: |
|
|
Think I figured out the issue, when the PO hacked open the access hole they pinched the wire into some of the torn sheet metal so the gauge was constantly grounded and thus reading full. Repaired and re-routed the wire and now the gauge reads 3/4 full which should be about right as I only put about 9 gallons in before the filler neck started to dump fuel  (hence why it is not being driven at the moment) (hence why it is not being driven at the moment)
_________________
Failure is always an option. |
|
| Back to top |
|
|
SGKent 
Samba Member
Joined: October 30, 2007
Posts: 42957
Location: at the beach in Northern Wokistan
|
| Posted: Mon Oct 01, 2012 3:35 pm Post subject: |
|
|
| Hondaslayer wrote: |
| Think I figured out the issue, when the PO hacked open the access hole they pinched the wire into some of the torn sheet metal so the gauge was constantly grounded and thus reading full. Repaired and re-routed the wire and now the gauge reads 3/4 full which should be about right as I only put about 9 gallons in before the filler neck started to dump fuel (hence why it is not being driven at the moment) |
awesome sleuthing !!!
_________________
 Canned Water - the new California approved parts cleaner (except in a drought in which case rub it with sand). Canned Water - the new California approved parts cleaner (except in a drought in which case rub it with sand).
George Carlin:
"Most people don't know what they're doing, and a lot of them are really good at it."
Skills@EuroCarsPlus:
"never time to do it right but always time to do it twice" |
|
| Back to top |
|
|
Hondaslayer
Samba Member
Joined: April 07, 2012
Posts: 206
Location: Auburn, WA
|
| Posted: Mon Oct 01, 2012 4:18 pm Post subject: |
|
|
| SGKent wrote: |
| Hondaslayer wrote: |
| Think I figured out the issue, when the PO hacked open the access hole they pinched the wire into some of the torn sheet metal so the gauge was constantly grounded and thus reading full. Repaired and re-routed the wire and now the gauge reads 3/4 full which should be about right as I only put about 9 gallons in before the filler neck started to dump fuel (hence why it is not being driven at the moment) |
awesome sleuthing !!! |
If not for the shorter days I probably would have found it last night
_________________
Failure is always an option. |
|
| Back to top |
|
|
dfwagnerjr
Samba Member

Joined: July 03, 2012
Posts: 40
Location: Lexington, Kentucky
|
| Posted: Tue Apr 09, 2013 2:42 pm Post subject: |
|
|
I'm going to piggyback this thread, because I have the same symptom (always full gauge when key is on).
'75 Westfalia here as well.
The first thing tried in order to diagnose the problem was to disconnect the sender wire from the gauge and test resistance to ground. It showed a dead short.
I pulled the sender and ohm'ed it out on the bench. It tested at 0 ohms so I was satisfied that my sender was the issue.
Ordered a new sender, and it came today. Tested it on the bench and showed between ~7 ohms and .. I can't remember exactly .. ~20 something ohms.
Installed the new sender and turned the key......, still a full tank. It should show ~1/2 tank.
Frustrated.., I decided to test the sending wire from the sender side. Surprise! It also read shorted to ground.
I realize that the short could be anywhere between the gauge and the sending unit, but I'm wondering if there is a likely place where this wire could be shorted.
I did notice that the sender wire seems to be snagged inside the tank compartment. Or.., maybe it is secured with a clip on the inside. I say this, because if I gently tug from underneath where the wire exits the compartment through the grommet, it only has about 1" of play before it snags.
If the short is inside the tank compartment, would I have to remove the firewall to find it?
Any input, ideas or questions are welcomed. |
|
| Back to top |
|
|
dfwagnerjr
Samba Member
Joined: July 03, 2012
Posts: 40
Location: Lexington, Kentucky
|
| Posted: Tue Apr 09, 2013 3:10 pm Post subject: |
|
|
Just found this pic on Ratwell's site. Looks like the sender wire is glued to the floor of the tank compartment immediately after it enters through the grommet. I guess that would explain the "snag".
|
|
| Back to top |
|
|
busdaddy
Samba Member
Joined: February 12, 2004
Posts: 53214
Location: Surrey B.C. Canada, but thinking of Ukraine
|
| Posted: Tue Apr 09, 2013 3:12 pm Post subject: |
|
|
Most of those have an extension wire inside the tank compartment, maybe the snag you are feeling is the connector?
I can't begin to offer an idea where to start looking but from the pedals past the fusebox through the nose and up to the gauge is the most likely spot. You can cut the wire part way along and test each end for the short to narrow it down, use a good crimp connector and heat shrink tubing to reattach it.
_________________
Rust NEVER sleeps and stock never goes out of style.
Please don't PM technical questions, ask your problem in public so everyone can play along. If you think it's too stupid post it here
Stop dead photo links! Post your photos to The Samba Gallery!
Слава Україні! |
|
| Back to top |
|
|
dfwagnerjr
Samba Member
Joined: July 03, 2012
Posts: 40
Location: Lexington, Kentucky
|
| Posted: Tue Apr 09, 2013 3:21 pm Post subject: |
|
|
So here is what I am thinking.
I could cut the sender wire just below the grommet near the wheel well and test to see if the short is between the grommet and the sender connection or between the grommet and the fuel gauge.
If it is the latter then I'm pretty much left with running a new wire from the gauge and splicing it where I cut the wire at the grommet.
If the short is between the grommet and the sender then possibly, I could snake a new wire through the grommet using a coat hanger, connect it to the sender and splice with the wire to the gauge.
Does this sound at all feasible? Would I be missing anything? |
|
| Back to top |
|
|
webwalker
Samba Member

Joined: January 26, 2006
Posts: 2803
Location: Mount Laurel, NJ
|
| Posted: Tue Jul 30, 2013 7:05 pm Post subject: |
|
|
| dfwagnerjr wrote: |
Just found this pic on Ratwell's site. Looks like the sender wire is glued to the floor of the tank compartment immediately after it enters through the grommet. I guess that would explain the "snag".
|
CLEAR! ZORRCH!
I just brought this thread back to life. (I'm slap happy, cut me a break.)
Picture above shows the pickle I'm in, except my tank is in. The long wire is the one that runs to the gauge.
So, on a 1977 with two independent spade connectors on the sender...where does the other wire (the ground) attach? I know it attaches somewhere, as the wiring diagram shows a specific current track (41) and they only do that when there is a body ground connector to attach to, so it isn't grounded through the tank body like the early senders.
Someone please tell me where to find this ground connection. I've stared at the tank enclosure so long I'm cross-eyed.
M
M
_________________
"Consistent maintenance with quality products is the cheapest warranty you'll ever need."
1977 CE1 Transporter Deluxe, Subaru EJ22, Skills Cooling, Steedle HD 091 w/ GuardT .82 4th
Click to view image |
|
| Back to top |
|
|
busdaddy
Samba Member
Joined: February 12, 2004
Posts: 53214
Location: Surrey B.C. Canada, but thinking of Ukraine
|
| Posted: Tue Jul 30, 2013 7:28 pm Post subject: |
|
|
Look up,,,, waaaaaayyyy up......
The ground wire is dangling from the roof of the tank compartment, it's brown and about 12" long and screwed to one of the crossmembers above the sender, it connects to the non insulated tab on the sender.
Hmmm....maybe only a Canadian would get the Friendly giant reference 
_________________
Rust NEVER sleeps and stock never goes out of style.
Please don't PM technical questions, ask your problem in public so everyone can play along. If you think it's too stupid post it here
Stop dead photo links! Post your photos to The Samba Gallery!
Слава Україні! |
|
| Back to top |
|
|
webwalker
Samba Member
Joined: January 26, 2006
Posts: 2803
Location: Mount Laurel, NJ
|
| Posted: Tue Jul 30, 2013 9:02 pm Post subject: |
|
|
If I weren't already in bed trying to make an excuse to sleep, I'd get up and go outside to the garage now and crawl under the Bus in my robe to look.
Maybe in the morning. 
Thanks so much for assisting the brain fried.
M
_________________
"Consistent maintenance with quality products is the cheapest warranty you'll ever need."
1977 CE1 Transporter Deluxe, Subaru EJ22, Skills Cooling, Steedle HD 091 w/ GuardT .82 4th
Click to view image |
|
| Back to top |
|
|
1975 Kombi
Samba Member

Joined: August 12, 2007
Posts: 2458
Location: Acton, Ontario, Canada
|
| Posted: Tue Jul 30, 2013 10:35 pm Post subject: |
|
|
The wire that is coming through the grommet, goes up over the top of the tank and under the strap that holds the tank in place. It also goes under the mat wear dampener which is under the strap. The ground wire screws into the top of the tank compartment just behind the firewall and in front of the tank and travels to the sender.
_________________
Brett
“He’s decieving you boy! Reach into his pocket and take what he’s got.” Mr. Crabbs.
75 Westy auto
03 Jetta TDI
71 SB
74 Westy
2011 Touareg TDI
2001 NB TDI
Licensed pilot (single engine land VFR)
--
Rust In Pieces: 72 Bug, 73 Bug, 81 Rabbit LS D 2D, 83 Rabbit D 2D, 84 Jetta TD GL, 85 Jetta D, 68 Z28 RS 302, 91 Passat 16v |
|
| Back to top |
|
|
webwalker
Samba Member
Joined: January 26, 2006
Posts: 2803
Location: Mount Laurel, NJ
|
| Posted: Wed Jul 31, 2013 5:06 am Post subject: |
|
|
| 1975 Kombi wrote: |
| The wire that is coming through the grommet, goes up over the top of the tank and under the strap that holds the tank in place. It also goes under the mat wear dampener which is under the strap. The ground wire screws into the top of the tank compartment just behind the firewall and in front of the tank and travels to the sender. |
Late out the door to work this morning so I didn't get to consult my bus.
It sounds like that ground wire should be pretty short; it can't be more than six inches from where you're describing to the center of the tank and the sender.
Does anyone know if the connection point for the wire on the tank compartment is a screw (for a ring or split ring terminal) or a blade terminal? It just helps to know what I'm looking for. If there's just a screw hole there, and I'm looking for a spotwelded blade, I'm going to be lost.
THanks!!
M
_________________
"Consistent maintenance with quality products is the cheapest warranty you'll ever need."
1977 CE1 Transporter Deluxe, Subaru EJ22, Skills Cooling, Steedle HD 091 w/ GuardT .82 4th
Click to view image |
|
| Back to top |
|
|
1975 Kombi
Samba Member
Joined: August 12, 2007
Posts: 2458
Location: Acton, Ontario, Canada
|
| Posted: Wed Jul 31, 2013 6:22 am Post subject: |
|
|
It is a screw and will take a pic of it in a minute.
I think the green arrow is where the loop terminal adheres to the bulkhead/frame support for the firewall and the female spade is for the sender.
_________________
Brett
“He’s decieving you boy! Reach into his pocket and take what he’s got.” Mr. Crabbs.
75 Westy auto
03 Jetta TDI
71 SB
74 Westy
2011 Touareg TDI
2001 NB TDI
Licensed pilot (single engine land VFR)
--
Rust In Pieces: 72 Bug, 73 Bug, 81 Rabbit LS D 2D, 83 Rabbit D 2D, 84 Jetta TD GL, 85 Jetta D, 68 Z28 RS 302, 91 Passat 16v |
|
| Back to top |
|
|
webwalker
Samba Member
Joined: January 26, 2006
Posts: 2803
Location: Mount Laurel, NJ
|
| Posted: Wed Jul 31, 2013 7:13 am Post subject: |
|
|
| 1975 Kombi wrote: |
It is a screw and will take a pic of it in a minute.
I think the green arrow is where the loop terminal adheres to the bulkhead/frame support for the firewall and the female spade is for the sender.
|
Brett, you are a complete life saver. I've been going squinty-eyed trying to find this. The original color for my Bus is Agate Brown, which without really good general lighting is like trying to find your black cat while locked in a dark closet...at night.
Thank you so much. You get Karma points.  
_________________
"Consistent maintenance with quality products is the cheapest warranty you'll ever need."
1977 CE1 Transporter Deluxe, Subaru EJ22, Skills Cooling, Steedle HD 091 w/ GuardT .82 4th
Click to view image |
|
| Back to top |
|
|
1975 Kombi
Samba Member
Joined: August 12, 2007
Posts: 2458
Location: Acton, Ontario, Canada
|
| Posted: Wed Jul 31, 2013 7:30 am Post subject: |
|
|
Be careful with the long wire that comes through the body. The plastic connector will unplug if you pull on it too much.
If your this far you might as well pull the tank and replace the vapour lines for the tank. I had to drop the engine on the drivers side 1/2" to pull the tank out clean. My filler neck rubber connectors were totally cracked beyond use so I replaced them and the vapour recovery system rubber connectors.
_________________
Brett
“He’s decieving you boy! Reach into his pocket and take what he’s got.” Mr. Crabbs.
75 Westy auto
03 Jetta TDI
71 SB
74 Westy
2011 Touareg TDI
2001 NB TDI
Licensed pilot (single engine land VFR)
--
Rust In Pieces: 72 Bug, 73 Bug, 81 Rabbit LS D 2D, 83 Rabbit D 2D, 84 Jetta TD GL, 85 Jetta D, 68 Z28 RS 302, 91 Passat 16v |
|
| Back to top |
|
|
webwalker
Samba Member
Joined: January 26, 2006
Posts: 2803
Location: Mount Laurel, NJ
|
| Posted: Wed Jul 31, 2013 7:49 am Post subject: |
|
|
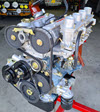
Yep. I went the full Monty on the fuel tank, transmission, and now I'm doing an "all new parts" Type4 engine to go back in.
http://www.thesamba.com/vw/forum/viewtopic.php?t=5...p;start=60
THANKS!
_________________
"Consistent maintenance with quality products is the cheapest warranty you'll ever need."
1977 CE1 Transporter Deluxe, Subaru EJ22, Skills Cooling, Steedle HD 091 w/ GuardT .82 4th
Click to view image |
|
| Back to top |
|
|
|


